2014 SKODA OCTAVIA audio
[x] Cancel search: audioPage 35 of 83
CAUTION■Only use standard sizeSD cards. When using smaller SD cards with the adapt-
er the SD memory card can fall out of the adapter while driving due to vehicle
vibrations.■
We recommend using SD memory cards of class 4 and higher. This guaran-
tees the fastest possible access to the audio files.
■
Always store the SD cards in suitable cases to protect them from dirt, dust
and other forms of damage.
USB-, AUX inputs
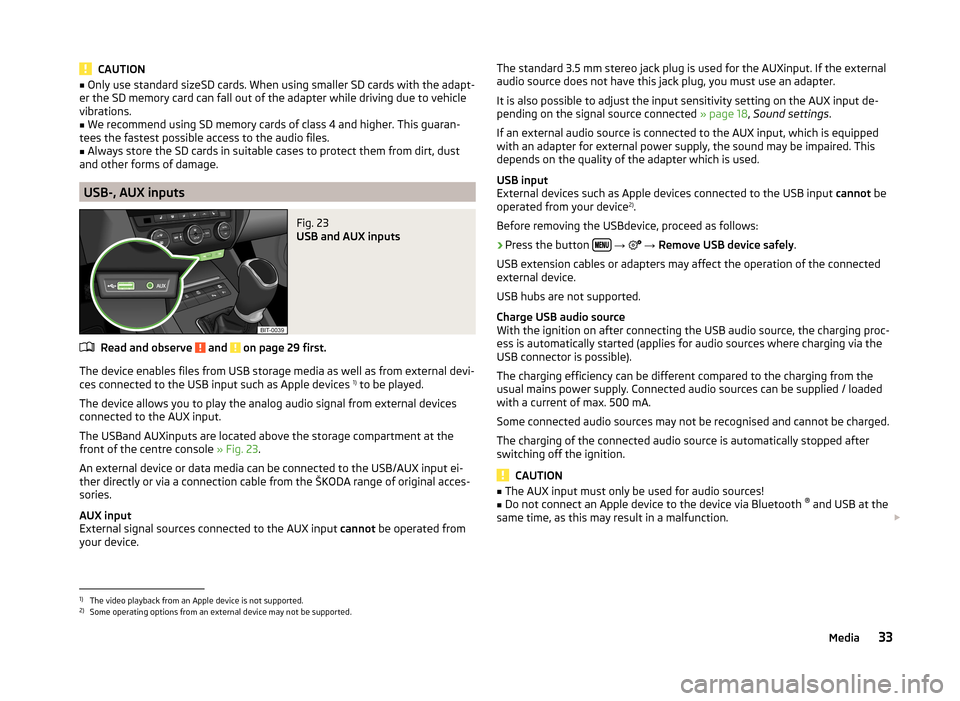
Fig. 23
USB and AUX inputs
Read and observe and on page 29 first.
The device enables files from USB storage media as well as from external devi-
ces connected to the USB input such as Apple devices 1)
to be played.
The device allows you to play the analog audio signal from external devices
connected to the AUX input.
The USBand AUXinputs are located above the storage compartment at the
front of the centre console » Fig. 23.
An external device or data media can be connected to the USB/AUX input ei-
ther directly or via a connection cable from the ŠKODA range of original acces-
sories.
AUX input
External signal sources connected to the AUX input cannot be operated from
your device.
The standard 3.5 mm stereo jack plug is used for the AUXinput. If the external
audio source does not have this jack plug, you must use an adapter.
It is also possible to adjust the input sensitivity setting on the AUX input de- pending on the signal source connected » page 18, Sound settings .
If an external audio source is connected to the AUX input, which is equipped
with an adapter for external power supply, the sound may be impaired. This
depends on the quality of the adapter which is used.
USB input
External devices such as Apple devices connected to the USB input cannot be
operated from your device 2)
.
Before removing the USBdevice, proceed as follows:›
Press the button
→
→ Remove USB device safely .
USB extension cables or adapters may affect the operation of the connected
external device.
USB hubs are not supported.
Charge USB audio source
With the ignition on after connecting the USB audio source, the charging proc-
ess is automatically started (applies for audio sources where charging via the
USB connector is possible).
The charging efficiency can be different compared to the charging from the
usual mains power supply. Connected audio sources can be supplied / loaded
with a current of max. 500 mA.
Some connected audio sources may not be recognised and cannot be charged.
The charging of the connected audio source is automatically stopped after
switching off the ignition.
CAUTION
■ The AUX input must only be used for audio sources!■Do not connect an Apple device to the device via Bluetooth ®
and USB at the
same time, as this may result in a malfunction.
1)
The video playback from an Apple device is not supported.
2)
Some operating options from an external device may not be supported.
33Media
Page 36 of 83
NoteThe operation of the external device and its connection with other devices can
be seen in the operating instructions of the respective manufacturer.
DVD video
Introduction
This chapter contains information on the following subjects:
Main menu
34
video playback
34
Operation of DVD video
34
DVD video menu
35
Settings
35
First and foremost, pay attention to the safety instructions » page 4 , Impor-
tant notes .
Main menu
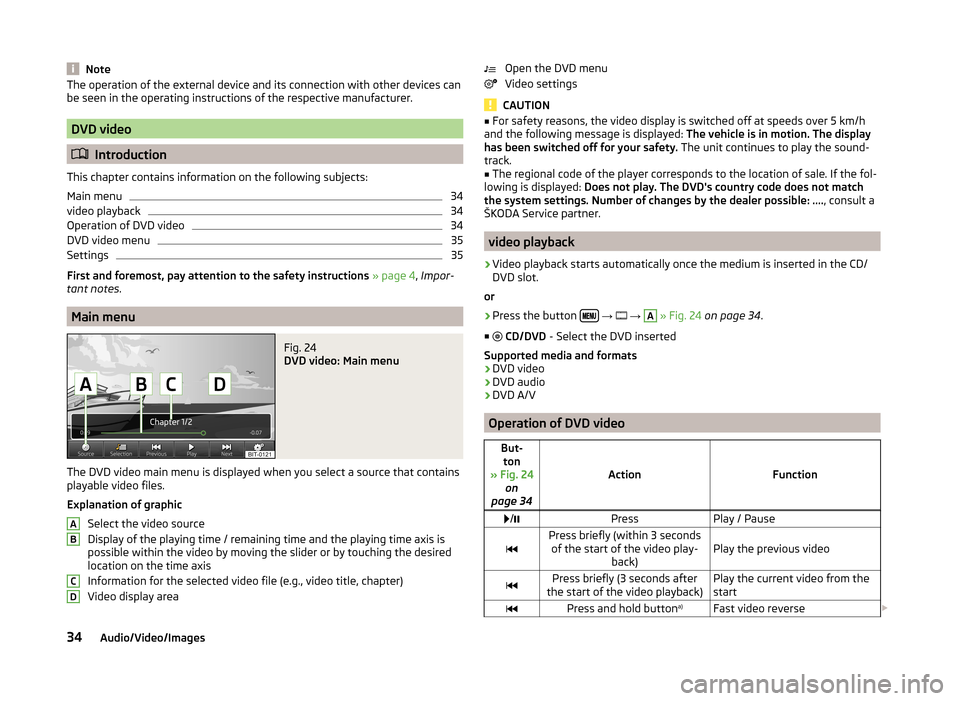
Fig. 24
DVD video: Main menu
The DVD video main menu is displayed when you select a source that contains
playable video files.
Explanation of graphic Select the video source
Display of the playing time / remaining time and the playing time axis is
possible within the video by moving the slider or by touching the desired
location on the time axis
Information for the selected video file (e.g., video title, chapter)
Video display area
ABCDOpen the DVD menu
Video settings
CAUTION
■ For safety reasons, the video display is switched off at speeds over 5 km/h
and the following message is displayed: The vehicle is in motion. The display
has been switched off for your safety. The unit continues to play the sound-
track.■
The regional code of the player corresponds to the location of sale. If the fol-
lowing is displayed: Does not play. The DVD's country code does not match
the system settings. Number of changes by the dealer possible: .... , consult a
ŠKODA Service partner.
video playback
›
Video playback starts automatically once the medium is inserted in the CD/
DVD slot.
or
›
Press the button
→
→
A
» Fig. 24 on page 34 .
■
CD/DVD - Select the DVD inserted
Supported media and formats › DVD video
› DVD audio
› DVD A/V
Operation of DVD video
But-
ton
» Fig. 24 on
page 34
ActionFunction
/PressPlay / PausePress briefly (within 3 seconds
of the start of the video play- back)Play the previous videoPress briefly (3 seconds after
the start of the video playback)Play the current video from the
startPress and hold button a)Fast video reverse
34Audio/Video/Images
Page 37 of 83
But-ton
» Fig. 24 on
page 34
ActionFunction
Press brieflyPlay the next videoPress and hold button a)Fast video forwarda)
The longer the button is pressed, the faster the fast forward/reverse.
DVD video menu
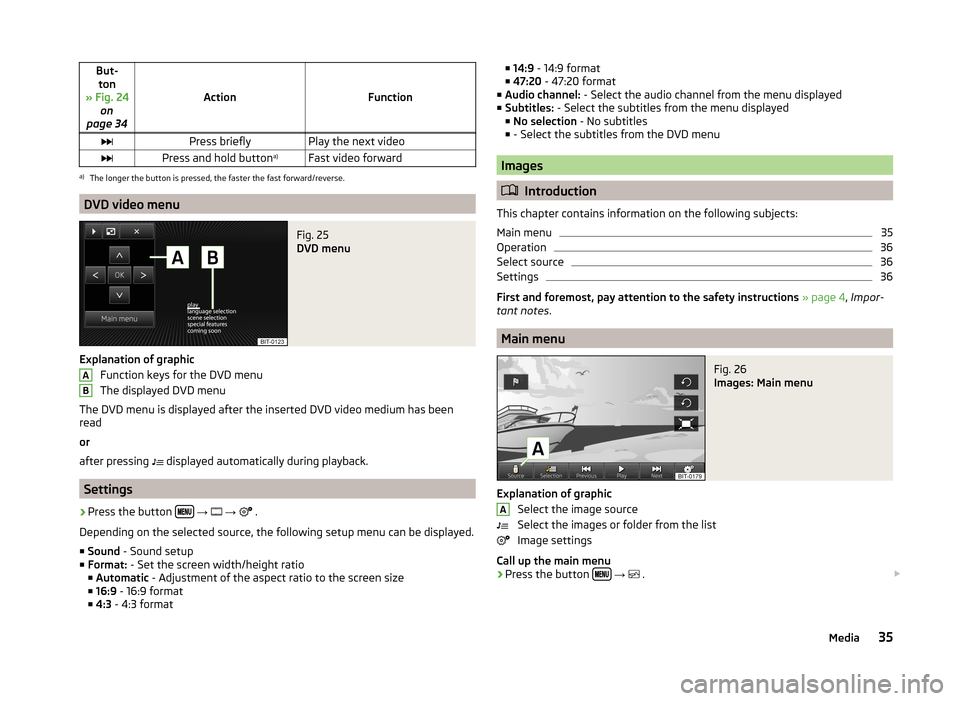
Fig. 25
DVD menu
Explanation of graphic
Function keys for the DVD menu
The displayed DVD menu
The DVD menu is displayed after the inserted DVD video medium has been
read
or
after pressing displayed automatically during playback.
Settings
›
Press the button
→
→
.
Depending on the selected source, the following setup menu can be displayed.
■ Sound - Sound setup
■ Format: - Set the screen width/height ratio
■ Automatic - Adjustment of the aspect ratio to the screen size
■ 16:9 - 16:9 format
■ 4:3 - 4:3 format
AB■
14:9 - 14:9 format
■ 47:20 - 47:20 format
■ Audio channel: - Select the audio channel from the menu displayed
■ Subtitles: - Select the subtitles from the menu displayed
■ No selection - No subtitles
■ - Select the subtitles from the DVD menu
Images
Introduction
This chapter contains information on the following subjects:
Main menu
35
Operation
36
Select source
36
Settings
36
First and foremost, pay attention to the safety instructions » page 4 , Impor-
tant notes .
Main menu
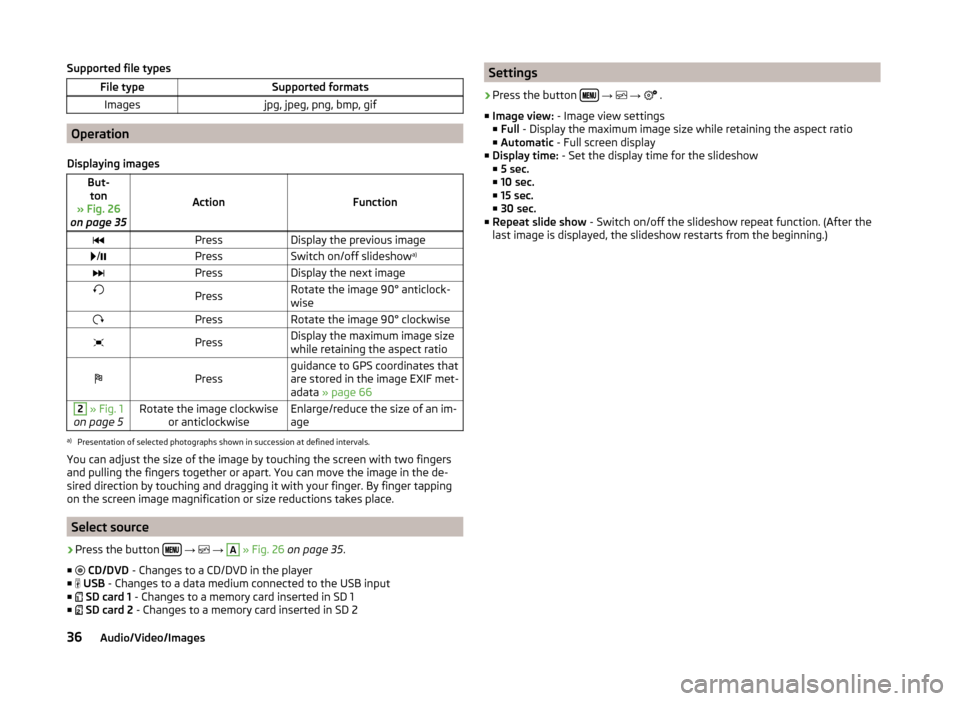
Fig. 26
Images: Main menu
Explanation of graphic
Select the image source
Select the images or folder from the list
Image settings
Call up the main menu
›
Press the button
→
.
A35Media
Page 38 of 83
Supported file typesFile typeSupported formatsImagesjpg, jpeg, png, bmp, gif
Operation
Displaying images
But- ton
» Fig. 26
on page 35
ActionFunction
PressDisplay the previous image /PressSwitch on/off slideshow a)PressDisplay the next imagePressRotate the image 90° anticlock-
wisePressRotate the image 90° clockwisePressDisplay the maximum image size
while retaining the aspect ratioPressguidance to GPS coordinates that
are stored in the image EXIF met-
adata » page 662 » Fig. 1
on page 5Rotate the image clockwise or anticlockwiseEnlarge/reduce the size of an im-
agea)
Presentation of selected photographs shown in succession at defined intervals.
You can adjust the size of the image by touching the screen with two fingers
and pulling the fingers together or apart. You can move the image in the de-
sired direction by touching and dragging it with your finger. By finger tapping
on the screen image magnification or size reductions takes place.
Select source
›
Press the button
→
→
A
» Fig. 26 on page 35 .
■
CD/DVD - Changes to a CD/DVD in the player
■
USB - Changes to a data medium connected to the USB input
■
SD card 1 - Changes to a memory card inserted in SD 1
■
SD card 2 - Changes to a memory card inserted in SD 2
Settings›
Press the button
→
→
.
■ Image view: - Image view settings
■ Full - Display the maximum image size while retaining the aspect ratio
■ Automatic - Full screen display
■ Display time: - Set the display time for the slideshow
■ 5 sec.
■ 10 sec.
■ 15 sec.
■ 30 sec.
■ Repeat slide show - Switch on/off the slideshow repeat function. (After the
last image is displayed, the slideshow restarts from the beginning.)
36Audio/Video/Images
Page 54 of 83
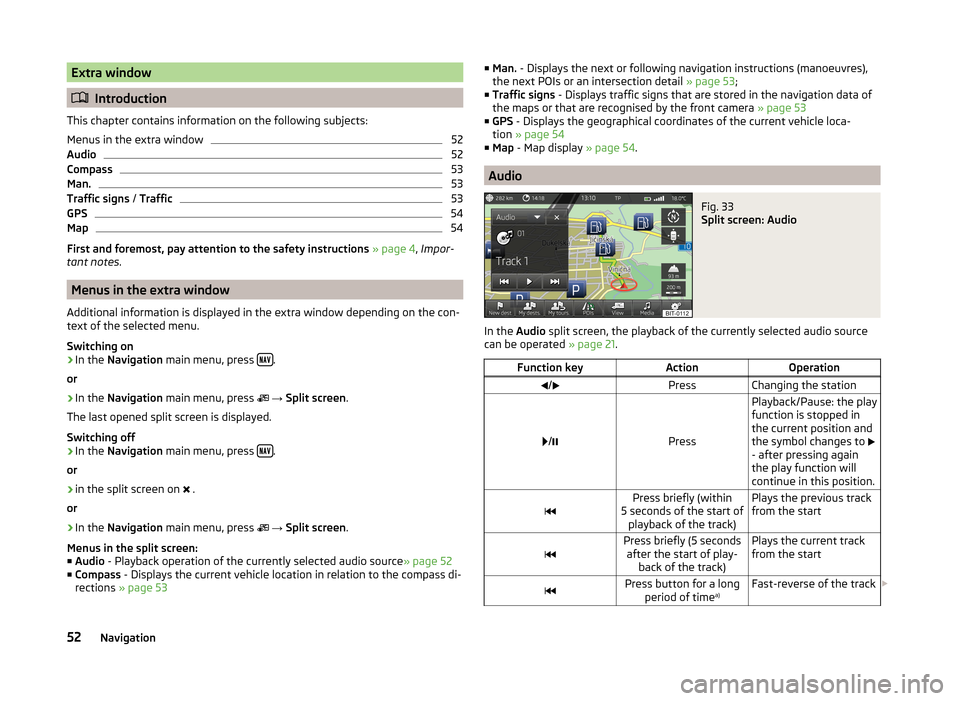
Extra window
Introduction
This chapter contains information on the following subjects:
Menus in the extra window
52
Audio
52
Compass
53
Man.
53
Traffic signs / Traffic
53
GPS
54
Map
54
First and foremost, pay attention to the safety instructions » page 4 , Impor-
tant notes .
Menus in the extra window
Additional information is displayed in the extra window depending on the con-
text of the selected menu.
Switching on
›
In the Navigation main menu, press .
or
›
In the Navigation main menu, press
→ Split screen .
The last opened split screen is displayed.
Switching off
›
In the Navigation main menu, press .
or
›
in the split screen on .
or
›
In the Navigation main menu, press
→ Split screen .
Menus in the split screen:
■ Audio - Playback operation of the currently selected audio source » page 52
■ Compass - Displays the current vehicle location in relation to the compass di-
rections » page 53
■
Man. - Displays the next or following navigation instructions (manoeuvres),
the next POIs or an intersection detail » page 53;
■ Traffic signs - Displays traffic signs that are stored in the navigation data of
the maps or that are recognised by the front camera » page 53
■ GPS - Displays the geographical coordinates of the current vehicle loca-
tion » page 54
■ Map - Map display » page 54.
Audio
Fig. 33
Split screen: Audio
In the Audio split screen, the playback of the currently selected audio source
can be operated » page 21.
Function keyActionOperation/PressChanging the station
/Press
Playback/Pause: the play
function is stopped in
the current position and
the symbol changes to
- after pressing again
the play function will
continue in this position.Press briefly (within
5 seconds of the start of playback of the track)Plays the previous track
from the startPress briefly (5 seconds after the start of play- back of the track)Plays the current track
from the startPress button for a long period of time a)Fast-reverse of the track
52Navigation
Page 74 of 83

■Rear tone setting - Setting the pitch of the beeps for the rear obstacle de-
tection
■ Audio lowering: - lowering the volume of the speakers (audio)
■ Off - No volume reduction of the sound from speakers
■ Weak - weak volume attenuation of sound from speakers
■ Medium - medium volume attenuation of sound from speakers
■ Strong - Strong volume attenuation of sound from speakers
Note
The compact display of the parking aid can be switched to a full screen view by
touching the screen within the display.
Light
›
Press the button
→
→ Light .
■ Light assistance - Setting of outdoor lighting
■ Light Assist - Switch on/off the head light assist
■ Switch-on time: - Set the sensibility of the light sensor against the change
in intensity of the ambient light ■ Early - High sensibility
■ Medium - Medium sensibility
■ Late - Low sensibility
■ Automatic headlight control (rain) - Activate/deactivate automatic head-
light control in rain
■ Daytime running lights - Activate/deactivate daytime running lights
■ Lane change flash - Activate/deactivate lane change flashing
■ Travel mode: - Travel mode on/off
■ Right-hand traffic - For right-hand traffic
■ Left-hand traffic - For left-hand traffic
■ Interior lighting - Sets the interior lighting
■ Instrument/switch lighting - Sets the brightness of the instrument/switch
lighting
■ Footwell lighting - Sets the brightness of the footwell light
■ Coming/Leaving Home function - Setting the COMING HOME / LEAVING
HOME-function
■ Coming Home function - Sets the period that the lights remain on after you
leave the vehicle (0 - 30 seconds; 0 = function deactivated)
■ Leaving Home function - Sets the period that the lights remain on after
you unlock the vehicle (0 - 30 seconds; 0 = function deactivated)
mirrors and wiper›
Press the button
→
→ Mirrors and wipers .
■ Mirrors - Adjusts the mirrors
■ Synchronous adjustment - Activate/deactivate synchronous mirror adjust-
ment
■ Lower while reversing - Activate/deactivate the lowering of the front pas-
senger mirror
■ Fold in when parked - Activate/deactivate folding the mirror via the remote
control key or by using the sensor in the handle (KESSY)
■ Wipers - Adjusts the windscreen wipers
■ Automatic wiping in rain - Activate/deactivate automatic windscreen wip-
ing in rain
■ Automatic rear wiper - Activate/deactivate automatic rear window wiping
Opening and closing
›
Press the button
→
→ Opening and closing .
■ Window operation - Window operation settings
■ Convenience opening: - Set the convenience opening feature
■ All windows - All windows
■ Driver window - Driver's window only
■ Off - Deactivates the convenience opening
■ Central locking - Settings for opening and closing of doors
■ Door unlocking: - Set the door unlocking feature
■ All doors - All doors
■ Single door - Driver's door or driver's or passenger door with KESSY sys-
tem
■ Vehicle side - Doors on the driver's side or on the driver's or passenger's
side with KESSY system
■ Automatic locking - Activate/deactivate automatic locking when starting
off
■ Acoustic confirmation - Activate/deactivate acoustic signals when locking/
unlocking the vehicle with an anti-theft alarm system
Seats
›
Press the button
→
→ Seats .
72Vehicle
Page 77 of 83

Index
A
ACC
71
Additional keyboard languages19
Address55
Adjusting Volume
6
Adjust vehicle systems ESC system
70
Advanced settings49
AM21
Anti-theft protection4
Apple devices33
ASR70
Audio21
Media26
Radio21
Automatic distance control71
Automatic front window wiping in rain72
Automatic headlight in rain72
Automatic locking72
Automatic rear window wiping72
Automatic scan22
AUX33
Auxiliary heater and ventilation Settings
70
B
Bluetooth Connect telephone to the device
40
Settings20
Switch on/off20
Visibility20
Bluetooth audio31
Bluetooth player31
C
CD
31
Climatronic automatic air recirculation
73
Automatic operation73
mode73
COMING HOME72
Communication37
Phonebox39
Component protection4
Control lever9
Convenience consumer69
D
DAB
21
Settings25
Station information24
Data Convenience consumer
69
Travel69
Vehicle status69
Date19
Daytime running lights72
Declaration of conformity4
Description of the unit5
Destination details66
Destination entry Home address
51
Destination management66
Destination details66
Stopover66
Device operation Control lever
9
MAXI DOT display9
Multifunction steering wheel11, 12
Device pairing41
Device screen Important notice5
Maintenance5
Operation7
Digital radio reception Settings
25
Display5, 7
Display in instrument cluster Telefon
11
Display in the instrument cluster9
Door release72
Driving mode68
Driving Mode Selection68
DVD31
DVD video34
Main menu34
Menu35
Operation34
Settings35
DVD video menu35
DVD video playback34
Dynamic route Switch on/off
64
E
Eco tips
73
Edit tour65
Enter destination Address
55
From the list57
Home address57
Map56
Own destination58
POI58
Enter into map56
ESC sport70
Explanation of graphic navigation instructions62
75Index
Page 78 of 83

External inputAUX33
USB33
Extra window52
Audio52
Compass53
Geographical coordinates54
GPS54
Manoeuvre53
Map54
Menus52
Navigation announcement53
Switching on/off52
Traffic53
Traffic signs53
F
Factory settings
20 , 73
File formats29
Requirements and restrictions30
FM21
Settings24
Folders List Media
27
Folding down the exterior mirrors - folding in while parking
72
Frequency range See main menu
21
Front Assist71
Fuel options49
Function key7
Function keys7
G
Graphical navigation instructions
53
H
Head Light Assist
72
Home address49, 57
I
Images
21, 35
Display36
Main menu35
Operation36
Select source36
Settings36
Important notes4
Important notice Touch screen
5
Import destinations58
Information display Manoeuvre
53
Navigation announcement53
In map56
Input destination55
Possibilities55
Input screen Language characters
19
Input screen with keyboard Search
8
Storing8
Input screen with numeric keypad8
Instrument lighting72
Introductory information4
J
Jukebox
30
K
Keyboard
8 , 19
L
Lane Assist
71
Lane change flash72
Lane guidance63
LEAVING HOME72
Light sensor - light switch-on time72
List of available stations Radio22
M
Main menu DVD video
34
Images35
Media26
Navigation47
Telephone38
Unit settings17
Manage memory49
Manoeuvre explanation of graphic navigation instructions
62
Nav. announcements62
Map49
Display50
Display options50
Introductory information50
Lane guidance63
Main menu50
Operation51
Map display options50
MAXI DOT Navigation
12
MAXI DOT display operation
9
media source
29
Media26
AUX33
Bluetooth audio31
CD/DVD31
DVD video34
File formats29
Folder list27
Folder List27
Jukebox30
Main menu26
Multifunction steering wheel9
76Index