2014 SKODA OCTAVIA lock
[x] Cancel search: lockPage 5 of 54
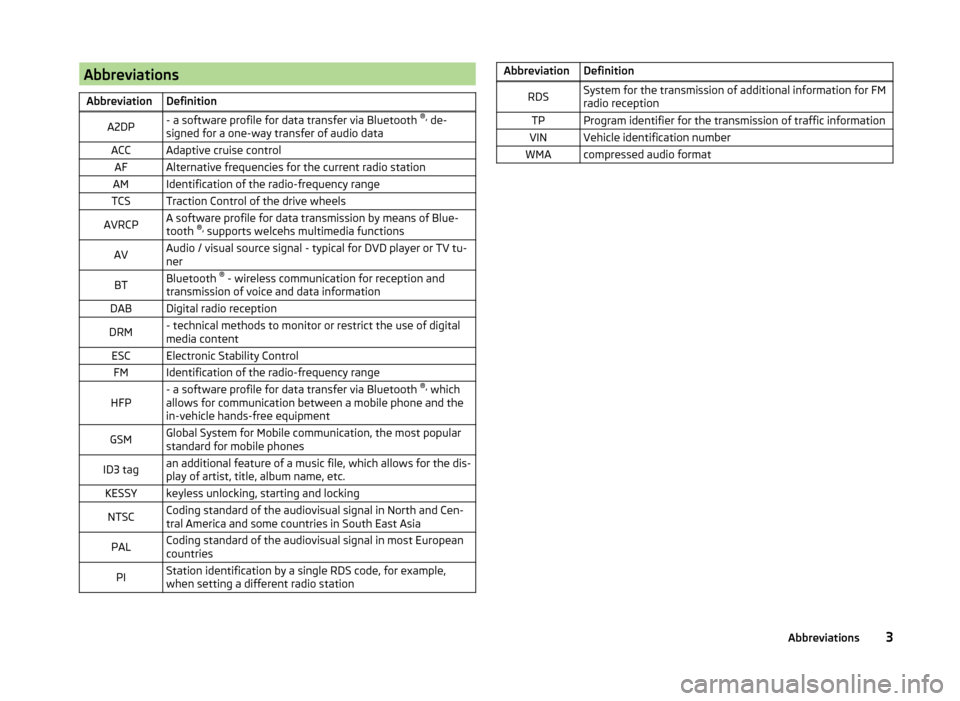
AbbreviationsAbbreviationDefinitionA2DP- a software profile for data transfer via Bluetooth ®,
de-
signed for a one-way transfer of audio dataACCAdaptive cruise controlAFAlternative frequencies for the current radio stationAMIdentification of the radio-frequency rangeTCSTraction Control of the drive wheelsAVRCPA software profile for data transmission by means of Blue-
tooth ®,
supports welcehs multimedia functionsAVAudio / visual source signal - typical for DVD player or TV tu-
nerBTBluetooth ®
- wireless communication for reception and
transmission of voice and data informationDABDigital radio receptionDRM- technical methods to monitor or restrict the use of digital
media contentESCElectronic Stability ControlFMIdentification of the radio-frequency rangeHFP- a software profile for data transfer via Bluetooth ®,
which
allows for communication between a mobile phone and the
in-vehicle hands-free equipmentGSMGlobal System for Mobile communication, the most popular
standard for mobile phonesID3 tagan additional feature of a music file, which allows for the dis-
play of artist, title, album name, etc.KESSYkeyless unlocking, starting and lockingNTSCCoding standard of the audiovisual signal in North and Cen-
tral America and some countries in South East AsiaPALCoding standard of the audiovisual signal in most European
countriesPIStation identification by a single RDS code, for example,
when setting a different radio stationAbbreviationDefinitionRDSSystem for the transmission of additional information for FM
radio receptionTPProgram identifier for the transmission of traffic informationVINVehicle identification numberWMAcompressed audio format3Abbreviations
Page 8 of 54
If Telephone mode was active before you switched off the unit and the igni-
tion and Bluetooth ®
function is not switched on, the screen displays the mes-
sage » page 32 . Switch on the ignition or the Bluetooth ®
function » page 18 .
If the vehicle key is pulled out of the ignition lock while the unit is switched on,
the unit will switch off automatically. After switching on the ignition, the unit
is turned on automatically.
If the device was switched off using the knob
, then the device will not
switch on automatically after switching on the ignition.
If your vehicle is fitted with the KESSY system, the device will switch off auto-
matically after the engine has been turned off and the door opened. If you
open the driver's door before switching off the engine, the device will also
switch off.
When the ignition is switched off, the device switches off automatically after
approx. half an hour (discharge protection of the vehicle battery).
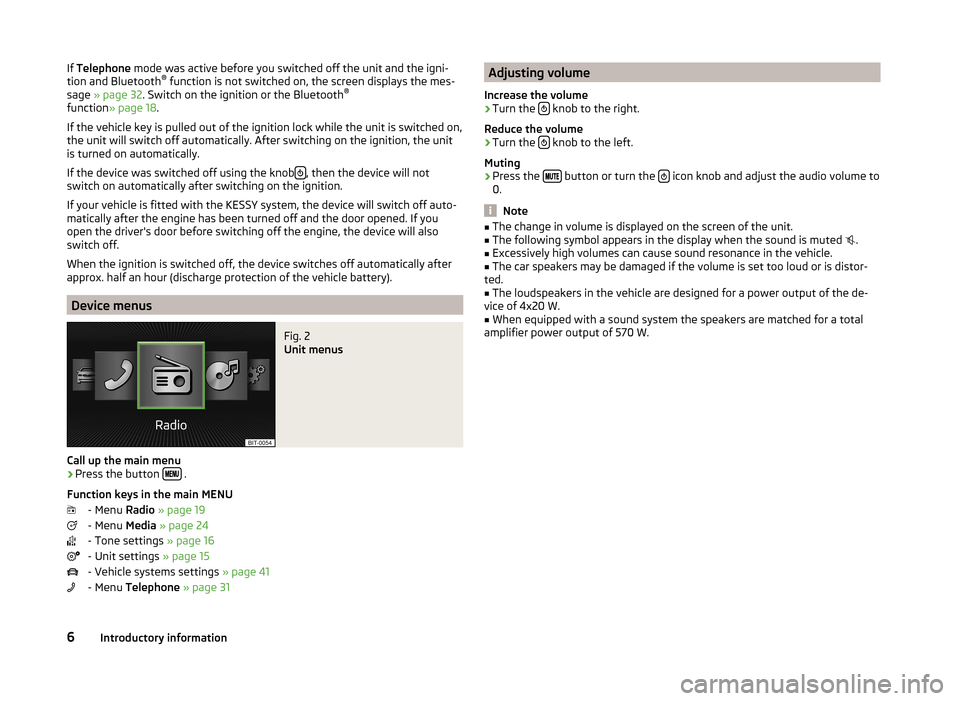
Device menus
Fig. 2
Unit menus
Call up the main menu
›
Press the button .
Function keys in the main MENU - Menu Radio » page 19
- Menu Media » page 24
- Tone settings » page 16
- Unit settings » page 15
- Vehicle systems settings » page 41
- Menu Telephone » page 31
Adjusting volume
Increase the volume›
Turn the knob to the right.
Reduce the volume
›
Turn the knob to the left.
Muting
›
Press the button or turn the icon knob and adjust the audio volume to
0.
Note
■ The change in volume is displayed on the screen of the unit.■The following symbol appears in the display when the sound is muted .■
Excessively high volumes can cause sound resonance in the vehicle.
■
The car speakers may be damaged if the volume is set too loud or is distor-
ted.
■
The loudspeakers in the vehicle are designed for a power output of the de-
vice of 4x20 W.
■
When equipped with a sound system the speakers are matched for a total
amplifier power output of 570 W.
6Introductory information
Page 18 of 54
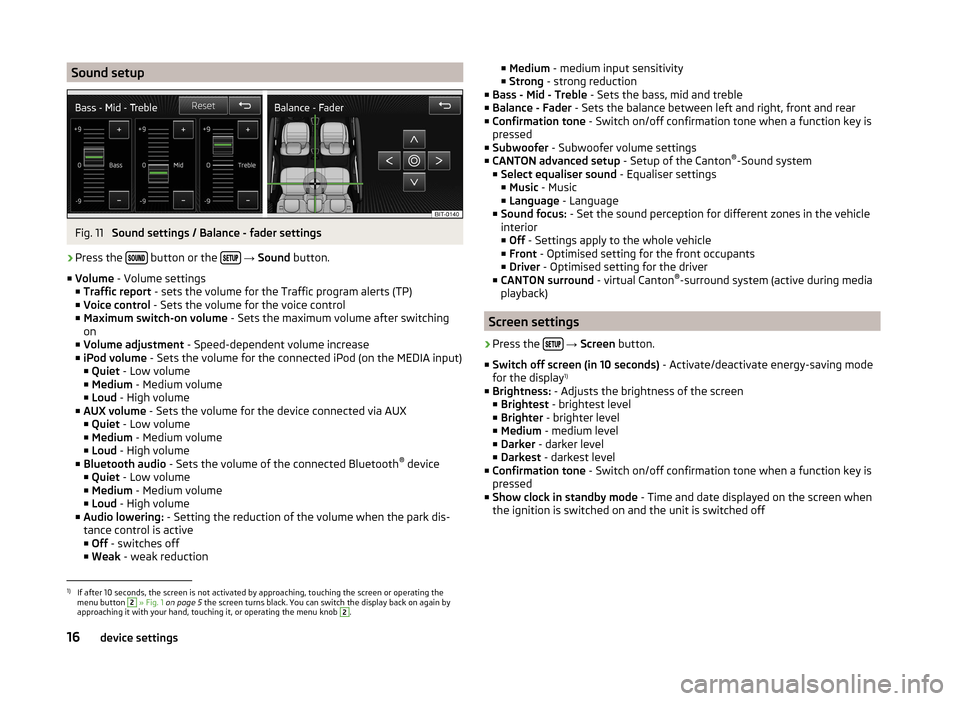
Sound setupFig. 11
Sound settings / Balance - fader settings
›
Press the button or the
→ Sound button.
■ Volume - Volume settings
■ Traffic report - sets the volume for the Traffic program alerts (TP)
■ Voice control - Sets the volume for the voice control
■ Maximum switch-on volume - Sets the maximum volume after switching
on
■ Volume adjustment - Speed-dependent volume increase
■ iPod volume - Sets the volume for the connected iPod (on the MEDIA input)
■ Quiet - Low volume
■ Medium - Medium volume
■ Loud - High volume
■ AUX volume - Sets the volume for the device connected via AUX
■ Quiet - Low volume
■ Medium - Medium volume
■ Loud - High volume
■ Bluetooth audio - Sets the volume of the connected Bluetooth ®
device
■ Quiet - Low volume
■ Medium - Medium volume
■ Loud - High volume
■ Audio lowering: - Setting the reduction of the volume when the park dis-
tance control is active ■ Off - switches off
■ Weak - weak reduction
■
Medium - medium input sensitivity
■ Strong - strong reduction
■ Bass - Mid - Treble - Sets the bass, mid and treble
■ Balance - Fader - Sets the balance between left and right, front and rear
■ Confirmation tone - Switch on/off confirmation tone when a function key is
pressed
■ Subwoofer - Subwoofer volume settings
■ CANTON advanced setup - Setup of the Canton®
-Sound system
■ Select equaliser sound - Equaliser settings
■ Music - Music
■ Language - Language
■ Sound focus: - Set the sound perception for different zones in the vehicle
interior
■ Off - Settings apply to the whole vehicle
■ Front - Optimised setting for the front occupants
■ Driver - Optimised setting for the driver
■ CANTON surround - virtual Canton®
-surround system (active during media
playback)
Screen settings
›
Press the
→ Screen button.
■ Switch off screen (in 10 seconds) - Activate/deactivate energy-saving mode
for the display 1)
■ Brightness: - Adjusts the brightness of the screen
■ Brightest - brightest level
■ Brighter - brighter level
■ Medium - medium level
■ Darker - darker level
■ Darkest - darkest level
■ Confirmation tone - Switch on/off confirmation tone when a function key is
pressed
■ Show clock in standby mode - Time and date displayed on the screen when
the ignition is switched on and the unit is switched off
1)
If after 10 seconds, the screen is not activated by approaching, touching the screen or operating the
menu button
2
» Fig. 1 on page 5 the screen turns black. You can switch the display back on again by
approaching it with your hand, touching it, or operating the menu knob
2
.
16device settings
Page 30 of 54
CAUTION■Be sure to wait until the CD has been fully ejected before you try to insert a
new CD. Otherwise you can damage the drive inside the unit.■
Only insert into the CD - drive original audio - CDs or standardised CD-Rs and
CD-RWs .
■
Do not stick anything to the CDs!
■
Outside temperatures that are either too high or too low might cause the
playback device to switch off temporarily. The unit switches to the last active
menu.
Note
■ After pressing the icon button it takes a few seconds for the CD to be ejec-
ted.■
Uneven or unsteady road surfaces and strong vibrations may cause the CD to
jump.
■
Damp (condensation) may affect the device in cold weather or after showers.
This can lead to playback jumps or impair the play function. In that case, wait
until the moisture has dissipated.
■
If the CDhas mechanical damage, is not readable or is inserted incorrectly,
the following message is displayed: Error: CD. Check theCD and insert properly
into the drive.
■
It is possible that CDs protected by copyright and home-made CDs will not be
played back at all or only in certain circumstances.
■
The national copyright laws that apply in your country must be observed.
SD memory card
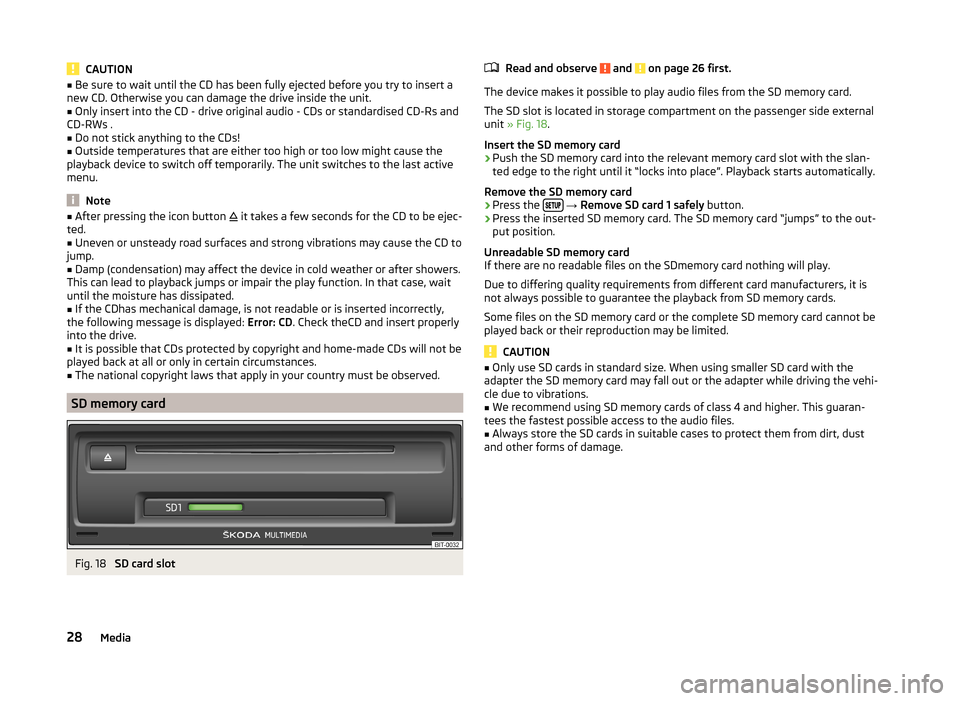
Fig. 18
SD card slot
Read and observe and on page 26 first.
The device makes it possible to play audio files from the SD memory card.
The SD slot is located in storage compartment on the passenger side external
unit » Fig. 18 .
Insert the SD memory card
›
Push the SD memory card into the relevant memory card slot with the slan-
ted edge to the right until it “locks into place”. Playback starts automatically.
Remove the SD memory card
›
Press the
→ Remove SD card 1 safely button.
›
Press the inserted SD memory card. The SD memory card “jumps” to the out-
put position.
Unreadable SD memory card
If there are no readable files on the SDmemory card nothing will play.
Due to differing quality requirements from different card manufacturers, it is
not always possible to guarantee the playback from SD memory cards.
Some files on the SD memory card or the complete SD memory card cannot be
played back or their reproduction may be limited.
CAUTION
■ Only use SD cards in standard size. When using smaller SD card with the
adapter the SD memory card may fall out or the adapter while driving the vehi-
cle due to vibrations.■
We recommend using SD memory cards of class 4 and higher. This guaran-
tees the fastest possible access to the audio files.
■
Always store the SD cards in suitable cases to protect them from dirt, dust
and other forms of damage.
28Media
Page 34 of 54
The reasons for this are as follows:
› no external aerial;
› incorrectly installed external aerial;
› transmission power greater than 10 watts.
Note
■
We recommend that the installation of mobile phones and two-way radio
systems in a vehicle be carried out by a specialist garage.■
The phone features are dependent on the mobile network operators, as well
as the phone being used. Further information is available from the mobile net-
work operator or to refer to the telephone manual.
■
In signal-free areas the reception can be disturbed or a call will be disconnec-
ted.
■
Most modern electronic equipment is shielded against high frequency sig-
nals. In exceptional cases, electronic equipment may not be shielded against
high frequency signals of the telephone and service may be disrupted.
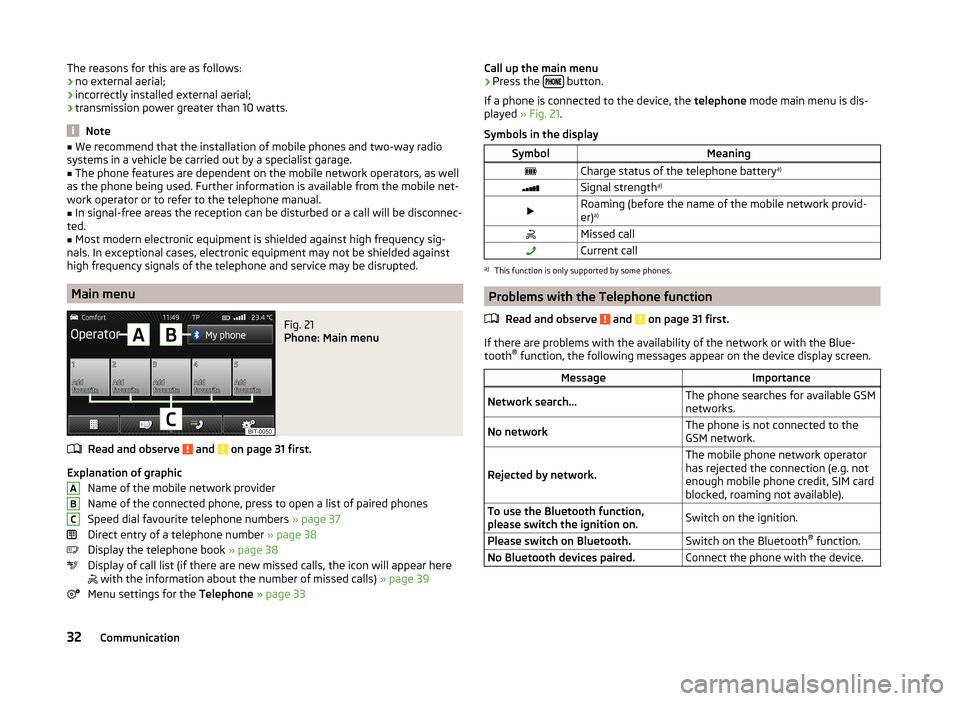
Main menu
Fig. 21
Phone: Main menu
Read and observe and on page 31 first.
Explanation of graphic
Name of the mobile network provider
Name of the connected phone, press to open a list of paired phones
Speed dial favourite telephone numbers » page 37
Direct entry of a telephone number » page 38
Display the telephone book » page 38
Display of call list (if there are new missed calls, the icon will appear here
with the information about the number of missed calls) » page 39
Menu settings for the Telephone » page 33
ABCCall up the main menu›Press the button.
If a phone is connected to the device, the telephone mode main menu is dis-
played » Fig. 21 .
Symbols in the displaySymbolMeaningCharge status of the telephone battery a)Signal strengtha)Roaming (before the name of the mobile network provid-
er) a)Missed callCurrent calla)
This function is only supported by some phones.
Problems with the Telephone function
Read and observe
and on page 31 first.
If there are problems with the availability of the network or with the Blue-
tooth ®
function, the following messages appear on the device display screen.
MessageImportanceNetwork search...The phone searches for available GSM
networks.No networkThe phone is not connected to the
GSM network.
Rejected by network.
The mobile phone network operator
has rejected the connection (e.g. not
enough mobile phone credit, SIM card
blocked, roaming not available).To use the Bluetooth function,
please switch the ignition on.Switch on the ignition.Please switch on Bluetooth.Switch on the Bluetooth ®
function.No Bluetooth devices paired.Connect the phone with the device.32Communication
Page 47 of 54
■Rear tone setting - Setting the pitch of the beeps for the rear obstacle de-
tection
■ Audio lowering: - lowering the volume of the speakers (audio)
■ Off - No volume reduction of the sound from speakers
■ Weak - weak volume attenuation of sound from speakers
■ Medium - medium volume attenuation of sound from speakers
■ Strong - Strong volume attenuation of sound from speakers
Note
The compact display of the parking aid can be switched to a full screen view by
touching the screen within the display.
Light
›
Press the button
→
→ Light .
■ Light assistance - Setting of outdoor lighting
■ Dynamic Light Assist - Switch on/off the head light assist function
■ Switch-on time: - Set the sensibility of the light sensor against the change
in intensity of the ambient light ■ Early - High sensibility
■ Medium - Medium sensibility
■ Late - Low sensibility
■ Automatic headlight control in rain - Activate/deactivate automatic head-
light control in rain
■ Daytime running lights - Activate/deactivate daytime running lights
■ Lane change flash - Activate/deactivate lane change flashing
■ Travel mode: - Travel mode on/off
■ R-hand traffic - For right-hand traffic
■ L-hand traffic - For left-hand traffic
■ Interior lighting - Sets the interior lighting
■ Instrument/switch lighting - Set the brightness of the instrument/switch
lighting
■ Footwell lighting - Sets the brightness of the footwell light
■ Coming/Leaving home Fct. - Setting the COMING HOME/LEAVING HOME func-
tion
■ Coming Home function - Sets the period that the lights remain on after you
leave the vehicle (0 - 30 seconds; 0 = function deactivated)
■ Leaving Home function - Sets the period that the lights remain on after
you unlock the vehicle (0 - 30 seconds; 0 = function deactivated)
mirrors and wiper›
Press the button
→
→ Mirrors and wipers .
■ Mirrors - Adjusts the mirrors
■ Synchronous adjustment - Activate/deactivate synchronous mirror adjust-
ment
■ Lower while reversing - Activate/deactivate the lowering of the front pas-
senger mirror
■ Fold in when parked - Activate/deactivate folding the mirror via the remote
control key or by using the sensor in the handle (KESSY)
■ Wipers - Adjusts the windscreen wipers
■ Automatic wiping in rain - Activate/deactivate automatic windscreen wip-
ing in rain
■ Automatic rear wiper - Activate/deactivate automatic rear window wiping
Opening and closing
›
Press the button
→
→ Opening and closing .
■ Window operation - Window operation settings
■ Conven. opening: - Set the convenience opening feature
■ All windows - All windows
■ Driver window - Driver's window only
■ Off - Deactivates the convenience opening
■ Central locking - Settings for opening and closing of doors
■ Door unlocking: - Set the door unlocking feature
■ All doors - All doors
■ Single door - Driver's door or driver's or passenger door with KESSY sys-
tem
■ Vehicle side - Doors on the driver's side or on the driver's or passenger's
side with KESSY system
■ Automatic locking - Activate/deactivate automatic locking when starting
off
■ Acoustic confirmation - Activate/deactivate acoustic signals when locking/
unlocking the vehicle with an anti-theft alarm system
Seats
›
Press the button
→
→ Seats .
45Vehicle systems
Page 48 of 54
■Store seat position - Store the driver's seat position and exterior mirror posi-
tion in the remote control key when locking the vehicle ■ Vehicle key activated - Activate/deactivate storing the driver's seat posi-
tion and exterior mirror position when locking the vehicle
Multifunction display
›
Press the button
→
→ Multifunction display .
In this menu it is possible to hide/show the appearance of the menu items in
the instrument cluster multifunction display and reset the driving data.
■ Current consumption - Display of current fuel consumption on/off
■ Average consumption - Display of average fuel consumption on/off
■ Refuel quantity - Display of refuel quantity on/off
■ Convenience consumers - Display of fuel consumption of convenience con-
sumers on/off
■ Eco tips - Display of tips for economical driving on/off
■ Travelling time - Display of travelling time on/off
■ Distance - Display of distance travelled on/off
■ Average speed - Display of average speed on/off
■ Digital speed display - Display of current speed on/off
■ Speed warning - Winter tyres warning on/off
■ Oil temperature - Oil temperature on/off
■ Reset Since start driving data - Reset the single-trip memory in the device
screen and in the display of the instrument cluster
■ Reset Long-term driving data - Reset the long-term memory in the device
screen and in the display of the instrument cluster
Service
›
Press the button
→
→ Service .
■ Vehicle no.: - Display of the vehicle identification number
■ Inspection: --- / --- - Number of km/days remaining until the next service
event
■ Oil change service: --- / --- - Number of km/days until the next oil change
Restore factory settings
›
Press the button
→
→ Factory settings .
In this menu you have the possibility to reset the menu items in the settings of the vehicle systems to factory settings.
■ All settings - Restoration of the settings all menu items
■ Driver assistance - Restoration of the driver assistance menus
■ Parking and manoeuvring - Restoration of the Parking and manoeuvring
menu items
■ Light - Restoration of the light menus
■ Mirrors and wipers - Restoration of the Mirrors and wipers menu
■ Opening and closing - Restoration of the Opening/closing menu items
■ Multifunction display - Restoration of the Multifunction display menus
If one of the above menu items is selected, the system will ask you whether
you really want to restore the settings.
■ Cancel - Return to higher-level menu
■ Reset - Restore the settings
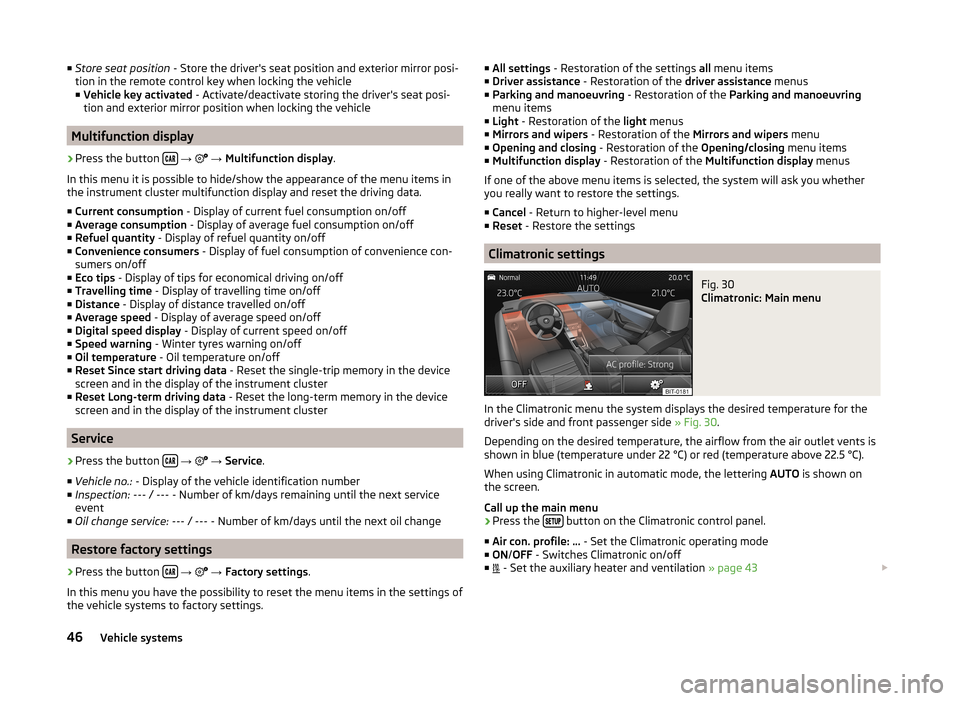
Climatronic settings
Fig. 30
Climatronic: Main menu
In the Climatronic menu the system displays the desired temperature for the
driver's side and front passenger side » Fig. 30.
Depending on the desired temperature, the airflow from the air outlet vents is
shown in blue (temperature under 22 °C) or red (temperature above 22.5 °C).
When using Climatronic in automatic mode, the lettering AUTO is shown on
the screen.
Call up the main menu
›
Press the button on the Climatronic control panel.
■ Air con. profile: ... - Set the Climatronic operating mode
■ ON /OFF - Switches Climatronic on/off
■ - Set the auxiliary heater and ventilation
» page 43
46Vehicle systems
Page 50 of 54
Index
A
ACC
44
Additional keyboard languages17
Adjusting volume
6
Adjust vehicle systems ESC system
43
AM19
Anti-theft protection4
Apple - device30
ASR43
Audio Media
24
Radio19
Automatic distance control44
Automatic front window wiping in rain45
Automatic headlight in rain45
Automatic locking45
Automatic rear window wiping45
Automatic search for radio station20
AUX29
Auxiliary heater and ventilation Settings
43
B
Bluetooth Connect the device with the phone
34
settings18
switch on/off18
visibility18
Bluetooth audio27
Bluetooth player27
C
CD
27
Climatronic automatic air recirculation46
Automatic operation46
mode46
COMING HOME45
Communication31
Phonebox33
Component protection4
Connect the device with the phone
34
Control lever9
Convenience consumer42
D
DAB
19
Settings23
Station information22
Data Convenience consumer
42
Travel42
Vehicle status42
date17
Daytime running lights45
Declaration of conformity4
Description of the device5
Device menus6
Device operation7
Control lever9
device screen7
Device screen7
MAXI DOT display8
Multifunction steering wheel9, 11
device screen keyboard
8
maintenance5
numerical keyboard8
operation7
Device screen16
Operation7
Device Settings15
Digital radio reception Settings
23
display5
Door release45
Driving mode41
Driving Mode Selection41
E
Eco tips
46
ESC sport43
External input AUX
29
MEDIA IN30
USB29
F
factory settings
18
Factory settings18, 46
Fatigue detection44
File formats26
Requirements and Limitations27
FM19
Settings22
Folder list Media
24
Folding down the exterior mirrors - folding in while parking
45
Frequency range See main menu
19
Front Assist44
Function key7
Function keys7
H
Head Light Assist
45
48Index