Page 49 of 77
 Amundsen Infotainment Navigation System Manual Operation
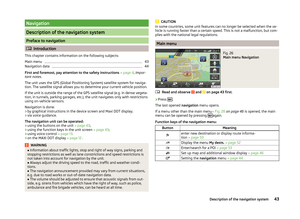
Moving the map
The map can be moved in any direction by touching it with your finger and
dragging it on the screen in the desired direction.
Changing the scale
› with the menu button 2
»")
Operation
Moving the map
The map can be moved in any direction by touching it with your finger and
dragging it on the screen in the desired direction.
Changing the scale
› with the menu button 2
» Fig. 1
on page 5 ;
› by touching the screen with two fingers and pulling the fingers together or
apart
Function keys and map display symbols
ButtonMeaning
2D map display - the map rotates and the direction of travel
arrow C
» Fig. 28 on page 46 points to the top of screen, or
the north is aligned with the top edge of the screen, and the
arrow
C
shows the direction of travel
3D map view -the direction of travel arrow C » Fig. 28 on
page 46 points to the top of the screen (if the map scale is
larger than 100 km, the map is aligned to the north).By touching, the map is aligned with the vehicle position (for
example, the function key is displayed when moving the map)The number located below the symbol indicates the eleva-
tion a)By pressing the button, the map scale is reduced for a few
seconds and then reset to the original scale (quick view)Display the manually set map scaleDisplay the automatic map scale
Switch auto-zoom on/off during route guidance. Active auto-
zoom is indicated by a green symbol. If Autozoom is active,
the map scale will change automatically, depending on the
driven route (motorway trip: large map scale - city: small map
scale)a)
To display the elevation, the signal of at least five satellites must be received. Also, the route guidance
must not be running in demo mode.
Switch off auto-zoom by touching
→
or off by changing the map scale.
Touch
(function key highlighted in green) turns the autozoom on again. Au-
tozoom can also be switched on/off in the navigation settings » page 45
Auto-zoom is only functional when the map is aligned with the vehicle position
(the function key with symbol with the symbol).
Traffic signs
The traffic sign display can be switched on in the unit screen » page 45.
The system provides the option of displaying the traffic signs
B
» Fig. 28 on
page 46 on the screen which are stored in the navigation data of the maps.
If the Traffic signs split screen is not switched on, only one traffic sign is dis-
played on the unit screen.
Switching on the traffic sign display function » page 45.
Only one traffic sign is displayed without the additional signs in the screen
outside the split screen » page 49.
Extra window
Introduction
This chapter contains information on the following subjects:
Menus in extra window
47
Audio
48
Compass
48
Manoeuvre
49
Traffic signs
49
GPS
49
First and foremost, pay attention to the safety instructions » page 4 , Impor-
tant notes .
Menus in extra window
Depending on the context of the selected menus, additional information is dis-
played in the split screen.
Switching on
›
In the Navigation main menu, press .
or
›
In the Navigation main menu, press
→ Split screen .
The last opened split screen is displayed.
47Description of the navigation system
Page 50 of 77
 Amundsen Infotainment Navigation System Manual Switching off›In the Navigation main menu, press .
or›
in the split screen on
the button.
or
›
In the Navigation main menu, press
→ Split screen .
Menus in the split")
Switching off›In the Navigation main menu, press .
or›
in the split screen on
the button.
or
›
In the Navigation main menu, press
→ Split screen .
Menus in the split screen
■ Audio - Playback operation of the currently selected audio
source » page 48
■ Compass - Displays the current vehicle location in relation to the compass di-
rections » page 48
■ Manoeuv. - Display of the next or following navigation announcement (ma-
noeuvre) » page 49
■ Traffic - Display of traffic signs which are stored in the navigation data of the
maps » page 49
■ GPS - Displays the geographical coordinates of the current vehicle loca-
tion » page 49
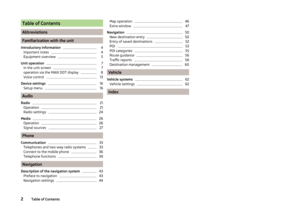
Audio
Fig. 29
Split screen: Audio
In the Audio split screen, the playback of the currently selected audio source
can be operated » page 21.
Description of the function keysButtonActionFunction
PressChanging the station
/Press
Play / pause: Playback is paused at the cur-
rent location and the symbol changes to
-
Playback continues after re-tapping the play
from this point
Press briefly (with-
in 5 seconds of the
start of playback of the track)
Plays the previous track from the start
Press briefly
(5 seconds after
the start of play-
back of the track)
Plays the current track from the startPress button for a long period of time a)Fast-reverse of the trackPress brieflyPlays the next track from the startPress button for a
long period of time a)Fast-forward of the track
a)
The longer the button is pressed, the faster the fast forward/reverse.
Compass
Fig. 30
Split screen: Compass
The
Compass split screen displays the current vehicle position in relation to
the compass.
48Navigation
Page 51 of 77
 Amundsen Infotainment Navigation System Manual ManoeuvreFig. 31
Split screen: Manoeuv.
The next or following navigation announcement (manoeuvre) is displayed in
the Manoeuv. split screen.
Displayed information: › Direction of the navigation i")
ManoeuvreFig. 31
Split screen: Manoeuv.
The next or following navigation announcement (manoeuvre) is displayed in
the Manoeuv. split screen.
Displayed information: › Direction of the navigation instruction;
› Street name or street number of the current position;
› Street name or street number of the displayed navigation instruction;
› Distance to the city with the following navigation instruction including nu-
meric indication of the remaining distance or graphically with decreasing bars
of the navigation instruction.
Traffic signs
Fig. 32
Split screen: Traffic signs
The Traffic signs split screen displays traffic signs.
Up to three traffic signs and three additional traffic signs can be displayed.
If the message No traffic signs available. is displayed in the split screen, the
navigation data did not recognise any traffic sign or you are outside the range
of the navigation data.
Further information » page 47.
GPS
Fig. 33
Split screen: GPS
The GPS (Global Positioning System) split screen displays information on the
current geographical position of the vehicle.
Displayed information
■ - Longitude 1)
■ - Latitude 1)
■ - Elevation 2)
■ Satellites: - Number of received/available satellites
1)
In order to display the information regarding the geographical longitude and latitude of the current vehi-
cle position, the GPS signal has to be received from at least three satellites.
2)
To display information about elevation above sea level of the current vehicle position, the GPS signal of
at least five satellites must be received. Also, the route guidance must not be running in demo mode.
49Description of the navigation system
Page 52 of 77
 Amundsen Infotainment Navigation System Manual Navigation
New destination entry
Introduction
This chapter contains information on the following subjects:
Destination entry options
50
Address
50
Map
51
First and foremost, pay attention to the sa")
Navigation
New destination entry
Introduction
This chapter contains information on the following subjects:
Destination entry options
50
Address
50
Map
51
First and foremost, pay attention to the safety instructions » page 4 , Impor-
tant notes .
Destination entry options
Fig. 34
Destination entry options
Explanation of graphic
Address » page 50
POI » page 53
in the map » page 51
Select the menu with the option to enter a destination » Fig. 34.
›
In the Navigation main menu, press
→ Options →
the button.
or
›
In the Navigation main menu, press
→ New dest./stopover → Options →
the button.
or
›
In the Navigation main menu, press
→ Other POIs → Options →
the
button.
ABCMake sure that the destination has been entered correctly, for example, by
checking that the destination is displayed in the map. Some names of places
and other destinations can occur at several places.
Address
Fig. 35
Destination entry by address
Explanation of graphic Country
City / town
Street
Enter building number (the function key is enabled only after the street
has been entered)
Enter junction (the function key is enabled only after the street has been
entered)
Return to the higher-level menu
Delete characters in the entry lines
Switch to letters » page 8
Switch to special characters
Input a junction (crossroads)
Confirmation of text entered into the entry line
›
In the Navigation main menu, press
→ Options → Address button.
or
›
In the Navigation main menu, press
→ New dest./stopover → Options →
Address .
or
ABCDE50Navigation
Page 53 of 77
 Amundsen Infotainment Navigation System Manual ›In the
Navigation main menu, press → Other POIs → Options → Address .
Some address positions are already pre-filled with the data of the last destina-
tion.
The pre-filled positio")
›In the
Navigation main menu, press → Other POIs → Options → Address .
Some address positions are already pre-filled with the data of the last destina-
tion.
The pre-filled positions can be adjusted by touching the item and then adjust-
ing it in the input screen » page 8.
To start navigation, you need to enter country, city and street.
The information is entered step by step in individual input screens.
When entering the street, instead of a street name, it is possible to select the centre of the entered city by touching Centre. Then it is no longer necessary to
enter the house number or junction.
Both the house number and also a further address supplement in the form of a number can be entered. The system displays a list of destinations found from
combinations of the two numbers.
If the entered house number was not found, a menu opens to clarify the desti-
nation:
■ No house number - Enter an address without a house number and display a
menu with destination details
■ Nearest house number: - Confirmation of the proposed house number
■ Enter junction - Open a menu with junctions with the selected street
If the address is entered correctly, destination details are dis-
played » page 60 .
Map
Fig. 36
Destination entry in the map
›
In the Navigation main menu, press
→ Options → On map .
or›
In the Navigation main menu, press
→ New dest./stopover → Options →
On map .
or
›
In the Navigation main menu, press
→ Other POIs → Options → On map .
Entry on the map is also used for entering the search area for POIs » page 53.
›
In the Navigation main menu, press
→ Other POIs → Search area → Se-
lect on map → Edit .
The destination can be entered on the map by using the GPS coordinates or
the crosshairs » Fig. 36.
GPS coordinates
The destination can be entered through the degrees of latitude and longitude
(GPS coordinates).
By pressing the function button with the degree of latitude or longitude for
the location, a menu appears with the specification option. Use the function
keys with the symbol /
. Touching the screen outside of the function but-
tons calls up a basic menu for entering the location on the map.
The crosshairs move to the coordinates entered, which allows for checking of
the destination entered.
Crosshairs
The crosshairs show the position of the address which was previously entered.
The desired destination can be set by dragging your finger over the map to the
centre of the crosshairs.
The contact point is moved into the crosshairs through the finger movement
and at the same time the degrees of latitude and longitude are adjusted to the
point entered.
The symbol displays the current map scale. This can be changed while the
entry is being made » page 47.
The bottom of the screen displays the address or the longitude and latitude of
the selected item.
Confirm destination
Confirm the destination by touching OK. Then the following items are dis-
played:
51Navigation
Page 54 of 77
 Amundsen Infotainment Navigation System Manual ■Store - Store the destination in the destination memory » page 8
■ Edit - Return to the main menu with the option to input a destina-
tion » page 50
■ Option. - Display a menu for settin")
■Store - Store the destination in the destination memory » page 8
■ Edit - Return to the main menu with the option to input a destina-
tion » page 50
■ Option. - Display a menu for setting the route parameters » page 44
■ Start - Route calculation starts with subsequent selection of route type and
route guidance or with guidance according to the preferred route type
Reduce/enlarge map
Press the function key with symbol
the map goes to full screen display
Press the function key with symbol
the map is displayed on a split screen
along with the menu for the entry using the GPS coordinates.
Entry of saved destinations
Introduction
This chapter contains information on the following subjects:
My destinations
52
Home address
52
Own destination (vCard)
53
First and foremost, pay attention to the safety instructions » page 4 , Impor-
tant notes .
My destinations
Fig. 37
My destinations menu
The menu is used to select the type of destinations stored in the unit memo-
ry » Fig. 37 .
›In the
Navigation main menu, press → Dest. and contacts → the but-
ton.
or›
In the Navigation main menu, press
→ Last destinations →
the button.
Destinations list Last destinations
Destination memory (stored destinations and flag destinations)
Favourites
List of contacts with stored addresses 1)
(the phone must be connected via
Bluetooth ®
» page 33 )
Confirm one of the menu items of dests. and contacts to display the following: ■ Find - The function key is displayed if more than 5 entries exist. Touch to
start the search for a destination or a contact by the name stored in the des-
tination menu » page 8
■ - Detailed information on the destination or contact
Confirm a destination to start guidance depending on the context or to display
details of the destination » page 60.
Home address
The menu provides a quick destination guide to a stored home address.
›
In the Navigation main menu, press
→ Home address .
If the preferred route type has been set, then touching the Home address will
start the calculation and route guidance, or after the calculation, you need to
select the route type before the route guidance starts.
If the home address has not been entered, an input window is displayed with
the following message:
Please select as your home address: your current position or a new address.
The following function keys are displayed:
› Position
- Entry of the home address by adoption of the current position of
the vehicle;
› Address
- Enter the home address in writing
Description of the adjustment or deletion process of the home address:
1)
This function is only supported by some mobile phones.
52Navigation
Page 55 of 77
 Amundsen Infotainment Navigation System Manual The home address is also available in the main navigation menu, by pressing
the symbol key → Manage memory → Define home address .
Own destination (vCard)
You can import custom destination")
The home address is also available in the main navigation menu, by pressing
the symbol key → Manage memory → Define home address .
Own destination (vCard)
You can import custom destinations in vCard format from an SD memory card,
a CD/DVD or a USB storage device into the device.
›
In the Navigation main menu, press
→ Import destinations .
A list of possible data import sources is displayed » page 26, Select signal
source .
Select the source and confirm the menu item Import all vCards from this folder
to start importing the data stored in vCard format into the device memory.
POI
Introduction
This chapter contains information on the following subjects:
Entry of a new POI
53
Search area for POIs
53
Find and select a POI
54
Quick select a POI
54
Search selection near the location, destination, stopover and along the
route
54
Search near the entered address or near the point entered on the map
55
First and foremost, pay attention to the safety instructions » page 4 , Impor-
tant notes .
Entry of a new POIFig. 38
Main menu
Explanation of graphic
Select search area
Menu with context-sensitive search areas
Search for POI by name
Search for POI by category
Open the main menu.
›
In the Navigation main menu, press
→ Options → POI .
or
›
In the Navigation main menu, press
→ New dest./stopover → Options →
POI .
or
›
In the Navigation main menu, press
Other POIs
Search area for POIs
Fig. 39
Search area for POIs
123453Navigation
Page 56 of 77
 Amundsen Infotainment Navigation System Manual Explanation of graphicNear current location - Near current vehicle position
Near destination -Near the destination
Near stopover dest. - Search near the stopover
Along the route - Search along the")
Explanation of graphicNear current location - Near current vehicle position
Near destination -Near the destination
Near stopover dest. - Search near the stopover
Along the route - Search along the route
Near address - Near the entered address
Select on map - Near the point entered on the map
First select a search area for the POI.›
In the main menu, to enter a new POI, press
1
» Fig. 38 on page 53 .
Depending on the context, the following search options
2
» Fig. 38 on
page 53 can be displayed.
Find and select a POI
The POIs are searched for in the selected search area » page 53.
Search option: » Fig. 38 on page 53
Search by the entered POI name » page 8
Search by the selected POI category » page 55
The menu with the found destinations is displayed when the search has finish-
ed. The menu is sorted by the distance to the specified search area and in-
cludes a maximum of 200 entries found.
Confirm a menu item to display details » page 60 .
Quick select a POI
›
In the
Navigation main menu, press
the button.
Speed dial menu Car park
Restaurant
Fuel station
When you touch a menu item, a list of the nearest POIs in the selected catego-
ry is displayed.
By selecting a menu item in the list of the selected POIs, the POI details is dis-
played.
ABCDEF34Search selection near the location, destination, stopover and
along the routeFig. 40
Search area for POIs
Explanation of graphic
Country
City
Street
The menu items displayed in the search area are for information only and can- not be changed.
The figure applies to the following search-area options near
1
» Fig. 38 on
page 53 .
■ Near current location - Current position
■ Near destination - Destination
■ Near stopover dest. - Stopover
■ Along the route - Route
Touch
3
or
4
» Fig. 38 on page 53 to start the POI search for the selected
search area.
ABC54Navigation