2014 Seat Leon 5D key
[x] Cancel search: keyPage 9 of 84
Introduction
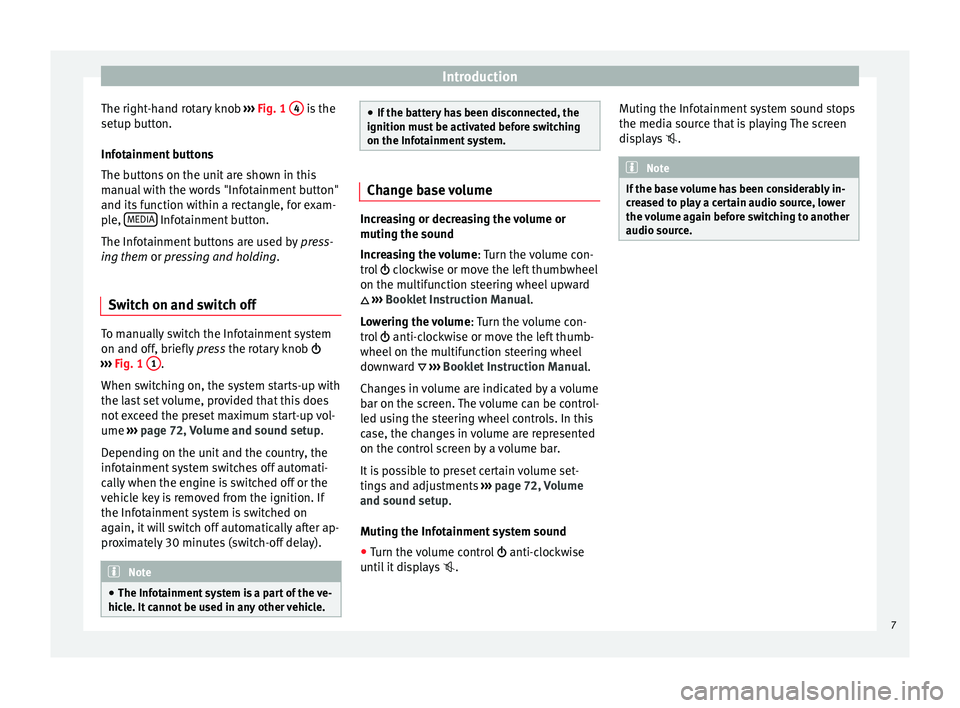
The right-hand rotary knob ››› Fig. 1 4 is the
setup button.
Infotainment buttons
The buttons on the unit are shown in this
manual with the words "Infotainment button"
and its function within a rectangle, for exam-
ple, MEDIA Infotainment button.
The Infotainment buttons are used by press-
ing them or pressing and holding.
Sw it
ch on and switch off To manually switch the Infotainment system
on and off, briefly
press the rotary knob
››› Fig. 1 1 .
When switching on, the system starts-up with
the last set volume, provided that this does
not exceed the preset maximum start-up vol-
ume ››› page 72, Volume and sound setup .
D ependin
g on the unit and the country, the
infotainment system switches off automati-
cally when the engine is switched off or the
vehicle key is removed from the ignition. If
the Infotainment system is switched on
again, it will switch off automatically after ap-
proximately 30 minutes (switch-off delay). Note
● The Infotainment system is a part of the ve-
hicle. It cannot be used in any other vehicle. ●
If the battery has been disconnected, the
ignition must be activated before switching
on the Infotainment system. Change base volume
Increasing or decreasing the volume or
muting the sound
Increasing the volume
: Turn the volume con-
trol clockwise or move the left thumbwheel
on the mu ltif
unction steering wheel upward
››› Booklet Instruction Manual.
L o
wering the volume : Turn the volume con-
trol anti-clockwise or move the left thumb-
wheel on the multifunction steering wheel
downward ››› Booklet Instruction Manual.
Changes in volume are indicated by a volume
bar on the screen. The volume can be control-
led using the steering wheel controls. In this
case, the changes in volume are represented
on the control screen by a volume bar.
It is possible to preset certain volume set-
tings and adjustments ››› page 72, Volume
and sound setup.
Mutin
g the Infotainment system sound
● Turn the volume control anti-clockwise
until it displays . Muting the Infotainment system sound stops
the media source that is playing The screen
displays
. Note
If the base volume has been considerably in-
creased to play a certain audio source, lower
the volume again before switching to another
audio source. 7
Page 11 of 84

IntroductionDisplay and function buttons: operation and ef-
fect
×
Press to close a pop-up window or an input
window.
/ Press them to change the setup adjustments
one at a time.
Move the slider around the screen by pressing
it lightly and without lifting your finger.
Open list entries and search lists
Fig. 4
Entries on a setup menu list. The entries on a list can be activated by
pressing them on the screen directly or by us-
ing the setup button
›››
Fig. 1 4 .Mark list entries using the setup button and
open them
●
Turn the setup button to mark the entries
on the li s
t with a rectangle one by one and
continue searching the list in this manner.
● Press
the setup button to activate the
marked entry on the list.
Search lists (scrolling the screen)
The scroll bar is shown on the right and its
size depends on the entries in the list
››› Fig. 4 1 .
● Briefly press the screen above or below the
scroll marker.
● OR: Place a finger over the scroll marker
and without lifting it , mo
ve it around the
screen. Lift your finger off the screen when
you reach the desired position.
● OR:
Place your finger in the centre of the
screen and without lifting it , move it around
the screen. Lift your finger off the screen
when you reach the desired position. Input masks with on-screen keypad Fig. 5
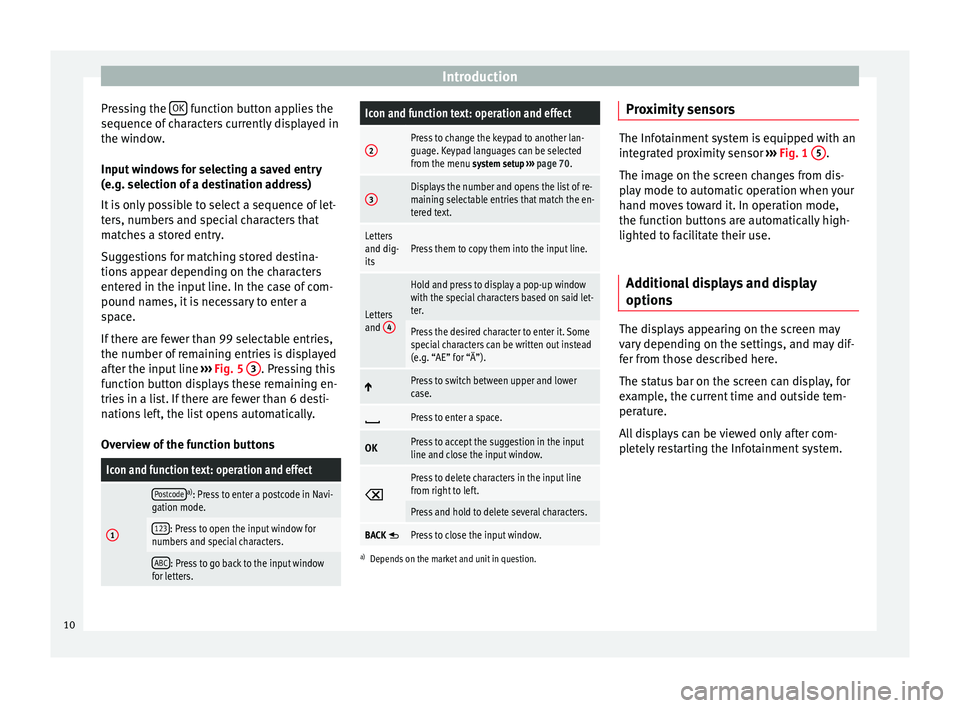
Input window with on-screen keypad. Input windows with on-screen keypad are
used for functions such as entering an entry
name, selecting a destination address or en-
tering a search term for searching long lists.
The function buttons listed below are not
available in all countries or for all topics.
Subsequent chapters only explain those
functions that differ from those in the screen
shown in the figure.
The input line with cursor is located on the
left in the top bar of the screen. All inputs are
displayed here.
Input windows for “free text input”
In the input masks for open text, you may en-
ter letters, numbers and special characters in
any combination.
»
9
Page 12 of 84
Introduction
Pressing the OK function button applies the
sequence of characters currently displayed in
the window.
Input windows for selecting a saved entry
(e.g. selection of a destination address)
It is only possible to select a sequence of let-
ters, numbers and special characters that
matches a stored entry.
Suggestions for matching stored destina-
tions appear depending on the characters
entered in the input line. In the case of com-
pound names, it is necessary to enter a
space.
If there are fewer than 99 selectable entries,
the number of remaining entries is displayed
after the input line ››› Fig. 5 3 . Pressing this
function button displays these remaining en-
tries in a list. If there are fewer than 6 desti-
nations left, the list opens automatically.
Overview of the function buttonsIcon and function text: operation and effect
1
Postcodea) : Press to enter a postcode in Navi-
gation mode.
123: Press to open the input window for
numbers and special characters.
ABC: Press to go back to the input window
for letters.
Icon and function text: operation and effect
2Press to change the keypad to another lan-
guage. Keypad languages can be selected
from the menu system setup ››› page 70.
3Displays the number and opens the list of re-
maining selectable entries that match the en-
tered text.
Letters
and dig-
itsPress them to copy them into the input line.
Letters
and 4
Hold and press to display a pop-up window
with the special characters based on said let-
ter.
Press the desired character to enter it. Some
special characters can be written out instead
(e.g. “AE” for “Ä”).
Press to switch between upper and lower
case.
Press to enter a space.
OKPress to accept the suggestion in the input
line and close the input window.
Press to delete characters in the input line
from right to left.
Press and hold to delete several characters.
BACK Press to close the input window.
a)
Depends on the market and unit in question.
Proximity sensors The Infotainment system is equipped with an
integrated proximity sensor
››› Fig. 1 5 .
The image on the screen changes from dis-
play mode to automatic operation when your
hand moves toward it. In operation mode,
the function buttons are automatically high-
lighted to facilitate their use.
Additional displays and display
options The displays appearing on the screen may
vary depending on the settings, and may dif-
fer from those described here.
The status bar on the screen can display, for
example, the current time and outside tem-
perature.
All displays can be viewed only after com-
pletely restarting the Infotainment system.
10
Page 20 of 84
Audio and Media Mode
Note
Not all stations are stored in the database
and therefore it is not always possible to as-
sign logos automatically. Manually save station logos in the
saved station buttons
The station logos can be imported from a
compatible data medium (for example, mem-
ory card or memories with USB port).
● Press the function button Setup and then
Station logos .
● Press the station button where you wish to
store the logo of a station.
● Select the source where the logo is stored
(for example, SD card 1 ). We recommend sav-
ing logos in the memory unit’s root directory.
● Select the station logo.
● Repeat the process to assign other logos;
press the infotainment button RADIO to re-
turn to the RADIO main menu.
● If you wish to change the logo of a preset
button that already has one assigned to it, it
must first be deleted from the button in ques-
tion. Select, tune and store a station
Fig. 14
RADIO main menu Fig. 15
Radio mode: list of stations.Selecting stations
Select stations
with the arrow
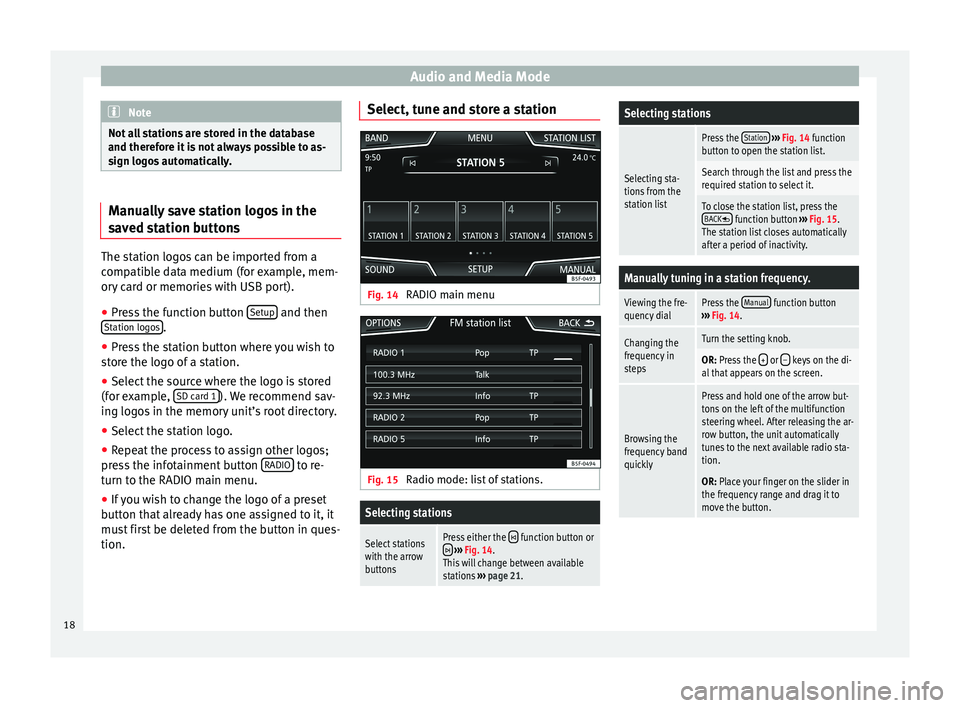
buttonsPress either the function button or ››› Fig. 14.
This will change between available
stations ››› page 21.
Selecting stations
Selecting sta-
tions from the
station list
Press the Station
››› Fig. 14 function
button to open the station list.
Search through the list and press the
required station to select it.
To close the station list, press the BACK function button ››› Fig. 15.
The station list closes automatically
after a period of inactivity.
Manually tuning in a station frequency.
Viewing the fre-
quency dialPress the Manual function button
››› Fig. 14.
Changing the
frequency in
stepsTurn the setting knob.
OR: Press the + or – keys on the di-
al that appears on the screen.
Browsing the
frequency band
quickly
Press and hold one of the arrow but-
tons on the left of the multifunction
steering wheel. After releasing the ar-
row button, the unit automatically
tunes to the next available radio sta-
tion.
OR: Place your finger on the slider in
the frequency range and drag it to
move the button. 18
Page 31 of 84
Audio and Media Mode
● Search through the track list and press the
desired track.
If there is information available on the track,
the track name is displayed (on the audio
CDs) or the name of the file (MP3) instead of Track + number .
General overview of the function buttons on
the track listFunction button: effect
AOpen the Source menu. Select another me-
dia source by pressing.
B
Indicates the media source being played.
Press to select another media source.
JUKEBOX: Internal hard drive of the Infotain-
ment system (SSD) ››› page 34.
CD/DVD: Internal CD and DVD drive
››› page 30.
SD CARD 1, SD CARD 2: SD memory card
››› page 30.
USB: External data storage device connec-
ted to the USB port ››› page 31.
BT AUDIO: External media player connected
by Bluetooth ®
››› page 33.
AUX: Audio source connected to the AUX-IN
socket ››› page 32
WLAN: External audio source connected by
WLAN ››› page 36
Function button: effect
CPress the function button to open the top
folder of the media source.
Starts playback from the first track.
Repeat all tracks.
Repeats all the tracks that are on the same
memory level as the track being played at
that moment. If in the
Media Setup menu
Mix/Repeat/Scan including subfolders is activa-
ted, it also includes the subfolders
››› page 36.
Random play.
Includes all tracks that are on the same
memory level as the track being played at
that moment. If in the
Media Setup menu
Mix/Repeat/Scan including subfolders is activa-
ted, it also includes the subfolders
››› page 36.
CLOSE ×To close the track list. Note
The tracks, folders and playlists can also be
selected by turning the setup button, and can
be played or opened by pressing it. Database view
Fig. 26
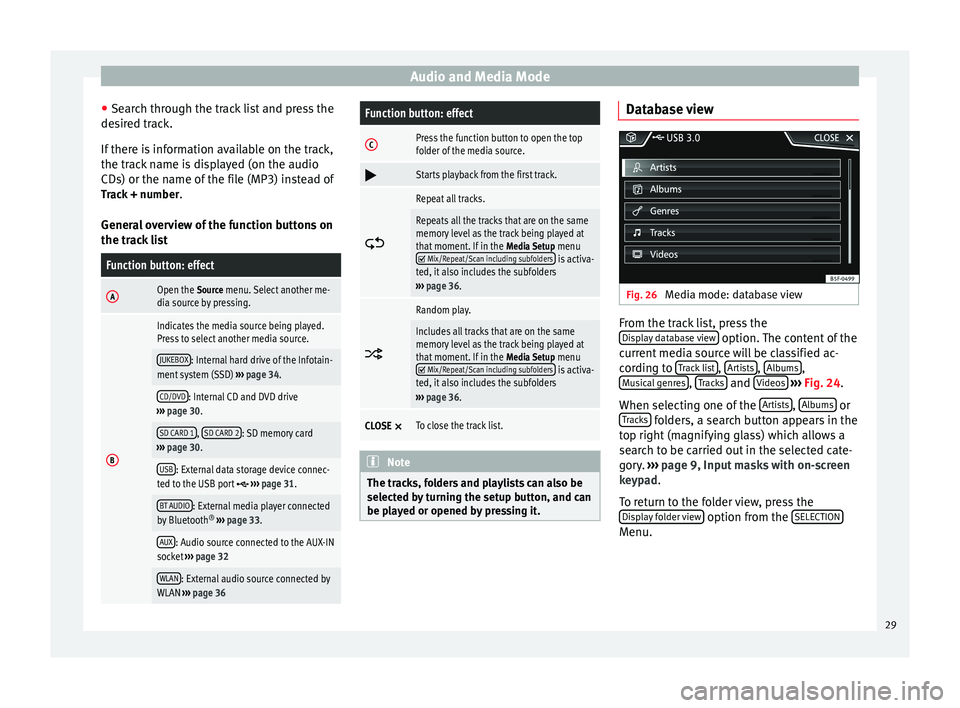
Media mode: database view From the track list, press the
Display database view option. The content of the
current media source will be classified ac-
cording to Track list ,
Artists ,
Albums ,
Musical genres ,
Tracks and
Videos
››› Fig. 24 .
When sel ectin
g one of the Artists ,
Albums or
Tracks folders, a search button appears in the
top right (magnifying glass) which allows a
search to be carried out in the selected cate-
gory. ››› page 9, Input masks with on-screen
keypad .
T o r
eturn to the folder view, press the
Display folder view option from the
SELECTION Menu.
29
Page 32 of 84
Audio and Media Mode
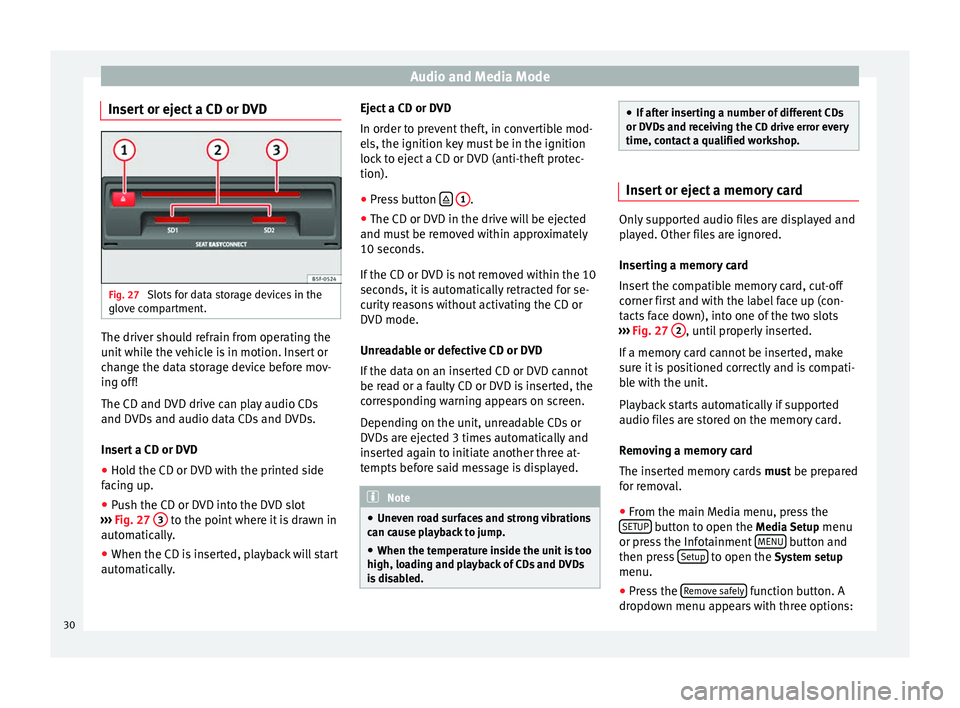
Insert or eject a CD or DVD Fig. 27
Slots for data storage devices in the
glove compartment. The driver should refrain from operating the
unit while the vehicle is in motion. Insert or
change the data storage device before mov-
ing off!
The CD and DVD drive can play audio CDs
and DVDs and audio data CDs and DVDs.
Insert a CD or DVD
● Hold the CD or DVD with the printed side
facing up.
● Push the CD or DVD into the DVD slot
››› Fig. 27 3 to the point where it is drawn in
automatically.
● When the CD is inserted, playback will start
automatically. Eject a CD or DVD
In order to prevent theft, in convertible mod-
els, the ignition key must be in the ignition
lock to eject a CD or DVD (anti-theft protec-
tion).
●
Press button
1 .
● The CD or DVD in the drive will be ejected
and must be removed within approximately
10 seconds.
If the CD or DVD is not removed within the 10
seconds, it is automatically retracted for se-
curity reasons without activating the CD or
DVD mode.
Unreadable or defective CD or DVD
If the data on an inserted CD or DVD cannot
be read or a faulty CD or DVD is inserted, the
corresponding warning appears on screen.
Depending on the unit, unreadable CDs or
DVDs are ejected 3 times automatically and
inserted again to initiate another three at-
tempts before said message is displayed. Note
● Uneven road surfaces and strong vibrations
can cause playback to jump.
● When the temperature inside the unit is too
high, loading and playback of CDs and DVDs
is disabled. ●
If after inserting a number of different CDs
or DVDs and receiving the CD drive error every
time, contact a qualified workshop. Insert or eject a memory card
Only supported audio files are displayed and
played. Other files are ignored.
Inserting a memory card
Insert the compatible memory card, cut-off
corner first and with the label face up (con-
tacts face down), into one of the two slots
››› Fig. 27 2 , until properly inserted.
If a memory card cannot be inserted, make
sure it is positioned correctly and is compati-
ble with the unit.
Playback starts automatically if supported
audio files are stored on the memory card.
Removing a memory card
The inserted memory cards must be prepared
for removal.
● From the main Media menu, press the
SETUP button to open the Media Setup
menu
or press the Infotainment MENU button and
then press Setup to open the System setup
menu.
● Press the Remove safely function button. A
dropdown menu appears with three options:
30
Page 36 of 84
Audio and Media Mode
Controlling playback
The extent to which the Bluetooth ®
audio
source can be controlled via the Infotainment
system depends on the connected Blue-
tooth ®
audio source.
The available functions will depend on the
Bluetooth ®
Audio profile that the connected
external player supports.
With media players that support the AVRCP
Bluetooth ®
profile, playback on the Blue-
tooth ®
audio source can be automatically
started or stopped when the unit is switched
to Bluetooth ®
Audio mode or to a different
audio source. In addition, it is possible to
view or change the track via the Infotainment
system. Note
● Due to the large number of possible Blue-
tooth ®
audio sources, it is not possible to
guarantee fault-free operation of all descri-
bed functions.
● Always switch off the warning and service
tones on a connected Bluetooth ®
audio
source, e.g. key tones on a mobile telephone,
to prevent possible interference noise and
malfunctions.
● Do not connect an external media player to
play music via Bluetooth ®
and via the USB
port ››› page 31 at the same time with the Infotainment system, as this could cause
playback limitations.
● If the external player is an Apple device™,
it cannot be simultaneously connected by
USB and by Bluetooth. Jukebox (SSD)
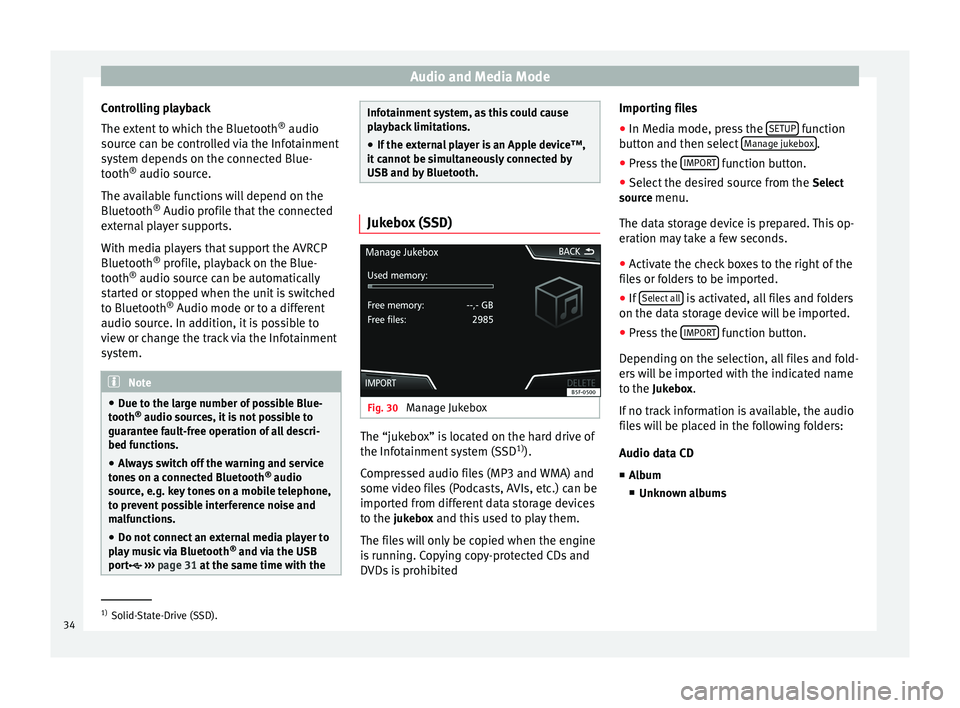
Fig. 30
Manage Jukebox The “jukebox” is located on the hard drive of
the Infotainment system (SSD
1)
).
Compressed audio files (MP3 and WMA) and
some video files (Podcasts, AVIs, etc.) can be
imported from different data storage devices
to the jukebox and this used to play them. The files will only be copied when the engine
is running. Copying copy-protected CDs and
DVDs is prohibited Importing files
● In Media mode, press the SETUP function
button and then select Manage jukebox .
● Press the IMPORT function button.
● Select the desired source from the Select
source menu.
The data storage device is prepared. This op-
eration may take a few seconds.
● Activate the check boxes to the right of the
files or folders to be imported.
● If Select all is activated, all files and folders
on the data storage device will be imported.
● Press the IMPORT function button.
Depending on the selection, all files and fold-
ers will be imported with the indicated name
to the Jukebox. If no track information is available, the audio
files will be placed in the following folders:
Audio data CD
■ Album
■ Unknown albums 1)
Solid-State-Drive (SSD).
34
Page 60 of 84
Telephone management system (PHONE)
Pair and connect a mobile telephone
to the Infotainment system In order to manage a mobile telephone via
the Infotainment system, it is necessary to
pair both devices
once.
F or
your safety, we recommend you make the
link when the vehicle is stationary. In some
countries it is not possible to perform the
pairing with the vehicle running.
Conditions
You must guarantee the following setup in
the mobile phone and the infotainment sys-
tem:
● The ignition must be switched on.
● Where necessary, disconnect the headset
from the connected telephone.
● The Bluetooth ®
fu
nction of the mobile tele-
phone and the Infotainment system must be
active as well as visibility.
● The
keypad lock on the mobile telephone
must be deactivated.
● The notification and key tones on the mo-
bile telephone must be disconnected.
Follow instructions in the manual for the mo-
bile telephone.
After turning on the ignition, the visibility of
the
Bluetooth ®
function activates. During the pairing process it is necessary to
enter data via the mobile telephone's key-
pad. To do so, the mobile telephone must be
ready.
Starting mobile telephone pairing
● Make sure the mobile device is active and
visible.
● Press the PHONE button on the Infotain-
ment system.
● Press the Find telephone function button.
OR:
● Press the PHONE button on the Infotain-
ment system.
● Press the Setup function button.
● Press the Select telephone function button
and then Find telephone .
OR: ● Press the PHONE unit button.
● Press the Setup function button.
● Press the Bluetooth function button.
● Press the Find devices function button.
As soon as the search is completed, the
names of the Bluetooth ®
devices found are
displayed on-screen.
● Activate the mobile telephone to be paired
on the list of Bluetooth ®
devices found. The Infotainment system and the mobile tele-
phone can connect. To finalise the connec-
tion between both devices, it may be neces-
sary to enter more data on the mobile tele-
phone and the on the Infotainment system.
● If necessary, confirm pairing on the mobile
telephone.
Depending on the mobile telephone:
● Enter and confirm your PIN code, as shown
on the Infotainment system display.
OR:
● Make the connection from the mobile de-
vice itself (ensure that the visibility of the In-
fotainment system in the menu Telephone setup >
BT setup is active). The
search process can take up to 1 minute. On
the screen the system will dynamically up-
date the names of the bluetooth devices
found.
● Select the infotainment system or the mo-
bile phone to which you want to connect from
the list of Bluetooth devices found. The info-
tainment system and the mobile phone will
now be connected to each other. In certain
circumstances, it is possible that to finish the
connection between the two devices, you
must enter additional data in the mobile
phone and infotainment system.
● If necessary, confirm the link to the mobile
phone.
58