2014 Seat Leon 5D phone
[x] Cancel search: phonePage 36 of 84
Audio and Media Mode
Controlling playback
The extent to which the Bluetooth ®
audio
source can be controlled via the Infotainment
system depends on the connected Blue-
tooth ®
audio source.
The available functions will depend on the
Bluetooth ®
Audio profile that the connected
external player supports.
With media players that support the AVRCP
Bluetooth ®
profile, playback on the Blue-
tooth ®
audio source can be automatically
started or stopped when the unit is switched
to Bluetooth ®
Audio mode or to a different
audio source. In addition, it is possible to
view or change the track via the Infotainment
system. Note
● Due to the large number of possible Blue-
tooth ®
audio sources, it is not possible to
guarantee fault-free operation of all descri-
bed functions.
● Always switch off the warning and service
tones on a connected Bluetooth ®
audio
source, e.g. key tones on a mobile telephone,
to prevent possible interference noise and
malfunctions.
● Do not connect an external media player to
play music via Bluetooth ®
and via the USB
port ››› page 31 at the same time with the Infotainment system, as this could cause
playback limitations.
● If the external player is an Apple device™,
it cannot be simultaneously connected by
USB and by Bluetooth. Jukebox (SSD)
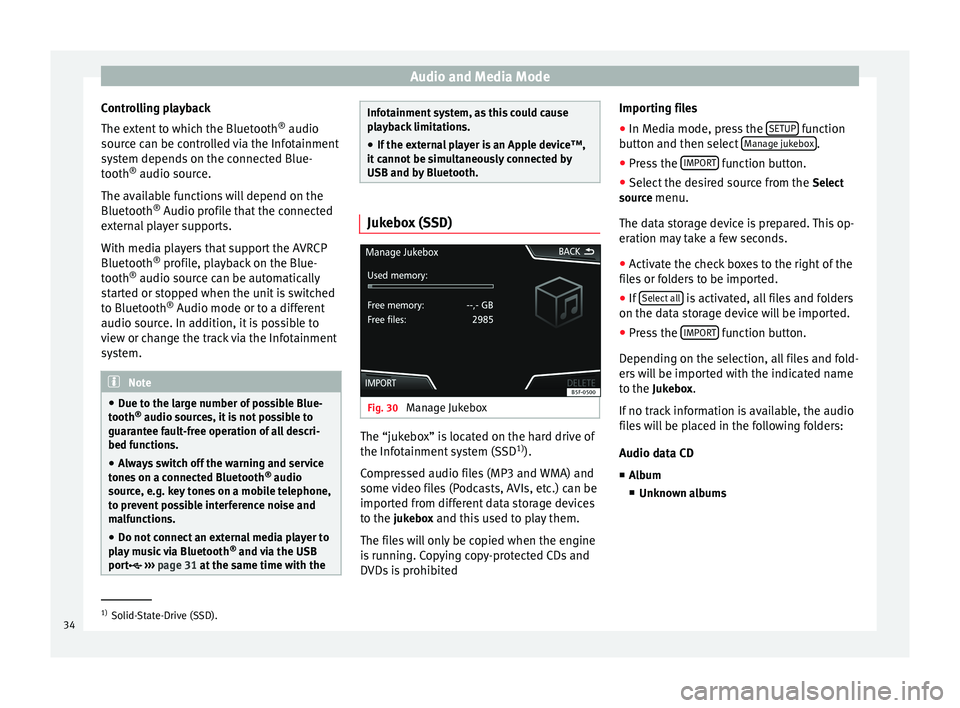
Fig. 30
Manage Jukebox The “jukebox” is located on the hard drive of
the Infotainment system (SSD
1)
).
Compressed audio files (MP3 and WMA) and
some video files (Podcasts, AVIs, etc.) can be
imported from different data storage devices
to the jukebox and this used to play them. The files will only be copied when the engine
is running. Copying copy-protected CDs and
DVDs is prohibited Importing files
● In Media mode, press the SETUP function
button and then select Manage jukebox .
● Press the IMPORT function button.
● Select the desired source from the Select
source menu.
The data storage device is prepared. This op-
eration may take a few seconds.
● Activate the check boxes to the right of the
files or folders to be imported.
● If Select all is activated, all files and folders
on the data storage device will be imported.
● Press the IMPORT function button.
Depending on the selection, all files and fold-
ers will be imported with the indicated name
to the Jukebox. If no track information is available, the audio
files will be placed in the following folders:
Audio data CD
■ Album
■ Unknown albums 1)
Solid-State-Drive (SSD).
34
Page 38 of 84
Audio and Media Mode
Connecting an external audio source
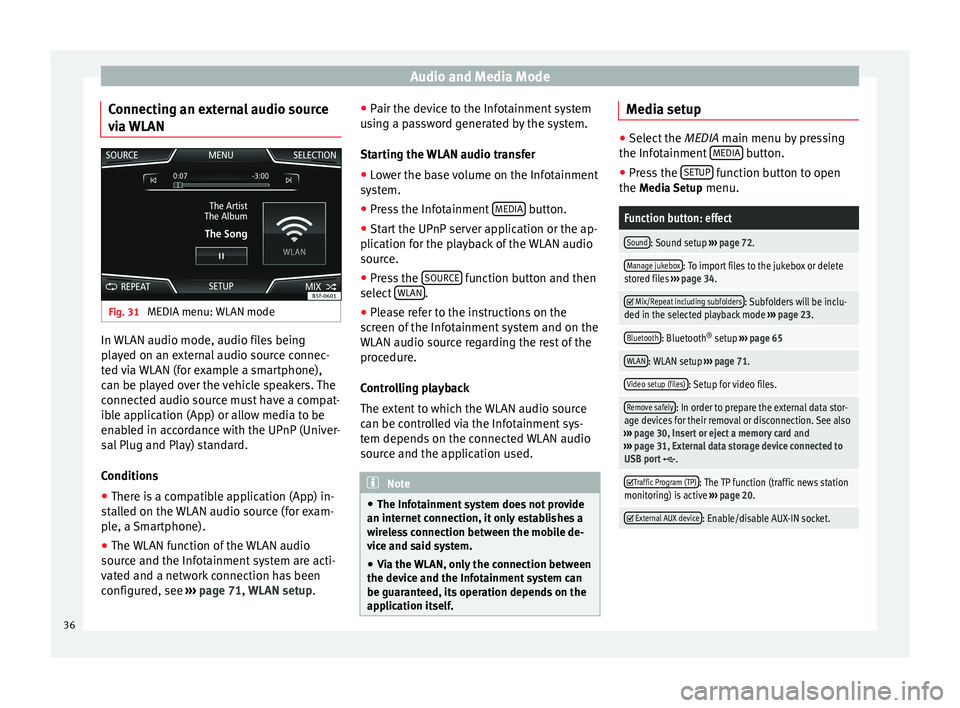
via WLAN Fig. 31
MEDIA menu: WLAN mode In WLAN audio mode, audio files being
played on an external audio source connec-
ted via WLAN (for example a smartphone),
can be played over the vehicle speakers. The
connected audio source must have a compat-
ible application (App) or allow media to be
enabled in accordance with the UPnP (Univer-
sal Plug and Play) standard.
Conditions
● There is a compatible application (App) in-
stalled on the WLAN audio source (for exam-
ple, a Smartphone).
● The WLAN function of the WLAN audio
source and the Infotainment system are acti-
vated and a network connection has been
configured, see ››› page 71, WLAN setup. ●
Pair the device to the Infotainment system
using a password generated by the system.
Starting the WLAN audio transfer
● Lower the base volume on the Infotainment
system.
● Press the Infotainment MEDIA button.
● Start the UPnP server application or the ap-
plication for the playback of the WLAN audio
source.
● Press the SOURCE function button and then
select WLAN .
● Please refer to the instructions on the
screen of the Infotainment system and on the
WLAN audio source regarding the rest of the
procedure.
Controlling playback
The extent to which the WLAN audio source
can be controlled via the Infotainment sys-
tem depends on the connected WLAN audio
source and the application used. Note
● The Infotainment system does not provide
an internet connection, it only establishes a
wireless connection between the mobile de-
vice and said system.
● Via the WLAN, only the connection between
the device and the Infotainment system can
be guaranteed, its operation depends on the
application itself. Media setup
●
Select the MEDIA main menu by pressing
the Inf ot
ainment MEDIA button.
● Press the SETUP function button to open
the Media Setup menu.
Function button: effect
Sound: Sound setup ››› page 72.
Manage jukebox: To import files to the jukebox or delete
stored files ››› page 34.
Mix/Repeat including subfolders: Subfolders will be inclu-
ded in the selected playback mode ››› page 23.
Bluetooth: Bluetooth ®
setup ››› page 65
WLAN: WLAN setup ››› page 71.
Video setup (files): Setup for video files.
Remove safely: In order to prepare the external data stor-
age devices for their removal or disconnection. See also
››› page 30, Insert or eject a memory card and
››› page 31, External data storage device connected to
USB port
.
Traffic Program (TP): The TP function (traffic news station
monitoring) is active ››› page 20.
External AUX device: Enable/disable AUX-IN socket.
36
Page 44 of 84
Navigation
● Press the Options function button and se-
lect the required type of destination entry
( Address, Point of Interest
or On the map).
Ad dr
ess
After entering a country and a town, you can
start navigating towards the centre of the se-
lected town.
When narrowing down the destination ad-
dress, please note that every entry restricts
the av
ailable range of subsequent selections.
For instance, if the street you are looking for
is not
in the postcode area you have selected
in a previous window, you will not be able to
find the street at the street selection stage.
Function button: effect
Country: To select the desired country.
Location: To enter the desired town or postcode.
Street: To enter the desired street name.
House number: To enter the desired house number.
Dipped beam: To select the desired intersection.
Last destinations: Open the My destinations menu
››› page 44.
Start: Start route guidance to the selected address. Points of Interest (POI)
Start route guidance to a point of interest.
Function button: effect
Search area: To select the search area for the points of in-
terest.
Near current location: The points of interest are
searched for near the current location.
Near destinationa) : The points of interest are
searched for near the destination.
Along the routea) : The points of interest are searched
for along the route.
Near address: The points of interest are searched for
near the address.
Select on map: The points of interest are searched
for near the destination selected on the map. To se-
lect a destination on the map, press the Edit
func-
tion button.
Search category: Select the main category (e.g. Vehicle
and travel), the category (e.g. Airports) and then the de-
sired entry from the list.
Save: To save the selected point of interest in the
destination memory ››› page 44.
Dial number: Establishes a telephone connection to
the number registered under the point of interest.
Start: Starts guided navigation to the selected
point of interest.
Find name: To search for a point of interest by entering
the name or by means of synonyms of categories (e.g.
“Sleep” for hotels and hostels).
a) This function button is only displayed with route guidance ac-
tivated.
Using the
● Select the destination on the map or enter
the GPS coordinates and confirm with OK .
Function button: effect
Save: To save the selected point of interest in the desti-
nation memory ››› page 44.
Edit: To edit a destination or to enter another destina-
tion.
Route options: To adjust route options, see Navigation
Setup ››› page 49.
Start: Starts guided navigation to the selected point of
interest. After starting route guidance
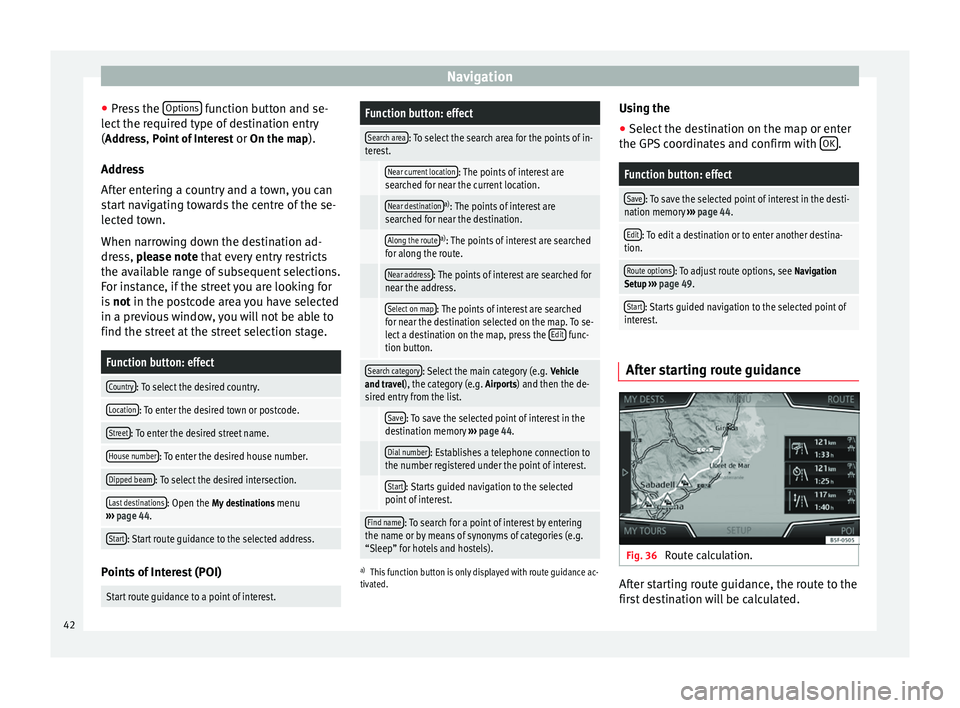
Fig. 36
Route calculation. After starting route guidance, the route to the
first destination will be calculated.
42
Page 46 of 84
NavigationFunction button: effect
Route information: View route information for current
route.
Store destination: To store the selected destina-
tion in the destination memory.
Congestion ahead: To exclude a section (of 0.2 to 10 km in
length) from the current route, e.g. to avoid congestion.
To cancel the exclusion, press the Route
function button
and then Cancel congestion.
Change route: The map of the calculated route appears
and by holding a finger on the route and dragging the
finger across said map, the route is changed to the
road(s) that you want and the new route is then recalcu-
lated. My destinations (destination memory)
The stored destinations can be selected from
the My destinations
menu.
● Press the My destinations function button in
the main Navigation
menu.
● Sel
ect the desired function button.
Store position ,
Destinations or
Home address .
Store position ● By pressing the Store position function but-
ton, the indicated position is stored as Flag-
ged destination in the Destination memory.
To permanently retain the position stored as
a Flagged destination, it must be renamed in the Destination memory. Otherwise the stored
position will be overwritten the next time a
flagged destination is stored.
● Mark the Flagged destination in the Destina-
tion memory.
● Press the Save function button.
The name can be changed in the following in-
put window. Press the function button to
store the destination.
Destinations and contacts
● Select the desired function button.
Function button: effect
Recent destinations: View of destinations for which a route
has already been started.
Dest. memory: View of destinations stored manually and
from imported vCards ››› page 48, Importing vCards
(electronic business cards) .
Favourites: View of destinations stored as favourites.
Contacts: View of entries in the phonebook that have a
stored address (postal address). Home address
Only one address or position can be stored
as the home address at any one time. The
stored home address can be edited or over-
written.If a home address has already been stored,
route guidance will be started to the stored
home address.
If a home address has not yet been stored,
an address can be assigned as the home ad-
dress.
Assigning the home address for the first time:
Position: Press to store the vehicle's current position as
the home address.
Address: Press to enter the home address manually.
Editing the home address:
The home address can be edited in the Navigation setup
menu ››› page 49.
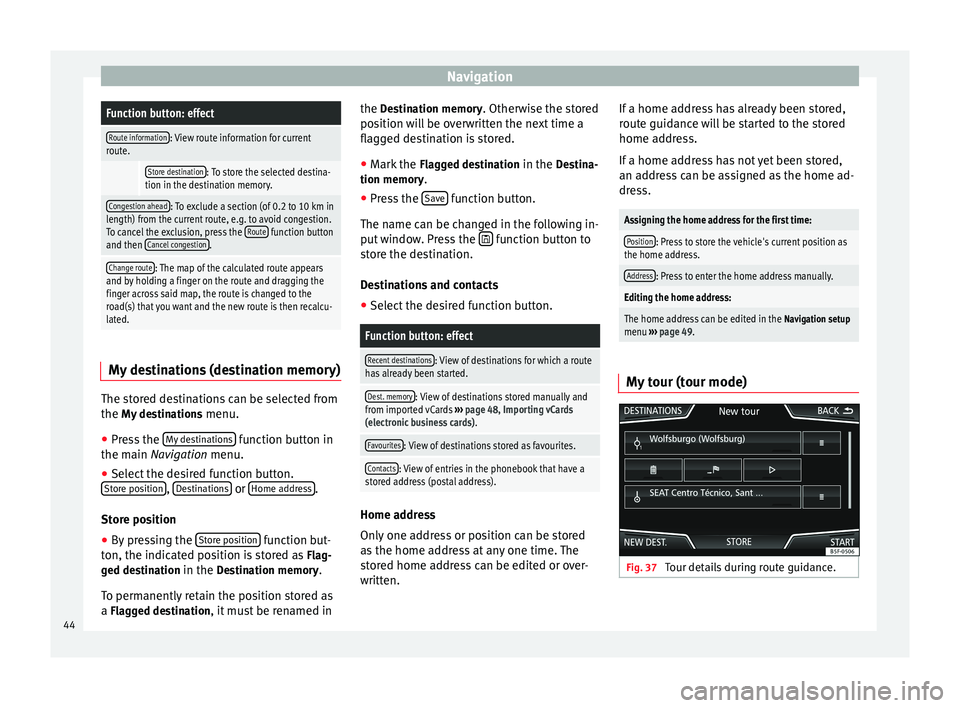
My tour (tour mode) Fig. 37
Tour details during route guidance.44
Page 52 of 84
NavigationFunction button: effect
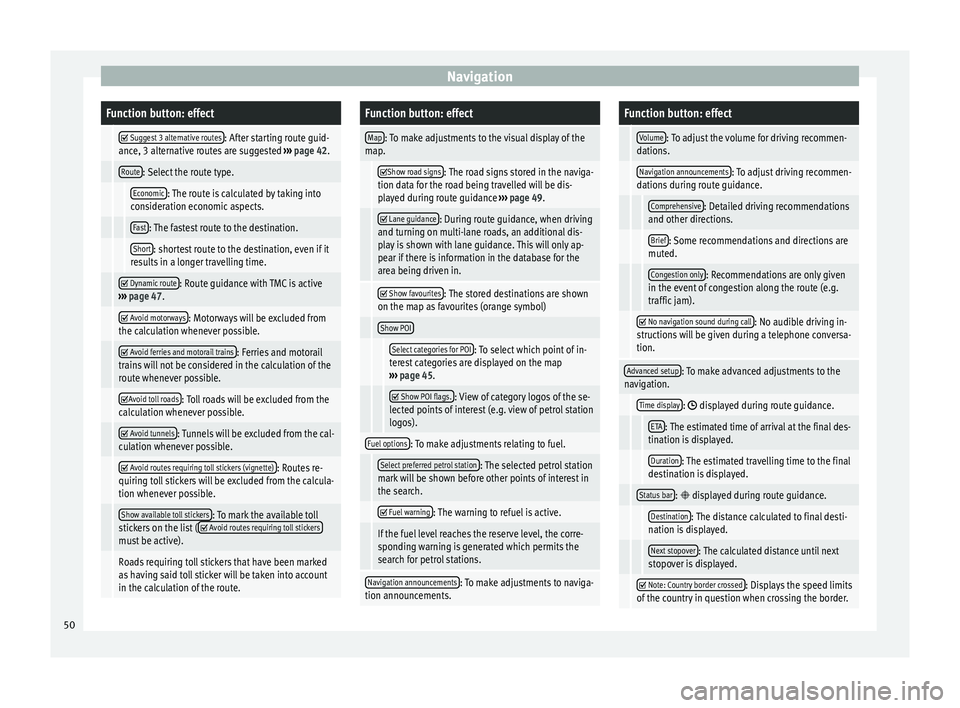
Suggest 3 alternative routes: After starting route guid-
ance, 3 alternative routes are suggested ››› page 42.
Route: Select the route type.
Economic: The route is calculated by taking into
consideration economic aspects.
Fast: The fastest route to the destination.
Short: shortest route to the destination, even if it
results in a longer travelling time.
Dynamic route: Route guidance with TMC is active
››› page 47.
Avoid motorways: Motorways will be excluded from
the calculation whenever possible.
Avoid ferries and motorail trains: Ferries and motorail
trains will not be considered in the calculation of the
route whenever possible.
Avoid toll roads: Toll roads will be excluded from the
calculation whenever possible.
Avoid tunnels: Tunnels will be excluded from the cal-
culation whenever possible.
Avoid routes requiring toll stickers (vignette): Routes re-
quiring toll stickers will be excluded from the calcula-
tion whenever possible.
Show available toll stickers: To mark the available toll
stickers on the list ( Avoid routes requiring toll stickersmust be active).
Roads requiring toll stickers that have been marked
as having said toll sticker will be taken into account
in the calculation of the route.
Function button: effect
Map: To make adjustments to the visual display of the
map.
Show road signs: The road signs stored in the naviga-
tion data for the road being travelled will be dis-
played during route guidance ››› page 49.
Lane guidance: During route guidance, when driving
and turning on multi-lane roads, an additional dis-
play is shown with lane guidance. This will only ap-
pear if there is information in the database for the
area being driven in.
Show favourites: The stored destinations are shown
on the map as favourites (orange symbol)
Show POI
Select categories for POI: To select which point of in-
terest categories are displayed on the map
››› page 45.
Show POI flags.: View of category logos of the se-
lected points of interest (e.g. view of petrol station
logos).
Fuel options: To make adjustments relating to fuel.
Select preferred petrol station: The selected petrol station
mark will be shown before other points of interest in
the search.
Fuel warning: The warning to refuel is active.
If the fuel level reaches the reserve level, the corre-
sponding warning is generated which permits the
search for petrol stations.
Navigation announcements: To make adjustments to naviga-
tion announcements.
Function button: effect
Volume: To adjust the volume for driving recommen-
dations.
Navigation announcements: To adjust driving recommen-
dations during route guidance.
Comprehensive: Detailed driving recommendations
and other directions.
Brief: Some recommendations and directions are
muted.
Congestion only: Recommendations are only given
in the event of congestion along the route (e.g.
traffic jam).
No navigation sound during call: No audible driving in-
structions will be given during a telephone conversa-
tion.
Advanced setup: To make advanced adjustments to the
navigation.
Time display: displayed during route guidance.
ETA: The estimated time of arrival at the final des-
tination is displayed.
Duration: The estimated travelling time to the final
destination is displayed.
Status bar: displayed during route guidance.
Destination: The distance calculated to final desti-
nation is displayed.
Next stopover: The calculated distance until next
stopover is displayed.
Note: Country border crossed: Displays the speed limits
of the country in question when crossing the border. 50
Page 53 of 84
NavigationFunction button: effect
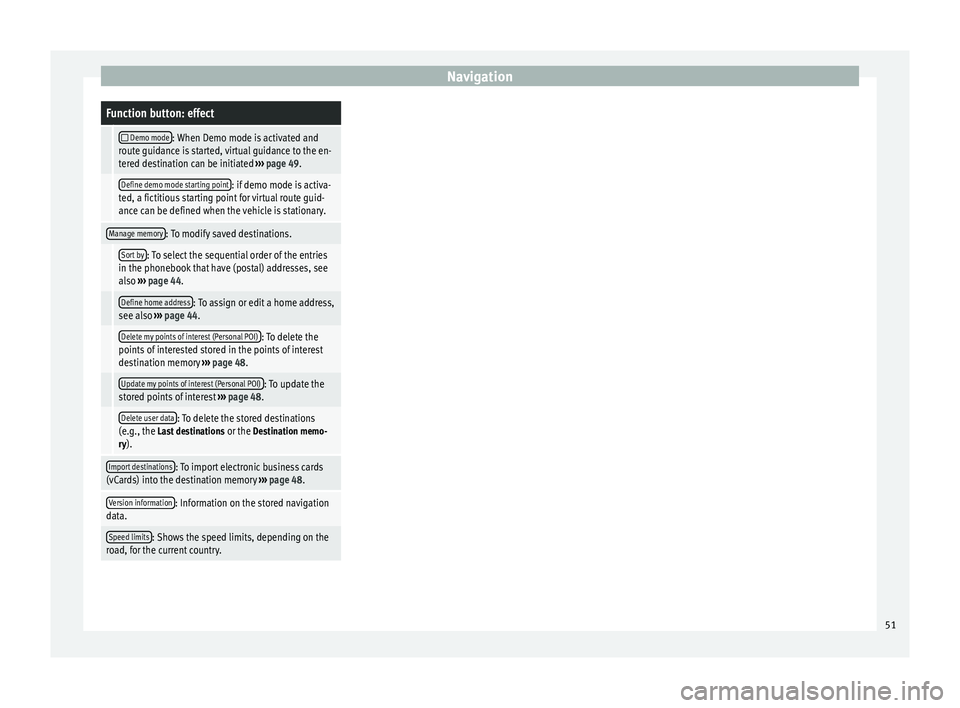
Demo mode: When Demo mode is activated and
route guidance is started, virtual guidance to the en-
tered destination can be initiated ››› page 49.
Define demo mode starting point: if demo mode is activa-
ted, a fictitious starting point for virtual route guid-
ance can be defined when the vehicle is stationary.
Manage memory: To modify saved destinations.
Sort by: To select the sequential order of the entries
in the phonebook that have (postal) addresses, see
also ››› page 44.
Define home address: To assign or edit a home address,
see also ››› page 44.
Delete my points of interest (Personal POI): To delete the
points of interested stored in the points of interest
destination memory ››› page 48.
Update my points of interest (Personal POI): To update the
stored points of interest ››› page 48.
Delete user data: To delete the stored destinations
(e.g., the Last destinations or the Destination memo-
ry).
Import destinations: To import electronic business cards
(vCards) into the destination memory ››› page 48.
Version information: Information on the stored navigation
data.
Speed limits: Shows the speed limits, depending on the
road, for the current country. 51
Page 58 of 84
Telephone management system (PHONE)
Telephone management
system (PHONE)
Introduction to the telephone
management system General information The Telephone functions described below
can be used through the Infotainment system
if there is a mobile telephone connected to it
via Bluetooth
®
››› page 58
.
In or der f
or the mobile telephone to be able
to connect to the Infotainment system the tel-
ephone must be equipped with Bluetooth®
.
If there is no mobile telephone connected to
the Infotainment system, the telephone man-
agement system will not be available.
The instructions shown on the screen for the
telephone menus will depend on the mobile
telephone used. There may be variations.
Only use compatible Bluetooth ®
devices. For
further information on compatible Blue-
tooth ®
products, ask your nearest SEAT deal-
er or check on the internet.
Use the instruction manual of the mobile tel-
ephone and of any accessories.
If you detect any strange behaviour between
your mobile telephone and the Infotainment system, restart your mobile by switching it off
and on again.
You may experience poor reception or may be
cut off in areas where the signal is weak.
Most electronic devices are shielded against
HF (high-frequency) signals. In any case, the
electronic equipment may not be protected
from the HF signals of the telephone man-
agement system. This may cause interfer-
ence.
WARNING
Speaking by telephone and operating the mo-
bile telephone whilst driving can distract you
from the road and cause an accident.
● Always drive carefully and responsibly.
● Select volume settings that allow you to
easily hear signals from outside the vehicle
at all times (e.g. emergency services sirens
and horns).
● In areas of little or no coverage or, in some
cases, in a tunnel, garage or underpass, your
call may be cut off and you may not be able to
make even emergency calls. WARNING
If a mobile telephone is not secured or is in-
correctly secured in the vehicle, it could move
around the passenger compartment in the
event of a sudden driving manoeuvre or emer-
gency stop, resulting in injury. ●
While the vehicle is in motion, always se-
cure the mobile telephone properly outside
the airbag deployment zone. WARNING
Mobile telephones may interfere with and al-
ter the correct operation of pacemakers if
they are carried directly over them.
● Maintain a minimum distance of at least
20 centimetres between the aerials of the
mobile telephone and the pacemaker, as mo-
bile phones may affect the functioning of
pacemakers.
● Do not carry your switched on mobile tele-
phone in your breast pocket directly over the
pacemaker.
● If you suspect interference, switch off the
mobile telephone immediately. WARNING
If the centre armrest is open, it may obstruct
the driver's arm movements, which could
cause an accident and severe injuries.
● Always keep the armrest closed while the
vehicle is in motion. CAUTION
High speeds, poor weather or road conditions
and the quality of reception can all affect the
quality of a telephone conversation in the ve-
hicle. 56
Page 59 of 84
Telephone management system (PHONE)
Note
● Restrictions on the use of devices using
Bluetooth ®
technology may apply in some
countries. For further information, contact the
local authorities.
● If you wish to connect a device to the tele-
phone management system via Bluetooth ®
technology, consult the safety warnings in its
instruction manual. Only use compatible
Bluetooth ®
devices. Areas where special regulations apply
Switch off the mobile telephone and the mo-
bile telephone provision in places with a risk
of explosion. In the majority of cases, these
places are signposted, but not always clearly
››› in General information on page 56. They
include, for example:
● the vicinity of chemical pipelines and tanks
● The lower decks of boats and ferries.
● In the proximity of vehicles that run on liq-
uid gas (such as propane or butane).
● places where the air is laden with chemi-
cals or particles such as flour, dust or metal
powder.
● all other places where the vehicle engine
must be switched off WARNING
Switch off the mobile phone in areas with a
risk of explosion! The mobile telephone can
automatically connect to the mobile tele-
phone network again if it loses the Blue-
tooth ®
connection to the telephone manage-
ment system. CAUTION
In areas where special regulations apply or
the use of mobile telephones is prohibited,
both the telephone and the telephone man-
agement system must be switched off. The
radiation produced by the mobile telephone
when switched on may interfere with sensi-
tive technical and medical equipment, possi-
bly resulting in a malfunction or damage to
the equipment. Bluetooth
® Bluetooth
®
Bluetooth ®
technology allows a mobile tele-
phone to be connected to your vehicle's tele-
phone management system. In order to use
the telephone management system with a
mobile telephone with Bluetooth ®
technolo-
gy, it is first necessary to pair them.
Some Bluetooth ®
mobile telephones detect
and automatically connect when turning on
the ignition if a connection has been previ-
ously established. For this to take place the telephone must be switched on and its Blue-
tooth
®
function activated, and there must be
no active Bluetooth ®
connection with other
devices.
Bluetooth ®
connections are free.
Bluetooth ®
is a registered trademark of Blue-
tooth ®
SIG, Inc.
Bluetooth profiles ®
When a mobile telephone is connected to the
telephone management system, a data ex-
change takes place via one of the Bluetooth ®
profiles.
● Hands-free Bluetooth profile (HFP) : If a mo-
b i
le telephone is connected to the telephone
manager through the HFP, calls can be made
wirelessly through the hands-free device.
This function also requires other Bluetooth
profiles such as the phonebook download
and instant messaging.
● Advanced audio profile (A2DP): Bluetooth
profile for transmitting audio signals with
stereo quality. This function can also connect
other additional Bluetooth profiles for view-
ing tracks and for controlling playback on the
mobile device.
57