2014 Peugeot Boxer tyre pressure
[x] Cancel search: tyre pressurePage 8 of 240
6
Location
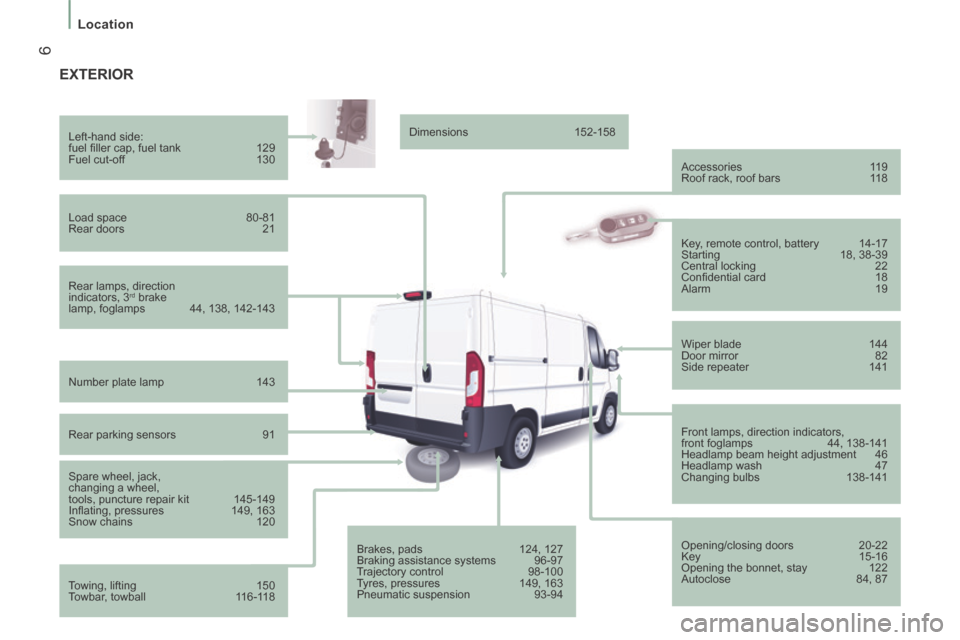
EXTERIOR
Rear lamps, direction
indicators, 3 rd brake
lamp, foglamps 44, 138, 142-143 Left-hand side:
fuel fi ller cap, fuel tank 129
Fuel cut-off 130
Load space 80-81
Rear doors 21
Number plate lamp 143
Rear parking sensors 91
Spare wheel, jack,
changing a wheel,
tools, puncture repair kit 145-149
Infl ating, pressures 149, 163
Snow chains 120
Towing, lifting 150
Towbar, towball 116-118 Dimensions
152-158
Accessories 119
Roof rack, roof bars 118
Brakes, pads 124, 127
Braking assistance systems 96-97
Trajectory control 98-100
Tyres, pressures 149, 163
Pneumatic suspension 93-94 Key, remote control, battery 14-17
Starting
18, 38-39
Central locking 22
Confi dential card 18
Alarm 19
Wiper blade 144
Door mirror 82
Side repeater 141
Front lamps, direction indicators,
front foglamps 44, 138-141
Headlamp beam height adjustment 46
Headlamp wash 47
Changing bulbs 138-141
Opening/closing doors 20-22
Key 15-16
Opening the bonnet, stay 122
Autoclose 84, 87
Page 15 of 240
13
1
AT A GLANCE
Limit the causes of excess consumption
Spread loads throughout the vehicle; place the heaviest items in
the bottom of the boot, as close as possible to the rear seats.
Limit the loads carried in the vehicle and reduce wind resistance
(roof bars, roof rack, bicycle carrier, trailer...). Use a roof box in
preference.
Remove roof bars and roof racks after use.
At the end of winter, remove snow tyres and refit your summer
tyres.
Observe the recommendations on maintenance
Check the tyre pressures regularly, when cold, referring to the
label in the door aperture, driver's side.
Carry out this check in particular:
- before a long journey,
- at each change of season,
- after a long period out of use.
Don't forget the spare wheel and the tyres on any trailer or
caravan.
Have your vehicle serviced regularly (engine oil, oil filter, air
filter, cabin filter...) and observe the schedule of operations in the
warranty and maintenance record.
When refuelling, do not continue after the 3
rd cut-off of the nozzle
to avoid any overflow.
At the wheel of your new vehicle, it is only after the first
1 800 miles (3 000 kilometres) that you will see the fuel
consumption settle down to a consistent average.
Page 35 of 240
33
2
READY TO SET OFF
Instruments and controls
EMISSIONS CONTROLS
EOBD (European On Board Diagnosis) is
a diagnostics system which complies with,
among others, the standards concerning
authorised emissions of:
- CO (carbon monoxide),
- HC (unburnt hydrocarbons),
- NOx (nitrous oxides) or particles, detected by oxygen sensors placed
upstream and downstream of the
catalytic converters.
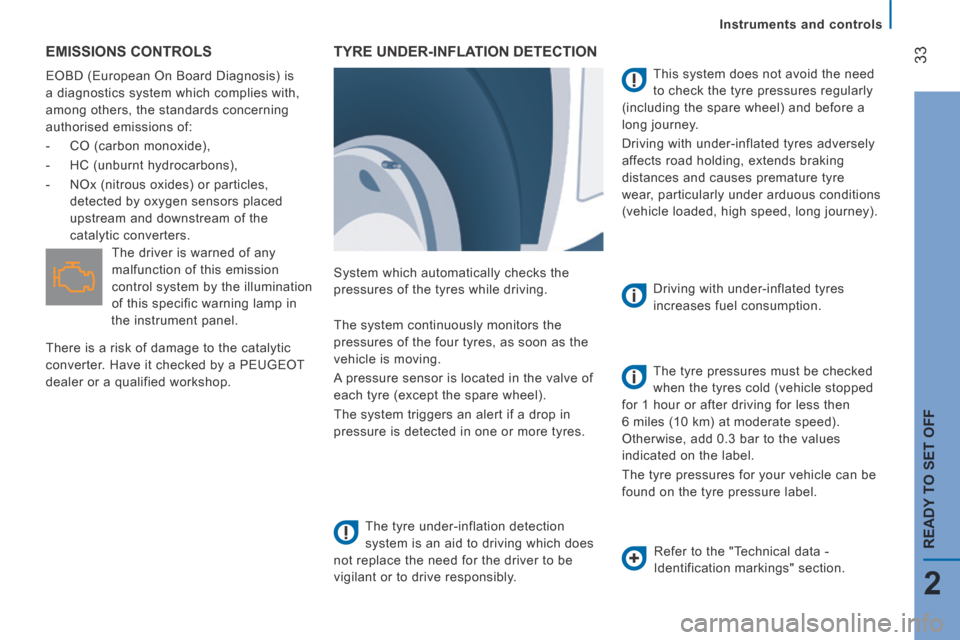
TYRE UNDER-INFLATION DETECTION
System which automatically checks the
pressures of the tyres while driving.
The tyre under-inflation detection
system is an aid to driving which does
not replace the need for the driver to be
vigilant or to drive responsibly. This system does not avoid the need
to check the tyre pressures regularly
(including the spare wheel) and before a
long journey.
Driving with under-inflated tyres adversely
affects road holding, extends braking
distances and causes premature tyre
wear, particularly under arduous conditions
(vehicle loaded, high speed, long journey).
Driving with under-inflated tyres
increases fuel consumption.
The system continuously monitors the
pressures of the four tyres, as soon as the
vehicle is moving.
A pressure sensor is located in the valve of
each tyre (except the spare wheel).
The system triggers an alert if a drop in
pressure is detected in one or more tyres. The tyre pressures must be checked
when the tyres cold (vehicle stopped
for 1 hour or after driving for less then
6 miles (10 km) at moderate speed).
Otherwise, add 0.3 bar to the values
indicated on the label.
The tyre pressures for your vehicle can be
found on the tyre pressure label.
The driver is warned of any
malfunction of this emission
control system by the illumination
of this specific warning lamp in
the instrument panel.
There is a risk of damage to the catalytic
converter. Have it checked by a PEUGEOT
dealer or a qualified workshop.
Refer to the "Technical data -
Identification markings" section.
Page 36 of 240
34
Instruments and controls
Under-inflation alert
The alert is given by the fi xed
illumination of this warning lamp,
accompanied by an audible signal,
and depending on equipment, the
display of a message.
In the event of a problem on one of the
tyres, the symbol or the message appears,
according to equipment, to identify it.
- Reduce speed, avoid sudden steering
movements or harsh brake applications.
- Stop as soon as it is safe to do so.
- In the event of a puncture, use the temporary puncture repair kit or the
spare wheel (according to equipment),
or
- if you have a compressor, the one in the temporary puncture repair kit for
example, check the four tyre pressures
when cold,
or
- if it is not possible to check the tyre pressures at the time, drive carefully at
reduced speed. The loss of pressure detected does not
always lead to visible deformation of
the tyre. Do not rely on just a visual check.
The alert is maintained until the tyre or
tyres concerned is reinflated, repaired
or replaced.
The spare wheel (space-saver type or a
steel rim) does not have a sensor.
Operating fault
The flashing and then fixed
illumination of this warning lamp
accompanied by the illumination
of the service warning lamp, and
depending on equipment, the display of a
message indicates a fault with the system.
In this case, monitoring of the tyre pressures
is not assured.
This alert is also displayed when one or
more wheels is not fitted with a sensor
(for example, a space-saver or steel spare
wheel).
Go to a PEUGEOT dealer or a qualified
workshop to have the system checked or,
following the repair of a puncture, to have
the original wheel, equipped with a sensor,
refitted.
Page 99 of 240
97
5
Driving safely
SAFETY
Good practice
The ABS system does not provide shorter
braking distances. On very slippery surfaces
(black ice, oil...) the ABS can extend braking
distances. For emergency braking, press the
brake pedal hard and do not release it, even
on a slipper surface; you will then be able to
steer the vehicle and avoid an obstacle.
When replacing wheels (tyres and
rims), ensure that they conform to the
manufacturer's recommendations. Emergency braking assistance
System which, in an emergency, enables
you to obtain the optimum braking pressure
more quickly, thus reducing the stopping
distance.
Operation
It is triggered by the speed at which the
brake pedal is pressed.
The effect of this is a reduction in the
resistance of the pedal and an increase in
braking efficiency.
Switching off
This system cannot be deactivated by the
driver.
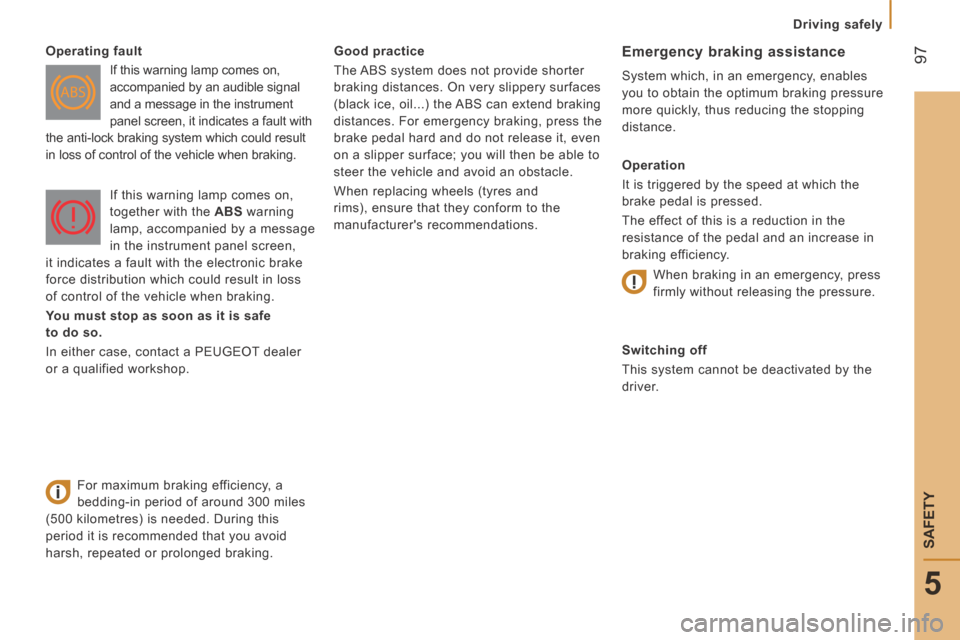
Operating fault
If this warning lamp comes on,
accompanied by an audible signal
and a message in the instrument
panel screen, it indicates a fault with
the anti-lock braking system which could result
in loss of control of the vehicle when braking.
For maximum braking efficiency, a
bedding-in period of around 300 miles
(500 kilometres) is needed. During this
period it is recommended that you avoid
harsh, repeated or prolonged braking. If this warning lamp comes on,
together with the
ABS warning
lamp, accompanied by a message
in the instrument panel screen,
it indicates a fault with the electronic brake
force distribution which could result in loss
of control of the vehicle when braking.
You must stop as soon as it is safe
to do so.
In either case, contact a PEUGEOT dealer
or a qualified workshop. When braking in an emergency, press
firmly without releasing the pressure.
Page 119 of 240
11 7
6
Transport solutions
ACCESSORIES
Distribution of loads: distribute the load in
the trailer so that the heaviest objects are as
close as possible to the axle and the nose
weight is close to the maximum authorised
without, however, exceeding it.
Driving advice
A towed vehicle must free wheel: gearbox in
neutral.
Cooling: towing a trailer on a slope
increases the coolant temperature.
As the fan is electrically controlled, its
cooling capacity is not dependent on the
engine speed.
On the contrary, use a high gear to lower the
engine speed and reduce your speed.
In all cases, pay attention to the coolant
temperature. Tyres: check the tyre pressures of the
towing vehicle and of the trailer, observing
the recommended pressures.
Fitting a towbar
We recommend the use of genuine
PEUGEOT towbars and their harnesses,
which have been tested and approved from
the design stage of your vehicle and that
the fitting of this equipment is entrusted to a
PEUGEOT dealer.
These genuine towbars are compatible with
the operation of the rear parking sensors
and the reversing camera, if fitted to your
vehicle.
If this equipment is not fitted by a PEUGEOT
dealer, it must be fitted in line with the
manufacturer's instructions.
Good practice
In certain cases of particularly arduous
use (towing the maximum load up a steep
slope in high temperatures), the engine
automatically limits its power. In this
case, the automatic cutting off of the air
conditioning allows the engine power to be
recovered.
If the coolant temperature
warning lamp comes on, stop the
vehicle and switch off the engine
as soon as possible.
Refer to the "Checks - Levels and
checks" section.
Brakes: towing increases the braking
distance. Drive at a moderate speed,
change down early and brake gradually. Side wind: sensitivity to side wind is
increased. Drive smoothly and at a
moderate speed.
ABS: the system only controls the vehicle,
not the trailer.
Rear parking sensors: the system does not
operate while the vehicle is towing.
Refer to the "Technical data -
Identification markings" section.
Page 149 of 240
147
QUICK HELP
8
Puncture
Refitting the repaired wheel
Refitting the repaired wheel is the same as
fitting the spare wheel; don't forget to refit
the wheel trim. Refer to the "Technical data -
Identification markings" section for the
location of the tyre pressure label.
The spare wheel is not designed to be used
over long distances. Have the tightening
of the bolts and pressure of the spare
wheel checked by a PEUGEOT dealer or a
qualified workshop without delay.
Also, have the original wheel repaired and
refitted by a PEUGEOT dealer or a qualified
workshop as soon as possible.
Fitting the spare wheel
- Put the spare wheel in place on the hub and start screwing in the bolts by hand.
- Carry out an initial tightening of the bolts using the wheelbrace E .
- Lower the vehicle completely by folding the jack, then remove the jack.
- Tighten the bolts again using the wheelbrace E , tighten them fully without
forcing them.
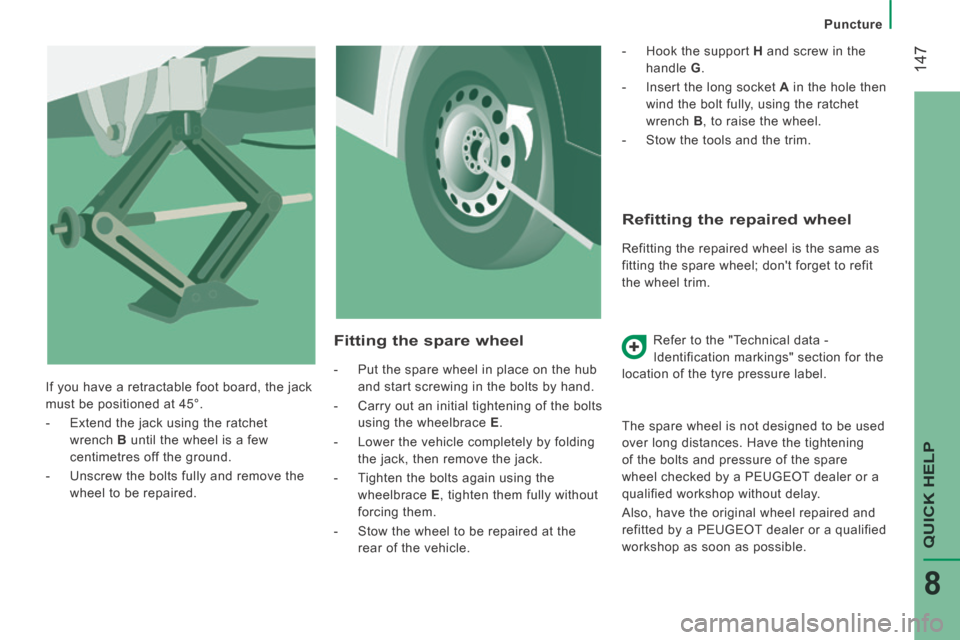
- Stow the wheel to be repaired at the rear of the vehicle. - Hook the support H
and screw in the
handle G .
- Insert the long socket A in the hole then
wind the bolt fully, using the ratchet
wrench B , to raise the wheel.
- Stow the tools and the trim.
If you have a retractable foot board, the jack
must be positioned at 45°.
- Extend the jack using the ratchet wrench B until the wheel is a few
centimetres off the ground.
- Unscrew the bolts fully and remove the wheel to be repaired.
Page 150 of 240
148
Puncture
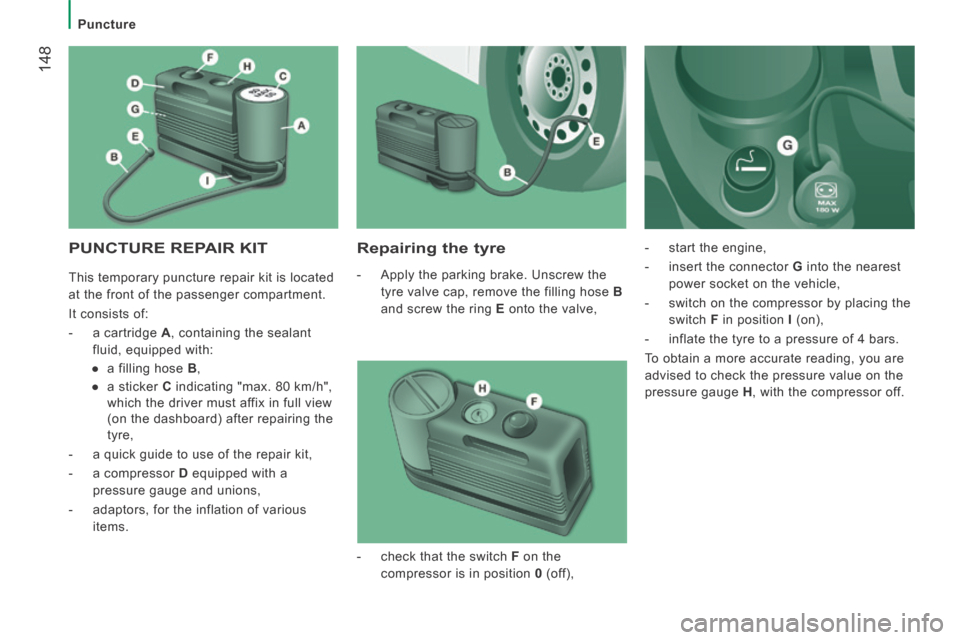
PUNCTURE REPAIR KIT Repairing the tyre
- Apply the parking brake. Unscrew the tyre valve cap, remove the filling hose B
and screw the ring E onto the valve, - start the engine,
- insert the connector G
into the nearest
power socket on the vehicle,
- switch on the compressor by placing the switch F in position I (on),
- inflate the tyre to a pressure of 4 bars.
To obtain a more accurate reading, you are
advised to check the pressure value on the
pressure gauge H , with the compressor off.
- check that the switch F on the
compressor is in position 0 (off),
This temporary puncture repair kit is located
at the front of the passenger compartment.
It consists of:
- a cartridge A
, containing the sealant
fluid, equipped with:
● a filling hose B ,
● a sticker C indicating "max. 80 km/h",
which the driver must affix in full view
(on the dashboard) after repairing the
tyre,
- a quick guide to use of the repair kit,
- a compressor D equipped with a
pressure gauge and unions,
- adaptors, for the inflation of various items.