Page 76 of 389
Comfort
74
Steering wheel adjustment
When stationary , pull the control lever to When stationary , pull the control lever to When stationaryrelease the adjustment mechanism. Adjust the height and reach to suit your driving position. Push the control lever to lock the adjustment mechanism.
As a safety precaution, these operations should only be carried out while the vehicle is stationary.
Page 113 of 389
6
Fittings111
Interior fi ttings
1. Sun visor
2. Grab handle with coat hook
3. Storage compartment
4. Storage compar tment under the steering wheel
5. Storage compartment
6. Console handle
7. Storage compartment with net
8. Illuminated glove box
9. Door pockets
10. Front 12 V accessor y socket(120 W )
11. Cup holder
12 . Front armrest with storage compartment
13. Storage compartment
14 . Rear 12 V accessor y socket(120 W )
Page 123 of 389
6
Fittings121
The hooks can be used to secure shopping bags.
Hooks
To store it at the bottom of the boot: remove the rear parcel shelf as described above, place the floor at an angle, place the rear parcel shelf in its location (recess marked A ), at bottom of the boot, A ), at bottom of the boot, A the rear parcel shelf will be protected if you place the floor in the intermediate position.
To put it back in place: take hold of the rear parcel shelf with both hands then place it on its support, unfold it to the boot pillars, hook the two cords, if necessary, press on the top of the rear parcel shelf, on the left and on the right, to engage the fixings.
When changing a wheel
The hooks facilitate access to the spare
wheel, retaining the boot carpet by means of the two cords.
Page 125 of 389

6
Fittings123
Adjustable boot floor
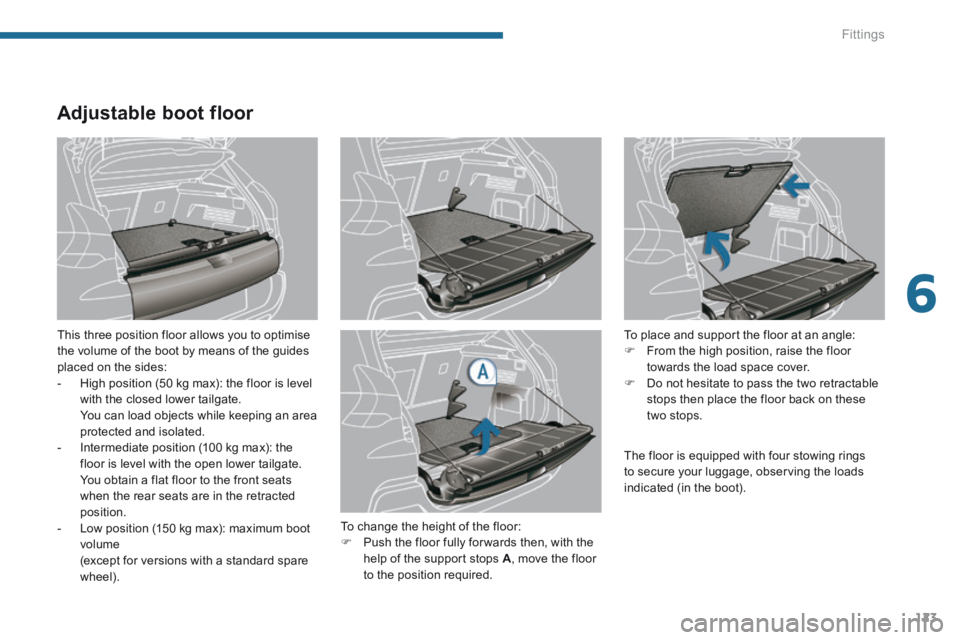
This three position floor allows you to optimise the volume of the boot by means of the guides placed on the sides: - High position (50 kg max): the floor is level with the closed lower tailgate. You can load objects while keeping an area protected and isolated. - Intermediate position (100 kg max): the floor is level with the open lower tailgate. You obtain a flat floor to the front seats when the rear seats are in the retracted position. - Low position (150 kg max): maximum boot volume (except for versions with a standard spare wheel).
To place and support the floor at an angle: From the high position, raise the floor towards the load space cover. Do not hesitate to pass the two retractable stops then place the floor back on these two stops.
To change the height of the floor:
Push the floor fully for wards then, with the help of the support stops A , move the floor to the position required.
The floor is equipped with four stowing rings to secure your luggage, observing the loads indicated (in the boot).
Page 126 of 389

Fittings
124
Torch
This is a removable lamp, fitted in the boot wall, which can be used to illuminate the boot or as a torch.
Operation
This torch operates with NiMH type rechargeable batteries. It has a battery life of approximately 45 minutes and charges while you are driving.
Use
Extract the torch from its location pulling the side of the torch A . Press the switch, located on the back, to switch the torch on or off. Unfold the support, located on the back, to set down and raise the torch; for example, when changing a wheel.
Storing
Put the torch back in place in its location starting with the narrow part B . If you have forgotten to switch off the torch, this switches it off automatically.
Rear side blinds
Fitted on the rear windows, these protect your young children from the sun.
Pull the blind by the central tab. Position the blind attachment on the hook.
It the torch is not engaged correctly, it may not charge and may not come on when the boot is opened.
For the boot lighting function, refer to the " Visibility" section.
Observe the polarities when fitting the batteries. Never replace the rechargeable batteries with normal single-use batteries.
Page 141 of 389

8
Safety139
Direction indicators
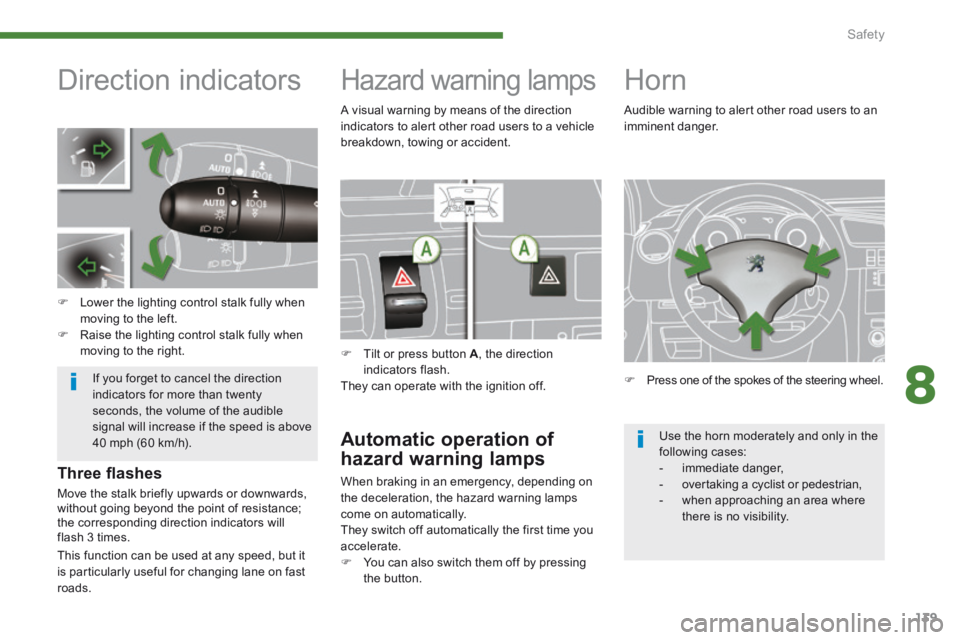
Lower the lighting control stalk fully when moving to the left. Raise the lighting control stalk fully when moving to the right.
Hazard warning lamps
Tilt or press button A , the direction indicators flash. They can operate with the ignition off.
Automatic operation of
hazard warning lamps
When braking in an emergency, depending on the deceleration, the hazard warning lamps come on automatically. They switch off automatically the first time you
accelerate. You can also switch them off by pressing the button.
Horn
Press one of the spokes of the steering wheel.
Audible warning to alert other road users to an imminent danger.
Three fl ashes
Move the stalk briefly upwards or downwards, without going beyond the point of resistance; the corresponding direction indicators will flash 3 times.
If you forget to cancel the direction indicators for more than twenty seconds, the volume of the audible signal will increase if the speed is above 40 mph (60 km/h).
A visual warning by means of the direction indicators to alert other road users to a vehicle breakdown, towing or accident.
Use the horn moderately and only in the following cases: - immediate danger, - overtaking a cyclist or pedestrian, - when approaching an area where there is no visibility.
This function can be used at any speed, but it is particularly useful for changing lane on fast roads.
Page 142 of 389

Safety
140
Tyre under-infl ation detection
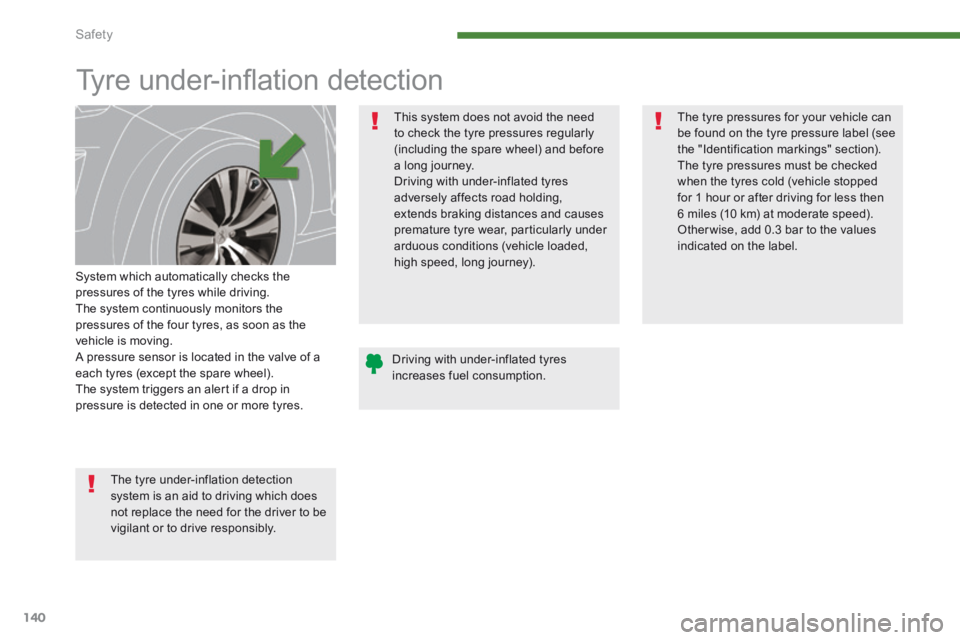
System which automatically checks the pressures of the tyres while driving. The system continuously monitors the pressures of the four tyres, as soon as the vehicle is moving. A pressure sensor is located in the valve of a each tyres (except the spare wheel). The system triggers an alert if a drop in pressure is detected in one or more tyres.
This system does not avoid the need to check the tyre pressures regularly (including the spare wheel) and before a long journey. Driving with under-inflated tyres adversely affects road holding, extends braking distances and causes premature tyre wear, particularly under arduous conditions (vehicle loaded, high speed, long journey).
The tyre pressures for your vehicle can be found on the tyre pressure label (see the "Identification markings" section). The tyre pressures must be checked when the tyres cold (vehicle stopped for 1 hour or after driving for less then 6 miles (10 km) at moderate speed). Other wise, add 0.3 bar to the values indicated on the label.
Driving with under-inflated tyres increases fuel consumption.
The tyre under-inflation detection system is an aid to driving which does not replace the need for the driver to be vigilant or to drive responsibly.
Page 143 of 389

8
Safety141
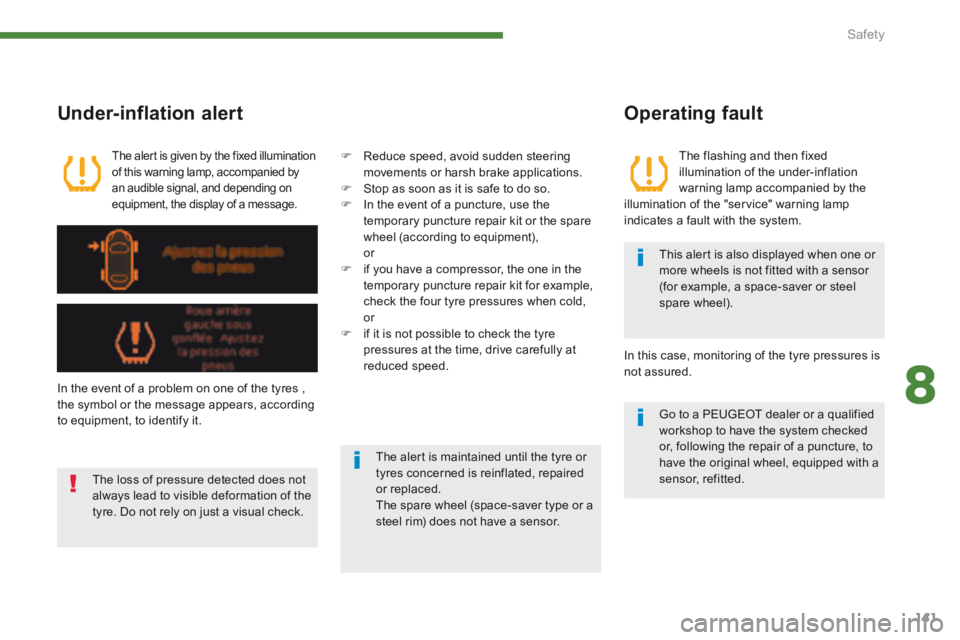
The flashing and then fixed illumination of the under-inflation warning lamp accompanied by the illumination of the "service" warning lamp indicates a fault with the system.
This alert is also displayed when one or more wheels is not fitted with a sensor (for example, a space-saver or steel spare wheel).
Under-inflation alert
The alert is given by the fixed illumination of this warning lamp, accompanied by an audible signal, and depending on equipment, the display of a message.
In the event of a problem on one of the tyres , the symbol or the message appears, according to equipment, to identify it.
Reduce speed, avoid sudden steering movements or harsh brake applications. Stop as soon as it is safe to do so. In the event of a puncture, use the temporary puncture repair kit or the spare
wheel (according to equipment), or if you have a compressor, the one in the temporary puncture repair kit for example, check the four tyre pressures when cold, or if it is not possible to check the tyre pressures at the time, drive carefully at reduced speed.
The loss of pressure detected does not always lead to visible deformation of the tyre. Do not rely on just a visual check.
The alert is maintained until the tyre or tyres concerned is reinflated, repaired or replaced. The spare wheel (space-saver type or a steel rim) does not have a sensor.
Operating fault
Go to a PEUGEOT dealer or a qualified workshop to have the system checked or, following the repair of a puncture, to have the original wheel, equipped with a sensor, refitted.
In this case, monitoring of the tyre pressures is not assured.