Page 136 of 256

134
Fuel tank
Low fuel levelRefuelling
When the low fuel level is reached,
this warning lamp comes on and the
last bar flashes, accompanied by an
audible signal.
You have approximately 5 litres remaining.
In certain driving conditions and depending on
the engine, the distance which can be travelled
with the fuel remaining may be less than
30
miles (50 km).
When the frequency of the flashing increases,
you have approximately 3 litres remaining .
to r
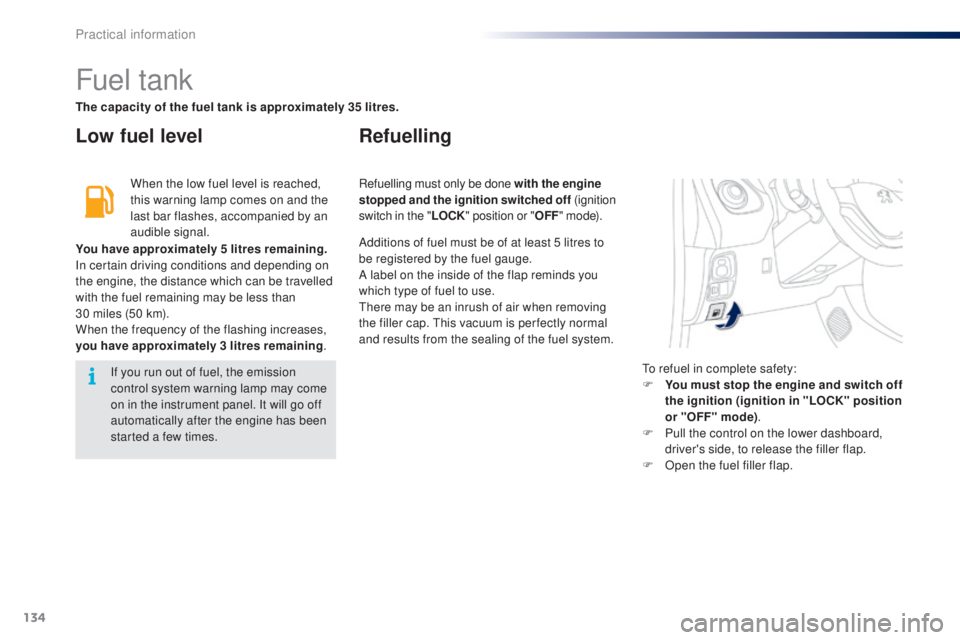
efuel in complete safety:
F
Y
ou must stop the engine and switch off
the ignition (ignition in "LOCK" position
or "OFF" mode) .
F
P
ull the control on the lower dashboard,
driver's side, to release the filler flap.
F
O
pen the fuel filler flap.
If you run out of fuel, the emission
control system warning lamp may come
on in the instrument panel. It will go off
automatically after the engine has been
started a few times. Refuelling must only be done with the engine
stopped and the ignition switched off
(ignition
switch in the " LOCK" position or " OFF" m o d e).
The capacity of the fuel tank is approximately 35 litres.
Additions of fuel must be of at least 5 litres to
be registered by the fuel gauge.
A label on the inside of the flap reminds you
which type of fuel to use.
th
ere may be an inrush of air when removing
the filler cap.
t
h
is vacuum is per fectly normal
and results from the sealing of the fuel system.
Practical information
Page 157 of 256
155
FuseN° Rating
(A) Functions
11 5Steering lock - Fuel injection system -
e
l
ectronic gearbox
12 7. 5Airbags
13 5Instrument panel - Display Screen - Stop & Start
14 15* *
Steering - Fuel injection system - Brake lamps
7. 5 *
15 7. 5 * *
Fuel injection system - Stop & Start
10*
16 7. 5
en
gine diagnosis
17 10Brake lamps -
t
h
ird brake lamp - Fuel injection system - ABS
system - VSC system -
e
l
ectronic gearbox - Keyless e
n
try and
Starting system
18 10Sidelamps - Number plate lamps - Rear foglamp - Front
foglamps - Rear lamps - Lighting dimmer
19 40Air conditioning
* V
ti 8
2 engine.
** V
ti 6
8 engine.
9
Practical information
Page 160 of 256
158
** Vti 68 engine.Fuse
N° Rating
(A) Functions
13 10Horn
14 30Distribution units
15* * 7. 5
ele
ctronic gearbox
16 7. 5Fuel injection system
17 7. 0Keyless e
n
try and Starting system
18* * 7. 5Battery
19 25Fuel injection system - Cooling fan
20 30Starter motor
21 7. 5Steering lock
22 25Front lamps
23 7. 5Fuel injection system
24 7. 5Fuel injection system - Starter motor - e
l
ectronic gearbox -
Stop
& Start
25 15Audio system - "Keyless e
n
try and Starting" system
26 7. 5Instrument panel - Display screen
Practical information
Page 167 of 256

165
towing the vehicle
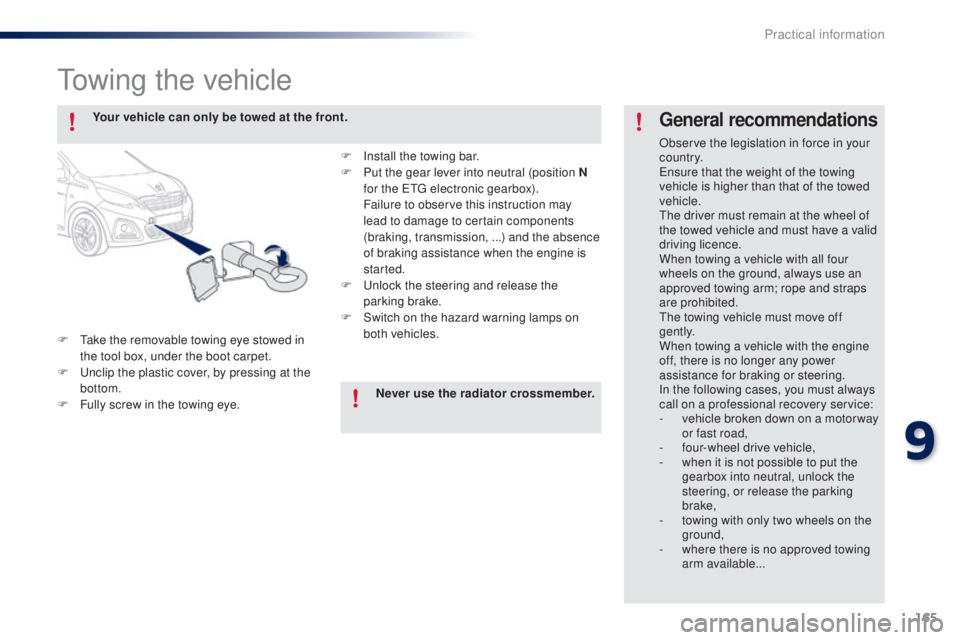
F take the removable towing eye stowed in the tool box, under the boot carpet.
F
u
n
clip the plastic cover, by pressing at the
bottom.
F
F
ully screw in the towing eye.
General recommendations
Observe the legislation in force in your
c o unt r y.
en
sure that the weight of the towing
vehicle is higher than that of the towed
vehicle.
th
e driver must remain at the wheel of
the towed vehicle and must have a valid
driving licence.
When towing a vehicle with all four
wheels on the ground, always use an
approved towing arm; rope and straps
are prohibited.
th
e towing vehicle must move off
g e nt l y.
When towing a vehicle with the engine
off, there is no longer any power
assistance for braking or steering.
In the following cases, you must always
call on a professional recovery service:
-
v
ehicle broken down on a motor way
or fast road,
-
f
our-wheel drive vehicle,
-
w
hen it is not possible to put the
gearbox into neutral, unlock the
steering, or release the parking
brake,
-
t
owing with only two wheels on the
ground,
-
w
here there is no approved towing
arm available...
Your vehicle can only be towed at the front.
F
I
nstall the towing bar.
F
P
ut the gear lever into neutral (position N
for the
etg
electronic gearbox).
F
ailure to observe this instruction may
lead to damage to certain components
(braking, transmission, ...) and the absence
of braking assistance when the engine is
started.
F
u
n
lock the steering and release the
parking brake.
F
S
witch on the hazard warning lamps on
both vehicles.
Never use the radiator crossmember.
9
Practical information
Page 187 of 256
03
185
STEERING MOUNTED CONTROLS
Short press: change multimedia
source.
Long press: mute / restore sound from
the radio or pause media sources.
Increase volume.
Decrease volume.
Radio: change to preset radio stations
in ascending order.
Media: next track.
Radio: change to preset radio stations
in descending order.
Media: previous track.Accept an incoming call.
Other than on a call: press to open the
list of contacts; a second press opens
the calls history.
Reject the incoming call.
e
nd the call in progress.
Other than on a call: press to return
to the radio screen or the clock if the
radio is not active.
B3_en_Chap12a_Autoradio-t oyota-tactile-1_ed01-2014
Page 217 of 256

215
Level 1
Level 2 Level 3 Comment
Configuration General Clock
OK
Save settings.
LanguageSelect the language.
BeepActivate or deactivate beep mode.
Personalise the startup
imagetransferStore images in a folder initially called "Startupimage",
before copying them to the system.
Delete all
OK
Save the settings.
AnimationActivate or deactivate animation mode.
Delete personal dataDelete
Choose settings, activate or deactivate options.
Do not delete
Update software
Software information
Configuration Audio Audio Bluetooth sound
configuration
Choose settings.
iPod® sound inputu
SBActivate or deactivate iPod® sound inputs.AuX
V
ideo input mode N
t SC
Activate or deactivate the video input modes.PA L
Sleeve configuration
Activate or deactivate sleeve configuration.
Automatic sound
adjustment OffActivate or deactivate the automatic sound adjustment
modes.Low
Medium
High
Configuration
Display General
Select the display configuration.
Video
B3_en_Chap12a_Autoradio-t
oyota-tactile-1_ed01-2014
Page 239 of 256
237
Keys 30
Remote control 3 1-32
"Keyless
e
n
try and Starting"
system
33 -36
Remote control battery
3
2, 36
Starting
7
1, 73
exterior
Door mirrors 5 1
Lighting control stalk
93
-97
Adjusting the headlamps
9
8
Changing bulbs
1
47-149, 151
-
f
ront lamps
-
d
irection indicator repeaters
Doors
38-40
-
ope
ning / closing
-
c
entral locking
el
ectric windows
4
1
Quarter lights (5 -door)
4
1 W ip e r s
9 9 -10 0
Changing a wiper blade
1
64
Boot 39-40te
mporary puncture
repair kit
1
36-140
Reversing camera
9
2
to
w i n g
16 5
Changing bulbs
1
50-151
-
r
ear lamps
-
3
rd brake lamp
-
n
umber plate lamps
Fuel tank, ref uelling
13 4 -13 5
Fuel gauge
2
5
ele
ctronic stability
programme
107-109
Snow chains
1
46
un
der-inflation detection
1
03-106
ty
re pressures
1
80
Changing a wheel
1
41-145
-
tools
-
r
emoval / fitting
ele
ctric fabric roof
4
2-46
Roof bars
1
66
Accessories
167-168
B3_en_Chap13_recherche-visuelle_ed01-2014
.
Visual search
Page 240 of 256
238
Rear parcel shelf 68
Boot fittings 6 9 -70
-
hooks
-
s
torage box
Interior
Child seats 1 18 -126
ISOFIX child seats 1 27-131
Child lock
1
33
Rear seats, bench seat
4
9
Rear head restraints
5
0
Interior fittings
6
4-67
-
g
love box
-
1
2 V accessory socket
- u
S
B port / Jack auxiliary socket
- mats
Deactivating the passenger's front airbag 114
A i r b a g s
11
3 -117
Seat belts
1
10-112
Front seats
4
7
Heated seats
4
8
Access to rear seats (3 - door)
48
B3_en_Chap13_recherche-visuelle_ed01-2014
Visual search