2014 NISSAN QUEST lock
[x] Cancel search: lockPage 138 of 482
The HomeLink®Universal Transceiver provides a
convenient way to consolidate the functions of
up to three individual hand-held transmitters into
one built-in device.
HomeLink
®Universal Transceiver:
. Will operate most Radio Frequency (RF)
devices such as garage doors, gates, home
and office lighting, entry door locks and
security systems.
. Is powered by your vehicle’s battery. No
separate batteries are required. If the
vehicle’s battery is discharged or is dis-
connected, HomeLink
®will retain all pro-
gramming.
When the HomeLink
®Universal Transcei-
ver is programmed, retain the original
transmitter for future programming proce-
dures (Example: new vehicle purchases) .
Upon sale of the vehicle, the programmed
HomeLink
®Universal Transceiver buttons
should be erased for security purposes.
For additional information, refer to “Pro-
gramming HomeLink
®” (P.2-59) .
WARNING
. Do not use the HomeLink®Universal
Transceiver with any garage door
opener that lacks safety stop and reverse features as required by
federal safety standards. (These
standards became effective for
opener models manufactured after
April 1, 1982) . A garage door opener
which cannot detect an object in the
path of a closing garage door and
then automatically stop and reverse,
does not meet current federal safety
standards. Using a garage door
opener without these features in-
creases the risk of serious injury or
death.
. During the programming procedure
your garage door or security gate
will open and close (if the transmit-
ter is within range) . Make sure that
people or objects are clear of the
garage door, gate, etc. that you are
programming.
. Your vehicle’s engine should be
turned off while programming the
HomeLink
®Universal Transceiver.
Do not breathe exhaust gases; they
contain colorless and odorless car-
bon monoxide. Carbon monoxide is
dangerous. It can cause uncon-
sciousness or death.
PROGRAMMING HomeLink®
If you have any questions or are having difficulty
programming your HomeLink®buttons, refer to
the HomeLink®web site at: www.homelink.com
or call 1-800-355-3515.
NOTE:
It is also recommended that a new battery
be placed in the hand-held transmitter of
the device being programmed to
HomeLink
®for quicker programming and
accurate transmission of the radio-fre-
quency.
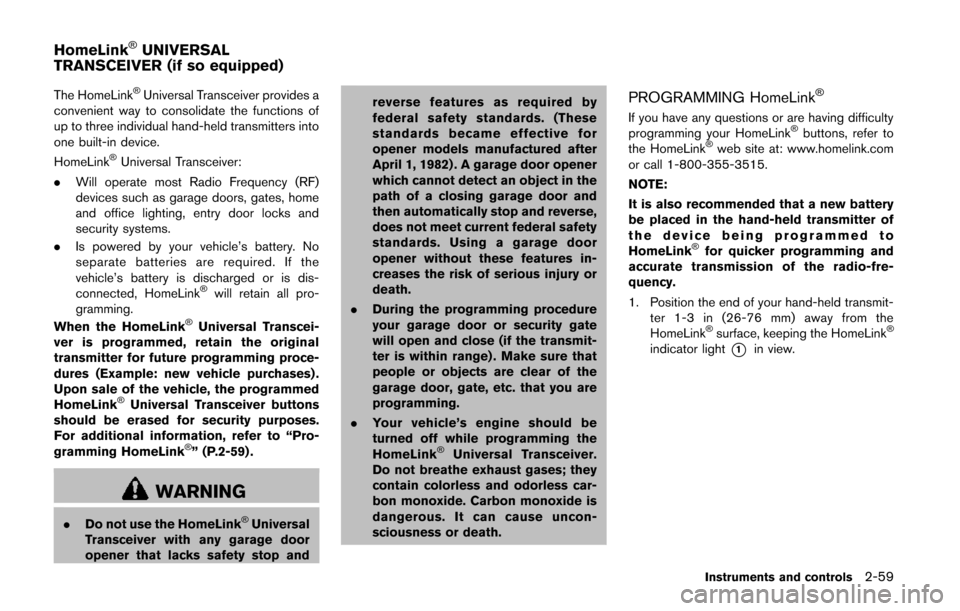
1. Position the end of your hand-held transmit- ter 1-3 in (26-76 mm) away from the
HomeLink
®surface, keeping the HomeLink®
indicator light*1in view.
Instruments and controls2-59
HomeLink®UNIVERSAL
TRANSCEIVER (if so equipped)
Page 144 of 482
3 Pre-driving checks and adjustments
Keys ........................................................................\
...................... 3-3Intelligent Key system ......................................................... 3-3
Mechanical key .................................................................... 3-4
Valet hand-off ....................................................................... 3-5
Doors ........................................................................\
.................... 3-5 Locking with mechanical key ............................................ 3-5
Opening and closing windows with the mechanical
key (if so equipped) ........................................................... 3-6
Locking with inside lock knob .......................................... 3-6
Locking with power door lock switch ............................ 3-6
Automatic door locks ......................................................... 3-7
Sliding doors ........................................................................\
3-7
Sliding door auto closure function (if
so equipped) ........................................................................\
3-9
Child safety sliding door lock .......................................... 3-9
Power sliding door (if so equipped) .................................... 3-9
Precautions on power sliding door operation ........... 3-10
Switching sliding door operation ................................. 3-11
Operating sliding door switch ...................................... 3-12
Operating the power sliding door with the Intelligent
Key (if so equipped) ........................................................ 3-12
Operating sliding door by power assist ..................... 3-13
Sliding door auto reverse function .............................. 3-13
Intelligent Key system ........................................................... 3-13 Intelligent Key operating range ..................................... 3-15 Door locks/unlocks precaution ................................... 3-15
Intelligent Key operation ............................................... 3-16
Battery saver system ..................................................... 3-19
Warning signals .............................................................. 3-19
Troubleshooting guide .................................................. 3-20
Remote keyless entry system ............................................. 3-21
How to use remote keyless entry system ................ 3-22
Hood ........................................................................\
................. 3-25
Lift gate ........................................................................\
............ 3-26 Operating manual lift gate ........................................... 3-26
Operating power lift gate (if so equipped) ............. 3-26
Auto closure .................................................................... 3-29
Lift gate release .............................................................. 3-30
Fuel-filler door ........................................................................\
3-30 Opening fuel-filler door ................................................ 3-30
Fuel-filler cap .................................................................. 3-30
Tilt/telescopic steering ......................................................... 3-32 Tilt or telescopic operation .......................................... 3-32
Sun visors ........................................................................\
........ 3-33
Mirrors ........................................................................\
.............. 3-33
Inside mirror ..................................................................... 3-33
Outside mirrors ............................................................... 3-35
Vanity mirror ..................................................................... 3-36
Communication mirror (if so equipped) ................... 3-36
Page 147 of 482
3-4Pre-driving checks and adjustments
nents when registering new keys, be sure to take
all Intelligent Keys that you have to the NISSAN
dealer.
CAUTION
.Be sure to carry the Intelligent Key
with you when driving. The Intelli-
gent Key is a precision device with a
built-in transmitter. To avoid dama-
ging it, please note the following.
— The Intelligent Key is water
resistant; however, wetting may
damage the Intelligent Key. If
the Intelligent Key gets wet,
immediately wipe until it is com-
pletely dry.
— Do not bend, drop or strike it against another object.
— If the outside temperature is below 148F (-108C) degrees, the
battery of the Intelligent Key
may not function properly.
— Do not place the Intelligent Key for an extended period in a
place where temperatures ex-
ceed 1408F (608C) . — Do not change or modify the
Intelligent Key.
— Do not use a magnet key holder.
— Do not place the Intelligent Key near an electric appliance such
as a television set, personal
computer or cellular phone.
— Do not allow the Intelligent Key to come into contact with water
or salt water, and do not wash it
in a washing machine. This
could affect the system function.
. If an Intelligent Key is lost or stolen,
NISSAN recommends erasing the ID
code of that Intelligent Key. This will
prevent the Intelligent Key from
unauthorized use to unlock the
vehicle. For information regarding
the erasing procedure, please con-
tact a NISSAN dealer.
SPA2033
MECHANICAL KEY
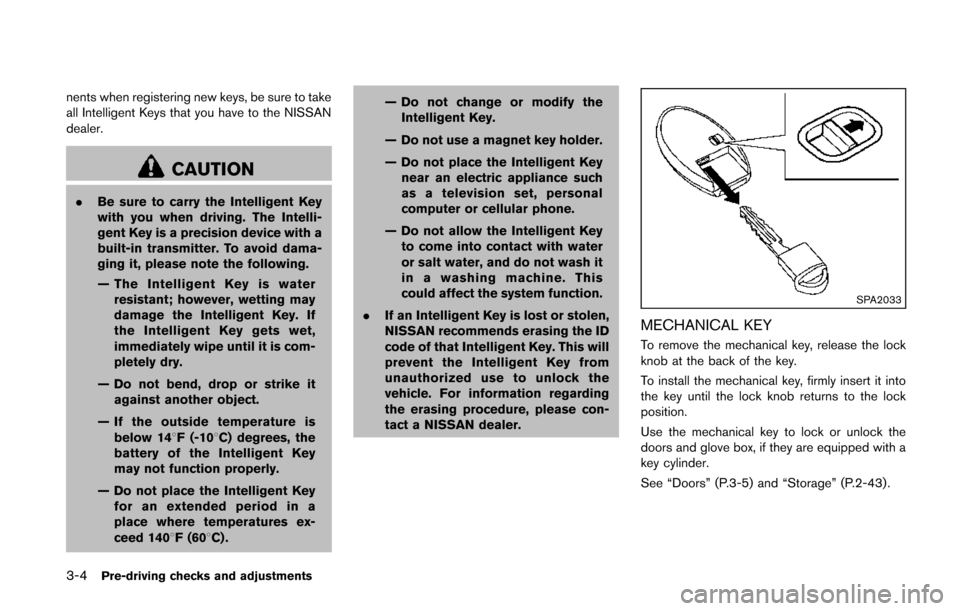
To remove the mechanical key, release the lock
knob at the back of the key.
To install the mechanical key, firmly insert it into
the key until the lock knob returns to the lock
position.
Use the mechanical key to lock or unlock the
doors and glove box, if they are equipped with a
key cylinder.
See “Doors” (P.3-5) and “Storage” (P.2-43) .
Page 148 of 482
CAUTION
Always carry the mechanical key in-
stalled in the key.
VALET HAND-OFF
When you have to leave a key with a valet, give
them the Intelligent Key itself after removing the
mechanical key to protect your belongings.
To prevent the glove box from being opened
during valet hand-off, follow the procedures
below.
1. Remove the mechanical key from the In-telligent Key.
2. Lock the glove box with the mechanical key.
3. Hand the Intelligent Key to the valet, keeping the mechanical key in your pocket or bag.
Insert the mechanical key into the Intelligent
Key when you retrieve your vehicle.
For glove box lock, see “Storage” (P.2-43) .
WARNING
. Always have the doors locked while
driving. Along with the use of seat
belts, this provides greater safety in
the event of an accident by helping
to prevent persons from being
thrown from the vehicle. This also
helps keep children and others from
unintentionally opening the doors,
and will help keep out intruders.
. Before opening any door, always
look for and avoid oncoming traffic.
. Do not leave children unattended
inside the vehicle. They could un-
knowingly activate switches or con-
trols. Unattended children could
become involved in serious acci-
dents.
SPA2527-B
LOCKING WITH MECHANICAL KEY
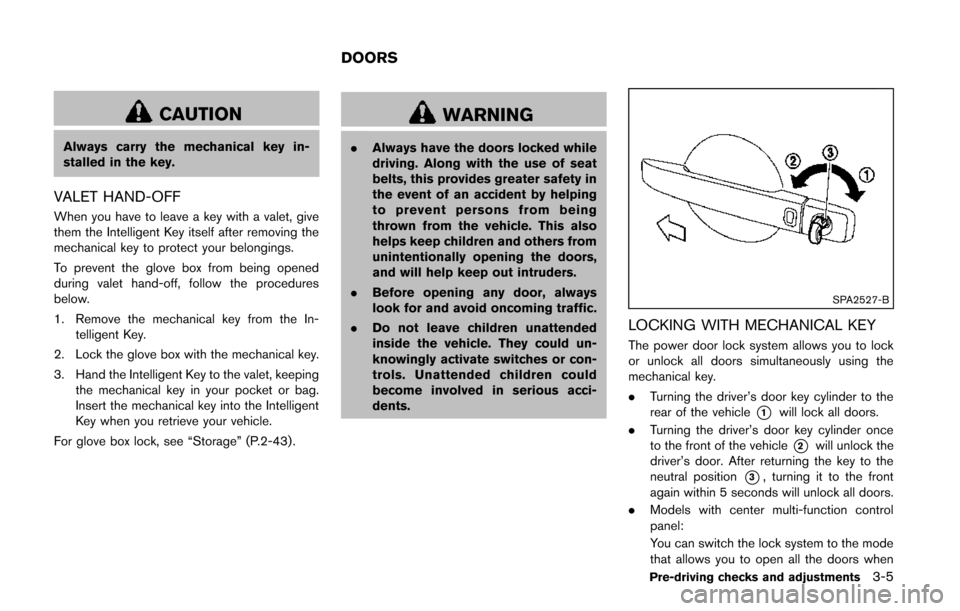
The power door lock system allows you to lock
or unlock all doors simultaneously using the
mechanical key.
.Turning the driver’s door key cylinder to the
rear of the vehicle
*1will lock all doors.
. Turning the driver’s door key cylinder once
to the front of the vehicle
*2will unlock the
driver’s door. After returning the key to the
neutral position
*3, turning it to the front
again within 5 seconds will unlock all doors.
. Models with center multi-function control
panel:
You can switch the lock system to the mode
that allows you to open all the doors when
Pre-driving checks and adjustments3-5
DOORS
Page 149 of 482
3-6Pre-driving checks and adjustments
the key is turned once. (See “How to use
SETTING button” (P.4-13).)
OPENING AND CLOSING WINDOWS
WITH THE MECHANICAL KEY (if so
equipped)
The driver’s door key operation also allows you
to open and close the window that is equipped
with the automatic open/close function. (See
“Power windows” (P.2-51).)
To open the windows, turn the driver’s door key
cylinder to the front of the vehicle forlonger
than 1 second. The door is unlocked and the
window keeps opening while turning the key.
This function can also be performed by pushing
and holding the door UNLOCK button of the
key. (See “Remote keyless entry system” (P.3-
21).)
To close the windows, turn the driver’s door key
cylinder to the rear of the vehicle for longer
than 1 second. The door is locked and the
window keeps closing while turning the key.
SPA2847
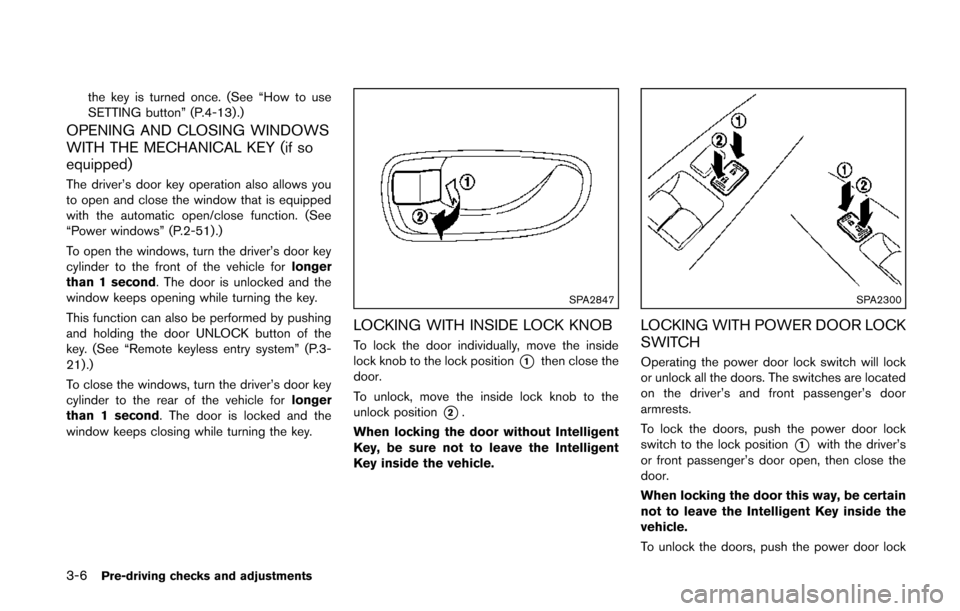
LOCKING WITH INSIDE LOCK KNOB
To lock the door individually, move the inside
lock knob to the lock position
*1then close the
door.
To unlock, move the inside lock knob to the
unlock position
*2.
When locking the door without Intelligent
Key, be sure not to leave the Intelligent
Key inside the vehicle.
SPA2300
LOCKING WITH POWER DOOR LOCK
SWITCH
Operating the power door lock switch will lock
or unlock all the doors. The switches are located
on the driver’s and front passenger’s door
armrests.
To lock the doors, push the power door lock
switch to the lock position
*1with the driver’s
or front passenger’s door open, then close the
door.
When locking the door this way, be certain
not to leave the Intelligent Key inside the
vehicle.
To unlock the doors, push the power door lock
Page 150 of 482
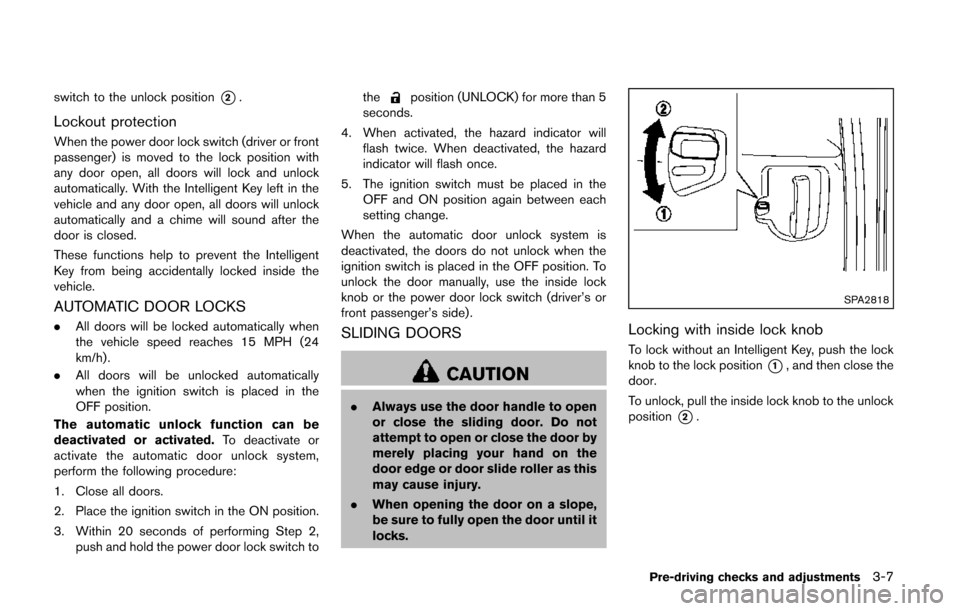
switch to the unlock position*2.
Lockout protection
When the power door lock switch (driver or front
passenger) is moved to the lock position with
any door open, all doors will lock and unlock
automatically. With the Intelligent Key left in the
vehicle and any door open, all doors will unlock
automatically and a chime will sound after the
door is closed.
These functions help to prevent the Intelligent
Key from being accidentally locked inside the
vehicle.
AUTOMATIC DOOR LOCKS
.All doors will be locked automatically when
the vehicle speed reaches 15 MPH (24
km/h).
. All doors will be unlocked automatically
when the ignition switch is placed in the
OFF position.
The automatic unlock function can be
deactivated or activated. To deactivate or
activate the automatic door unlock system,
perform the following procedure:
1. Close all doors.
2. Place the ignition switch in the ON position.
3. Within 20 seconds of performing Step 2, push and hold the power door lock switch to the
position (UNLOCK) for more than 5
seconds.
4. When activated, the hazard indicator will flash twice. When deactivated, the hazard
indicator will flash once.
5. The ignition switch must be placed in the OFF and ON position again between each
setting change.
When the automatic door unlock system is
deactivated, the doors do not unlock when the
ignition switch is placed in the OFF position. To
unlock the door manually, use the inside lock
knob or the power door lock switch (driver’s or
front passenger’s side).
SLIDING DOORS
CAUTION
. Always use the door handle to open
or close the sliding door. Do not
attempt to open or close the door by
merely placing your hand on the
door edge or door slide roller as this
may cause injury.
. When opening the door on a slope,
be sure to fully open the door until it
locks.
SPA2818
Locking with inside lock knob
To lock without an Intelligent Key, push the lock
knob to the lock position
*1, and then close the
door.
To unlock, pull the inside lock knob to the unlock
position
*2.
Pre-driving checks and adjustments3-7
Page 152 of 482
SLIDING DOOR AUTO CLOSURE
FUNCTION (if so equipped)
The auto closure function will operate when the
sliding door is not fully closed.
WARNING
When the auto closure function is
operating, keep hands and feet away
from the sliding door to prevent inju-
ries.
SPA2819
CHILD SAFETY SLIDING DOOR LOCK
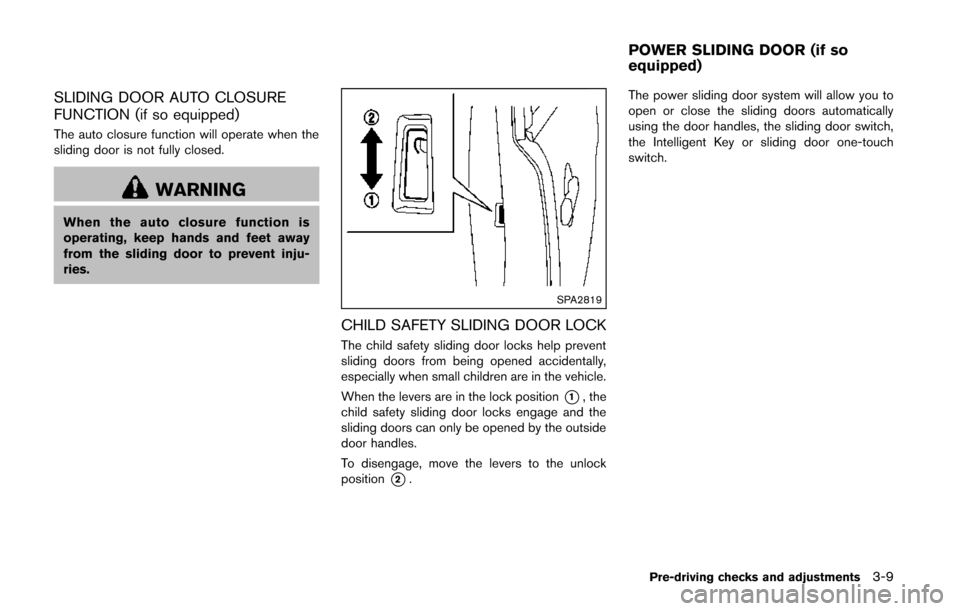
The child safety sliding door locks help prevent
sliding doors from being opened accidentally,
especially when small children are in the vehicle.
When the levers are in the lock position
*1, the
child safety sliding door locks engage and the
sliding doors can only be opened by the outside
door handles.
To disengage, move the levers to the unlock
position
*2. The power sliding door system will allow you to
open or close the sliding doors automatically
using the door handles, the sliding door switch,
the Intelligent Key or sliding door one-touch
switch.
Pre-driving checks and adjustments3-9
POWER SLIDING DOOR (if so
equipped)
Page 154 of 482
SPA2071
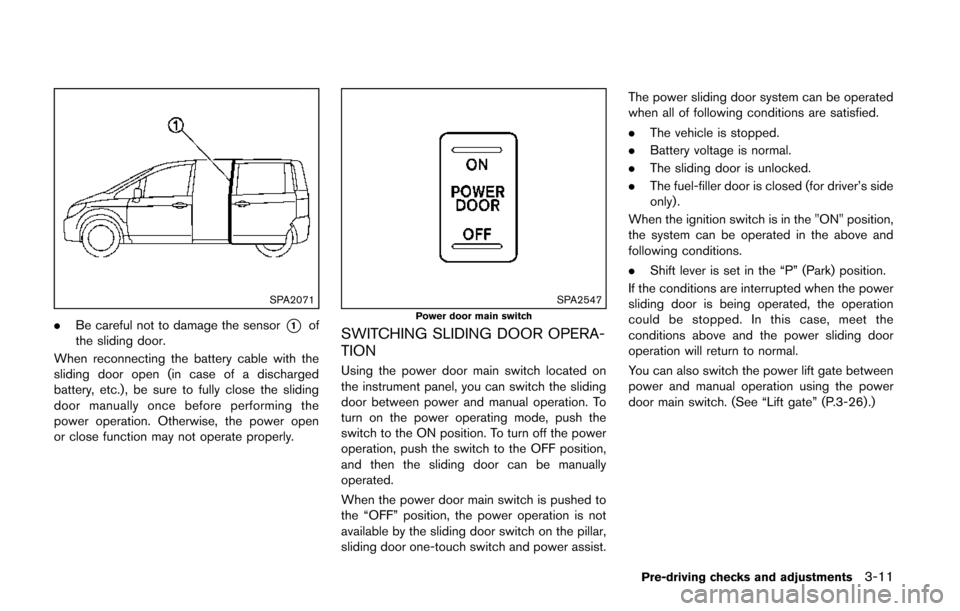
.Be careful not to damage the sensor*1of
the sliding door.
When reconnecting the battery cable with the
sliding door open (in case of a discharged
battery, etc.), be sure to fully close the sliding
door manually once before performing the
power operation. Otherwise, the power open
or close function may not operate properly.
SPA2547Power door main switch
SWITCHING SLIDING DOOR OPERA-
TION
Using the power door main switch located on
the instrument panel, you can switch the sliding
door between power and manual operation. To
turn on the power operating mode, push the
switch to the ON position. To turn off the power
operation, push the switch to the OFF position,
and then the sliding door can be manually
operated.
When the power door main switch is pushed to
the “OFF” position, the power operation is not
available by the sliding door switch on the pillar,
sliding door one-touch switch and power assist. The power sliding door system can be operated
when all of following conditions are satisfied.
.
The vehicle is stopped.
. Battery voltage is normal.
. The sliding door is unlocked.
. The fuel-filler door is closed (for driver’s side
only).
When the ignition switch is in the "ON" position,
the system can be operated in the above and
following conditions.
. Shift lever is set in the “P” (Park) position.
If the conditions are interrupted when the power
sliding door is being operated, the operation
could be stopped. In this case, meet the
conditions above and the power sliding door
operation will return to normal.
You can also switch the power lift gate between
power and manual operation using the power
door main switch. (See “Lift gate” (P.3-26) .)
Pre-driving checks and adjustments3-11