2014 NISSAN QUEST battery
[x] Cancel search: batteryPage 181 of 482
3-38Pre-driving checks and adjustments
The indicator light for the pushed memory
switch will stay on for approximately 5
seconds after pushing the switch.
If memory is stored in the same memory
switch, the previous memory will be deleted.
Linking Intelligent Key to a stored mem-
ory position
The Intelligent Key can be linked to a stored
memory position with the following procedure.
1. Follow one of the steps for storing a memoryposition.
. While the indicator light for the memory
switch being set is illuminated for 5 sec-
onds, push the
button on the Intelligent
Key.
. Push the ignition switch to the OFF position,
and then push the SET switch. Push the
button while pushing the memory button
while the indicator light stays on for approxi-
mately 5 seconds.
If the indicator light blinks, the Intelligent Key is
linked to that memory setting.
Push the ignition switch to the OFF position, and
then push the
button on the Intelligent Key.
The driver’s seat and outside mirrors will move to
the memorized position.
Confirming memory storage
. Push the ignition switch to the ON position
and push the SET switch. If the main
memory has not been stored, the indicator
light will come on for approximately 0.5
second. When the memory has stored in
position, the indicator light will stay on for
approximately 5 seconds.
. If the battery cable is disconnected, or if the
fuse opens, the memory will be canceled. In
this case, reset the desired position using
the previous procedure.
. If optional keys are added to your vehicle,
the memory storage procedure to switch 1
or 2 and linking Intelligent Key procedure to
a stored memory position should be per-
formed again for each Intelligent Key. For
additional Intelligent Key information, see
“Keys” (P.3-3) .
Selecting the memorized position
1. Move the shift lever to the P (Park) position.
2. Use one of the following methods to move
the driver’s seat and outside mirrors.
.Push the ignition switch to the ONposition and push the memory switch (1
or 2) .
.Within 45 seconds of opening thedriver’s door, push the memory switch (1 or 2) .
The driver’s seat and outside mirrors will
move to the memorized position with the
indicator light flashing, and then the light will
stay on for approximately 5 seconds.
SYSTEM OPERATION
The automatic drive positioner system will not
work or will stop operating under the following
conditions:
. When the vehicle speed is above 4 MPH (7
km/h) (entry/exit function) .
. When the vehicle is driven (memory sto-
rage).
. When the adjusting switch for the driver’s
seat is turned on while the automatic drive
positioner is operating.
. When the driver’s seat and outside mirrors
have already been moved to the memorized
position.
. When no position is stored in the memory
switch.
. When the engine is started while moving the
automatic drive positioner.
. When the shift lever is moved from the P
(Park) position to any other position. (How-
ever, it will not be canceled while the driver’s
seat is returning to the previous positions
(entry/exit function).)
Page 187 of 482
4-4Monitor, heater, air conditioner, audio, phone and voice recognition systems
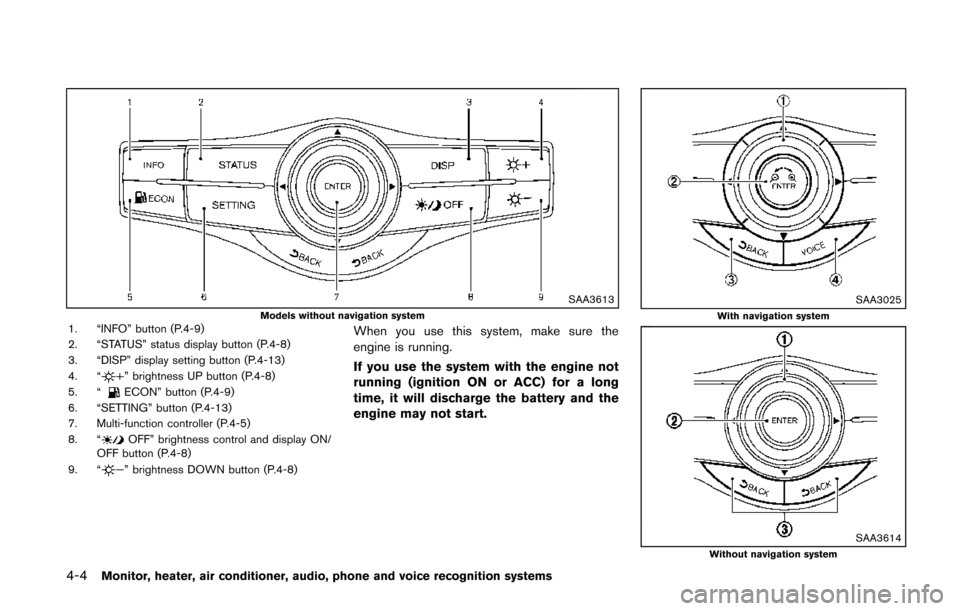
SAA3613Models without navigation system1. “INFO” button (P.4-9)
2. “STATUS” status display button (P.4-8)
3. “DISP” display setting button (P.4-13)
4. “
” brightness UP button (P.4-8)
5. “ECON” button (P.4-9)
6. “SETTING” button (P.4-13)
7. Multi-function controller (P.4-5)
8. “
OFF” brightness control and display ON/
OFF button (P.4-8)
9. “
” brightness DOWN button (P.4-8)
When you use this system, make sure the
engine is running.
If you use the system with the engine not
running (ignition ON or ACC) for a long
time, it will discharge the battery and the
engine may not start.
SAA3025With navigation system
SAA3614Without navigation system
Page 237 of 482
4-54Monitor, heater, air conditioner, audio, phone and voice recognition systems
SAA0306
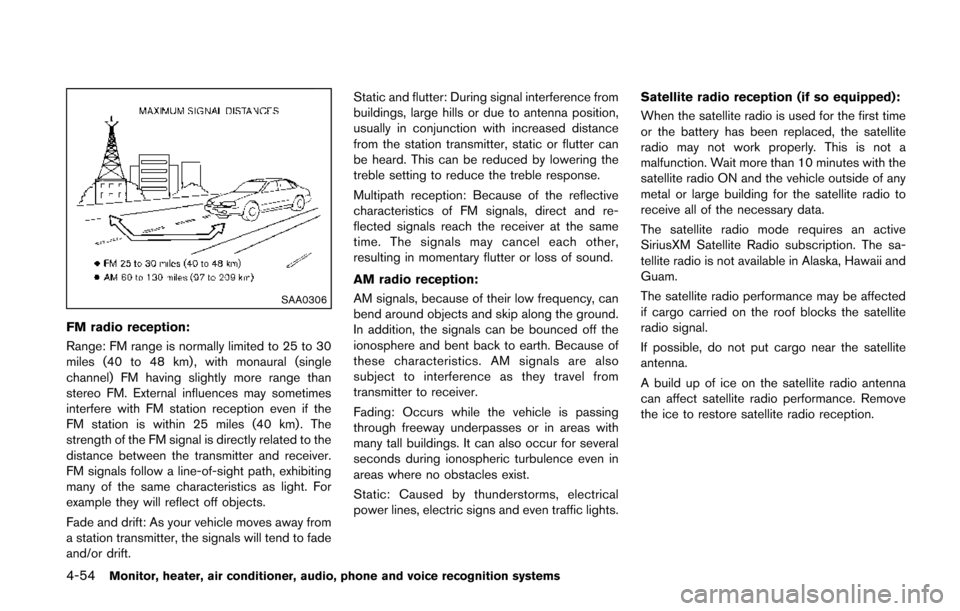
FM radio reception:
Range: FM range is normally limited to 25 to 30
miles (40 to 48 km) , with monaural (single
channel) FM having slightly more range than
stereo FM. External influences may sometimes
interfere with FM station reception even if the
FM station is within 25 miles (40 km). The
strength of the FM signal is directly related to the
distance between the transmitter and receiver.
FM signals follow a line-of-sight path, exhibiting
many of the same characteristics as light. For
example they will reflect off objects.
Fade and drift: As your vehicle moves away from
a station transmitter, the signals will tend to fade
and/or drift.Static and flutter: During signal interference from
buildings, large hills or due to antenna position,
usually in conjunction with increased distance
from the station transmitter, static or flutter can
be heard. This can be reduced by lowering the
treble setting to reduce the treble response.
Multipath reception: Because of the reflective
characteristics of FM signals, direct and re-
flected signals reach the receiver at the same
time. The signals may cancel each other,
resulting in momentary flutter or loss of sound.
AM radio reception:
AM signals, because of their low frequency, can
bend around objects and skip along the ground.
In addition, the signals can be bounced off the
ionosphere and bent back to earth. Because of
these characteristics. AM signals are also
subject to interference as they travel from
transmitter to receiver.
Fading: Occurs while the vehicle is passing
through freeway underpasses or in areas with
many tall buildings. It can also occur for several
seconds during ionospheric turbulence even in
areas where no obstacles exist.
Static: Caused by thunderstorms, electrical
power lines, electric signs and even traffic lights. Satellite radio reception (if so equipped):
When the satellite radio is used for the first time
or the battery has been replaced, the satellite
radio may not work properly. This is not a
malfunction. Wait more than 10 minutes with the
satellite radio ON and the vehicle outside of any
metal or large building for the satellite radio to
receive all of the necessary data.
The satellite radio mode requires an active
SiriusXM Satellite Radio subscription. The sa-
tellite radio is not available in Alaska, Hawaii and
Guam.
The satellite radio performance may be affected
if cargo carried on the roof blocks the satellite
radio signal.
If possible, do not put cargo near the satellite
antenna.
A build up of ice on the satellite radio antenna
can affect satellite radio performance. Remove
the ice to restore satellite radio reception.
Page 257 of 482
4-74Monitor, heater, air conditioner, audio, phone and voice recognition systems
from low to high frequencies and stop at each
broadcasting station/channel for 5 seconds.
Pushing the button again during this 5 seconds
period will stop SCAN tuning and the radio will
remain tuned to that station/channel.
If the Radio SCAN tuning button is not pushed
within 5 seconds, SCAN tuning moves to the
next station/channel.
*1to*6Station memory operations:
12 stations/channels can be set for the FM band
(6 each for FM1 and FM2) , 18 for SiriusXM
Satellite Radio (6 each for XM1, XM2 and XM3)
and 6 stations can be set for the AM band.
1. Choose the radio band using the radio band select button.
2. Tune to the desired station/channel using the SEEK·CAT, SCAN button or the radio
TUNE·SCROLL control knob.
3. Push and hold the desired station preset button
*1to*6until the radio mutes.
4. The station indicator will then come on and the sound will resume. Memorizing is now
complete.
5. Other buttons can be set in the same manner.
If the battery cable is disconnected, or if the fuse
opens, the radio memory will be erased. In that
case, reset the desired stations/channels.
SAA3607
Compact Disc (CD) player operation
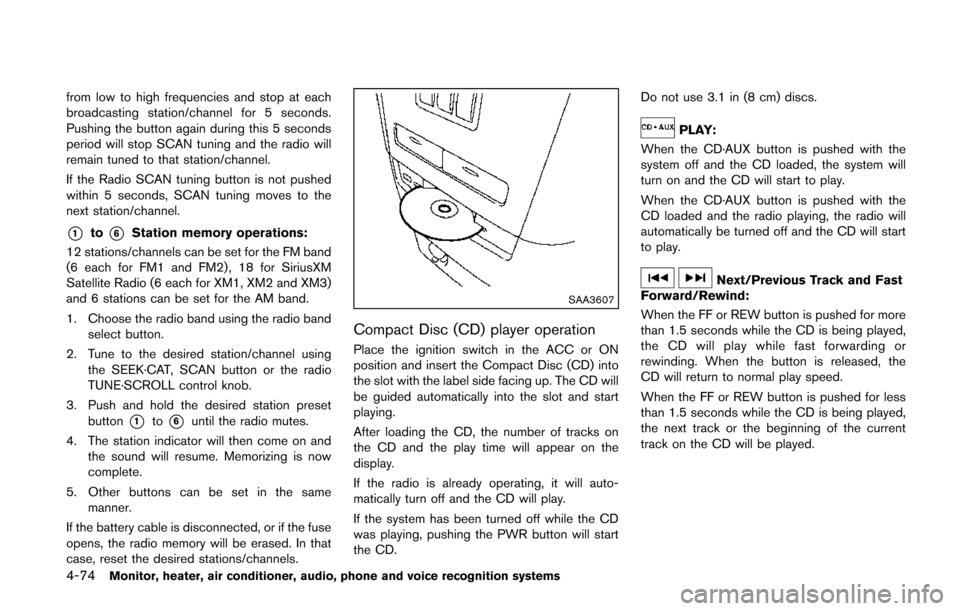
Place the ignition switch in the ACC or ON
position and insert the Compact Disc (CD) into
the slot with the label side facing up. The CD will
be guided automatically into the slot and start
playing.
After loading the CD, the number of tracks on
the CD and the play time will appear on the
display.
If the radio is already operating, it will auto-
matically turn off and the CD will play.
If the system has been turned off while the CD
was playing, pushing the PWR button will start
the CD. Do not use 3.1 in (8 cm) discs.
PLAY:
When the CD·AUX button is pushed with the
system off and the CD loaded, the system will
turn on and the CD will start to play.
When the CD·AUX button is pushed with the
CD loaded and the radio playing, the radio will
automatically be turned off and the CD will start
to play.
Next/Previous Track and Fast
Forward/Rewind:
When the FF or REW button is pushed for more
than 1.5 seconds while the CD is being played,
the CD will play while fast forwarding or
rewinding. When the button is released, the
CD will return to normal play speed.
When the FF or REW button is pushed for less
than 1.5 seconds while the CD is being played,
the next track or the beginning of the current
track on the CD will be played.
Page 260 of 482
SAA3600
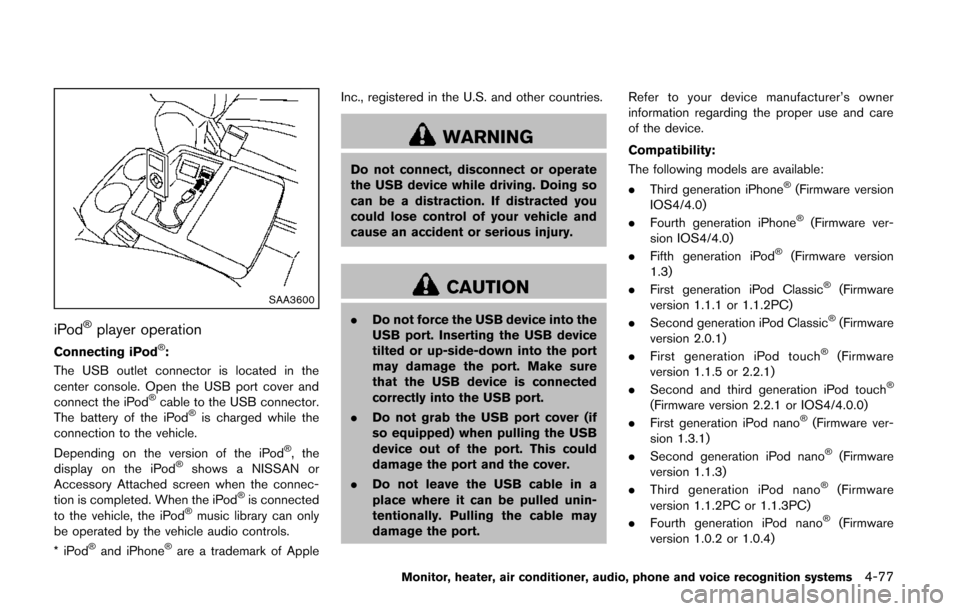
iPod®player operation
Connecting iPod®:
The USB outlet connector is located in the
center console. Open the USB port cover and
connect the iPod
®cable to the USB connector.
The battery of the iPod®is charged while the
connection to the vehicle.
Depending on the version of the iPod
®, the
display on the iPod®shows a NISSAN or
Accessory Attached screen when the connec-
tion is completed. When the iPod
®is connected
to the vehicle, the iPod®music library can only
be operated by the vehicle audio controls.
*iPod
®and iPhone®are a trademark of Apple Inc., registered in the U.S. and other countries.
WARNING
Do not connect, disconnect or operate
the USB device while driving. Doing so
can be a distraction. If distracted you
could lose control of your vehicle and
cause an accident or serious injury.
CAUTION
.
Do not force the USB device into the
USB port. Inserting the USB device
tilted or up-side-down into the port
may damage the port. Make sure
that the USB device is connected
correctly into the USB port.
. Do not grab the USB port cover (if
so equipped) when pulling the USB
device out of the port. This could
damage the port and the cover.
. Do not leave the USB cable in a
place where it can be pulled unin-
tentionally. Pulling the cable may
damage the port. Refer to your device manufacturer’s owner
information regarding the proper use and care
of the device.
Compatibility:
The following models are available:
. Third generation iPhone
®(Firmware version
IOS4/4.0)
. Fourth generation iPhone
®(Firmware ver-
sion IOS4/4.0)
. Fifth generation iPod
®(Firmware version
1.3)
. First generation iPod Classic
®(Firmware
version 1.1.1 or 1.1.2PC)
. Second generation iPod Classic
®(Firmware
version 2.0.1)
. First generation iPod touch
®(Firmware
version 1.1.5 or 2.2.1)
. Second and third generation iPod touch
®
(Firmware version 2.2.1 or IOS4/4.0.0)
. First generation iPod nano®(Firmware ver-
sion 1.3.1)
. Second generation iPod nano
®(Firmware
version 1.1.3)
. Third generation iPod nano
®(Firmware
version 1.1.2PC or 1.1.3PC)
. Fourth generation iPod nano
®(Firmware
version 1.0.2 or 1.0.4)
Monitor, heater, air conditioner, audio, phone and voice recognition systems4-77
Page 264 of 482
.UPDATING (When the satellite radio sub-
scription is not active)
SCAN tuning:
Push the SCAN tuning button to tune from low
to high frequencies and stop at each broad-
casting station/channel for 5 seconds. Pushing
the button again during this 5 seconds period
will stop SCAN tuning and the radio will remain
tuned to that station/channel.
If the SCAN tuning button is not pushed within 5
seconds, SCAN tuning moves to the next
station/channel.
*1to*6Station memory operations:
12 stations/channels can be set for the FM band
(6 each for FM1 and FM2) , 18 for SiriusXM
Satellite Radio (6 each for XM1, XM2 and XM3)
and 6 stations can be set for the AM band.
1. Choose the radio band using the radio band select button.
2. Tune to the desired station/channel using the SEEK/TRACK, SCAN button or the
radio TUNE knob.
3. Push and hold the desired station preset button
*1to*6until the radio mutes.
4. The station indicator will then come on and the sound will resume. Memorizing is now
complete. 5. Other buttons can be set in the same
manner.
If the battery cable is disconnected, or if the fuse
opens, the radio memory will be erased. In that
case, reset the desired stations/channels.
List (AM and FM radio) (models with
navigation system):
When the “List” key on the display is selected
while the FM or AM radio is being played, the
preset station list will be displayed.
If 1 of the 6 preset stations listed is touched and
held, the current station will be stored as the
new preset.
Menu (SiriusXM Satellite Radio):
When the “Menu” key on the display is selected
while the SiriusXM Satellite Radio is being
played, the menu list will be displayed.
The following items are available.
. Preset List
Displays the preset channel list. If 1 of the 6
preset stations listed is touched and held,
the current station will be stored as the new
preset.
. Customize Channel List
Selects specific channels to skip while using
the TUNE, SEEK/CATEGORY or Menu-
Categories feature. .
Favorite Artists & Songs
Stores the current artist or song that is being
played. Touch the “Alert” key to be reminded
when the stored artist or song is playing on a
station while listening to SiriusXM Satellite
Radio.
. Categories
Selecting a category will go to the first
channel in that category as defined by
SiriusXM Satellite Radio.
. Direct Tune
Inputs the channel number by using a
keypad.
Text (models without navigation system):
When the “Text” key is selected with the multi-
function controller on the display and then the
ENTER button is pushed while the satellite radio
is being played, the text information listed below
will be displayed on the screen.
. CH Name
. Category
. Name
. Title
. Other
Monitor, heater, air conditioner, audio, phone and voice recognition systems4-81
Page 266 of 482
When theorbutton is pushed for less
than 1.5 seconds while the CD is being played,
the next track or the beginning of the current
track on the CD will be played.
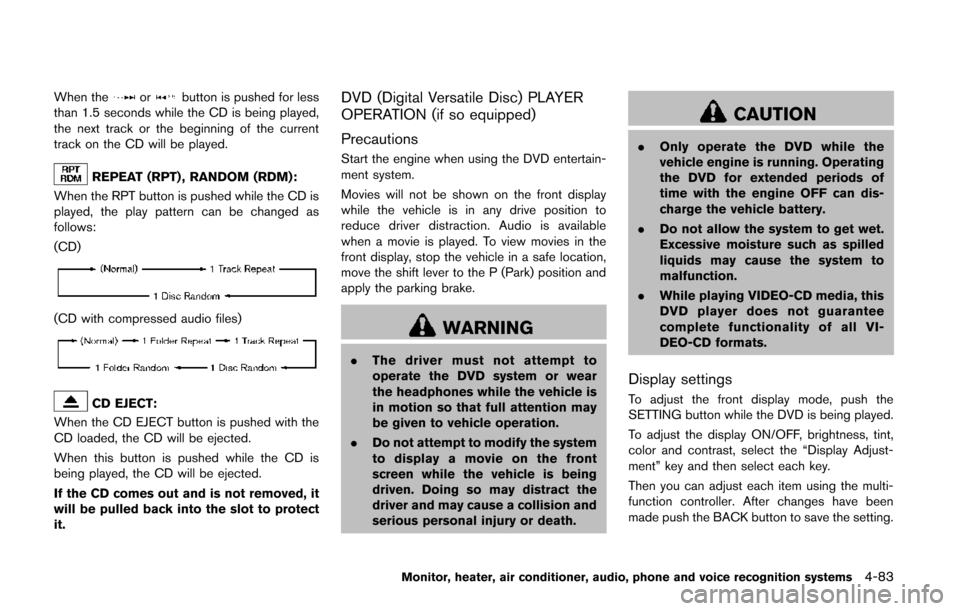
REPEAT (RPT) , RANDOM (RDM):
When the RPT button is pushed while the CD is
played, the play pattern can be changed as
follows:
(CD)
(CD with compressed audio files)
CD EJECT:
When the CD EJECT button is pushed with the
CD loaded, the CD will be ejected.
When this button is pushed while the CD is
being played, the CD will be ejected.
If the CD comes out and is not removed, it
will be pulled back into the slot to protect
it.
DVD (Digital Versatile Disc) PLAYER
OPERATION (if so equipped)
Precautions
Start the engine when using the DVD entertain-
ment system.
Movies will not be shown on the front display
while the vehicle is in any drive position to
reduce driver distraction. Audio is available
when a movie is played. To view movies in the
front display, stop the vehicle in a safe location,
move the shift lever to the P (Park) position and
apply the parking brake.
WARNING
. The driver must not attempt to
operate the DVD system or wear
the headphones while the vehicle is
in motion so that full attention may
be given to vehicle operation.
. Do not attempt to modify the system
to display a movie on the front
screen while the vehicle is being
driven. Doing so may distract the
driver and may cause a collision and
serious personal injury or death.
CAUTION
. Only operate the DVD while the
vehicle engine is running. Operating
the DVD for extended periods of
time with the engine OFF can dis-
charge the vehicle battery.
. Do not allow the system to get wet.
Excessive moisture such as spilled
liquids may cause the system to
malfunction.
. While playing VIDEO-CD media, this
DVD player does not guarantee
complete functionality of all VI-
DEO-CD formats.
Display settings
To adjust the front display mode, push the
SETTING button while the DVD is being played.
To adjust the display ON/OFF, brightness, tint,
color and contrast, select the “Display Adjust-
ment” key and then select each key.
Then you can adjust each item using the multi-
function controller. After changes have been
made push the BACK button to save the setting.
Monitor, heater, air conditioner, audio, phone and voice recognition systems4-83
Page 279 of 482
4-96Monitor, heater, air conditioner, audio, phone and voice recognition systems
SAA3600
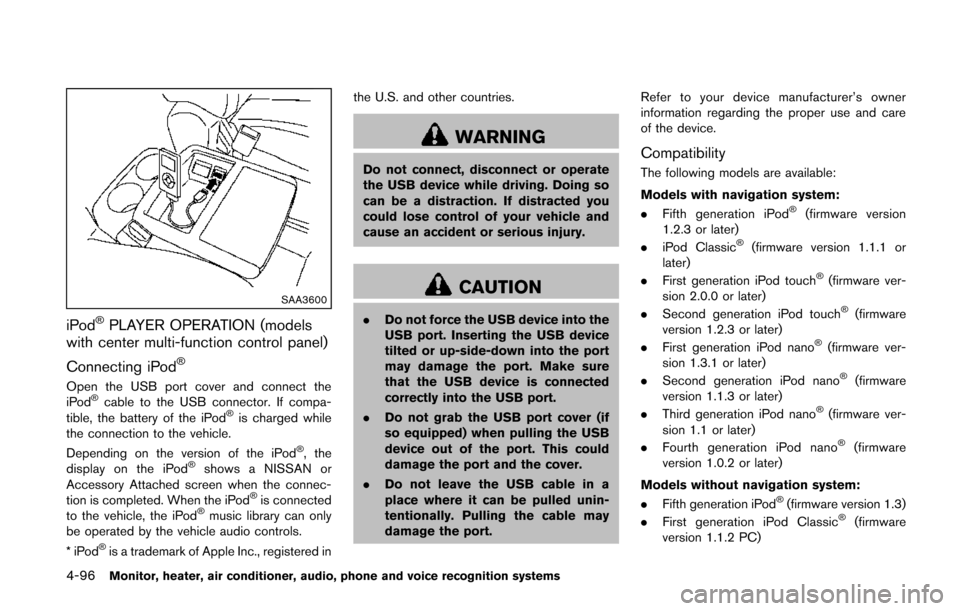
iPod®PLAYER OPERATION (models
with center multi-function control panel)
Connecting iPod
®
Open the USB port cover and connect the
iPod®cable to the USB connector. If compa-
tible, the battery of the iPod®is charged while
the connection to the vehicle.
Depending on the version of the iPod
®, the
display on the iPod®shows a NISSAN or
Accessory Attached screen when the connec-
tion is completed. When the iPod
®is connected
to the vehicle, the iPod®music library can only
be operated by the vehicle audio controls.
*iPod
®is a trademark of Apple Inc., registered in the U.S. and other countries.
WARNING
Do not connect, disconnect or operate
the USB device while driving. Doing so
can be a distraction. If distracted you
could lose control of your vehicle and
cause an accident or serious injury.
CAUTION
.
Do not force the USB device into the
USB port. Inserting the USB device
tilted or up-side-down into the port
may damage the port. Make sure
that the USB device is connected
correctly into the USB port.
. Do not grab the USB port cover (if
so equipped) when pulling the USB
device out of the port. This could
damage the port and the cover.
. Do not leave the USB cable in a
place where it can be pulled unin-
tentionally. Pulling the cable may
damage the port. Refer to your device manufacturer’s owner
information regarding the proper use and care
of the device.
Compatibility
The following models are available:
Models with navigation system:
.
Fifth generation iPod
®(firmware version
1.2.3 or later)
. iPod Classic
®(firmware version 1.1.1 or
later)
. First generation iPod touch
®(firmware ver-
sion 2.0.0 or later)
. Second generation iPod touch
®(firmware
version 1.2.3 or later)
. First generation iPod nano
®(firmware ver-
sion 1.3.1 or later)
. Second generation iPod nano
®(firmware
version 1.1.3 or later)
. Third generation iPod nano
®(firmware ver-
sion 1.1 or later)
. Fourth generation iPod nano
®(firmware
version 1.0.2 or later)
Models without navigation system:
. Fifth generation iPod
®(firmware version 1.3)
. First generation iPod Classic®(firmware
version 1.1.2 PC)