2014 NISSAN LEAF warning
[x] Cancel search: warningPage 3 of 27
TABLE OF CONTENTS
NEW SYSTEM FEATURES
C ARWINGS™/Remote Functions (if so equipped) ..................2
Approac
hing Vehicle Sound for Pedestrians (VSP) System
............2
Around V
iew
® Monitor (if so equipped).............................2 Shift Control System............................................4
Heated Seats..................................................4
E
SSENTIAL INFORMATION
Cold W
eather Range
............................................5 Parking in Extremely Cold W
eather
................................5 Quic
k Charge in Cold Weather (if so equipped) .....................
5 Li-ion B
attery Temperature Gauge
.................................6
Li-ion B
attery Gauges
...........................................6 P
ower Limitation Indicator Light
...................................6
Charge P
ort Lid/Charge Connector Lock Switch ....................
7 Li-ion B
attery Charging .........................................
8
T
ire Pressure Monitoring System (TPMS) with Easy Fill Tire Alert
......10 Cloc
k Set/Adjustment
..........................................10
FI
RST DRIVE FEATURES
N
ISSAN Intelligent Key
® System.................................11 Rear Hatc
h Release............................................11
Seat Adjustments
.............................................
12
Outside Mirror Control Switc
h
...................................12
P
ower Meter
.................................................
13
Electric V
ehicle (EV) System Warning Light
........................13
St
arting/Stopping the Electric Vehicle (EV) System .................
14
Headlight Control Switc
h .......................................
14
W
indshield Wiper and Washer Switch ............................
15
Automatic Climate Controls . . . . . . . . . . . . . . . . . . . . . . . . . . . . . . . . . . . .\
. 16
FM/AM/SiriusXM
® Satellite Radio with CD Player (if so equipped).....17 Cruise Control (if so equipped)
..................................18
USB/iPod
® Interface...........................................18
Pandora® Operation (if so equipped)...........................18
S
YSTEM GUIDE
T
rip Computer ................................................
19
Bluetooth
® Hands-free Phone System.............................20
System Operating T ips .....................................20
Bluetooth
® System without Navigation (if so equipped)...............20
Bluetooth® System with Navigation (if so equipped) .................22 Navigation System (if so equipped)...............................23
HomeLink
® Universal Transceiver (if so equipped)...................24
Please see your Owner’s Manual for impor tant safety
information and system operation limitations.
•
A c
ellular telephone should not be used for any purpose while
driving so full attention may be given to vehicle operation.
• Always wear your seat belt.
• Supplemental air bags do not replace proper seat belt usage.
•
C
hildren 12 and under should always ride in the rear
seat properly secured in child restraints or seat belts
according to their age and weight.
• Do not drink and drive.
For more information, refer to the “Safety — Seats, seat belts and
supplemental restraint system (section 1)”, “Heater, air conditioner,
audio and phone systems (section 4)” and the “Starting and driving
(section 5)” of your Owner’s Manual and the “Bluetooth
® hands-free
phone system (section 7)” and the “Audio systems (section 4)” of
your Navigation System Owner’s Manual.
Additional information about your vehicle is also available in your Owner’s Manual, Navigation System Owner’s Manual and at www.nissanusa.com.
To view detailed instructional videos, go to
www.nissanownersinfo.mobi/2014/leaf or snap this barcode with an appropriate barcode reader.
1700496_14b_Leaf_QRG_021114.indd 12/11/14 3:47 PM
Page 10 of 27
8
LI-ION BATTERY CHARGING
Before charging the Li-ion battery, see your Owner’s Manual for detailed warnings and cautions
when charging your battery.
There are three methods available to perform the charge operation: normal charge, trickle
charge and quick charge (if so equipped).
NORMAL CHARGE
Perform a normal charge using the charger installed
in your home.
It takes approximately 3-4 hours to charge the Li-ion
battery from empty to full with a 6.6 kW
charger (if so equipped).
To charge your vehicle:
• Place the power switc
h in the OFF position.
• Push the c
harge port lid opener switch located below the instrument panel to the left of
the steering wheel.
• Press the c
harge port tab and open the cap.
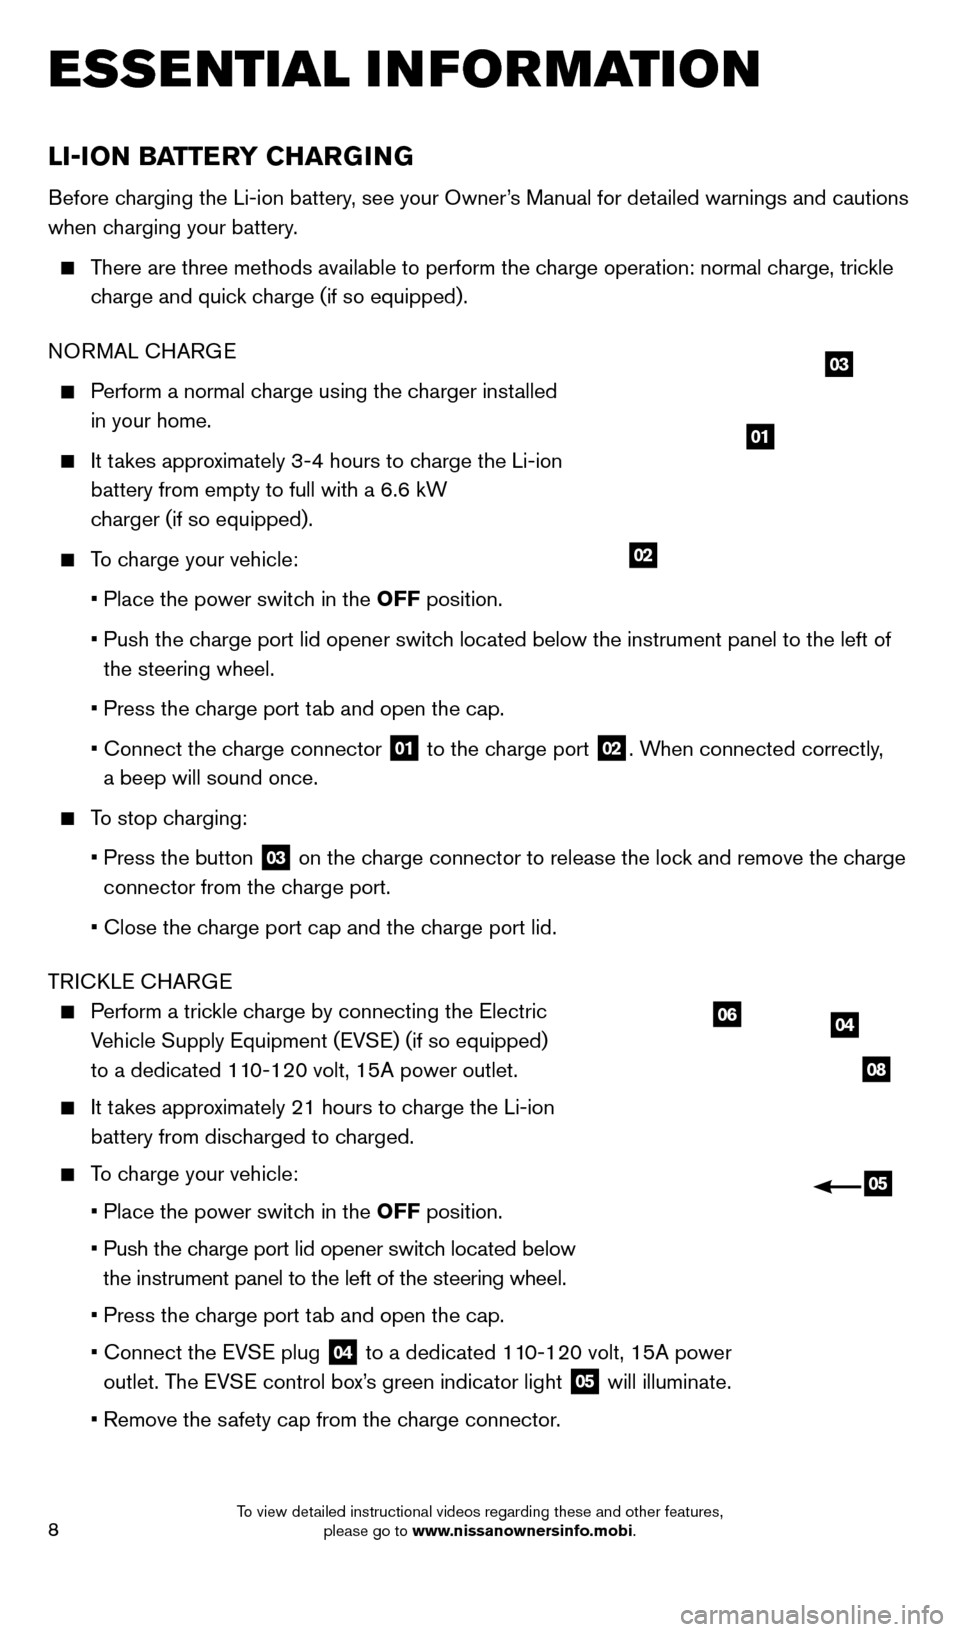
• Connect the c
harge connector
01 to the charge port
02. When connected correctly,
a beep will sound once.
To stop charging:
• Press the button
03 on the charge connector to release the lock and remove the charge
connector from the charge port.
• Close the c
harge port cap and the charge port lid.
TRICKLE CHARGE
Perform a trickle charge by connecting the Electric Vehicle Supply Equipment (EVSE) (if so equipped)
to a dedicated 110-120 volt, 15A power outlet.
It takes approximately 21 hours to charge the Li-ion battery from discharged to charged.
To charge your vehicle:
•
Place the power switc
h in the OFF position.
•
Push the c
harge port lid opener switch located below
the instrument panel to the left of the steering wheel.
•
Press the c
harge port tab and open the cap.
•
Connect the EV
SE plug
04 to a dedicated 110-120 volt, 15A power
outlet. The EVSE control box’s green indicator light 05 will illuminate.
•
Remove the s
afety cap from the charge connector.
04
08
06
05
01
02
03
ESSE NTIAL I N FOR MATION
1700496_14b_Leaf_QRG_021114.indd 82/11/14 3:48 PM
To view detailed instructional videos regarding these and other features, please go to www.nissanownersinfo.mobi.
Page 11 of 27
9
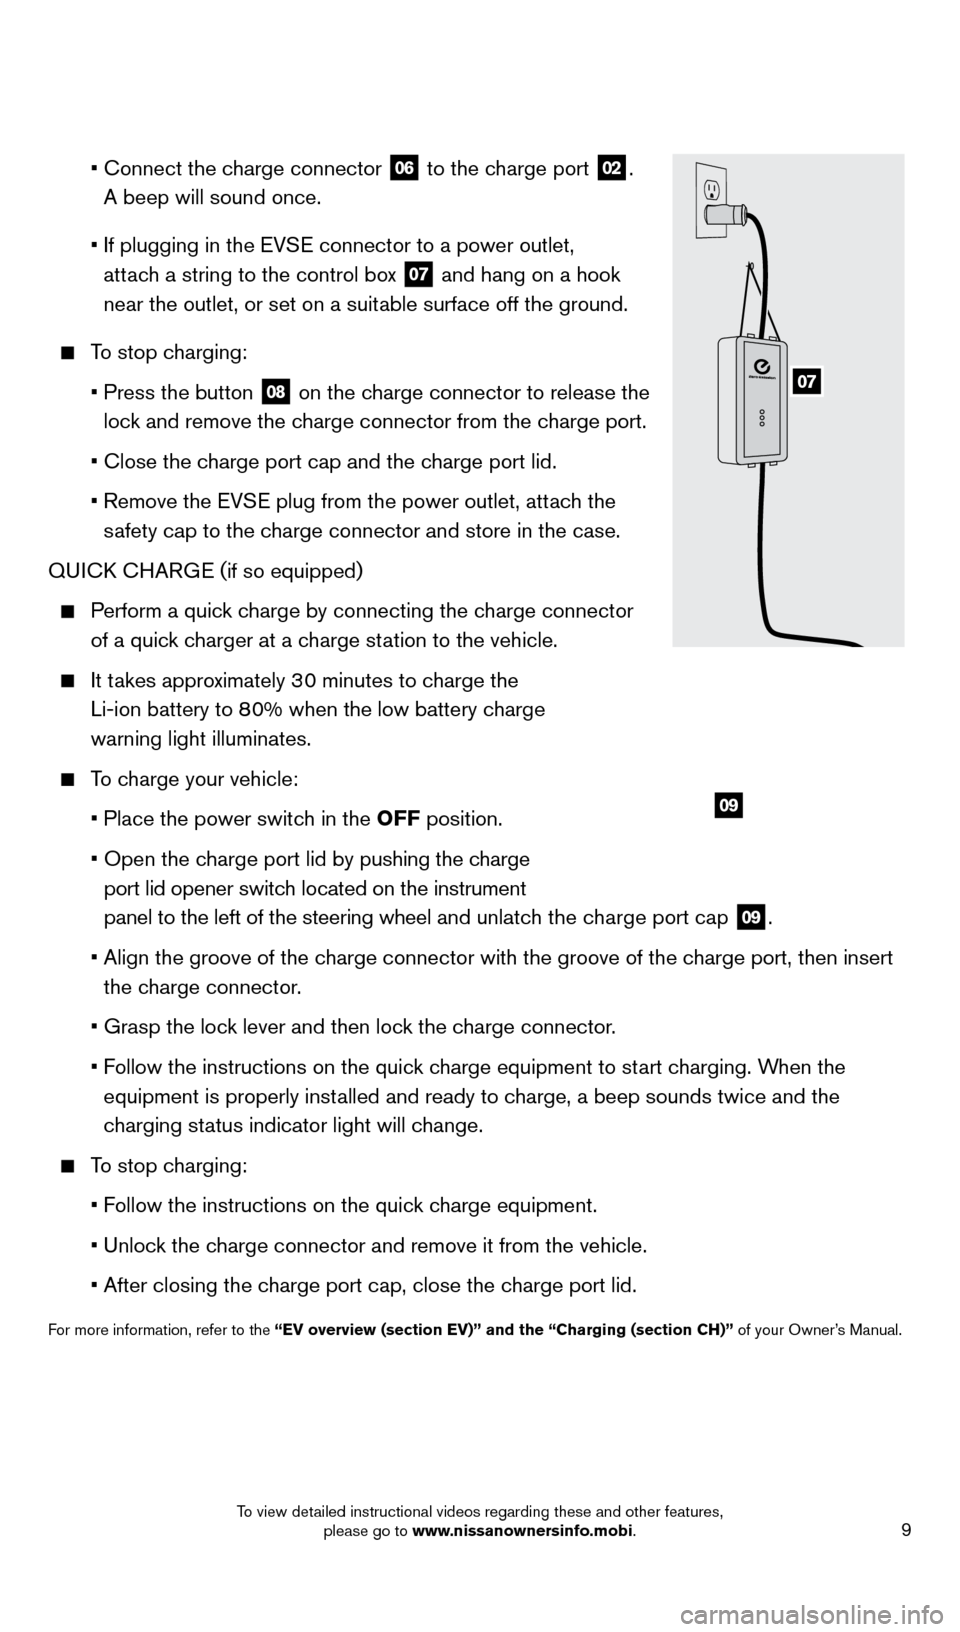
• Connect the c harge connector
06 to the charge port
02.
A beep will sound once.
•
If plugging in the EV
SE connector to a power outlet,
attach a string to the control box
07 and hang on a hook
near the outlet, or set on a suitable surface off the ground.
To stop charging:
•
Press the button 08 on the charge connector to release the
lock and remove the charge connector from the charge port.
•
Close the c
harge port cap and the charge port lid.
• Remove the EV
SE plug from the power outlet, attach the
safety cap to the charge connector and store in the case.
QUICK CHARGE (if so equipped)
Perform a quick charge by connecting the charge connector of a quick charger at a charge station to the vehicle.
It takes approximately 30 minutes to charge the
Li-ion battery to 80% when the low battery charge
warning light illuminates.
To charge your vehicle:
•
Place the power switc
h in the OFF position.
•
Open the c
harge port lid by pushing the charge
port lid opener switch located on the instrument
panel to the left of the steering wheel and unlatch the charge port cap
09.
•
Align the groove of the c
harge connector with the groove of the charge port, then insert
the charge connector.
• Grasp the loc
k lever and then lock the charge connector.
• F
ollow the instructions on the quick charge equipment to start charging. When the
equipment is properly installed and ready to charge, a beep sounds twice and the
charging status indicator light will change.
To stop charging:
•
F
ollow the instructions on the quick charge equipment.
•
Unloc
k the charge connector and remove it from the vehicle.
•
After closing the c
harge port cap, close the charge port lid.
For more information, refer to the “EV overview (section EV)” and the “Charging (section CH)”\
of your Owner’s Manual.
09
07
1700496_14b_Leaf_QRG_021114.indd 92/11/14 3:48 PM
To view detailed instructional videos regarding these and other features, please go to www.nissanownersinfo.mobi.
Page 12 of 27
10
CLOCK SET/ADJUSTMENT
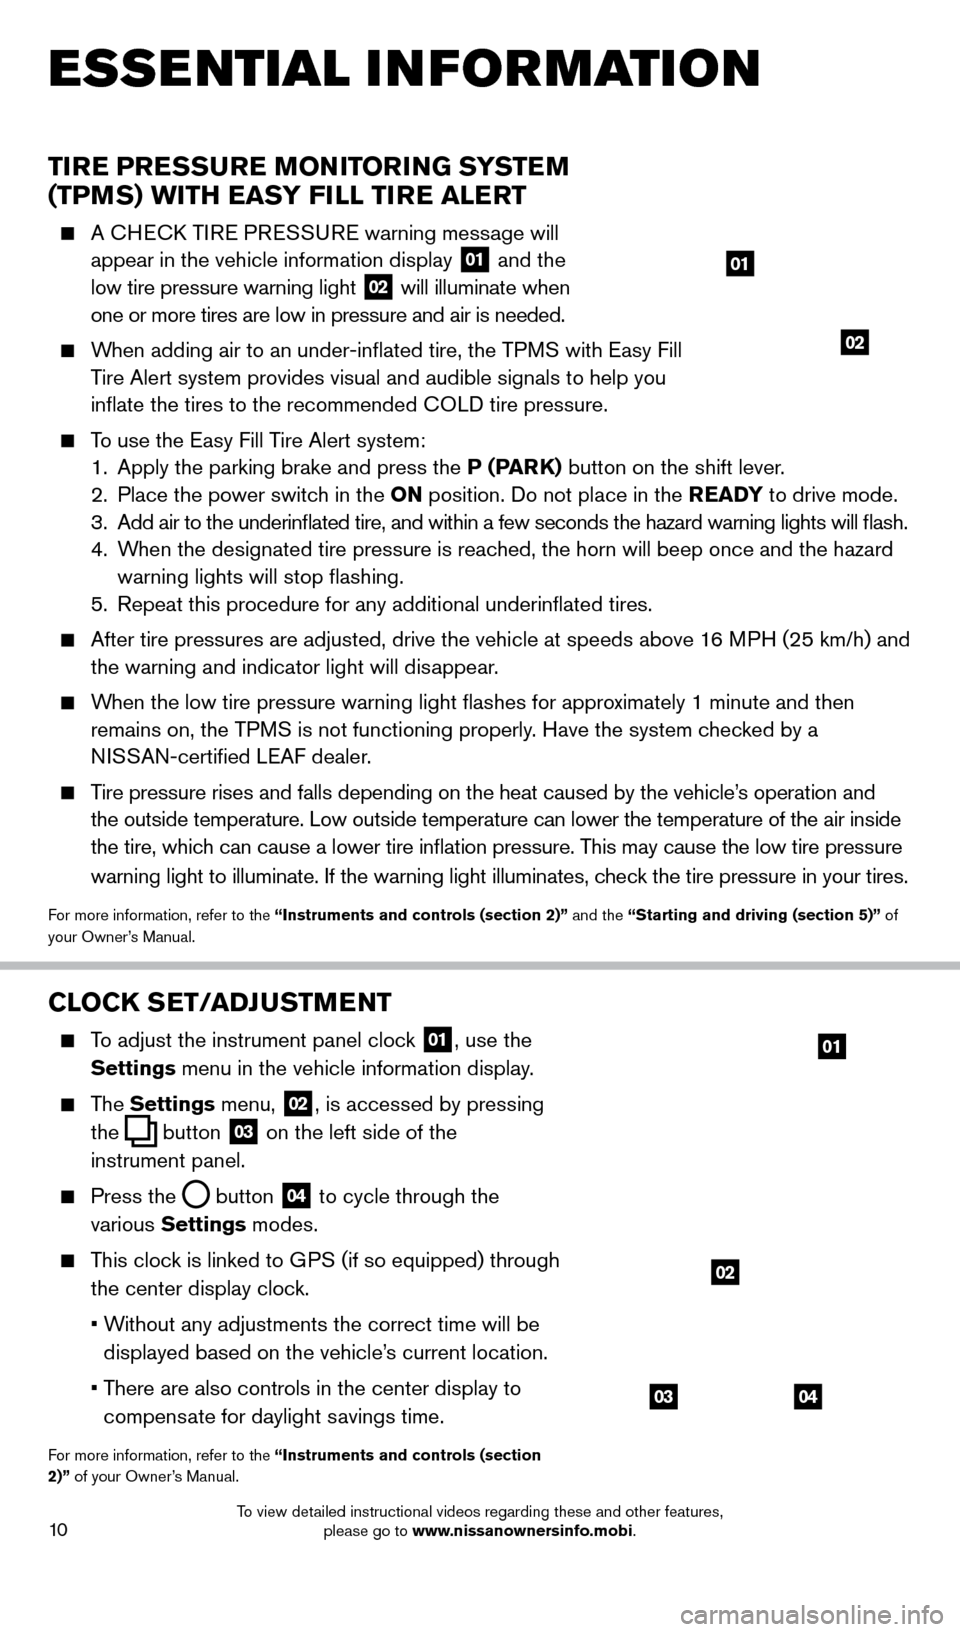
To adjust the instrument panel clock 01, use the
Settings menu in the vehicle information display.
The Settings menu, 02, is accessed by pressing
the
button
03 on the left side of the
instrument panel.
Press the button
04 to cycle through the
various Settings modes.
This clock is linked to GPS (if so equipped) through the center display clock.
•
W
ithout any adjustments the correct time will be
displayed based on the vehicle’s current location.
•
T
here are also controls in the center display to
compensate for daylight savings time.
For more information, refer to the “Instruments and controls (section
2)” of your Owner’s Manual.
0403
02
01
ESSE NTIAL I N FOR MATION
TIRE PRESSURE MONITORING SYSTEM
(TPMS) WITH EASY FILL TIRE ALERT
A CHECK TIRE PRESSURE warning message will appear in the vehicle information display 01 and the
low tire pressure warning light 02 will illuminate when
one or more tires are low in pressure and air is needed.
When adding air to an under-inflated tire, the TPMS with Easy Fill Tire Alert system provides visual and audible signals to help you
inflate the tires to the recommended COLD tire pressure.
To use the Easy Fill Tire Alert system:
1.
Apply the parking brake and press the
P (PARK) button on the shift lever.
2.
Place the power switc
h in the ON position. Do not place in the READY to drive mode.
3
.
Add air to the underinflated tire, and within a few seconds the hazard\
warning lights will flash.
4.
W
hen the designated tire pressure is reached, the horn will beep once and the hazard
warning lights will stop flashing.
5.
Repeat this procedure for any additional underinflated tires.
After tire pressures are adjusted, drive the vehicle at speeds above 1 6 MPH (25 km/h) and
the warning and indicator light will disappear.
When the low tire pressure warning light flashes for approximately 1 minute and then remains on, the TPMS is not functioning properly. Have the system checked by a
NISSAN-certified LEAF dealer.
Tire pressure rises and falls depending on the heat caused by the vehicle\
’s operation and the outside temperature. Low outside temperature can lower the temperatu\
re of the air inside
the tire, which can cause a lower tire inflation pressure. This may cause the low tire pressure
warning light to illuminate. If the warning light illuminates, check the tire pressure in your tires.
For more information, refer to the “Instruments and controls (section 2)” and the “Starting and driving (section 5)” of
your Owner’s Manual.
01
02
1700496_14b_Leaf_QRG_021114.indd 102/11/14 3:48 PM
To view detailed instructional videos regarding these and other features, please go to www.nissanownersinfo.mobi.
Page 15 of 27
13
POWER METER
The Power Meter displays the traction motor power
consumption and the regenerative brake power
applied to the Li-ion battery.
When the battery is charged, power is generated by
the regenerative brake system and the central dot
moves to the left.
When the battery discharges and power is provided to the motor, the central dot moves to
the right.
The number of circles will increase or decrease depending on Li-ion batte\
ry conditions
(motor output is limited if the Li-ion battery temperature is too high \
or too low or if the
Li-ion battery level is low).
For more information, refer to the “Instruments and controls (section 2)” of your Owner’s Manual.
ELECTRIC VEHICLE (EV) SYSTEM WARNING LIGHT
The warning light will illuminate if there is a
malfunction in the following systems:
• T
raction motor and inverter system
• Charge port or on-board c
harger
• Li-ion battery system
• Cooling system
• Shift control system
• Emergency shut-off system is activated.
If the warning light illuminates, cont act a NISSAN-certified LEAF dealer.
For more information, refer to the “Instruments and controls (section 2)” of your Owner’s Manual.
1700496_14b_Leaf_QRG_021114.indd 132/11/14 3:48 PM
To view detailed instructional videos regarding these and other features, please go to www.nissanownersinfo.mobi.
Page 21 of 27
19
TRIP COMPUTER
The Trip Computer 01 is located in the vehicle
information display.
With the power switch in the ON position, trip
computer modes can be selected by pressing
the
button
02 on the left side of the
instrument panel.
The following modes can be selected in the display:
• T
o 100% Charge – Displays the estimated time
to a full Li-ion charge by using either 120 volts or
240 volts.
• Energy Economy
– Displays the average and
instant energy economy.
• A
verage Speed – Displays the average vehicle
speed since the last reset.
• Driving Distance and Elapsed T
ime – Displays
the total distance the vehicle has been driven and
the time since the last reset.
•
SOC% – Displays the vehicle’s current state of charge.
• Settings
– Allows you to adjust the system settings for features such as the clock,
reminders or preferences for alerts, maintenance intervals and language \
displays.
· Press the button
03 to cycle through the various setting modes.
· Press the button
02 to choose the selected mode.
•
W
arning – Displays when a warning message is present.
To reset Average Energy Economy, Average Speed, Driving Distance and Elapsed
Time, go to that mode on the trip computer and hold the
button 03 for longer than
1 second.
For more information, refer to the “Instruments and controls (section 2)” of your Owner’s Manual.
0302
01
SYSTEM GUIDE
1700496_14b_Leaf_QRG_021114.indd 192/11/14 3:48 PM
To view detailed instructional videos regarding these and other features, please go to www.nissanownersinfo.mobi.