2014 NISSAN JUKE check oil
[x] Cancel search: check oilPage 89 of 402
2-14Instruments and controls
.Pressing the brake pedal with the
engine stopped and/or low brake
fluid level may increase your stop-
ping distance and braking will re-
quire greater pedal effort as well as
pedal travel.
. If the brake fluid level is below the
minimum or MIN mark on the brake
fluid reservoir, do not drive until the
brake system has been checked at a
NISSAN dealer.
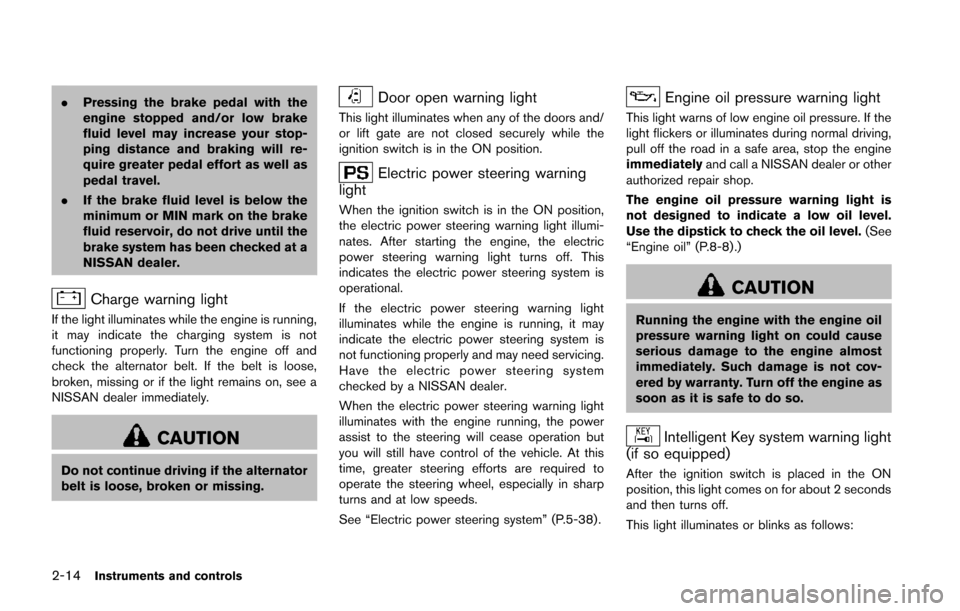
Charge warning light
If the light illuminates while the engine is running,
it may indicate the charging system is not
functioning properly. Turn the engine off and
check the alternator belt. If the belt is loose,
broken, missing or if the light remains on, see a
NISSAN dealer immediately.
CAUTION
Do not continue driving if the alternator
belt is loose, broken or missing.
Door open warning light
This light illuminates when any of the doors and/
or lift gate are not closed securely while the
ignition switch is in the ON position.
Electric power steering warning
light
When the ignition switch is in the ON position,
the electric power steering warning light illumi-
nates. After starting the engine, the electric
power steering warning light turns off. This
indicates the electric power steering system is
operational.
If the electric power steering warning light
illuminates while the engine is running, it may
indicate the electric power steering system is
not functioning properly and may need servicing.
Have the electric power steering system
checked by a NISSAN dealer.
When the electric power steering warning light
illuminates with the engine running, the power
assist to the steering will cease operation but
you will still have control of the vehicle. At this
time, greater steering efforts are required to
operate the steering wheel, especially in sharp
turns and at low speeds.
See “Electric power steering system” (P.5-38) .
Engine oil pressure warning light
This light warns of low engine oil pressure. If the
light flickers or illuminates during normal driving,
pull off the road in a safe area, stop the engine
immediately and call a NISSAN dealer or other
authorized repair shop.
The engine oil pressure warning light is
not designed to indicate a low oil level.
Use the dipstick to check the oil level. (See
“Engine oil” (P.8-8).)
CAUTION
Running the engine with the engine oil
pressure warning light on could cause
serious damage to the engine almost
immediately. Such damage is not cov-
ered by warranty. Turn off the engine as
soon as it is safe to do so.
Intelligent Key system warning light
(if so equipped)
After the ignition switch is placed in the ON
position, this light comes on for about 2 seconds
and then turns off.
This light illuminates or blinks as follows:
Page 147 of 402
3-20Pre-driving checks and adjustments
WARNING
.Always be sure the lift gate has
been closed securely to prevent it
from opening while driving.
. Do not drive with the lift gate open.
This could allow dangerous exhaust
gases to be drawn into the vehicle.
See “Exhaust gas (carbon monox-
ide)” (P.5-3) of this manual.
. Do not leave children unattended
inside the vehicle. They could un-
knowingly activate switches or con-
trols. Unattended children could
become involved in serious acci-
dents.
. Make sure that all passengers have
their hands, etc. inside the vehicle
before closing the lift gate.
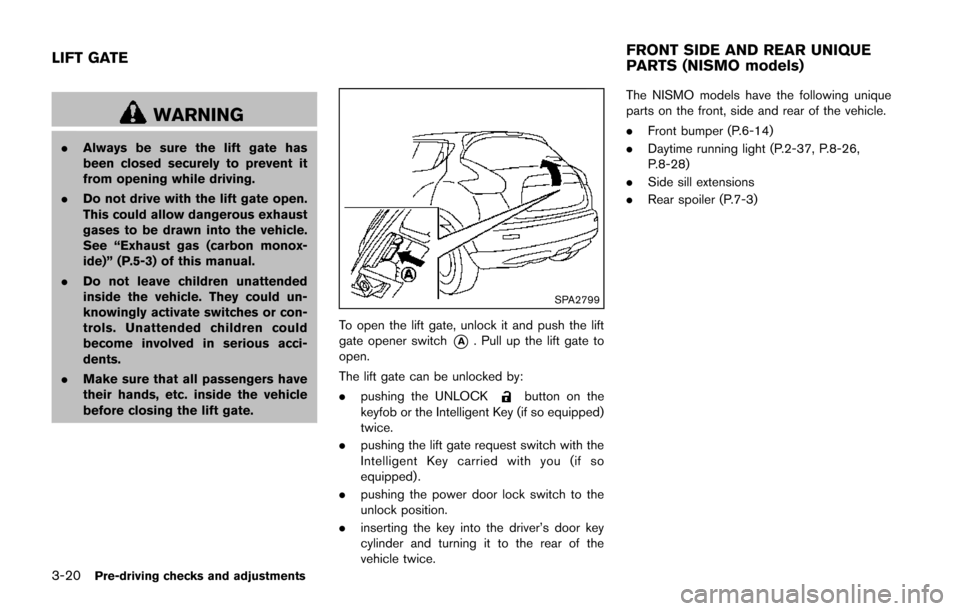
SPA2799
To open the lift gate, unlock it and push the lift
gate opener switch
*A. Pull up the lift gate to
open.
The lift gate can be unlocked by:
. pushing the UNLOCK
button on the
keyfob or the Intelligent Key (if so equipped)
twice.
. pushing the lift gate request switch with the
Intelligent Key carried with you (if so
equipped) .
. pushing the power door lock switch to the
unlock position.
. inserting the key into the driver’s door key
cylinder and turning it to the rear of the
vehicle twice. The NISMO models have the following unique
parts on the front, side and rear of the vehicle.
.
Front bumper (P.6-14)
. Daytime running light (P.2-37, P.8-26,
P.8-28)
. Side sill extensions
. Rear spoiler (P.7-3)
LIFT GATE FRONT SIDE AND REAR UNIQUE
PARTS (NISMO models)
Page 268 of 402
4. Push the ignition switch while depressingthe brake pedal within 10 seconds after the
chime sounds. The engine will start.
After step 3 is performed, when the ignition
switch is pushed without depressing the brake
pedal, the ignition switch position will change to
ACC.
NOTE:
. When the ignition switch is pushed to
the ACC or ON position or the engine is
started by the above procedures, the
Intelligent Key system warning light
may blink in yellow even if the Intelli-
gent Key is inside the vehicle. This is
not a malfunction. To stop the warning
light from blinking, touch the ignition
switch with the Intelligent Key again.
. If the Intelligent Key system warning
light in the meter is blinking in green,
replace the battery as soon as possible.
(See “Key battery replacement” (P.8-
22) .) .
Make sure the area around the vehicle is
clear.
. Check fluid levels such as engine oil, cool-
ant, brake fluid, and window washer fluid as
frequently as possible, or at least whenever
you refuel.
. Check that all windows and lights are clean.
. Visually inspect tires for their appearance
and condition. Also check tires for proper
inflation.
. Lock all doors.
. Position seat and adjust head restraints.
. Adjust inside and outside mirrors.
. Fasten seat belts and ask all passengers to
do likewise.
. Check the operation of warning lights when
the ignition switch is placed in the ON
position. (See “Warning/indicator lights and
audible reminders” (P.2-12) .)MODELS WITHOUT INTELLIGENT KEY
SYSTEM
1. Apply the parking brake.
2.Continuously Variable Transmission
(CVT) models:
Move the shift lever to the P (Park) or N
(Neutral) position. (P is recommended.)
The starter is designed so that it does not
operate unless the shift lever is in either of
the above positions.
Manual Transmission (MT) models:
Move the shift lever to the N (Neutral)
position. Depress the clutch pedal fully to
the floor.
The starter is designed not to operate unless
the clutch pedal is fully depressed.
3. Crank the engine with your foot off the
accelerator pedal by turning the ignition
switch to START. Release the switch when
the engine starts. If the engine starts, but
fails to run, repeat the above procedure.
.If the engine is very hard to start in
extremely cold weather or when restart-
ing, depress the accelerator pedal a little
(approximately 1/3 to the floor) and hold
it and then crank the engine. Release the
accelerator pedal when the engine starts.
Starting and driving5-15
BEFORE STARTING THE ENGINE STARTING THE ENGINE
Page 289 of 402
5-36Starting and driving
warning light will either remain illuminated or
blink.
High-temperature power train oil due to con-
tinuous operation of the vehicle to free a stuck
vehicle makes the warning light blink rapidly
(about twice per second) . The driving mode may
change to the 2WD mode. If the warning light
blinks rapidly during operation, stop the vehicle
with the engine idling in a safe place immedi-
ately. Then if the light goes off after a while, you
can continue driving.
A large difference between the diameters of
front and rear wheels will make the warning light
blink slowly (about once per 2 seconds) . Pull off
the road in a safe area, and idle the engine.
Check that all tire sizes are the same, tire
pressure is correct and tires are not worn.
Change the AWD mode switch to the 2WD
mode and do not drive fast.
CAUTION
.If the warning light illuminates while
driving, AWD mode will be changed
to 2WD mode. Reduce the vehicle
speed and have your vehicle
checked by a NISSAN dealer as
soon as possible. Be especially
careful when driving. .
The power train may be damaged if
you continue driving with the AWD
warning light blinking rapidly.
Page 304 of 402
SCE0933
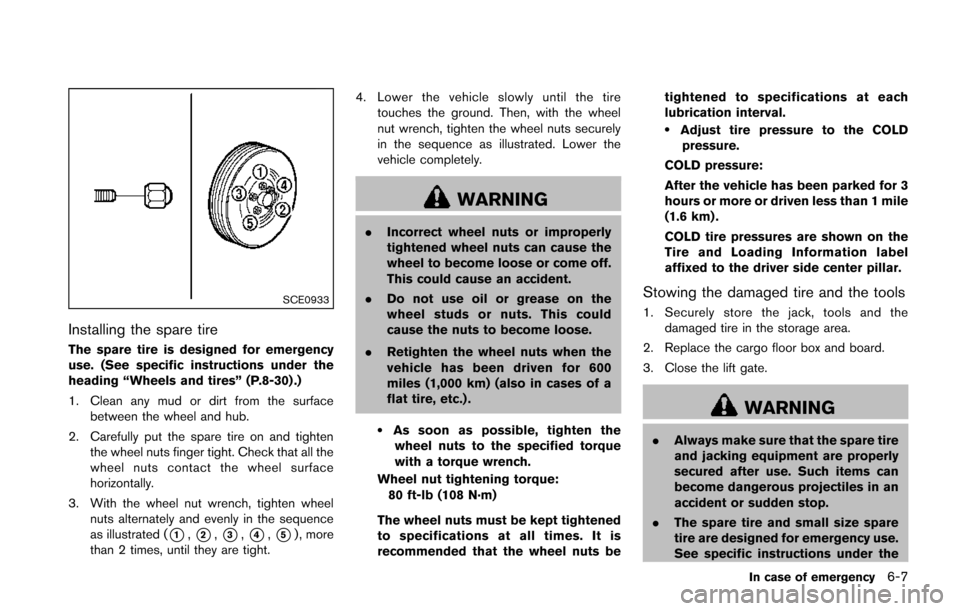
Installing the spare tire
The spare tire is designed for emergency
use. (See specific instructions under the
heading “Wheels and tires” (P.8-30) .)
1. Clean any mud or dirt from the surfacebetween the wheel and hub.
2. Carefully put the spare tire on and tighten the wheel nuts finger tight. Check that all the
wheel nuts contact the wheel surface
horizontally.
3. With the wheel nut wrench, tighten wheel nuts alternately and evenly in the sequence
as illustrated (
*1,*2,*3,*4,*5) , more
than 2 times, until they are tight. 4. Lower the vehicle slowly until the tire
touches the ground. Then, with the wheel
nut wrench, tighten the wheel nuts securely
in the sequence as illustrated. Lower the
vehicle completely.
WARNING
.Incorrect wheel nuts or improperly
tightened wheel nuts can cause the
wheel to become loose or come off.
This could cause an accident.
. Do not use oil or grease on the
wheel studs or nuts. This could
cause the nuts to become loose.
. Retighten the wheel nuts when the
vehicle has been driven for 600
miles (1,000 km) (also in cases of a
flat tire, etc.) .
.As soon as possible, tighten the
wheel nuts to the specified torque
with a torque wrench.
Wheel nut tightening torque: 80 ft-lb (108 N·m)
The wheel nuts must be kept tightened
to specifications at all times. It is
recommended that the wheel nuts be tightened to specifications at each
lubrication interval.
.Adjust tire pressure to the COLD
pressure.
COLD pressure:
After the vehicle has been parked for 3
hours or more or driven less than 1 mile
(1.6 km) .
COLD tire pressures are shown on the
Tire and Loading Information label
affixed to the driver side center pillar.
Stowing the damaged tire and the tools
1. Securely store the jack, tools and the damaged tire in the storage area.
2. Replace the cargo floor box and board.
3. Close the lift gate.
WARNING
. Always make sure that the spare tire
and jacking equipment are properly
secured after use. Such items can
become dangerous projectiles in an
accident or sudden stop.
. The spare tire and small size spare
tire are designed for emergency use.
See specific instructions under the
In case of emergency6-7
Page 316 of 402
JVA0014X
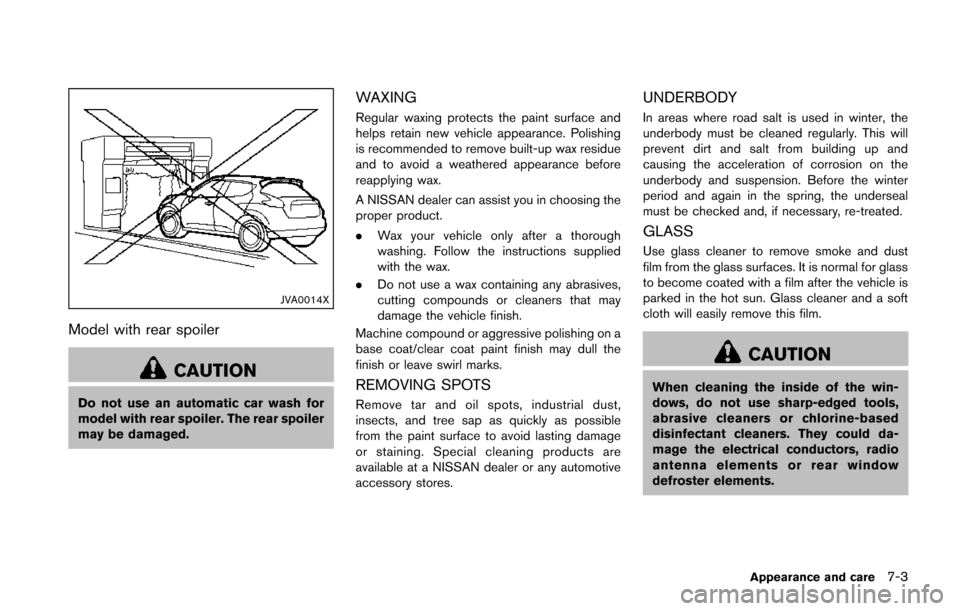
Model with rear spoiler
CAUTION
Do not use an automatic car wash for
model with rear spoiler. The rear spoiler
may be damaged.
WAXING
Regular waxing protects the paint surface and
helps retain new vehicle appearance. Polishing
is recommended to remove built-up wax residue
and to avoid a weathered appearance before
reapplying wax.
A NISSAN dealer can assist you in choosing the
proper product.
.Wax your vehicle only after a thorough
washing. Follow the instructions supplied
with the wax.
. Do not use a wax containing any abrasives,
cutting compounds or cleaners that may
damage the vehicle finish.
Machine compound or aggressive polishing on a
base coat/clear coat paint finish may dull the
finish or leave swirl marks.
REMOVING SPOTS
Remove tar and oil spots, industrial dust,
insects, and tree sap as quickly as possible
from the paint surface to avoid lasting damage
or staining. Special cleaning products are
available at a NISSAN dealer or any automotive
accessory stores.
UNDERBODY
In areas where road salt is used in winter, the
underbody must be cleaned regularly. This will
prevent dirt and salt from building up and
causing the acceleration of corrosion on the
underbody and suspension. Before the winter
period and again in the spring, the underseal
must be checked and, if necessary, re-treated.
GLASS
Use glass cleaner to remove smoke and dust
film from the glass surfaces. It is normal for glass
to become coated with a film after the vehicle is
parked in the hot sun. Glass cleaner and a soft
cloth will easily remove this film.
CAUTION
When cleaning the inside of the win-
dows, do not use sharp-edged tools,
abrasive cleaners or chlorine-based
disinfectant cleaners. They could da-
mage the electrical conductors, radio
antenna elements or rear window
defroster elements.
Appearance and care7-3
Page 322 of 402
8 Maintenance and do-it-yourself
Maintenance requirement ........................................................ 8-2Scheduled maintenance .................................................... 8-2
General maintenance ......................................................... 8-2
Where to go for service .................................................... 8-2
General maintenance ............................................................... 8-2 Explanation of maintenance items ................................... 8-2
Maintenance precautions ........................................................ 8-5
Engine compartment check locations .................................. 8-6 MR16DDT engine ............................................................... 8-6
Engine cooling system ............................................................. 8-7
Checking engine coolant level ......................................... 8-8
Changing engine coolant .................................................. 8-8
Engine oil ........................................................................\
............ 8-8
Checking engine oil level .................................................. 8-8
Changing engine oil and filter .......................................... 8-9
Continuously Variable Transmission (CVT) fluid ............ 8-11
Brake and clutch (if so equipped) fluid ............................ 8-11
Window washer fluid ............................................................ 8-12
Battery ........................................................................\
............... 8-13 Jump starting ..................................................................... 8-14
Variable voltage control system .......................................... 8-14
Drive belt ........................................................................\
.......... 8-15
Spark plugs ........................................................................\
..... 8-15 Replacing spark plugs .................................................... 8-16 Air cleaner ........................................................................\
....... 8-16
Windshield wiper blades ..................................................... 8-17
Cleaning ........................................................................\
... 8-17
Replacing ........................................................................\
. 8-17
Rear window wiper blade ................................................... 8-18
Brakes ........................................................................\
.............. 8-18
Self-adjusting brakes .................................................... 8-18
Brake pad wear warning .............................................. 8-18
Fuses ........................................................................\
................ 8-19 Engine compartment ..................................................... 8-19
Passenger compartment .............................................. 8-21
Key battery replacement ...................................................... 8-22 Keyfob ........................................................................\
....... 8-23
Intelligent Key .................................................................. 8-24
Lights ........................................................................\
................ 8-26 Headlights ........................................................................\
8-27
Exterior and interior lights ............................................ 8-28
Wheels and tires ................................................................... 8-30 Tire pressure ................................................................... 8-30
Tire labeling ..................................................................... 8-35
Types of tires ................................................................... 8-37
Tire chains ....................................................................... 8-38
Changing wheels and tires .......................................... 8-39
Page 325 of 402
8-4Maintenance and do-it-yourself
comes out of the defroster outlets properly and
in sufficient quantity when operating the heater
or air conditioner.
Windshield wiper and washer*:Check that
the wipers and washers operate properly and
that the wipers do not streak.
Under the hood and vehicle
The maintenance items listed here should be
checked periodically (for example, each time you
check the engine oil or refuel) .
Battery*: Check the fluid level in each cell.
It should be between the MAX and MIN lines.
Vehicles operated in high temperatures or under
severe condition require frequent checks of the
battery fluid level.
NOTE:
Care should be taken to avoid situations
that can lead to potential battery discharge
and potential no-start conditions such as:
1. Installation or extended use of electro-
nic accessories that consume battery
power when the engine is not running
(Phone chargers, GPS, DVD players,
etc.)
2. Vehicle is not driven regularly and/or
only driven short distances.
In these cases, the battery may need to be charged to maintain battery health.
Brake and clutch fluid level*:
Make sure that
the brake and clutch fluid level is between the
MAX and MIN lines on the reservoir.
Engine coolant level*: Check the coolant level
when the engine is cold.
Engine drive belt*: Make sure that the drive
belt is not frayed, worn, cracked or oily.
Engine oil level*: Check the level after parking
the vehicle on a level surface and turning off the
engine. Wait more than 10 minutes for the oil to
drain back into the oil pan.
Exhaust system: Make sure there are no loose
supports, cracks or holes. If the sound of the
exhaust seems unusual or there is a smell of
exhaust fumes, immediately have the exhaust
system inspected by a NISSAN dealer. (See
“Precautions when starting and driving” (P.5-3)
for exhaust gas (carbon monoxide) .)
Fluid leaks: Check under the vehicle for fuel,
oil, water or other fluid leaks after the vehicle has
been parked for a while. Water dripping from the
air conditioner after use is normal. If you should
notice any leaks or if gasoline fumes are evident,
check for the cause and have it corrected
immediately.
Radiator and hoses: Check the front of the
radiator and clean off any dirt, insects, leaves, etc., that may have accumulated. Make sure the
hoses have no cracks, deformation, rot or loose
connections.
Underbody:
The underbody is frequently ex-
posed to corrosive substances such as those
used on icy roads or to control dust. It is very
important to remove these substances, other-
wise rust will form on the floor pan, frame, fuel
lines and around the exhaust system. At the end
of winter, the underbody should be thoroughly
flushed with plain water, being careful to clean
those areas where mud and dirt may accumu-
late. For additional information, see “Cleaning
exterior” (P.7-2).
Windshield washer fluid*: Check that there is
adequate fluid in the reservoir.