Page 74 of 226

74 Change Address Book Information
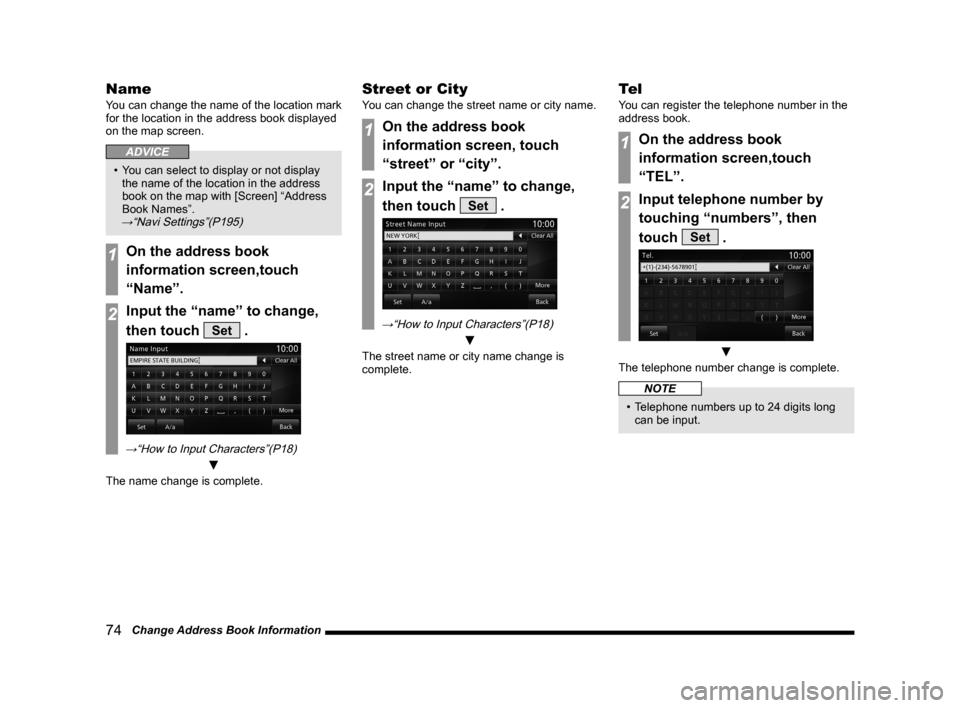
Name
You can change the name of the location mark
for the location in the address book displayed
on the map screen.
ADVICE
• You can select to display or not display
the name of the location in the address
book on the map with [Screen] “Address
Book Names”.
→“Navi Settings”(P195)
1On the address book
information screen,touch
“Name”.
2Input the “name” to change,
then touch
Set .
→“How to Input Characters”(P18)
▼
The name change is complete.
Street or City
You can change the street name or city name.
1On the address book
information screen, touch
“street” or “city”.
2Input the “name” to change,
then touch
Set .
→“How to Input Characters”(P18)
▼
The street name or city name change is
complete.
Te l
You can register the telephone number in the
address book.
1On the address book
information screen,touch
“TEL”.
2Input telephone number by
touching “numbers”, then
touch
Set .
▼
The telephone number change is complete.
NOTE
• Telephone numbers up to 24 digits long
can be input.
Page 75 of 226
RTT 75
NAVI RTT
RTT
RTT
You can use the real-time traffic message.
DRG (Dynamic Route
Guidance)
When the RTT messages or traffic rule
information is detected, the best route
is calculated automatically based on the
detected information and guidance is
provided.
→ “Select the DRG route” (P65)
ADVICE
• It is necessary to set the [RTT Options]
“Dynamic Route Guidance” to [On].→
“Navi Settings” (P195)
RTT Sur veillance Map
RTT is a service that provides traffic message
using FM HD Radio signal (FM Radio waves).
Areas can be registered to check the traffic
rules and traffic messages of the registered
area.
→ “Registering the RTT Surveillance Map” (P78)
RTT Switches
You can receive or check traffic messages.
1On the current location screen,
touch
RTT .
▼
This displays RTT messages with RTT Event
Icons.
ADVICE
• If a broadcast station is not received, the
below screen is displayed.
In this case, touch [Yes].
If a station is found, the following screen
is displayed.
Page 76 of 226
![MITSUBISHI LANCER 2014 8.G MMCS Manual 76 RTT
RTT Event Icons
Each traffic message is displayed with the
following marks on the map.
ADVICE
• Whether or not to display “RTT Event
Icons” can be selected with [RTT] → [RTT
Icons MITSUBISHI LANCER 2014 8.G MMCS Manual 76 RTT
RTT Event Icons
Each traffic message is displayed with the
following marks on the map.
ADVICE
• Whether or not to display “RTT Event
Icons” can be selected with [RTT] → [RTT
Icons](/manual-img/19/7458/w960_7458-75.png)
76 RTT
RTT Event Icons
Each traffic message is displayed with the
following marks on the map.
ADVICE
• Whether or not to display “RTT Event
Icons” can be selected with [RTT] → [RTT
Icons on Map].
→ “RTT Icons on Map” (P199)
Traffic
Closed/BlockedContra flow
AccidentDiversion
Congestion*1Narrow Road
Road WorkSlippery Road
Other
Other HazardsParking Information
Information*1
Traffic Congestion Information
Red Road closures
Traffic jams
Orange Congestion
Cyan Favorable route
*2
*1 This is displayed when [RTT] is touched and there is an
icon to display.
*2 This may not be displayed depending on the region.
1) Traffic Congestion Information
Traffic congestion (red line), crowded
(orange line), and no traffic (cyan line) is
displayed with lines to check the traffic
congestion information.
The favorable route (Cyan line) may not
be displayed depending on the region.
2) Traffic rule information
Allows you to check the road closures and
lane regulations with RTT Event Icons. 3) Traffic *
Only Traffic icons can be displayed.
4)
Other *
Only Other icons can be displayed.
* This is not displayed when there are no icons to display.
Display Contents
This section explains the RTT messages displayed on the map.
1)
2) 4)
3)
Page 77 of 226
Checking the RTT Traffic Messages 77
NAVIRTT
Checking the RTT
Traffic Messages
You can check the traffic messages using
R T T.
1On the current location screen,
touch
RTT .
2Touch the “RTT Event Icons” to
check.
ADVICE
• When “RTT Event Icons” are displayed
overlapped, a list is displayed to select
the icon.
▼
This displays the traffic message screen.
ADVICE
• You can check the previous and next
information by touching or .
• Touching [Map] displays a map of the
surroundings.
Page 79 of 226
Basic Operation 79
AV Audio Functions
AV
The following explains audio function operations.
Audio Functions
Basic Operation
NOTE
• The album names, titles, etc. in the title
information in pictures used with the
audio functions and related functions
of this manual were prepared for these
explanations. They have no relationship
whatsoever with actual title information.
Switch Audio ON/OFF
You can switch the audio function ON/OFF.
ADVICE
• Hold down the steering [MODE] key to
also turn the audio function ON/OFF.
1Press the PWR/VOL key.
▼
This switches the audio function OFF.
2Press the PWR/VOL key.
▼
The audio function comes ON.
Adjust Volume
Adjust the audio function volume.
1During audio play, turn the
PWR/VOL key counter-
clockwise.
▼
Volume display
The volume is lowered.
2Turn the PWR/VOL key
clockwise.
▼
The volume is raised.
Page 81 of 226
Basic Operation 81
AV Audio Functions
Forcing Disc Ejection
Usually, when the disc loading ends normally,
the inserted disc can be ejected with the
method in the
“Ejecting the Disc”, but if disc
loading fails and the playback information
screen can be displayed, you can forcibly
eject the disc with the following method.
1To start this product,
hold down the
OPEN key.
▼
The disc is forcibly ejected from this product.
AV Icons
During audio playback, an icon is displayed
on the navigation screen as below in order to
show the audio source being played back.
AV Icon
Icon Audio source
Audio OFF state
Radio (Example: FM)
Disc (Example: MP3)
Audio file on SD card (Example: MP3)
iPod/iPhone
Audio file on USB memory (Example:
MP3)
Bluetooth Audio
AUX
ADVICE
• Touching AV icon displays the audio
source screen being played back.
Page 84 of 226

84 Handling of Discs
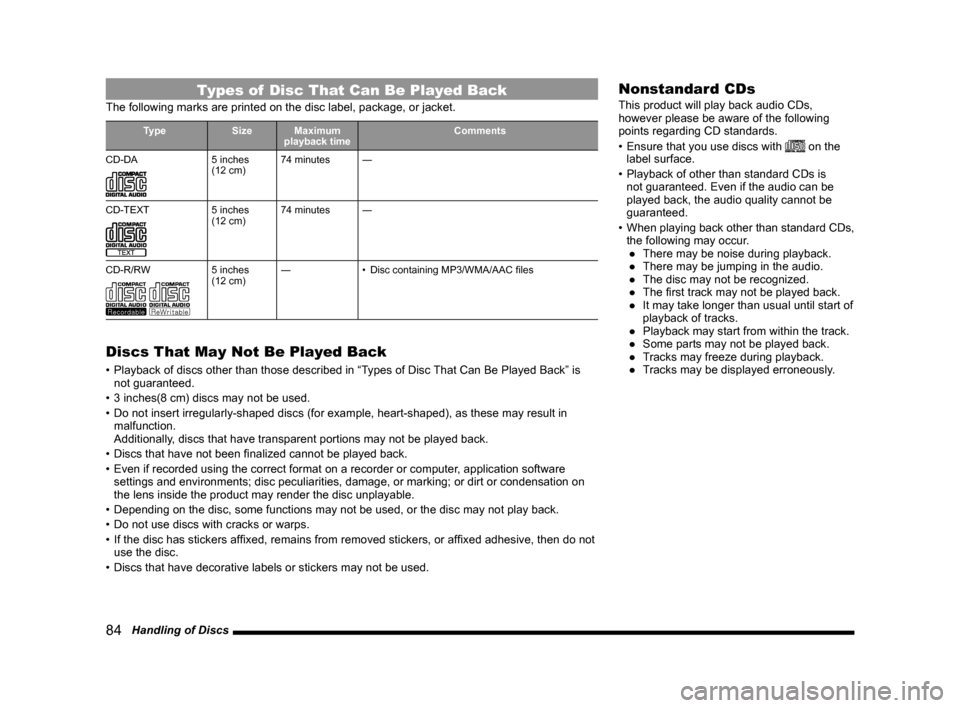
Types of Disc That Can Be Played Back
The following marks are printed on the disc label, package, or jacket.
Type SizeMaximum
playback time Comments
CD-DA
5 inches
(12 cm) 74 minutes
―
CD-TEXT
5 inches
(12 cm) 74 minutes
―
CD-R/RW
5 inches
(12 cm) ―
• Disc containing MP3/WMA/AAC files
Discs That May Not Be Played Back
• Playback of discs other than those described in “Types of Disc That Can Be Played Back” is
not guaranteed.
• 3 inches(8 cm) discs may not be used.
• Do not insert irregularly-shaped discs (for example, heart-shaped), as these may result in
malfunction.
Additionally, discs that have transparent portions may not be played back.
• Discs that have not been finalized cannot be played back.
• Even if recorded using the correct format on a recorder or computer, application software
settings and environments; disc peculiarities, damage, or marking; or di\
rt or condensation on
the lens inside the product may render the disc unplayable.
• Depending on the disc, some functions may not be used, or the disc may not play back.
• Do not use discs with cracks or warps.
• If the disc has stickers affixed, remains from removed stickers, or affixed adhesive, then do not
use the disc.
• Discs that have decorative labels or stickers may not be used.
Nonstandard CDs
This product will play back audio CDs,
however please be aware of the following
points regarding CD standards.
• Ensure that you use discs with
on the
label surface.
• Playback of other than standard CDs is
not guaranteed. Even if the audio can be
played back, the audio quality cannot be
guaranteed.
• When playing back other than standard CDs,
the following may occur.
● There may be noise during playback.
● There may be jumping in the audio.
● The disc may not be recognized.
● The first track may not be played back.
● It may take longer than usual until start of
playback of tracks.
● Playback may start from within the track.
● Some parts may not be played back.
● Tracks may freeze during playback.
● Tracks may be displayed erroneously.
Page 85 of 226

Audio Files(MP3/WMA/AAC/WAV) 85
AVAudio Functions
Audio Files(MP3/
WMA/AAC/WAV)
This product can play back MP3/WMA/
AAC/WAV format*2 audio files recorded on
CD-ROM, CD-R/RW, USB devices, and SD
cards
*1.
*1 SD card inserted into user slot
*2 WAV files recorded on CD-ROMs and audio files in
AAC format that have “.aac” file extension cannot be
played.
There are limitations on the files and media
that can be used, therefore read the following
prior to recording MP3/WMA/AAC/WAV format
audio files on any medium.
Additionally, ensure you read the user
manuals for your CD-R/RW drive and the
writing software, and ensure these are used
correctly.
If the MP3/WMA/AAC/WAV format audio files
include title information or other data, then this
can be displayed.
CAUTION
• Actions such as copying audio CDs or
files and either distributing these to others
for free or for charge, or uploading files
via the Internet or other means to servers
is an infringement of the law.
• Do not append the file extensions “.mp3”,
“.wma”, “.m4a”, “.aac”, or “.wav” to other
than MP3/WMA/AAC/WAV format files.
Playing back discs with files whose
contents do not match their file extension
may cause the files to be incorrectly
identified for playback, which may lead to
loud noise, resulting in speaker damage
or accident.
ADVICE
• Depending on the condition of the disc
recorder or recording software used,
correct playback may not be possible. In
these cases, refer to the user manual for
your product or software.
• Depending on your computer's operating
system, version, software, or settings,
files may not have a file extension
appended. In these cases, append the
file extensions “.mp3”, “.wma”, “.m4a”,
“.aac”, or “.wav” when copying the files to
the medium.
• Files larger than 2GB in size cannot be
played back.
• This product can also play back discs
that mix audio files in different formats,
MP3, WMA, and AAC.