2014 MERCEDES-BENZ SLS AMG ROADSTER transmission
[x] Cancel search: transmissionPage 240 of 292
special collection point for
used batteries.
! Have the battery checked regularly at a
qualified specialist workshop.
Observe the service intervals in the
Maintenance Booklet or contact a qualified
specialist workshop for more information.
! You should have all work involving the
battery carried out at a qualified specialist
workshop. In the exceptional case that it is
necessary for you to disconnect the battery
yourself, make sure that:
R you switch off the engine and remove the
SmartKey. On vehicles with KEYLESS-
GO, ensure that the ignition is switched
off. Check that all the indicator lamps in
the instrument cluster are off. Otherwise,
electronic components, such as the
alternator, may be damaged.
R you first remove the negative terminal
clamp and then the positive terminal
clamp. Never swap the terminal clamps.
Otherwise, the vehicle's electronic
system may be damaged.
R the transmission is locked in position P
after disconnecting the battery. The
vehicle is secured against rolling away.
You can then no longer move the vehicle.
The battery and the cover of the positive
terminal clamp must be installed securely
during operation.
Comply with safety precautions and take
protective measures when handling
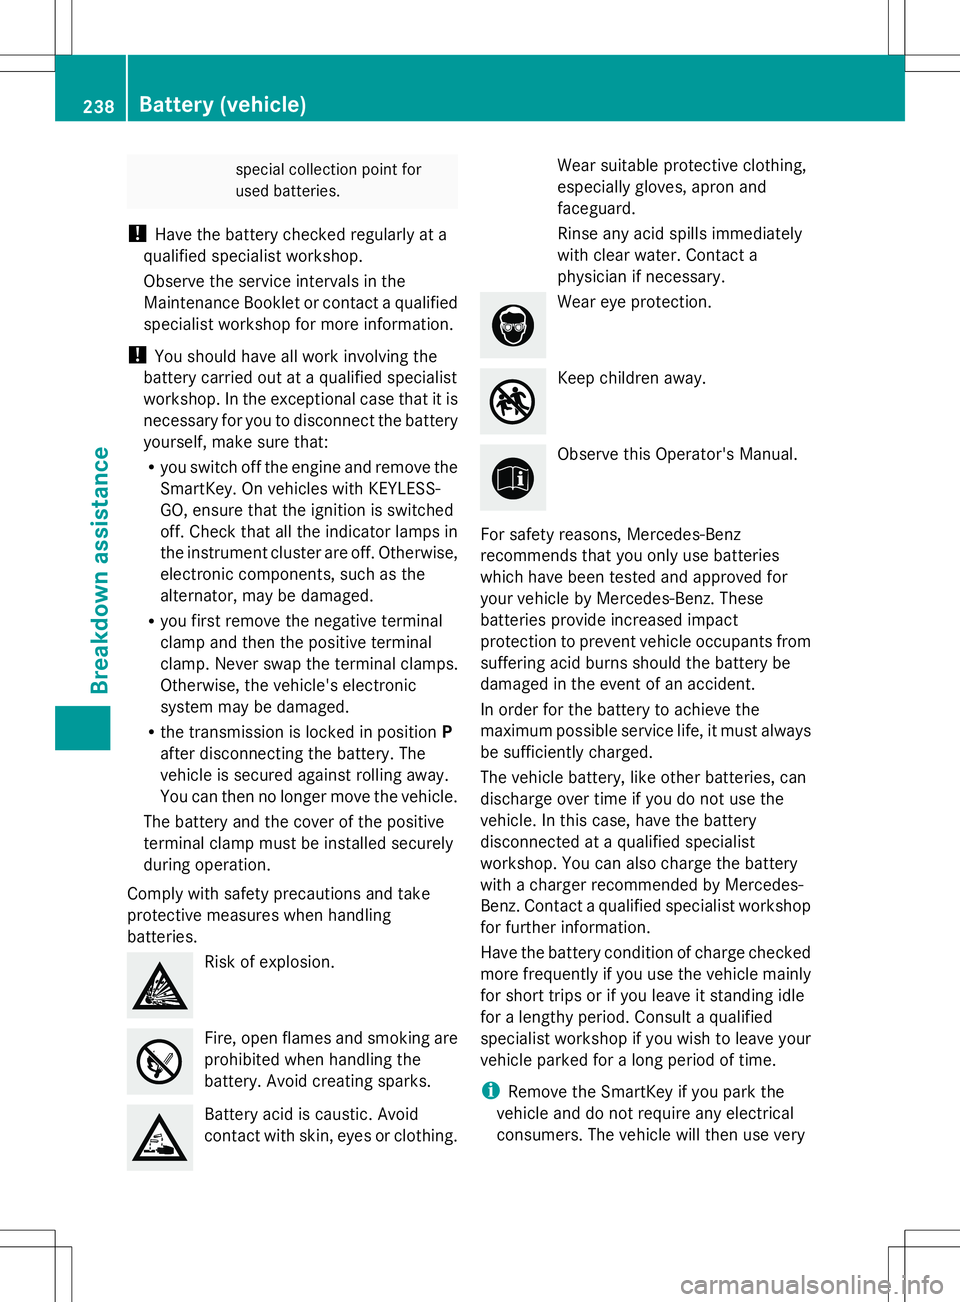
batteries. Risk of explosion.
Fire, open flames and smoking are
prohibited when handling the
battery. Avoid creating sparks. Battery acid is caustic. Avoid
contact with skin, eyes or clothing. Wear suitable protective clothing,
especially gloves, apron and
faceguard.
Rinse any acid spills immediately
with clear water. Contact a
physician if necessary. Wear eye protection.
Keep children away.
Observe this Operator's Manual.
For safety reasons, Mercedes-Benz
recommends that you only use batteries
which have been tested and approved for
your vehicle by Mercedes-Benz. These
batteries provide increased impact
protection to prevent vehicle occupants from
suffering acid burns should the battery be
damaged in the event of an accident.
In order for the battery to achieve the
maximum possible service life, it must always
be sufficiently charged.
The vehicle battery, like other batteries, can
discharge over time if you do not use the
vehicle. In this case, have the battery
disconnected at a qualified specialist
workshop. You can also charge the battery
with a charger recommended by Mercedes-
Benz. Contact a qualified specialist workshop
for further information.
Have the battery condition of charge checked
more frequently if you use the vehicle mainly
for short trips or if you leave it standing idle
for a lengthy period. Consult a qualified
specialist workshop if you wish to leave your
vehicle parked for a long period of time.
i Remove the SmartKey if you park the
vehicle and do not require any electrical
consumers. The vehicle will then use very 238
Battery (vehicle)Breakdown assistance
Page 243 of 292
R
If the battery is fully discharged, leave the battery that is being used to jump-start connected
for a few minutes before attempting to start. This charges the battery slightly.
R Make sure that the two vehicles do not touch.
Make sure that:
R the jumper cables are not damaged.
R when the jumper cables are connected to the battery, uninsulated sections of the terminal
clamp do not come into contact with other metal sections.
R the jumper cables cannot come into contact with parts such as the V-belt pulley or the fan.
These parts move when the engine is started and while it is running.
X Press the electric parking brake handle.
X Shift the transmission to Pwith the button in the center console.
X Remove the SmartKey from the ignition lock.
X Switch off all electrical consumers (e.g. radio, blower, etc.).
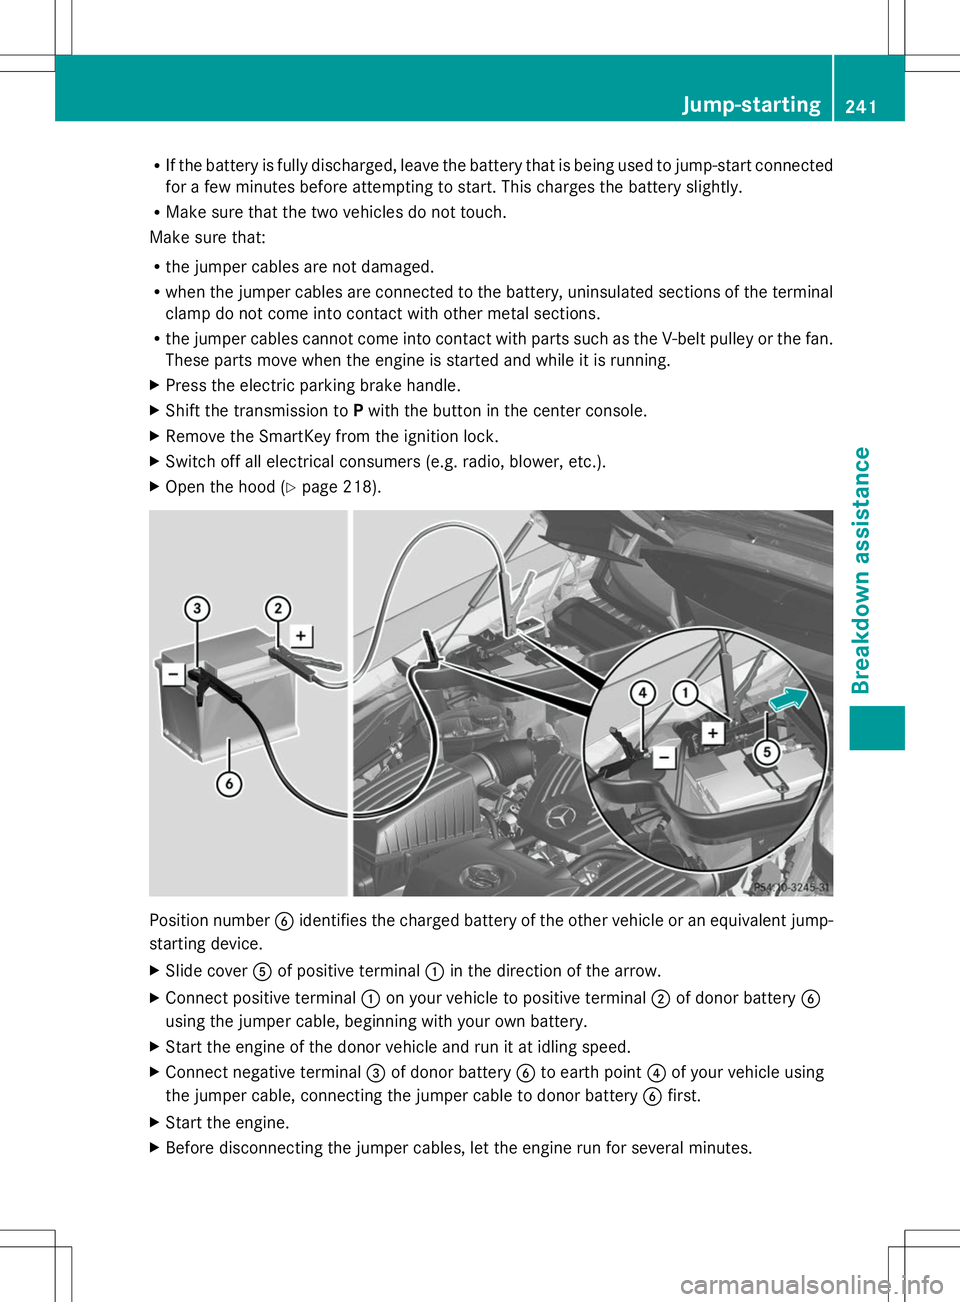
X Open the hood (Y page 218). Position number
Bidentifies the charged battery of the other vehicle or an equivalent jump-
starting device.
X Slide cover Aof positive terminal :in the direction of the arrow.
X Connect positive terminal :on your vehicle to positive terminal ;of donor battery B
using the jumper cable, beginning with your own battery.
X Start the engine of the donor vehicle and run it at idling speed.
X Connect negative terminal =of donor battery Bto earth point ?of your vehicle using
the jumper cable, connecting the jumper cable to donor battery Bfirst.
X Start the engine.
X Before disconnecting the jumper cables, let the engine run for several minutes. Jump-starting
241Breakdown assistance Z
Page 244 of 292
X
First, remove the jumper cables from earth point ?and negative terminal =, then from
positive clamp :and positive terminal ;. Each time beginning with your vehicle's battery.
X Slide cover Aof the positive terminal in the opposite direction to the arrow.
X Have the battery checked at a qualified specialist workshop.
i Jump-starting is not considered to be a normal operating condition.
i Jumper cables and further information regarding jump-starting can be obtained at any
qualified specialist workshop. Towing and tow-starting
Important safety notes
G
WARNING
The rear axle locks when:
R the engine is not running
R the engine stalls while the vehicle is being
towed
R there is a malfunction in the power supply
or the vehicle's electrical system
There is a risk of an accident.
In the event of a breakdown, you should
always have the vehicle transported. G
WARNING
If the brake system or power steering is
malfunctioning and your vehicle is then towed
away, significantly more effort may be
required to steer and brake than is normally
required. There is a risk of an accident.
In such cases, use a tow bar. Before towing,
make sure that the steering moves freely. G
WARNING
If the weight of the vehicle to be towed or tow-
started is greater than the permissible gross
weight of your vehicle:
R the towing eye could detach itself
R the vehicle/trailer combination could
rollover.
There is a risk of an accident.
When towing or tow-starting another vehicle,
its weight should not be greater than the
permissible gross weight of your vehicle. !
Use the SmartKey instead of the Start/
Stop button when towing the vehicle.
Start the engine and keep it running. Turn
the SmartKey to position 2in the ignition.
Set the transmission to Nusing the E-
SELECT lever. Make sure that you then
leave the SmartKey in position 2.
Check the transmission position in the
instrument cluster.
! Make sure that the electric parking brake
is released. If the electric parking brake is
faulty, visit a qualified specialist workshop.
Mercedes-Benz recommends that you use
an authorized Mercedes-Benz Center for
this purpose.
! When towing, pull away slowly and
smoothly. If the tractive power is too high,
the vehicles could be damaged.
! Only secure the tow rope or tow bar at the
towing eyes. Otherwise, the vehicle could
be damaged.
! Do not use the towing eyes for recovery
purposes as this could damage the vehicle.
If in doubt, recover the vehicle with a crane.
! The vehicle can be towed a maximum of
30 miles (50km). The towing speed of
30 mph (50 km/h) must not be exceeded.
If the vehicle has to be towed more than
30 miles (50km), the entire vehicle must be
raised and transported.
! Do not tow with sling-type equipment.
This could damage the vehicle. 242
Towing and tow-startingBreakdown assistance
Page 245 of 292
!
Tow-starting the vehicle is not permitted.
The transmission may otherwise be
damaged.
If the vehicle can no longer be driven because
of an accident or breakdown, you have the
following options:
R transporting the vehicle
As a rule, you should have the vehicle
transported.
R towing the vehicle with the rear axle raised
Only tow the vehicle with the rear axle
raised in exceptional cases.
R towing the vehicle with a tow rope or tow
bar
Only tow the vehicle in exceptional cases.
The engine must be running if you tow the
vehicle with a tow rope or tow bar. Observe
the following notes.
Also observe the following notes:
R If the engine does not start, try jump-
starting it (Y page 240). Tow-starting the
vehicle is not permitted.
R If it is not possible to jump-start the vehicle,
have it transported to the nearest qualified
specialist workshop, e.g. an authorized
Mercedes-Benz Center.
R If the vehicle has transmission damage,
have it transported to a qualified specialist
workshop. Observe the display messages
in the instrument cluster. Installing/removing the towing eye
Installing the towing eye X
Take the towing eye and the wheel
wrench 6
out of the wheel-change tool kit
(Y page 232).
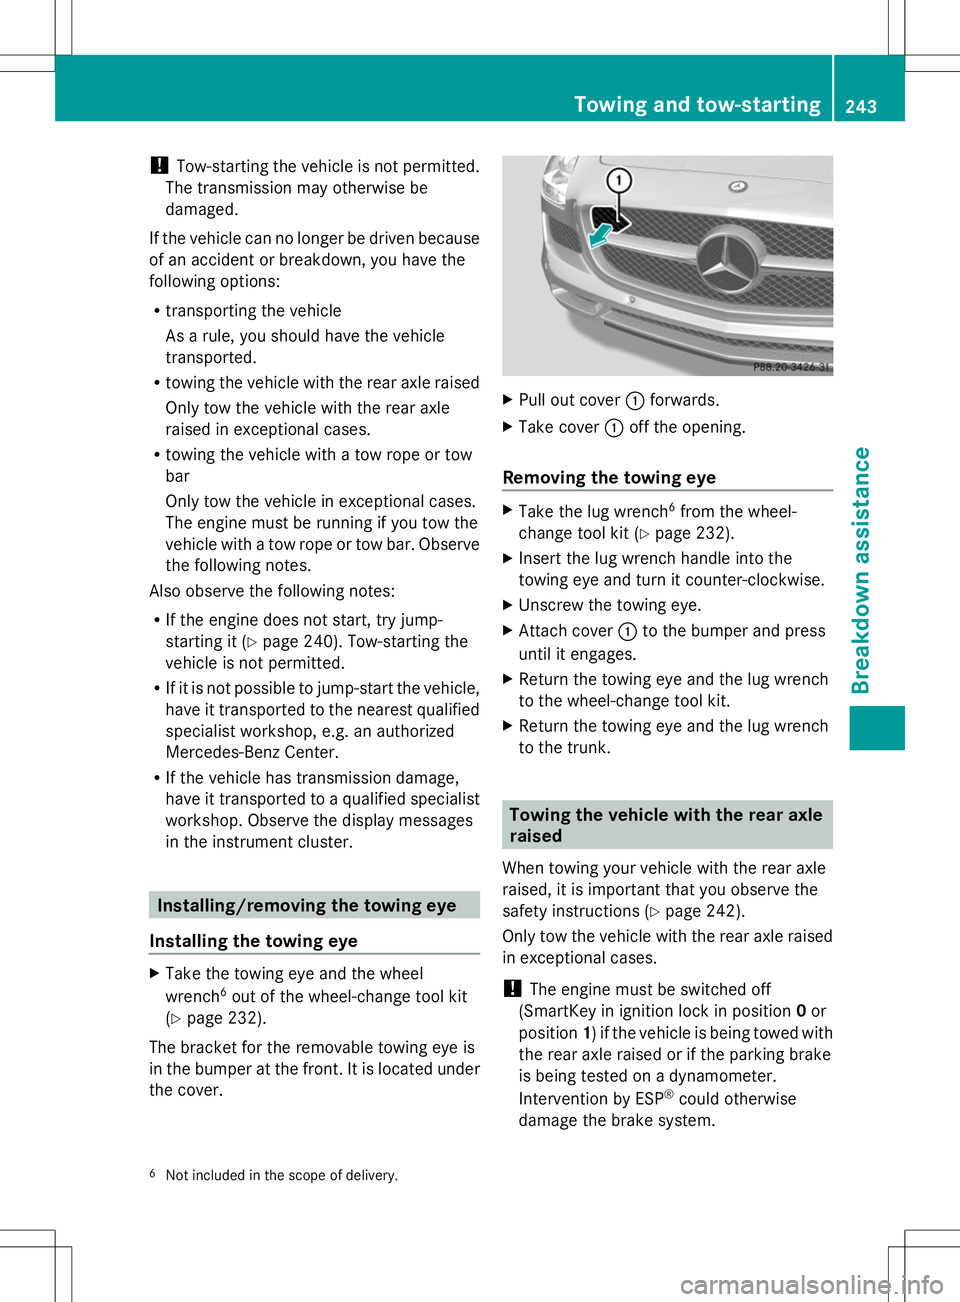
The bracket for the removable towing eye is
in the bumper at the front. It is located under
the cover. X
Pull out cover :forwards.
X Take cover :off the opening.
Removing the towing eye X
Take the lug wrench 6
from the wheel-
change tool kit (Y page 232).
X Insert the lug wrench handle into the
towing eye and turn it counter-clockwise.
X Unscrew the towing eye.
X Attach cover :to the bumper and press
until it engages.
X Return the towing eye and the lug wrench
to the wheel-change tool kit.
X Return the towing eye and the lug wrench
to the trunk. Towing the vehicle with the rear axle
raised
When towing your vehicle with the rear axle
raised, it is important that you observe the
safety instructions (Y page 242).
Only tow the vehicle with the rear axle raised
in exceptional cases.
! The engine must be switched off
(SmartKey in ignition lock in position 0or
position 1) if the vehicle is being towed with
the rear axle raised or if the parking brake
is being tested on a dynamometer.
Intervention by ESP ®
could otherwise
damage the brake system.
6 Not included in the scope of delivery. Towing and tow-starting
243Breakdown assistance Z
Page 246 of 292
X
Switch on the hazard warning lamps
(Y page 98).
X Make sure that the SmartKey is in position
2 in the ignition and that the engine is
running throughout the towing procedure.
X Move the transmission to Nwith the E-
SELECT lever. Check the transmission
position in the instrument cluster. Towing a vehicle with both axles on
the ground
It is important that you observe the safety
instructions when towing away your vehicle
(Y page 242).
X Switch on the hazard warning lamps
(Y page 98).
i When towing with the hazard warning
flashers switched on, use the combination
switch as usual to signal in which direction
you are changing. In this case, only the
indicator lamps for the direction of travel
flash. When you reset the combination
switch, the hazard warning flashers start
flashing again.
X Insert the SmartKey into the ignition lock
(Y page 119).
X Start the engine and leave the SmartKey in
the ignition.
X Move the transmission to Nwith the E-
SELECT lever.
X Check the transmission position in the
instrument cluster display (Y page 123).
X Leave the engine running throughout the
entire towing procedure Transporting the vehicle
The towing eye can be used to pull the vehicle
onto a trailer or transporter for transporting
purposes.
! You may only secure the vehicle by the
wheels, not by parts of the vehicle such as axle or steering components. Otherwise,
the vehicle could be damaged.
X Start the engine.
X Make sure that the SmartKey is in position
2in the ignition and that the engine is
running during the entire loading operation.
X Move the transmission to Nwith the E-
SELECT lever. Check the transmission
position in the instrument cluster.
As soon as the vehicle has been loaded:
X Prevent the vehicle from rolling away by
applying the electric parking brake.
X Shift the transmission to Pwith the button
in the center console.
X Turn the SmartKey to position 0in the
ignition lock and remove the SmartKey
from the ignition lock.
X Secure the vehicle. Fuses
Important safety notes
G
WARNING
If you manipulate or bridge a faulty fuse or if
you replace it with a fuse with a higher
amperage, the electric cables could be
overloaded. This could result in a fire. There
is a risk of an accident and injury.
Always replace faulty fuses with the specified
new fuses having the correct amperage.
! Only use fuses that have been approved
for Mercedes-Benz vehicles and which
have the correct fuse rating for the system
concerned. Otherwise, components or
systems could be damaged.
The fuses in your vehicle serve to close down
faulty circuits. If a fuse blows, all the
components on the circuit and their functions
stop operating.
Blown fuses must be replaced with fuses of
the same rating, which you can recognize by 244
FusesBreakdown assistance
Page 271 of 292
If your vehicle's tire configuration allows, you
can change the wheels according to the
intervals in the tire manufacturer's warranty
book in your vehicle documents. If no
warranty book is available, the tires should be
rotated every 3,000 to 6,000 miles (5,000 to
10,000 km), or earlier if tire wear requires. Do
not change the direction of wheel rotation.
Clean the contact surfaces of the wheel and
the brake disc thoroughly every time a wheel
is rotated. Check the tire pressure and
reactivate the tire pressure monitor if
necessary. Direction of rotation
Tires with a specified direction of rotation
have additional benefits, e.g. if there is a risk
of hydroplaning. You will only gain these
benefits if the correct direction of rotation is
maintained.
An arrow on the sidewall of the tire indicates
its correct direction of rotation. Storing wheels
Store wheels that are not being used in a cool,
dry and preferably dark place. Protect the
tires from oil, grease, gasoline and diesel. Cleaning the wheels
G
WARNING
The water jet from a circular jet nozzle (dirt
blasters) can cause invisible exterior damage
to the tires or chassis components.
Components damaged in this way may fail
unexpectedly. There is a risk of an accident.
Do not use power washers with circular jet
nozzles to clean the vehicle. Have damaged
tires or chassis components replaced
immediately. Mounting a wheel
Preparing the vehicle X
Stop the vehicle on solid, non-slippery and
level ground.
X Apply the electric parking brake manually.
X Bring the front wheels into the straight-
ahead position.
X Shift the transmission to position P.
X Switch off the engine.
X Open the driver's door.
The on-board electronics now have status
0. This is the same as the SmartKey having
been removed.
X Remove Start/Stop button from ignition
lock (Y page 119).
X Take the following objects from the left-
hand stowage compartment and the left-
hand stowage space in the trunk:
R
lug wrench
R folding wheel chock
R jack
R alignment bolt
X Secure the vehicle to prevent it from rolling
away.
Securing the vehicle to prevent it from
rolling away If your vehicle is equipped with a wheel chock,
it can be found in the vehicle tool kit
(Y
page 232).
The folding wheel chock is an additional
safety measure to prevent the vehicle from
rolling away, for example when changing a
wheel. Changing a wheel
269Wheels and tires Z
Page 281 of 292
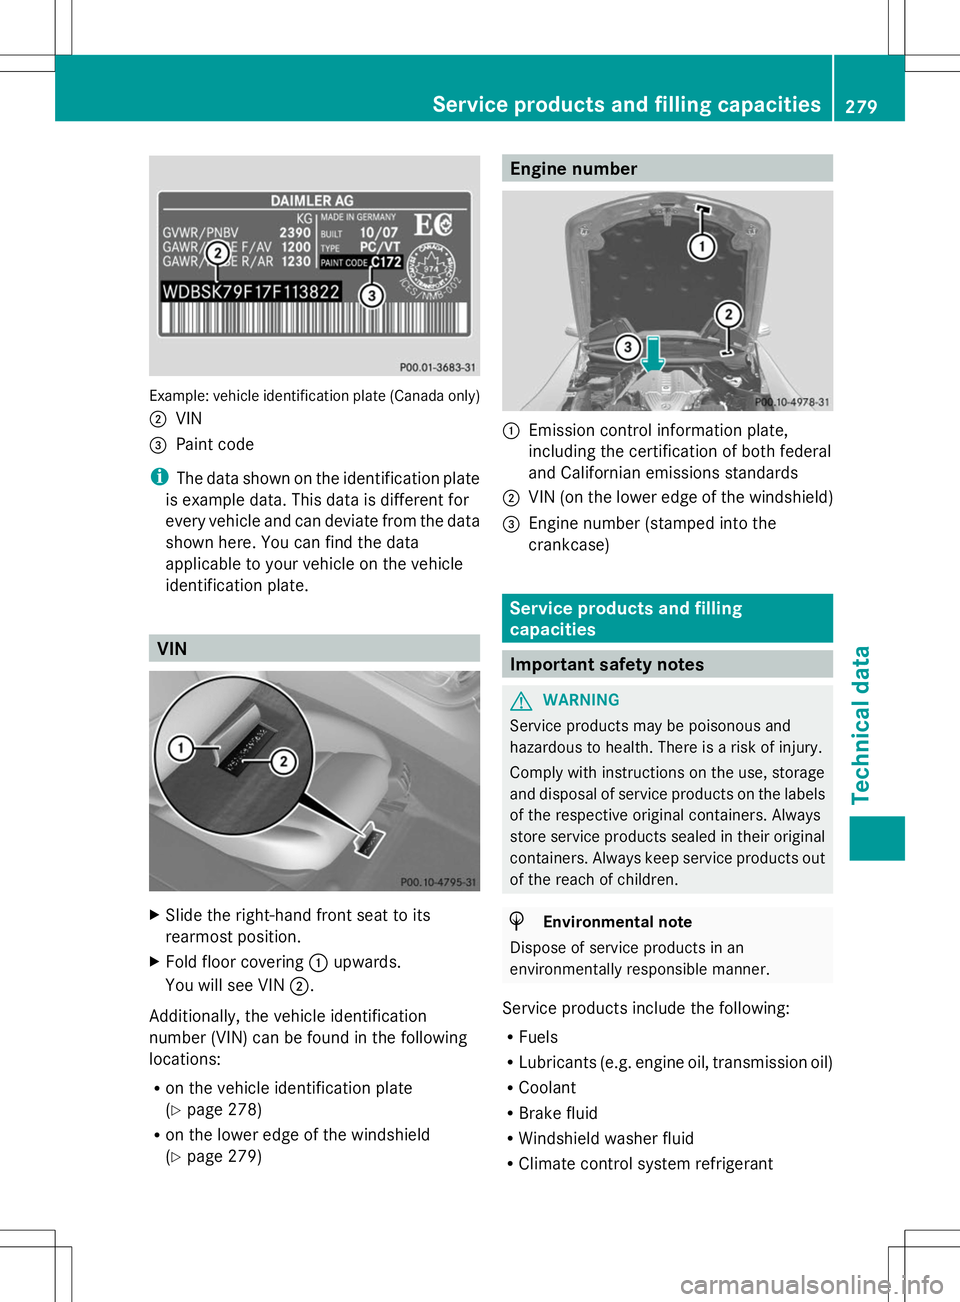
Example: vehicle identification plate (Canada only)
; VIN
= Paint code
i The data shown on the identification plate
is example data. This data is different for
every vehicle and can deviate from the data
shown here. You can find the data
applicable to your vehicle on the vehicle
identification plate. VIN
X
Slide the right-hand front seat to its
rearmost position.
X Fold floor covering :upwards.
You will see VIN ;.
Additionally, the vehicle identification
number (VIN) can be found in the following
locations:
R on the vehicle identification plate
(Y page 278)
R on the lower edge of the windshield
(Y page 279) Engine number
:
Emission control information plate,
including the certification of both federal
and Californian emissions standards
; VIN (on the lower edge of the windshield)
= Engine number (stamped into the
crankcase) Service products and filling
capacities
Important safety notes
G
WARNING
Service products may be poisonous and
hazardous to health. There is a risk of injury.
Comply with instructions on the use, storage
and disposal of service products on the labels
of the respective original containers. Always
store service products sealed in their original
containers. Always keep service products out
of the reach of children. H
Environmental note
Dispose of service products in an
environmentally responsible manner.
Service products include the following:
R Fuels
R Lubricants (e.g. engine oil, transmission oil)
R Coolant
R Brake fluid
R Windshield washer fluid
R Climate control system refrigerant Service products and filling capacities
279Technical data Z