2014 MERCEDES-BENZ SLK ROADSTER oil pressure
[x] Cancel search: oil pressurePage 7 of 357

1, 2, 3 ...
12 V socket see Sockets A
ABS (Anti-lock Braking System) Display message ............................ 223
Function/notes ................................ 60
Important safety notes .................... 60
Warning lamp .................................2 52
Accident
Automatic measures after an acci-
dent ................................................. 51
Activating/deactivating air-recir-
culation mode ................................... .134
Activating/deactivating cooling
with air dehumidification ................. 129
Active light function ......................... 114
ADAPTIVE BRAKE ................................. 66
Adaptive brake lights .......................... 62
Adaptive Highbeam Assist
Display message ............................ 234
Function/notes ............................ .115
Switching on/off ........................... 116
Additional speedometer ................... 213
Additives (engine oil) ........................ 347
Adjusting the headlamp range ......... 112
Air conditioning
General notes ................................ 126
Air filter (white display message) .... 237
Air pressure
see Tyre pressure
Air vents
Important safety notes .................. 135
Setting .......................................... .135
Setting the blower output of the
AIRSCARF vents ............................ .136
Setting the centre air vents ........... 136
Setting the side air vents .............. .136
Switching AIRSCARF on/off .......... 100
Air-conditioning system
see Climate control
Airbag
Headbag .......................................... 47
Introduction ..................................... 45 PASSENGER AIR BAG OFF indica-
tor lamp ..........................................
.41
Airbags
Front airbag (driver, front
passenger ) ....................................... 46
Important safety gu idelines ............ .45
Sidebag ............................................ 47
Triggering ......................................... 47
AIRGUIDE ............................................. 91
AIRSCARF
Problem (malfunction) ................... 100
Switching on/of f........................... 100
AIRSCARF vents
Setting the blower output .............. 136
Alarm
ATA (Anti-Theft Alarm system )......... 68
Switching off (ATA) .......................... 68
Switching the function on/off
(ATA) ................................................ 68
Alarm system
see ATA (Anti-Theft Alarm system)
Ambient lighting
Setting the brightness (on-board
computer) ...................................... 215
AMG menu (on-board computer) ..... 219
Anti-glare film .................................... 277
Anti-lock braking system
see ABS (Anti-lock Braking System)
Anti-Theft Alarm system
see ATA (Anti-Theft Alarm system)
Aquaplaning ....................................... 167
Ashtray ............................................... 268
Assistance display (on-board com-
puter) .................................................. 210
Assistance menu (on-board com-
puter) .................................................. 210
ASSYST PLUS
Displaying a service message ........ 285
Hiding a service message .............. 285
Resetting the service interval dis-
play ................................................ 285
Service message ............................ 285
Special service requirements ......... 286
ATA (Anti-Theft Alarm system)
Activating/deactivating ................... 68
Function ........................................... 68
Switching off the alarm .................... 68 4
Index
Page 286 of 357

G
WARNING
If engine oil comes into contact with hot com- ponents in the engine compartment, it may
ignite. There is a risk of fire and injury.
Make sure that engine oil does not spill out
over the filler neck. Allow the engine to cool
down and thoroughly clean the components
that have come into contact with engine oil
before you start the engine. H
Environmental note
When topping up the oil, take care not to spill
any. If oil enters the soil or waterways, it is
harmful to the environment.
! Only use engine oils and oil filters that
have been approved for vehicles with a ser-
vice system. You can obtain a list of the
engine oils and oil filters tested and
approved in accordance with the
Mercedes-Benz Specifications for Service
Products at any Mercedes-Benz Service
Centre.
Damage to the engine or exhaust system is caused by the following:
R using engine oils and oil filters that have
not been specifically approved for the
service system
R changing the engine oil and oil filter after
missing the change interval required by
the service system
R using engine oil additives
! Do not add too much oil. If the oil level is
above the "max" mark on the dipstick, too
much oil has been added. This can lead to
damage to the engine or the catalytic con-
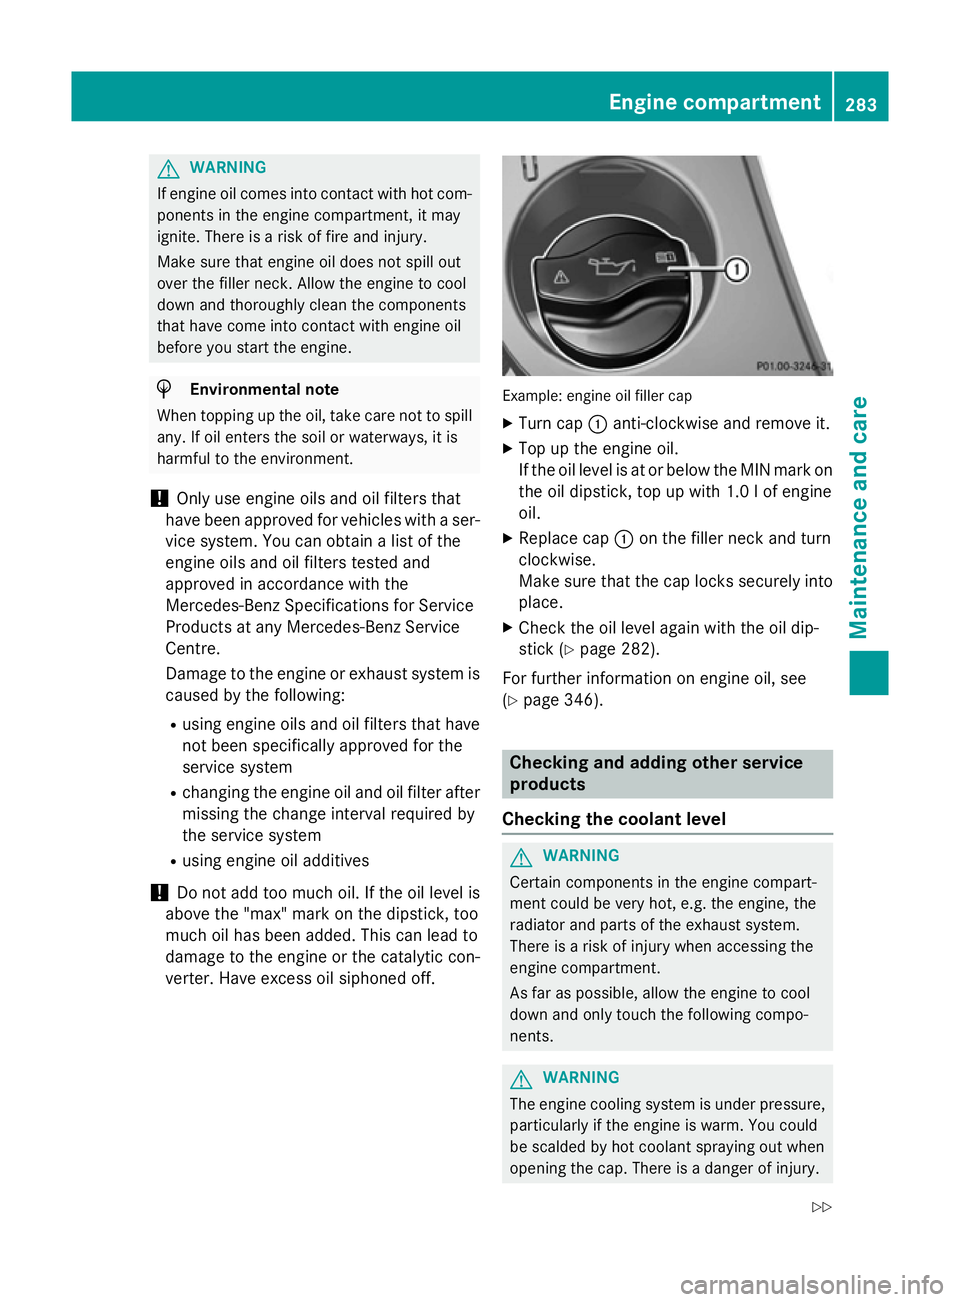
verter. Have excess oil siphoned off. Example: engine oil filler cap
X Turn cap :anti-clockwise and remove it.
X Top up the engine oil.
If the oil level is at or below the MIN mark on
the oil dipstick, top up with 1.0 lof engine
oil.
X Replace cap :on the filler neck and turn
clockwise.
Make sure that the cap locks securely into place.
X Check the oil level again with the oil dip-
stick (Y page 282).
For further information on engine oil, see
(Y page 346). Checking and adding other service
products
Checking the coolant level G
WARNING
Certain components in the engine compart-
ment could be very hot, e.g. the engine, the
radiator and parts of the exhaust system.
There is a risk of injury when accessing the
engine compartment.
As far as possible, allow the engine to cool
down and only touch the following compo-
nents. G
WARNING
The engine cooling system is under pressure, particularly if the engine is warm. You could
be scalded by hot coolant spraying out when
opening the cap. There is a danger of injury. Engine compartment
283Maintenance and care
Z
Page 291 of 357

Do not aim directly at any of the following:
R tyres
R door gaps, roof gaps, joints etc.
R electrical components
R battery
R connectors
R lights
R seals
R trim elements
R ventilation slots
Damaged seals or electrical components
can lead to leaks or failures.
! Do not use high-pressure cleaning equip-
ment to clean the tank recess when it is
open. This can damage the seals or other
components.
Cleaning the paintwork !
Do not affix:
R stickers
R films
R magnetic plates or similar items
to painted surfaces. You could otherwise
damage the paintwork.
Scratches, corrosive deposits, areas affected
by corrosion and damage caused by inade-
quate care cannot always be completely
repaired. In such cases, visit a qualified spe-
cialist workshop.
X Remove impurities immediately, where
possible, whilst avoiding rubbing too hard.
X Soak insect remains with insect remover
and rinse off the treated areas afterwards.
X Soak bird droppings with water and rinse
off the treated areas afterwards.
X Remove coolant, brake fluid, tree resin,
oils, fuels and greases by rubbing gently
with a cloth soaked in petroleum ether or
lighter fluid.
X Use tar remover to remove tar stains.
X Use silicone remover to remove wax. Care and treatment of matt paintwork !
Never polish the vehicle or the light alloy
wheels. Polishing makes the paintwork
shiny.
! The following may cause the paint to
become shiny and thus reduce the matt
effect:
R Vigorous rubbing with unsuitable mate-
rials.
R Frequent use of car washes.
R Washing the vehicle in direct sunlight.
! Never use paint cleaner, buffing or pol-
ishing products, or gloss preserver, e.g.
wax. These products are only suitable for
high-gloss surfaces. Their use on vehicles
with matt finish leads to considerable sur-
face damage (shiny, spotted areas).
Always have paintwork repairs carried out
at a qualified specialist workshop.
! Do not use wash programs with a hot wax
treatment under any circumstances.
Observe these notes if your vehicle has a
clear matt finish. This will help you to avoid
damage to the paintwork due to incorrect
treatment.
These notes also apply to light-alloy wheels
with a clear matt finish.
i The vehicle should preferably be washed
by hand using a soft sponge, car shampoo
and plenty of water.
i Use only insect remover and car shampoo
from the range of recommended and
approved Mercedes-Benz care products. Cleaning vehicle parts
Cleaning the wheels !
Do not use acidic wheel cleaning products
to remove brake dust. This could damage
wheel bolts and brake components. 288
CareMaintenance and care
Page 327 of 357

The wear patterns on the front and rear tyres
differ, depending on the operating conditions.
Interchange the wheels before a clear wear
pattern has formed on the tyres. Front tyres
typically wear more on the shoulders and the rear tyres in the centre.
On vehicles that have the same size front and
rear wheels, you can interchange the wheels
every 5,000 to 10,000 km depending on the
degree of tyre wear. Ensure the direction of
rotation is maintained.
Clean the contact surfaces of the wheel and
the brake disc thoroughly every time a wheel
is interchanged. Check the tyre pressure and, if necessary, restart the tyre pressure loss
warning system or the tyre pressure monitor. Direction of rotation
Tyres with a specified direction of rotation
have additional benefits, e.g. if there is a risk of aquaplaning. You will only gain these ben-
efits if the correct direction of rotation is
observed.
An arrow on the sidewall of the tyre indicates
its correct direction of rotation. Storing wheels
Store wheels that are not being used in a cool, dry and preferably dark place. Protect the
tyres against oil, grease, petrol and diesel. Cleaning the wheels
G
WARNING
The water jet of circular-jet nozzles (dirt grind- ers) can cause damage not visible from the
outside to tyres or chassis components. Com-
ponents damaged in this way can unexpect-
edly fail. There is a risk of an accident.
Do not use high-pressure cleaners with circu-
lar-jet nozzles to clean the vehicle. Have dam- aged tyres or chassis components replaced
immediately. Fitting a wheel
Preparing the vehicle X
Stop the vehicle on solid, non-slippery and
level ground.
X Apply the electric parking brake manually.
X Move the front wheels to the straight-
ahead position.
X Vehicles with manual transmission:
depress the clutch pedal fully and engage
first or reverse gear.
X Vehicles with automatic transmission:
move the selector lever to P.
X Switch off the engine.
X Vehicles without KEYLESS-GO: remove
the key from the ignition lock.
X Vehicles with KEYLESS-GO: open the
driver's door.
The on-board electronics now have status
0. This is the same as the key having been removed.
X Vehicles with KEYLESS-GO: remove the
Start/Stop button from the ignition lock
(Y page 141).
X If included in the vehicle equipment,
remove the tyre-change tool kit from the
vehicle.
X Secure the vehicle to prevent it from rolling
away.
i Not all vehicles are fitted with a tyre-
change tool kit. For information on which
tools are required to perform a wheel
change on your vehicle, consult a
Mercedes-Benz Service Centre.
Necessary wheel-changing tools may
include, for example:
R jack
R wheel chock
R wheel wrench 324
Changing a wheelWheels and tyres