2014 MERCEDES-BENZ SLK ROADSTER key
[x] Cancel search: keyPage 163 of 357
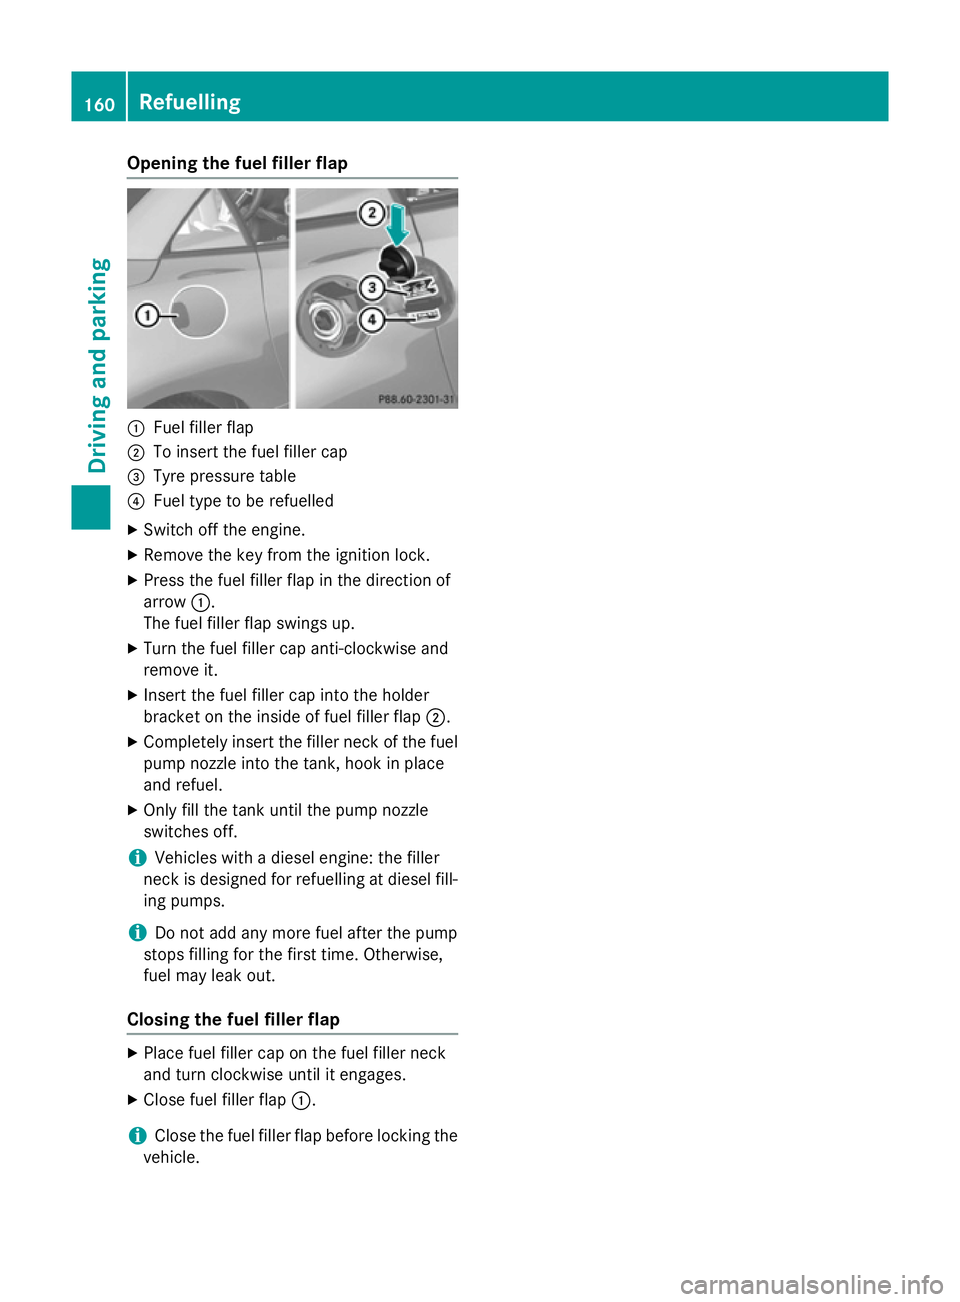
Opening the fuel filler flap
:
Fuel filler flap
; To insert the fuel filler cap
= Tyre pressure table
? Fuel type to be refuelled
X Switch off the engine.
X Remove the key from the ignition lock.
X Press the fuel filler flap in the direction of
arrow :.
The fuel filler flap swings up.
X Turn the fuel filler cap anti-clockwise and
remove it.
X Insert the fuel filler cap into the holder
bracket on the inside of fuel filler flap ;.
X Completely insert the filler neck of the fuel
pump nozzle into the tank, hook in place
and refuel.
X Only fill the tank until the pump nozzle
switches off.
i Vehicles with a diesel engine: the filler
neck is designed for refuelling at diesel fill-
ing pumps.
i Do not add any more fuel after the pump
stops filling for the first time. Otherwise,
fuel may leak out.
Closing the fuel filler flap X
Place fuel filler cap on the fuel filler neck
and turn clockwise until it engages.
X Close fuel filler flap :.
i Close the fuel filler flap before locking the
vehicle. 160
RefuellingDriving and parking
Page 164 of 357
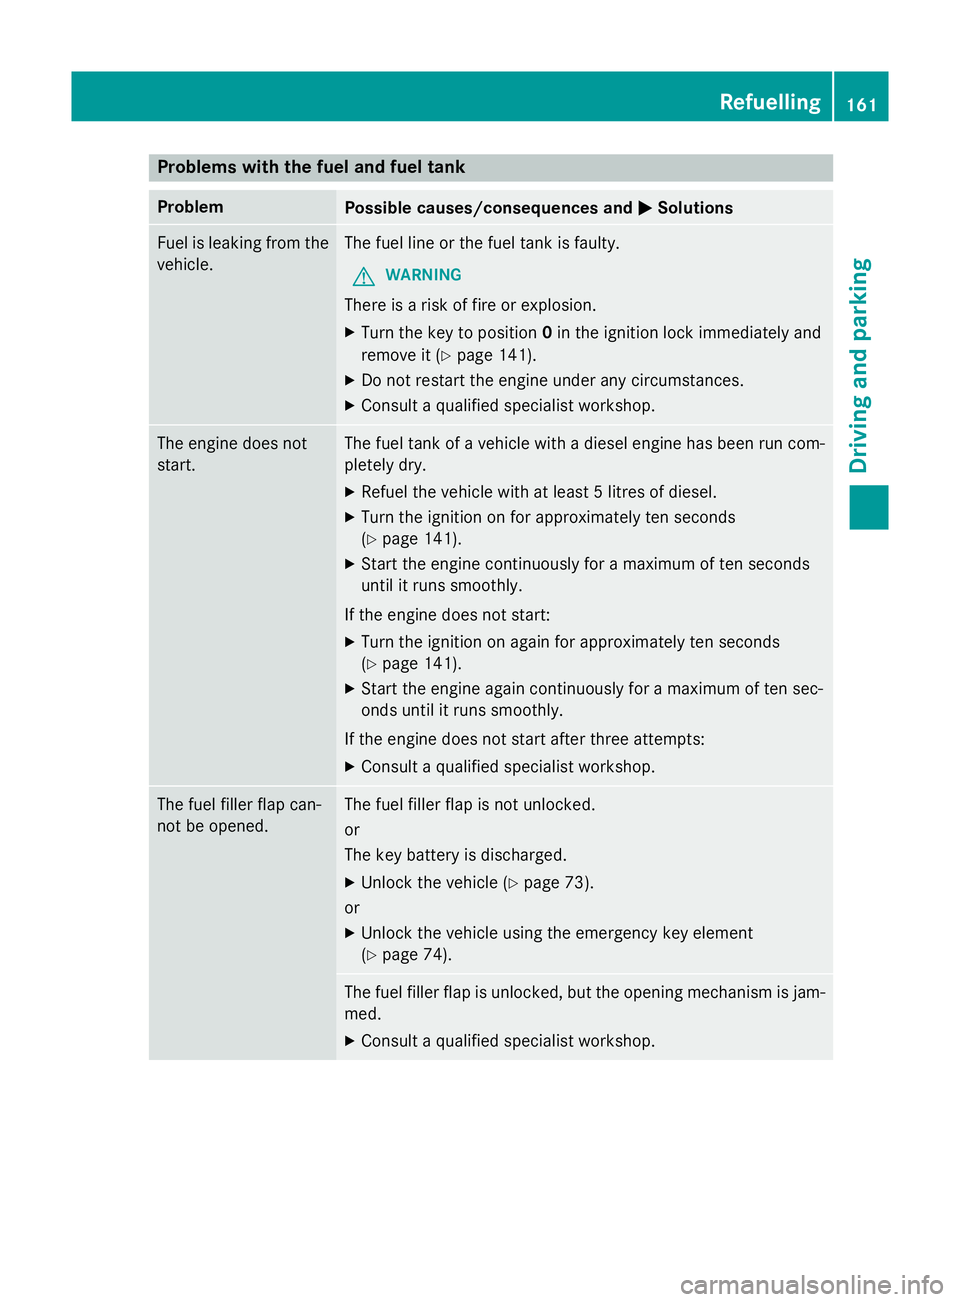
Problems with the fuel and fuel tank
Problem
Possible causes/consequences and
M
MSolutions Fuel is leaking from the
vehicle. The fuel line or the fuel tank is faulty.
G WARNING
There is a risk of fire or explosion. X Turn the key to position 0in the ignition lock immediately and
remove it (Y page 141).
X Do not restart the engine under any circumstances.
X Consult a qualified specialist workshop. The engine does not
start. The fuel tank of a vehicle with a diesel engine has been run com-
pletely dry.
X Refuel the vehicle with at least 5 litres of diesel.
X Turn the ignition on for approximately ten seconds
(Y page 141).
X Start the engine continuously for a maximum of ten seconds
until it runs smoothly.
If the engine does not start:
X Turn the ignition on again for approximately ten seconds
(Y page 141).
X Start the engine again continuously for a maximum of ten sec-
onds until it runs smoothly.
If the engine does not start after three attempts:
X Consult a qualified specialist workshop. The fuel filler flap can-
not be opened. The fuel filler flap is not unlocked.
or
The key battery is discharged.
X Unlock the vehicle (Y page 73).
or
X Unlock the vehicle using the emergency key element
(Y page 74). The fuel filler flap is unlocked, but the opening mechanism is jam-
med.
X Consult a qualified specialist workshop. Refuelling
161Driving and parking Z
Page 165 of 357
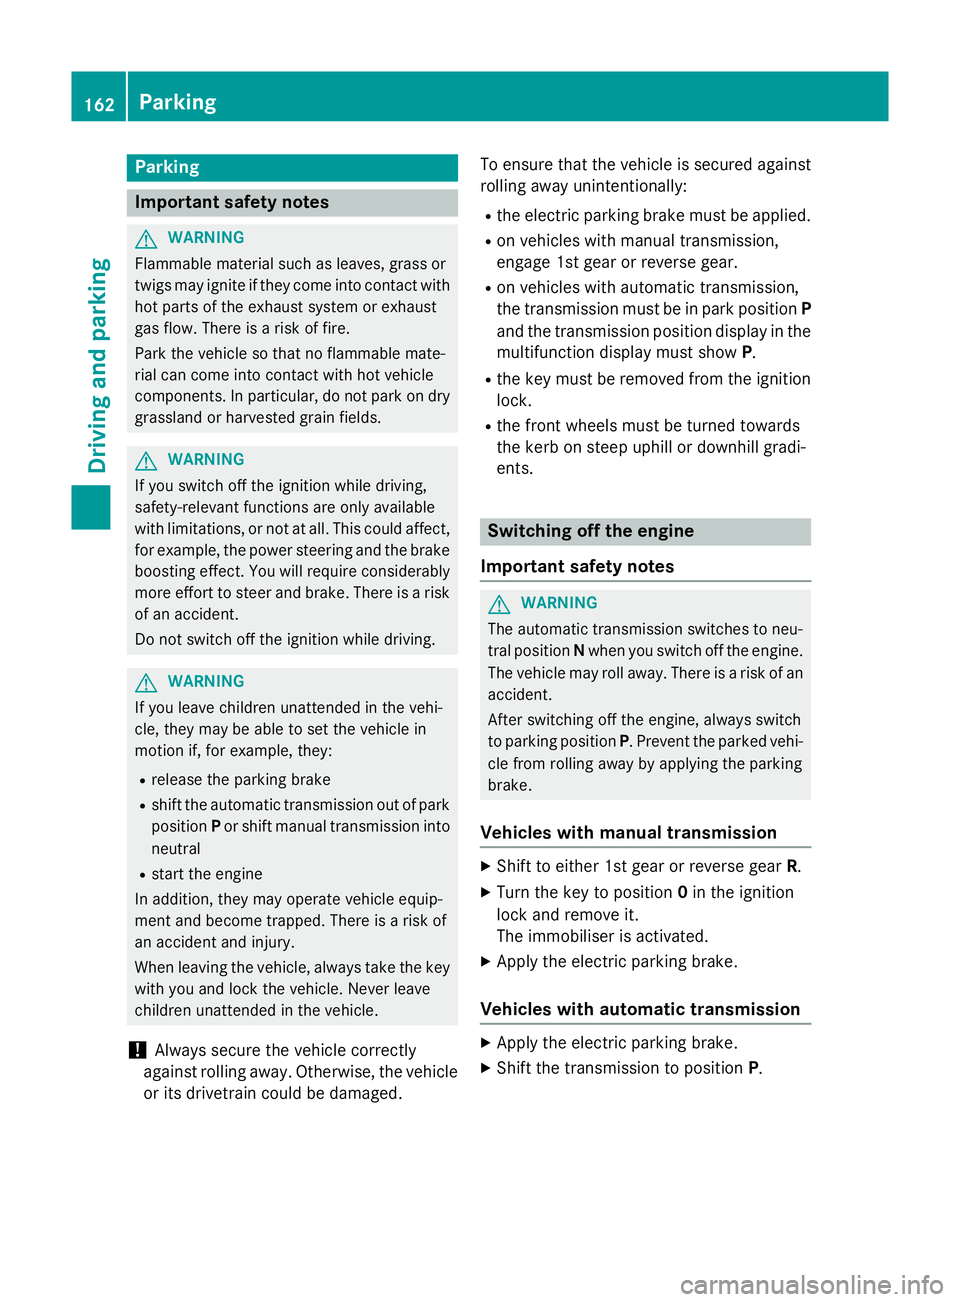
Parking
Important safety notes
G
WARNING
Flammable material such as leaves, grass or
twigs may ignite if they come into contact with hot parts of the exhaust system or exhaust
gas flow. There is a risk of fire.
Park the vehicle so that no flammable mate-
rial can come into contact with hot vehicle
components. In particular, do not park on dry grassland or harvested grain fields. G
WARNING
If you switch off the ignition while driving,
safety-relevant functions are only available
with limitations, or not at all. This could affect, for example, the power steering and the brake
boosting effect. You will require considerably
more effort to steer and brake. There is a risk of an accident.
Do not switch off the ignition while driving. G
WARNING
If you leave children unattended in the vehi-
cle, they may be able to set the vehicle in
motion if, for example, they:
R release the parking brake
R shift the automatic transmission out of park
position Por shift manual transmission into
neutral
R start the engine
In addition, they may operate vehicle equip-
ment and become trapped. There is a risk of
an accident and injury.
When leaving the vehicle, always take the key with you and lock the vehicle. Never leave
children unattended in the vehicle.
! Always secure the vehicle correctly
against rolling away. Otherwise, the vehicle
or its drivetrain could be damaged. To ensure that the vehicle is secured against
rolling away unintentionally:
R the electric parking brake must be applied.
R on vehicles with manual transmission,
engage 1st gear or reverse gear.
R on vehicles with automatic transmission,
the transmission must be in park position P
and the transmission position display in the
multifunction display must show P.
R the key must be removed from the ignition
lock.
R the front wheels must be turned towards
the kerb on steep uphill or downhill gradi-
ents. Switching off the engine
Important safety notes G
WARNING
The automatic transmission switches to neu-
tral position Nwhen you switch off the engine.
The vehicle may roll away. There is a risk of an
accident.
After switching off the engine, always switch
to parking position P. Prevent the parked vehi-
cle from rolling away by applying the parking
brake.
Vehicles with manual transmission X
Shift to either 1st gear or reverse gear R.
X Turn the key to position 0in the ignition
lock and remove it.
The immobiliser is activated.
X Apply the electric parking brake.
Vehicles with automatic transmission X
Apply the electric parking brake.
X Shift the transmission to position P.162
ParkingDriving and parking
Page 166 of 357
Using the key
X Turn the key to position 0in the ignition
lock and remove it.
The immobiliser is activated.
i The key can only be removed if the trans-
mission is in position P.
Using KEYLESS-GO
X Press the Start/Stop button (Y page 141).
The engine stops and all the indicator
lamps in the instrument cluster go out.
i When the driver's door is closed, this cor-
responds to key position 1. When the driv-
er's door is open, this corresponds to key
position 0: "key removed".
i The engine can be switched off while the
vehicle is in motion by pressing and holding
the Start/Stop button for about three sec-
onds. This function operates independently of the ECO start/stop automatic engine
switch-off function. Electric parking brake
General notes G
WARNING
If you leave children unattended in the vehi-
cle, they may be able to set the vehicle in
motion if, for example, they:
R release the parking brake
R shift the automatic transmission out of park
position Por shift manual transmission into
neutral
R start the engine
In addition, they may operate vehicle equip-
ment and become trapped. There is a risk of
an accident and injury.
When leaving the vehicle, always take the key with you and lock the vehicle. Never leave
children unattended in the vehicle. The function of the electric parking brake is
dependent on the on-board voltage. If the on-
board voltage is low or if there is a malfunc-
tion in the system, it may not be possible to
apply the released parking brake.
X If this is the case, only park the vehicle on
level ground and secure it to prevent it from
rolling away.
X Vehicles with automatic transmission:
shift the automatic transmission to posi-
tion P.
X Vehicles with manual transmission:
engage first gear.
It may not be possible to release an applied
parking brake if the on-board voltage is low or if there is a malfunction in the system. Con-
tact a qualified specialist workshop.
i The electric parking brake carries out a
function check at regular intervals when
the engine is switched off. Noises that
occur are normal.
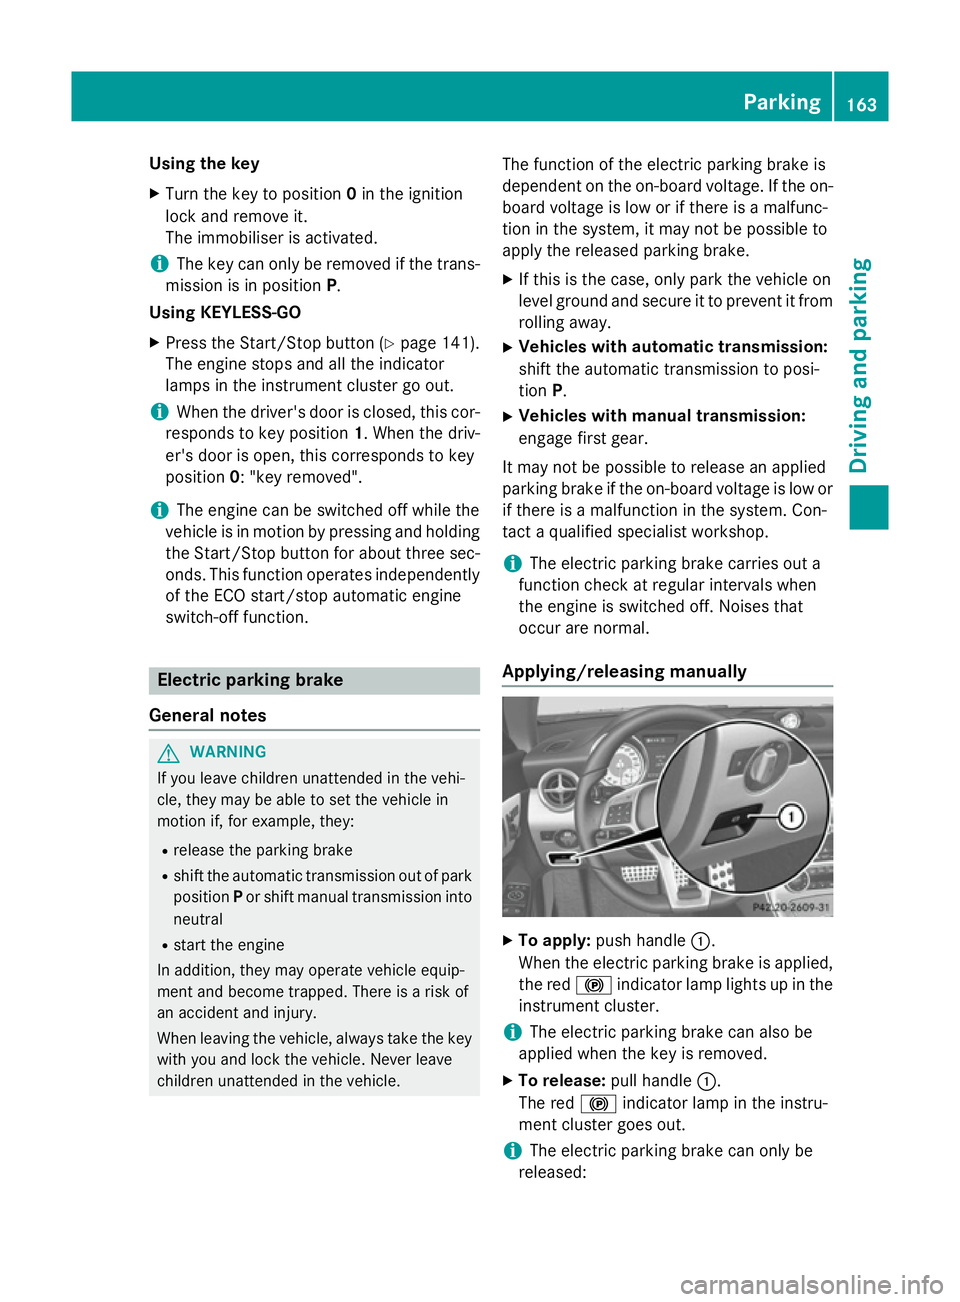
Applying/releasing manually X
To apply: push handle :.
When the electric parking brake is applied, the red !indicator lamp lights up in the
instrument cluster.
i The electric parking brake can also be
applied when the key is removed.
X To release: pull handle:.
The red !indicator lamp in the instru-
ment cluster goes out.
i The electric parking brake can only be
released: Parking
163Driving and parking Z
Page 167 of 357
R
when the key is in position 1in the igni-
tion lock (Y page 141) or
R if the ignition was switched on using the
Start/Stop button
Applying automatically The electric parking brake is applied auto-
matically:
R if DISTRONIC PLUS brings the vehicle to a
standstill or
R if the HOLD function is keeping the vehicle
stationary
In addition, at least one of the following con-
ditions must be fulfilled:
R the engine is switched off
R the driver's seat belt is not inserted in the
belt buckle and the driver's door is open
R the vehicle is stationary for a lengthy period
The red !indicator lamp in the instrument
cluster lights up.
i The electric parking brake is not automat-
ically applied if the engine is switched off by
the ECO start/stop function.
Releasing automatically The electric parking brake is released auto-
matically when all of the following conditions
are fulfilled:
R the engine is running
R the transmission is in position Dor R
R the driver's seat belt is fastened
R you depress the accelerator pedal
If the transmission is in position R, the boot lid
must be closed.
If your seat belt is not fastened, the following conditions must be fulfilled to automatically
release the electric parking brake:
R the driver's door is closed
R you have shifted out of Por you have pre-
viously driven faster than 3 km/h i
The electric parking brake can only be
released automatically in vehicles with
automatic transmission.
Ensure that you do not depress the acceler-
ator pedal unintentionally. Otherwise, the
parking brake will be released and the vehicle will start to move.
Emergency braking The vehicle can also be braked during an
emergency by using the electric parking
brake.
X While driving, push handle :of the electric
parking brake.
i The vehicle is braked for as long as the
handle of the electric parking brake is
pressed. The longer the electric parking
brake handle is depressed, the greater the braking force.
During braking:
R a warning tone sounds
R the Release parking brake Release parking brake message
appears
R the red !indicator lamp in the instru-
ment cluster flashes
When the vehicle has been braked to a stand- still, the electric parking brake is applied. Parking up the vehicle
If you leave the vehicle parked up for longer
than four weeks, the battery may be damaged by exhaustive discharging.
X Disconnect the battery or connect it to a
trickle charger.
i You can obtain information about trickle
chargers from a qualified specialist work-
shop.
If you leave the vehicle parked up for longer
than six weeks, the vehicle may suffer dam-
age as a result of lack of use.
X Visit a qualified specialist workshop and
seek advice. 164
ParkingDriving and parking
Page 185 of 357
Setting a speed
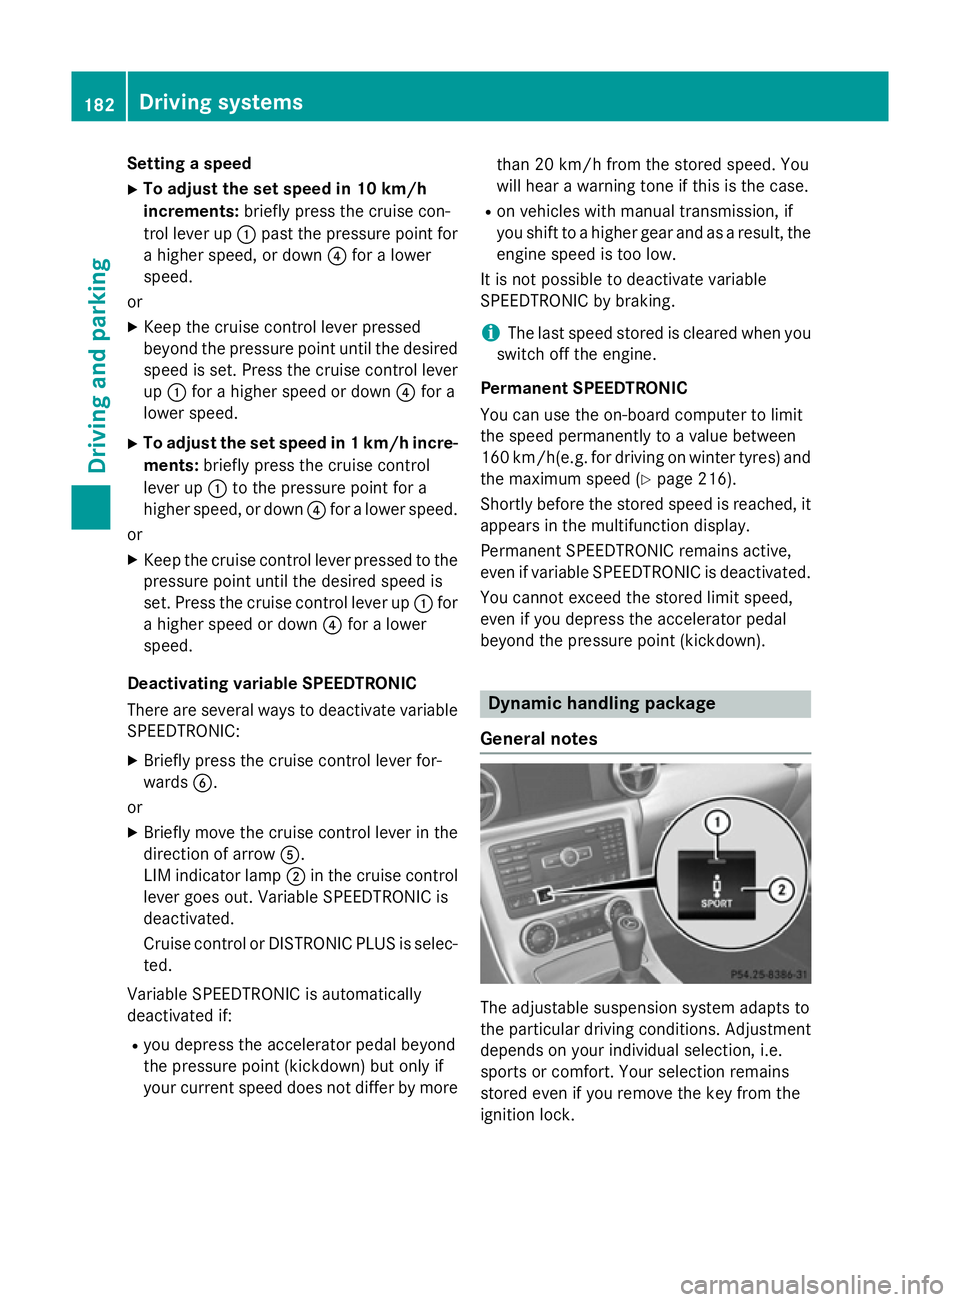
X To adjust the set speed in 10 km/h
increments: briefly press the cruise con-
trol lever up :past the pressure point for
a higher speed, or down ?for a lower
speed.
or
X Keep the cruise control lever pressed
beyond the pressure point until the desired
speed is set. Press the cruise control lever
up : for a higher speed or down ?for a
lower speed.
X To adjust the set speed in 1 km/h incre-
ments: briefly press the cruise control
lever up :to the pressure point for a
higher speed, or down ?for a lower speed.
or
X Keep the cruise control lever pressed to the
pressure point until the desired speed is
set. Press the cruise control lever up :for
a higher speed or down ?for a lower
speed.
Deactivating variable SPEEDTRONIC
There are several ways to deactivate variable SPEEDTRONIC:
X Briefly press the cruise control lever for-
wards B.
or
X Briefly move the cruise control lever in the
direction of arrow A.
LIM indicator lamp ;in the cruise control
lever goes out. Variable SPEEDTRONIC is
deactivated.
Cruise control or DISTRONIC PLUS is selec-
ted.
Variable SPEEDTRONIC is automatically
deactivated if:
R you depress the accelerator pedal beyond
the pressure point (kickdown) but only if
your current speed does not differ by more than 20 km/h from the stored speed. You
will hear a warning tone if this is the case.
R on vehicles with manual transmission, if
you shift to a higher gear and as a result, the
engine speed is too low.
It is not possible to deactivate variable
SPEEDTRONIC by braking.
i The last speed stored is cleared when you
switch off the engine.
Permanent SPEEDTRONIC
You can use the on-board computer to limit
the speed permanently to a value between
160 km/h(e.g. for driving on winter tyres) and the maximum speed (Y page 216).
Shortly before the stored speed is reached, it appears in the multifunction display.
Permanent SPEEDTRONIC remains active,
even if variable SPEEDTRONIC is deactivated.
You cannot exceed the stored limit speed,
even if you depress the accelerator pedal
beyond the pressure point (kickdown). Dynamic handling package
General notes The adjustable suspension system adapts to
the particular driving conditions. Adjustment
depends on your individual selection, i.e.
sports or comfort. Your selection remains
stored even if you remove the key from the
ignition lock. 182
Driving systemsDriving and parking
Page 190 of 357
From the:
R sixth segment onwards, you will hear an
intermittent warning tone for approx-
imately two seconds.
R seventh segment onwards, you will hear a
warning tone for approximately two sec-
onds. This indicates that you have now
reached the minimum distance.
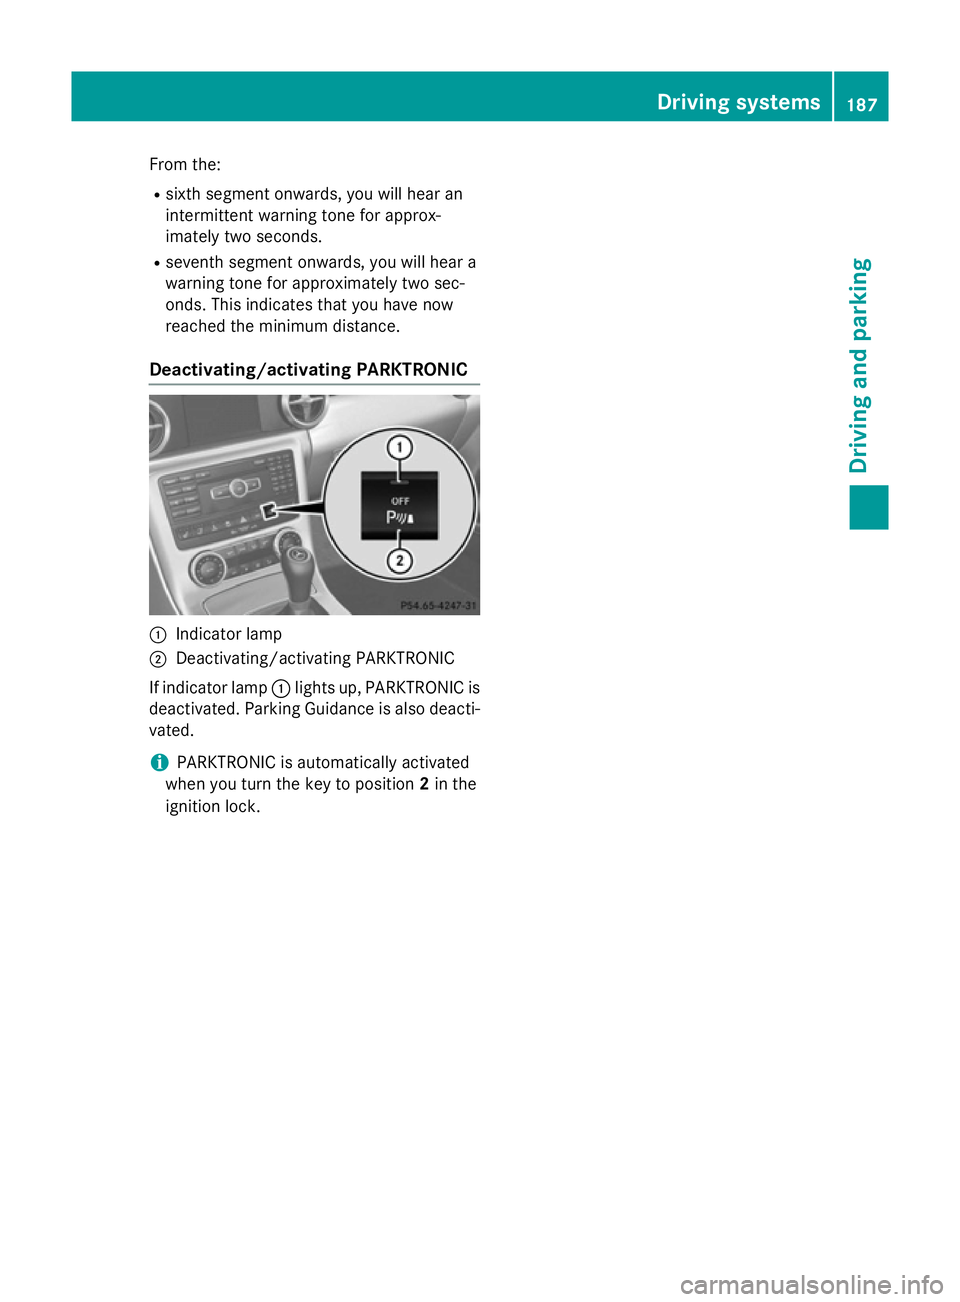
Deactivating/activating PARKTRONIC :
Indicator lamp
; Deactivating/activating PARKTRONIC
If indicator lamp :lights up, PARKTRONIC is
deactivated. Parking Guidance is also deacti-
vated.
i PARKTRONIC is automatically activated
when you turn the key to position 2in the
ignition lock. Driving systems
187Driving and parking Z
Page 198 of 357
driving in the middle of their lane. This may be
the case if there are vehicles at the edge of
their lane nearest your vehicle.
Due to the nature of the system:
R warnings may be issued in error when driv-
ing close to crash barriers or similar solid
lane borders
R warnings may be interrupted when driving
alongside long vehicles, for example lor-
ries, for a prolonged time
The two radar sensors for Blind Spot Assist
are integrated into the sides of the rear
bumper. Make sure that the bumper is free of dirt, ice or slush in the vicinity of the sensors.
The sensors must not be covered, for exam-
ple by cycle racks or overhanging loads. Fol-
lowing a severe impact or in the event of dam- age to the bumpers, have the function of the
sensors checked at a qualified specialist
workshop. Blind Spot Assist may otherwise
not work properly.
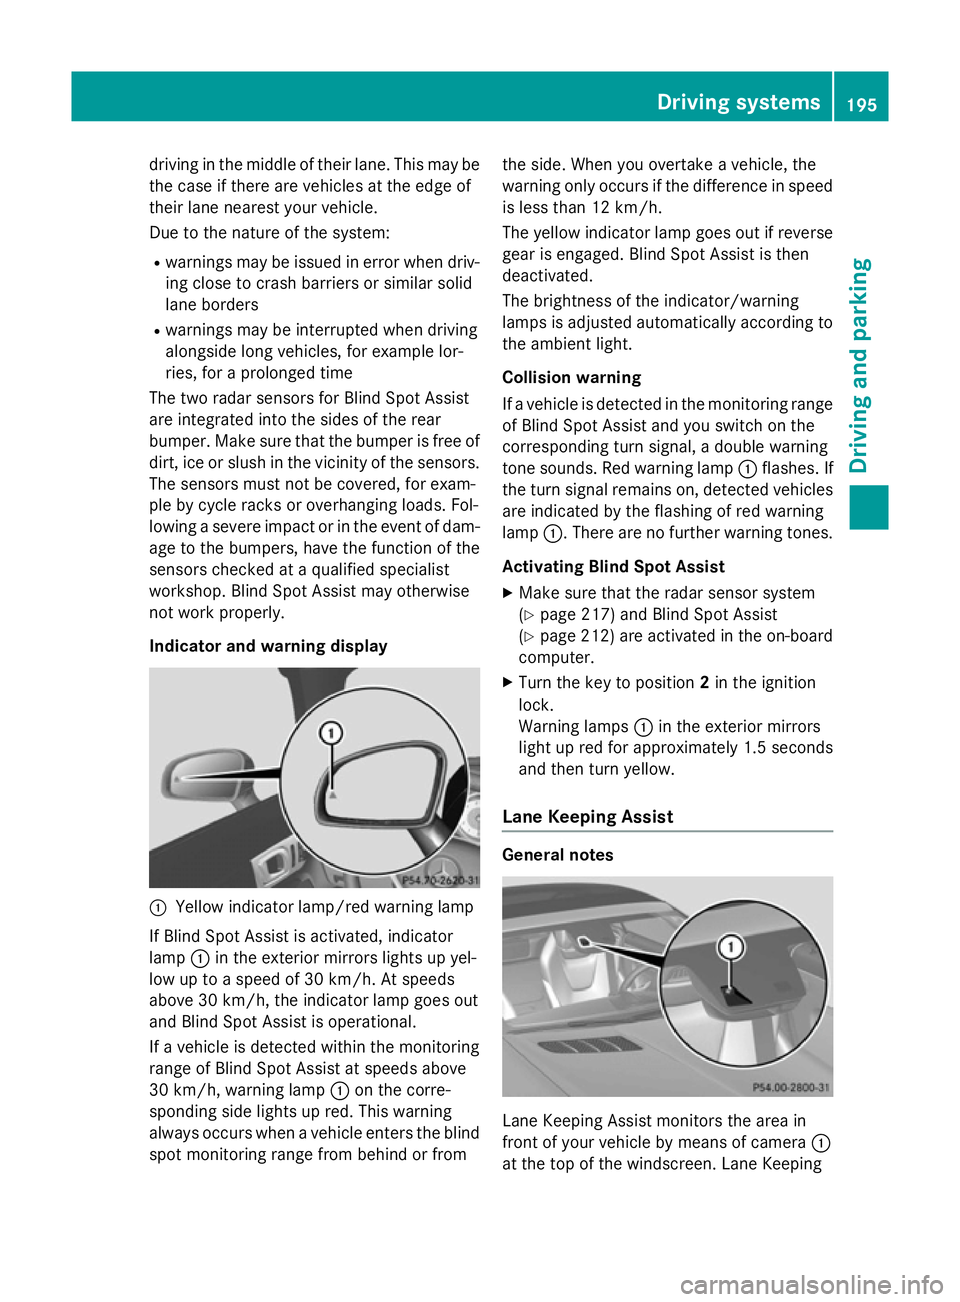
Indicator and warning display :
Yellow indicator lamp/red warning lamp
If Blind Spot Assist is activated, indicator
lamp :in the exterior mirrors lights up yel-
low up to a speed of 30 km/h. At speeds
above 30 km/h, the indicator lamp goes out
and Blind Spot Assist is operational.
If a vehicle is detected within the monitoring
range of Blind Spot Assist at speeds above
30 km/h, warning lamp :on the corre-
sponding side lights up red. This warning
always occurs when a vehicle enters the blind
spot monitoring range from behind or from the side. When you overtake a vehicle, the
warning only occurs if the difference in speed
is less than 12 km/h.
The yellow indicator lamp goes out if reversegear is engaged. Blind Spot Assist is then
deactivated.
The brightness of the indicator/warning
lamps is adjusted automatically according to
the ambient light.
Collision warning
If a vehicle is detected in the monitoring range
of Blind Spot Assist and you switch on the
corresponding turn signal, a double warning
tone sounds. Red warning lamp :flashes. If
the turn signal remains on, detected vehicles
are indicated by the flashing of red warning
lamp :. There are no further warning tones.
Activating Blind Spot Assist
X Make sure that the radar sensor system
(Y page 217) and Blind Spot Assist
(Y page 212) are activated in the on-board
computer.
X Turn the key to position 2in the ignition
lock.
Warning lamps :in the exterior mirrors
light up red for approximately 1.5 seconds
and then turn yellow.
Lane Keeping Assist General notes
Lane Keeping Assist monitors the area in
front of your vehicle by means of camera
:
at the top of the windscreen. Lane Keeping Driving systems
195Driving and parking Z