Page 23 of 434

Wheel bolt tightening torque
...........412
Wheel chock ...................................... 408
Wheels Changing a wheel .......................... 407
Checking ........................................ 385
Cleaning ......................................... 356
Cleaning (warning) .........................407
Important safety notes ..................384
Interchanging/changing ................407
Mounting a new wheel ...................411
Mounting a wheel .......................... 408
Removing a wheel ..........................411
Storing ........................................... 407
Tightening torque ........................... 412
Wheel size/tire size .......................413
Window curtain air bag
Operation ........................................ .50
Windows
see Side windows
Windshield
Defrosting ...................................... 161
Infrared reflective .......................... 345
Windshield washer fluid
see Windshield washer system
Windshield washer system
Adding washer fluid .......................351
Notes ............................................. 427
Windshield wipers
Problem (malfunction) ...................149
Replacing the wiper blades ............147
Switching on/off ........................... 146
Winter driving
Important safety notes ..................386
Slippery road surfaces ...................198
Snow chains .................................. 387
Winter operation
Summer tires ................................. 386
Winter tires
M+S tires ....................................... 386
Wiper blades
Cleaning ......................................... 357
Important safety notes ..................147
Replacing ....................................... 147
Wooden trim (cleaning instructions) 360
Workshop see Qualified specialist workshop Index
21
Page 412 of 434

Vehicles with aluminum hub caps:
X To remove: take socket0044and lug wrench
0087 from the vehicle tool kit ( Ypage 364).
X Position socket 0044on hub cap 0043.
X Attach lug wrench 0087to socket 0044and
loosen hub cap 0043counter-clockwise.
X Remove hub cap 0043.
X To install: before installing, check hub
cap 0043and the wheel area for soiling and
clean if necessary.
X Put hub cap 0043in position and turn until it
is in the right position.
X Position socket 0044on hub cap 0043.
X Attach lug wrench 0087to socket 0044and
tighten hub cap 0043.
The tightening torque must be 18 lb-ft
(25 Nm).
i Note that the hub cap should be
tightened to the specified torque of 18 lb-ft
(25 Nm). Mercedes-Benz recommends
that you have the hub cap installed at a
qualified specialist workshop. X
Using lug wrench 0087, loosen the bolts on
the wheel you wish to change by about one
full turn. Do not unscrew the bolts
completely. The jacking points are located just behind the
front wheel housings and just in front of the
rear wheel housings (arrows).
X
Take the ratchet wrench out of the vehicle
tool kit and place it on the hexagon nut of
the jack so that the letters AUFare visible.
AMG vehicles and vehicles with AMG
equipment: to protect the vehicle body, the
vehicle has covers next to the jacking points
on the outer sills. X
AMG vehicles and vehicles with AMG
equipment: fold cover0085upwards. 410
Changing a wheelWheels and tires
Page 414 of 434

Always pay attention to the instructions and
safety notes in the "Changing a wheel"
section ( Ypage 407).
Only use wheel bolts that have been designed
for the wheel and the vehicle. For safety
reasons, Mercedes-Benz recommends that
you only use wheel bolts which have been
approved for Mercedes-Benz vehicles and the
respective wheel.
! AMG vehicles: during removal and
repositioning of the wheel, the wheel rim
can strike the ceramic-brake disc and
damage it. Therefore, take precautions and
get a second person to assist you.
Alternatively, you can use a second
alignment bolt.
! To prevent damage to the paintwork, hold
the wheel securely against the wheel hub
while screwing in the first wheel bolt. X
Clean the wheel and wheel hub contact
surfaces.
X Slide the wheel to be mounted onto the
alignment bolt and push it on.
X Tighten the wheel bolts until they are
finger-tight.
X Unscrew the alignment bolt.
X Tighten the last wheel bolt until it is finger-
tight. Lowering the vehicle G
WARNING
The wheels could work loose if the wheel nuts
and bolts are not tightened to the specified
tightening torque. There is a risk of accident.
Have the tightening torque immediately
checked at a qualified specialist workshop
after a wheel is changed. X
Place the ratchet wrench onto the hexagon
nut of the jack so that the letters ABare
visible.
X Turn the ratchet wrench until the vehicle is
once again standing firmly on the ground.
X Place the jack to one side.
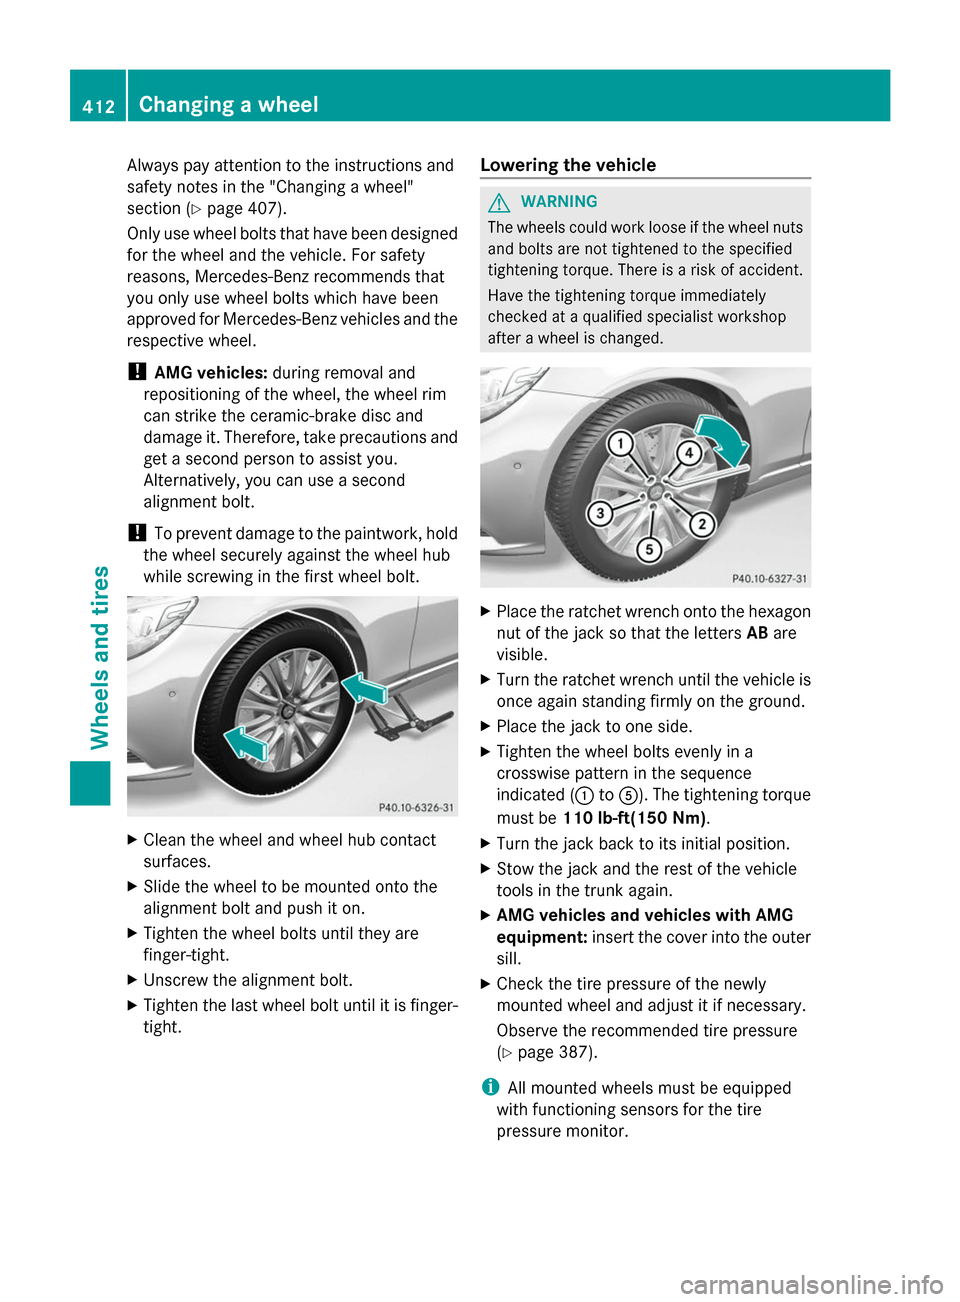
X Tighten the wheel bolts evenly in a
crosswise pattern in the sequence
indicated ( 0043to0083). The tightening torque
must be 110 lb-ft(150 Nm).
X Turn the jack back to its initial position.
X Stow the jack and the rest of the vehicle
tools in the trunk again.
X AMG vehicles and vehicles with AMG
equipment: insert the cover into the outer
sill.
X Check the tire pressure of the newly
mounted wheel and adjust it if necessary.
Observe the recommended tire pressure
(Y page 387).
i All mounted wheels must be equipped
with functioning sensors for the tire
pressure monitor. 412
Changing a wheelWheels and tires