2014 MERCEDES-BENZ S-Class engine
[x] Cancel search: enginePage 132 of 434

backwards if it is not already in the
rearmost position.
Position of the steering wheel and the
driver's seat for driving The steering wheel and the driver's seat are
moved to the previously set position if:
R the driver's door is closed and you insert
the SmartKey into the ignition lock
R you close the driver's door when the
ignition is switched on
R you press the Start/Stop button once on
vehicles with KEYLESS-GO
i The steering wheel and the driver's seat
only return to the last set position when the
driving position is stored after seat or
steering wheel adjustment (Y page 133).
The last position of the steering wheel or seat
is stored if:
R the ignition is switched off.
R the setting is stored with the memory
function (Y page 133).
Crash-responsive EASY-EXIT feature If the crash-responsive EASY-EXIT feature is
triggered in an accident, the steering column
will move upwards when the driver's door is
opened or the SmartKey is removed from the
ignition lock. This makes it easier to exit the
vehicle and rescue the occupants.
The crash-responsive EASY-EXIT feature is
only operational if the EASY-EXIT/ENTRY
feature is activated in COMAND (see the
separate operating instructions). Mirrors
Rear-view mirror
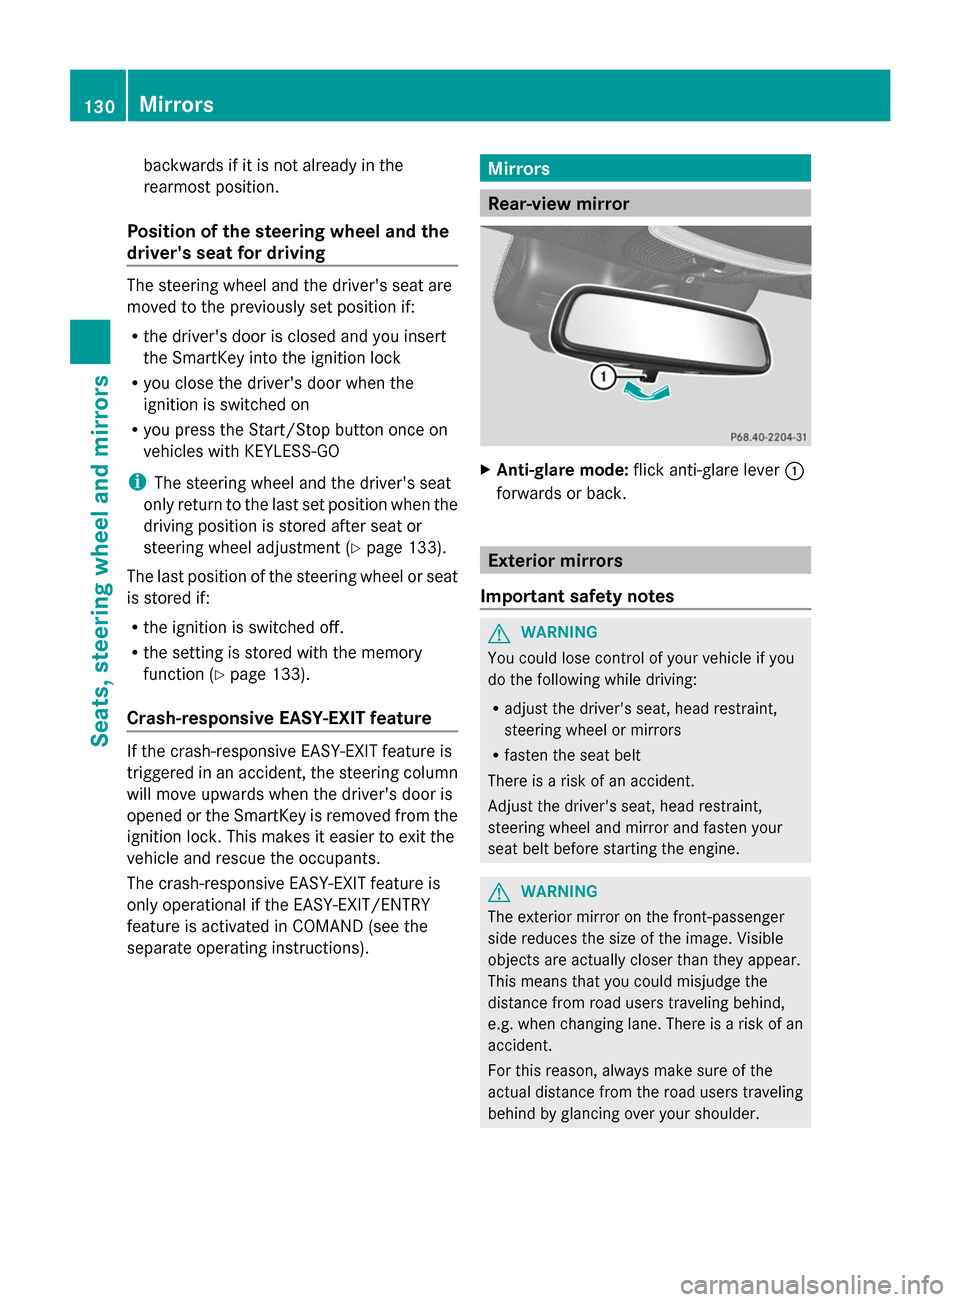
X
Anti-glare mode: flick anti-glare lever 0043
forwards or back. Exterior mirrors
Important safety notes G
WARNING
You could lose control of your vehicle if you
do the following while driving:
R adjust the driver's seat, head restraint,
steering wheel or mirrors
R fasten the seat belt
There is a risk of an accident.
Adjust the driver's seat, head restraint,
steering wheel and mirror and fasten your
seat belt before starting the engine. G
WARNING
The exterior mirror on the front-passenger
side reduces the size of the image. Visible
objects are actually closer than they appear.
This means that you could misjudge the
distance from road users traveling behind,
e.g. when changing lane. There is a risk of an
accident.
For this reason, always make sure of the
actual distance from the road users traveling
behind by glancing over your shoulder. 130
MirrorsSeats, steering wheel and mirrors
Page 133 of 434

Adjusting the exterior mirrors
X
Turn the SmartKey to position 1or 2in the
ignition lock (Y page 171).
X Press button 0044for the right-hand exterior
mirror or button 0087for the left-hand
exterior mirror.
The indicator lamp lights up in the button
that has been pressed.
The indicator lamp goes out again after
some time. You can adjust the selected
mirror using adjustment button 0043as long
as the indicator lamp is lit.
X Press adjustment button 0043up, down, or
to the left or right until you have adjusted
the exterior mirror to the correct position.
You should have a good overview of traffic
conditions.
The convex exterior mirrors provide a larger
field of vision.
After the engine has been started, the
exterior mirrors are automatically heated if
the rear window defroster is switched on and
the outside temperature is low. Folding the exterior mirrors in or out
electrically X
Turn the SmartKey to position 1or 2in the
ignition lock (Y page 171).
X Briefly press button 0043.
Both exterior mirrors fold in or out.
i Make sure that the exterior mirrors are
always folded out fully while driving. They
could otherwise vibrate.
i If you are driving faster than 30 mph
(47 km/h), you can no longer fold in the
exterior mirrors.
Setting the exterior mirrors If the battery has been disconnected or
completely discharged, the exterior mirrors
must be reset. The exterior mirrors will
otherwise not fold in when you select the
"Fold in mirrors when locking" function in the
on-board computer.
X
Turn the SmartKey to position 1or 2in the
ignition lock (Y page 171).
X Briefly press button 0043.
Folding the exterior mirrors in or out
automatically This function is only available in vehicles for
Canada.
When the "Automatic mirror folding" function
is activated in COMAND (see the separate
operating instructions): Mirrors
131Seats, steering wheel and mirrors Z
Page 141 of 434

causes of poor visibility due to the weather
conditions such as spray. There is a risk of an
accident.
In such situations, turn the light switch to
0058.
The automatic headlamp feature is only an
aid. The driver is responsible for the vehicle's
lighting at all times.
Only for Canada:
The daytime running lamps improve the
visibility of your vehicle during the day. The
daytime running lamps function is required by
law in Canada. It cannot therefore be
deactivated.
When the engine is running and the vehicle is
stationary: if you move the selector lever from
a drive position to P, the daytime running
lamps/low-beam headlamps go out after
three minutes.
When the engine is running, the vehicle is
stationary and in bright ambient light: if you
turn the light switch to 0060, the daytime
running lamps and parking lamps switch on.
If the engine is running and you turn the light
switch to 0058, the manual settings take
precedence over the daytime running lamps.
USA only:
The daytime running lamps improve the
visibility of your vehicle during the day. To do
this, the daytime running lamps function must
be switched on using the on-board computer
(Y page 262).
If the engine is running and you turn the light
switch to 0060or0058, the manual settings
take precedence over the daytime running
lamps.
0058 is the favored light switch setting. The
light setting is automatically selected
according to the brightness of the ambient
light (exception: poor visibility due to weather
conditions such as fog, snow or spray):
R SmartKey in position 1in the ignition lock:
the parking lamps are switched on or off automatically depending on the brightness
of the ambient light.
R With the engine running: if you have
activated the daytime running lamps
function via the on-board computer, the
daytime running lamps or the low-beam
headlamps and parking lamps are switched
on or off automatically depending on the
brightness of the ambient light.
X To switch on automatic headlamp
mode: turn the light switch to 0058.
Low-beam headlamps
Even if the light sensor does not detect that
it is dark, the parking lamps and low-beam
headlamps switch on when the ignition is
switched on and the light switch is set to the
0058 position. This is a particularly useful
function in the event of rain and fog.
X To switch on the low-beam headlamps:
turn the SmartKey in the ignition lock to
position 2or start the engine.
X Turn the light switch to 0058.
The green 0058indicator lamp in the
instrument cluster lights up.
Parking lamps
! If the battery has been excessively
discharged, the parking lamps or standing
lamps are automatically switched off to
enable the next engine start. Always park
your vehicle safely and sufficiently lit
according to legal standards. Avoid the
continuous use of the 0060parking lamps
for several hours. If possible, switch on the
0064 right or the 0063left standing lamp.
X To switch on: turn the light switch to
0060.
The green 0060indicator lamp in the
instrument cluster lights up.
Standing lamps
Switching on the standing lamps ensures the
corresponding side of the vehicle is
illuminated. Exterior lighting
139Lights and windshield wipers Z
Page 142 of 434

X
To switch on the standing lamps: the
SmartKey is not in the ignition lock or it is
in position 0.
X Turn the light switch to 0063(left-hand side
of the vehicle) or 0064(right-hand side of
the vehicle). Combination switch
Turn signal 0043
High-beam headlamps
0044 Turn signal, right
0087 High-beam flasher
0085 Turn signal, left
X To indicate briefly: press the combination
switch briefly to the pressure point in the
direction of arrow 0044or0085.
The corresponding turn signal flashes three
times.
X To indicate: press the combination switch
beyond the pressure point in the direction
of arrow 0044or0085.
High-beam headlamps X
To switch on the high-beam headlamps:
turn the SmartKey in the ignition lock to
position 2or start the engine.
X Turn the light switch to 0058or0058. X
Press the combination switch beyond the
pressure point in the direction of
arrow 0043.
In the 0058position, the high-beam
headlamps are only switched on when it is
dark and the engine is running.
The blue 0057indicator lamp in the
instrument cluster lights up when the high-
beam headlamps are switched on.
X To switch off the high-beam
headlamps: move the combination switch
back to its normal position.
The blue 0057indicator lamp in the
instrument cluster goes out.
If Adaptive Highbeam Assist is active, it
controls activation and deactivation of the
high-beam headlamps (Y page 141).
If Adaptive Highbeam Assist is active, it
controls activation and deactivation of the
high-beam headlamps (Y page 143).
High-beam flasher X
To switch on: turn the SmartKey in the
ignition lock to position 1or 2, or start the
engine.
X Pull the combination switch in the direction
of arrow 0087. Hazard warning lamps
X
To switch on the hazard warning lamps:
press button 0043.
All turn signals flash. If you now switch on
a turn signal using the combination switch, 140
Exterior lightingLights and
windshield wipers
Page 151 of 434

Problems with the windshield wipers
Problem Possible causes/consequences and
0050
0050Solutions The windshield wipers
are obstructed Leaves or snow, for example, may be obstructing the windshield
wiper movement. The wiper motor has been deactivated.
X
Switch off the engine using the Start/Stop button and open the
driver's door.
X Remove the cause of the obstruction.
X Switch the windshield wipers back on. The windshield wipers
fail completely. The windshield wiper drive is malfunctioning.
X
Select another wiper speed on the combination switch.
X Have the windshield wipers checked at a qualified specialist
workshop. The wiper motor has been deactivated.
X
Switch off the engine using the Start/Stop button and open the
driver's door.
X Remove the cause of the obstruction.
X Switch the windshield wipers back on. For a standard wiper
system only: the
windshield washer fluid
from the spray nozzles
no longer hits the
center of the
windshield. The spray nozzles are misaligned.
X
Have the spray nozzles adjusted at a qualified specialist
workshop. Windshield wipers
149Lights and windshield wipers Z
Page 154 of 434

Useful information
i This Operator's Manual describes all
models and all standard and optional
equipment of your vehicle available at the
time of publication of the Operator's
Manual. Country-specific differences are
possible. Please note that your vehicle may
not be equipped with all features
described. This also applies to safety-
related systems and functions.
i Read the information on qualified
specialist workshops: (Y page 27).Overview of climate control systems
Important safety notes
Observe the settings recommended on the
following pages. The windows could
otherwise fog up.
To prevent the windows from fogging up:
R switch off climate control only briefly
R switch on air-recirculation mode only
briefly
R switch on the cooling with air
dehumidification function
R switch on the defrost windshield function
briefly, if required
Climate control regulates the temperature
and air humidity in the vehicle interior. The air
filter cleans the air, thus improving the
interior climate.
The "Cooling with air dehumidification"
function is only available when the engine is
running. Optimum climate control is only
achieved with the side windows and roof
closed.
The residual heat function can only be
activated or deactivated with the ignition
switched off (Y page 163).
i Ventilate the vehicle for a brief period
during warm weather, e.g. using the
convenience opening feature
(Y page 100). This will speed up the cooling process and the desired interior
temperature will be reached more quickly.
i The integrated filter filters out most
particles of dust and soot and completely
filters out pollen. It also reduces gaseous
pollutants and odors. A clogged filter
reduces the amount of air supplied to the
vehicle interior. For this reason, you should
always observe the interval for replacing
the filter, which is specified in the
Maintenance Booklet. As it depends on
environmental conditions, e.g. heavy air
pollution, the interval may be shorter than
stated in the Maintenance Booklet.
i It is possible that the blower may be
activated automatically 60 minutes after
the key has been removed depending on
various factors, e.g. the outside
temperature. The vehicle is then ventilated
for 30 minutes to dry the automatic climate
control. 152
Overview of climate control systemsClimate control
Page 157 of 434

Notes on using climate control
Automatic climate control Below, you can find a number of notes and
recommendations to help you use climate
control optimally.
R Activate climate control using the 0058
rocker switch. The indicator lamp in the
0058 rocker switch lights up.
R Set the temperature to 72 ‡ (22 †).
R Only use the "Windshield defrosting"
function briefly until the windshield is clear
again.
R Only use air-recirculation mode briefly, e.g.
if there are unpleasant outside odors or
when in a tunnel. The windows could
otherwise fog up, since no fresh air is drawn
into the vehicle in air-recirculation mode.
R Use the residual heat function if you want
to heat or ventilate the vehicle interior
when the ignition is switched off. The
residual heat function can only be activated
or deactivated with the ignition switched
off. The residual heat function is switched
off when the ignition is switched on.
If you are controlling the rear climate control
using the front control panel, note the
following:
R If you set rear-compartment climate
control using the front control panel, the
00A4 symbol appears in the rear-
compartment control panel display.
R If the rear-compartment climate control is
set using the front control panel, it cannot
be set at the same time using the rear
control panel. If controlling the rear climate
control from the front control panel is
locked, wait five seconds. You will then be
able to control the rear climate control
using the rear control panel.
R After selecting the rear compartment
settings, the front climate control can be
controlled automatically again via
COMAND after five seconds. Alternatively, you can select "Cancel rear
compartment" in the COMAND air-
conditioning function bar.
ECO start/stop function During automatic engine switch-off, the
climate control only operates at a reduced
capacity. If you require the full climate control
output, you can switch off the ECO start/stop
function by pressing the ECO button
(Y
page 177). Operating the climate control
systems
Switching climate control on/off
General notes When the climate control is switched off, the
air supply and air circulation are also
switched off. The windows could fog up.
Therefore, switch off climate control only
briefly
Switch on climate control primarily using the
0058 rocker switch ( Ypage 157).
Switching the front climate control on
and off using the control panel X
Turn the SmartKey to position 2in the
ignition lock ( Ypage 171).
X To activate: press the008Arocker switch
up or down.
The COMAND climate control menu opens.
X Activate climate control via the air-
conditioning setting bar in COMAND (see
the separate operating instructions).
X To deactivate: press the008Arocker
switch up or down.
The COMAND climate control menu opens.
X Deactivate climate control via the air-
conditioning setting bar in COMAND (see
the separate operating instructions). Operating the climate control systems
155Climate control
Page 158 of 434

Switching the front climate control on/
off using the control panel Observe the notes on controlling the rear-
compartment climate control using the front
control panel (Y page 155).
X Turn the SmartKey to position 2in the
ignition lock (Y page 171).
X To activate: press the008Arocker switch
up or down.
The COMAND climate control menu opens.
X Select "Rear adjustment" in the air-
conditioning setting bar (see the separate
COMAND operating instructions).
You can control the rear-compartment
climate control using the front control
panel or COMAND.
X Activate rear-compartment climate control
via the air-conditioning setting bar.
X To deactivate: press the008Arocker
switch up or down.
The COMAND climate control menu opens.
X Select "Rear adjustment" in the air-
conditioning setting bar (see the separate
COMAND operating instructions).
X Deactivate rear-compartment climate
control via the air-conditioning setting bar.
Switching rear-compartment climate
control on/off using the control panel X
Turn the SmartKey to position 2in the
ignition lock (Y page 171).
X To activate: press rocker switch 0074up or
down (Y page 153).
The indicator lamp in rocker switch 0074goes
out. All settings are displayed in full in the
rear-compartment display.
X To deactivate: press rocker switch 0074up
or down (Y page 153).
The indicator lamp in rocker switch 0074
lights up. OFF
OFF is displayed in the rear-
compartment display. Activating/deactivating cooling with
air dehumidification
General notes If you deactivate the "Cooling with air-
dehumidification" function, the air inside the
vehicle will not be cooled. The air inside the
vehicle will also not be dehumidified. The
windows can fog up more quickly. Therefore,
deactivate the cooling with air-
dehumidification function only briefly.
The "Cooling with air dehumidification"
function is only available when the engine is
running. The air inside the vehicle is cooled
and dehumidified according to the
temperature selected.
Condensation may drip from the underside of
the vehicle when it is in cooling mode. This is
normal and not a sign that there is a
malfunction.
Activating/deactivating cooling with
air dehumidification You can activate or deactivate the "Cooling
with air dehumidification" function using
COMAND (see the separate operating
instructions).156
Operating the climate control systemsClimate control