2014 MERCEDES-BENZ S-CLASS COUPE battery
[x] Cancel search: batteryPage 251 of 413
X
Use ò on the steering wheel to call up
the list of menus.
X Press the :or9 button on the steer-
ing wheel to select the Trip
Tripmenu.
X Confirm by pressing aon the steering
wheel.
X Press the :or9 button to select
approximate range :and current fuel con-
sumption ;(not for AMG vehicles).
Approximate range :that can be covered is
calculated according to your current driving
style and the amount of fuel in the tank. If
there is only a small amount of fuel left in the fuel tank, the display shows a vehicle being
refuelled Cinstead of range :.
Recuperation display =shows you if energy
is being recuperated from the kinetic energy
in overrun mode and saved in the battery.
Recuperation display =depends on the
engine installed and is therefore not available
in all vehicles.
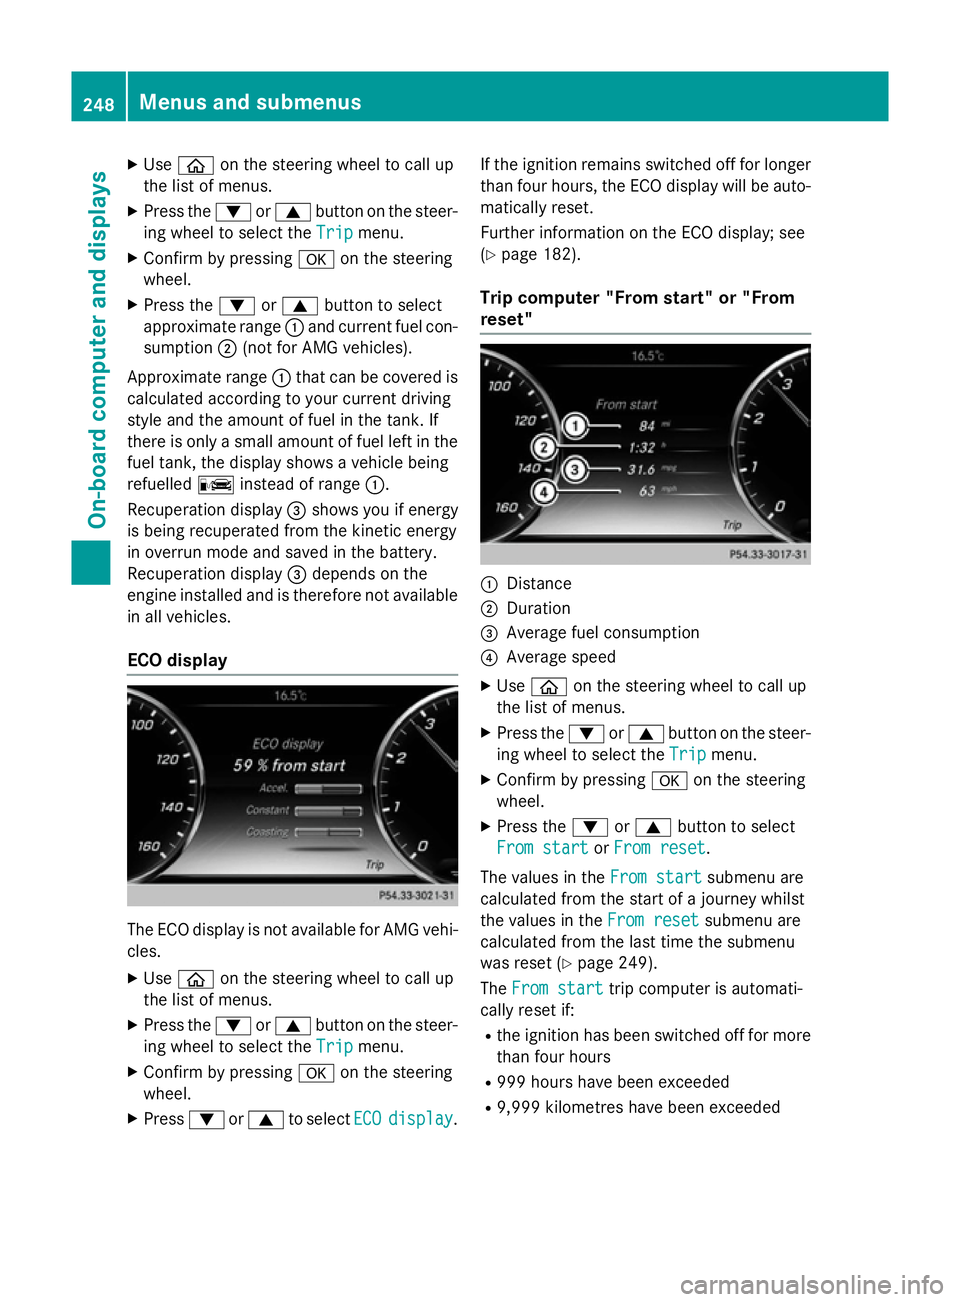
ECO display The ECO display is not available for AMG vehi-
cles.
X Use ò on the steering wheel to call up
the list of menus.
X Press the :or9 button on the steer-
ing wheel to select the Trip Tripmenu.
X Confirm by pressing aon the steering
wheel.
X Press :or9 to select ECO
ECOdisplay
display. If the ignition remains switched off for longer
than four hours, the ECO display will be auto-
matically reset.
Further information on the ECO display; see
(Y page 182).
Trip computer "From start" or "From
reset" :
Distance
; Duration
= Average fuel consumption
? Average speed
X Use ò on the steering wheel to call up
the list of menus.
X Press the :or9 button on the steer-
ing wheel to select the Trip Tripmenu.
X Confirm by pressing aon the steering
wheel.
X Press the :or9 button to select
From start From start orFrom reset
From reset.
The values in the From start
From startsubmenu are
calculated from the start of a journey whilst
the values in the From reset From resetsubmenu are
calculated from the last time the submenu
was reset (Y page 249).
The From start From start trip computer is automati-
cally reset if:
R the ignition has been switched off for more
than four hours
R 999 hours have been exceeded
R 9,999 kilometres have been exceeded 248
Menus and submenusOn-board computer and displays
Page 274 of 413
Display messages
Possible causes/consequences and
M
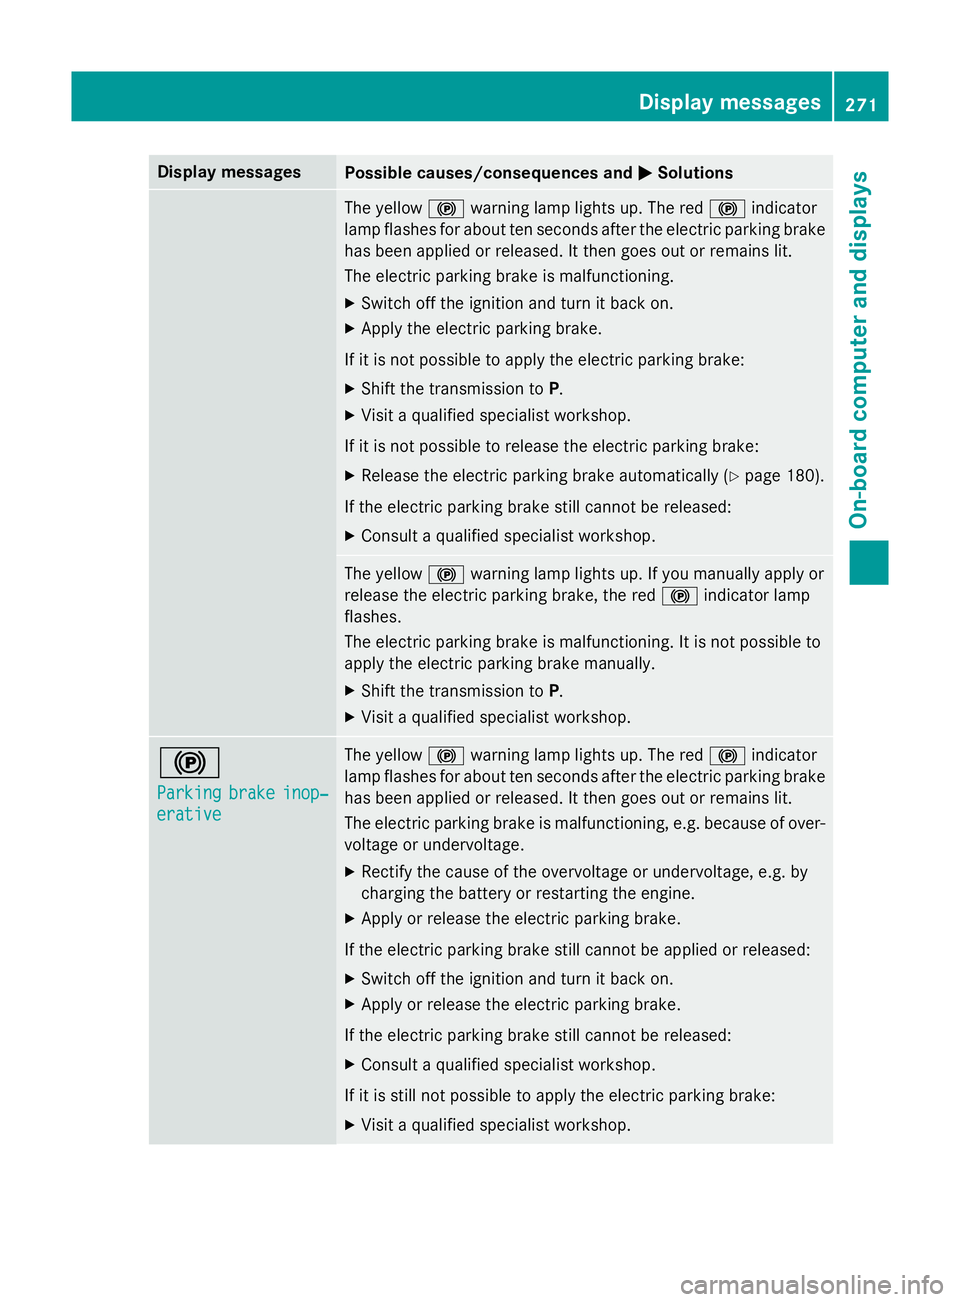
MSolutions The yellow
!warning lamp lights up. The red !indicator
lamp flashes for about ten seconds after the electric parking brake
has been applied or released. It then goes out or remains lit.
The electric parking brake is malfunctioning.
X Switch off the ignition and turn it back on.
X Apply the electric parking brake.
If it is not possible to apply the electric parking brake:
X Shift the transmission to P.
X Visit a qualified specialist workshop.
If it is not possible to release the electric parking brake:
X Release the electric parking brake automatically (Y page 180).
If the electric parking brake still cannot be released:
X Consult a qualified specialist workshop. The yellow
!warning lamp lights up. If you manually apply or
release the electric parking brake, the red !indicator lamp
flashes.
The electric parking brake is malfunctioning. It is not possible to
apply the electric parking brake manually.
X Shift the transmission to P.
X Visit a qualified specialist workshop. !
Parking Parking
brake
brakeinop‐
inop‐
erative
erative The yellow
!warning lamp lights up. The red !indicator
lamp flashes for about ten seconds after the electric parking brake
has been applied or released. It then goes out or remains lit.
The electric parking brake is malfunctioning, e.g. because of over- voltage or undervoltage.
X Rectify the cause of the overvoltage or undervoltage, e.g. by
charging the battery or restarting the engine.
X Apply or release the electric parking brake.
If the electric parking brake still cannot be applied or released: X Switch off the ignition and turn it back on.
X Apply or release the electric parking brake.
If the electric parking brake still cannot be released: X Consult a qualified specialist workshop.
If it is still not possible to apply the electric parking brake: X Visit a qualified specialist workshop. Display
messages
271On-board computer and displays Z
Page 286 of 413
Display messages
Possible causes/consequences and
M
MSolutions #
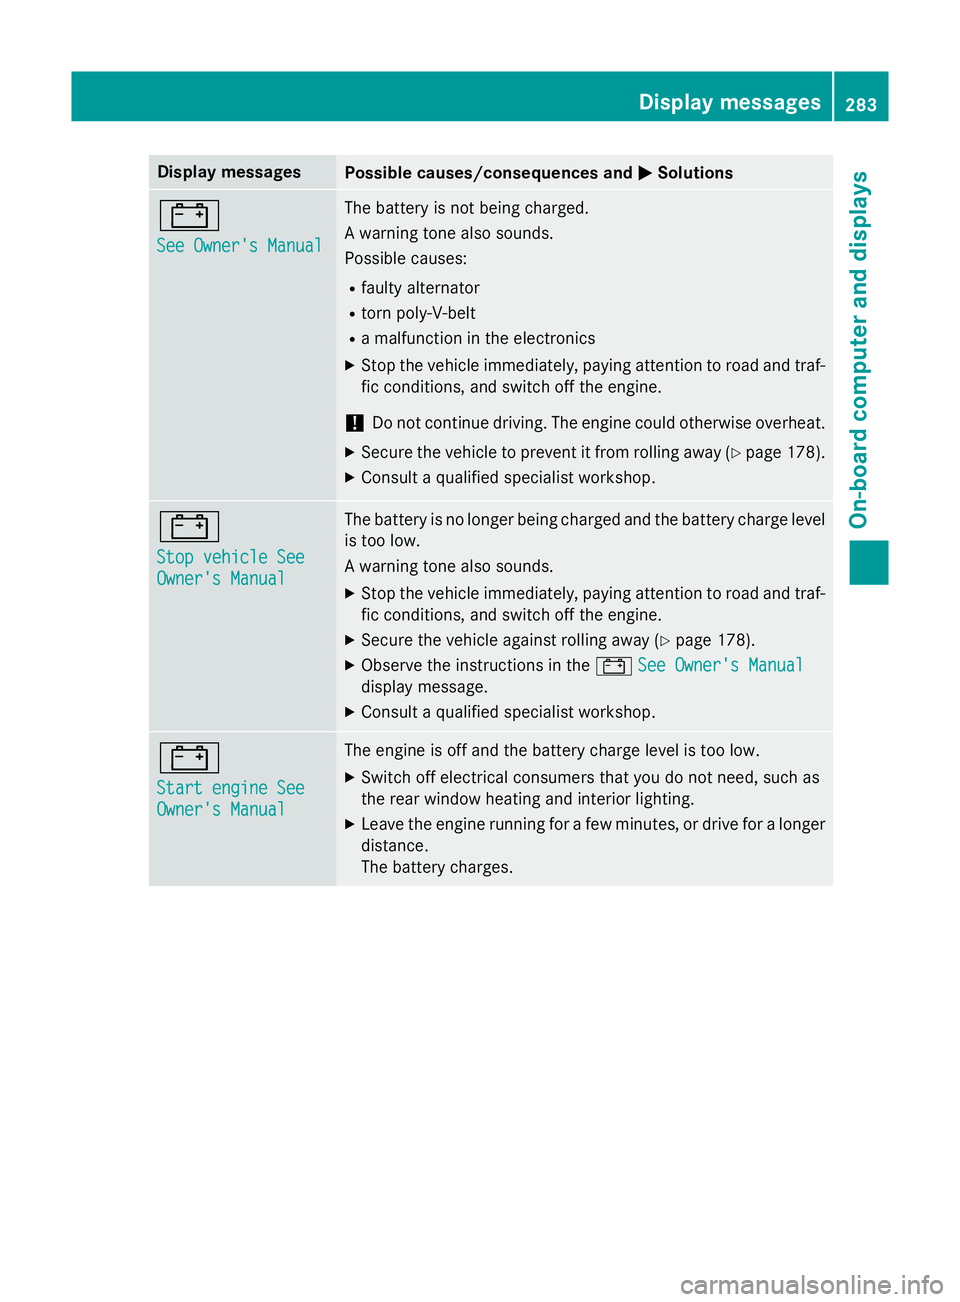
See Owner's Manual See Owner's Manual The battery is not being charged.
A warning tone also sounds.
Possible causes:
R faulty alternator
R torn poly-V-belt
R a malfunction in the electronics
X Stop the vehicle immediately, paying attention to road and traf-
fic conditions, and switch off the engine.
! Do not continue driving. The engine could otherwise overheat.
X Secure the vehicle to prevent it from rolling away (Y page 178).
X Consult a qualified specialist workshop. #
Stop vehicle See Stop vehicle See
Owner's Manual Owner's Manual The battery is no longer being charged and the battery charge level
is too low.
A warning tone also sounds.
X Stop the vehicle immediately, paying attention to road and traf-
fic conditions, and switch off the engine.
X Secure the vehicle against rolling away (Y page 178).
X Observe the instructions in the #See Owner's Manual See Owner's Manual
display message.
X Consult a qualified specialist workshop. #
Start engine See Start engine See
Owner's Manual Owner's Manual The engine is off and the battery charge level is too low.
X Switch off electrical consumers that you do not need, such as
the rear window heating and interior lighting.
X Leave the engine running for a few minutes, or drive for a longer
distance.
The battery charges. Display
messages
283On-board computer and displays Z
Page 298 of 413
Display messages
Possible causes/consequences and
M
MSolutions Tyre press. moni‐
Tyre press. moni‐
tor currently tor currently
unavailable unavailable Due to a source of radio interference, no signals can be received
from the wheel sensors. The tyre pressure monitor is temporarily
malfunctioning.
X Drive on.
The tyre pressure monitor restarts automatically as soon as the
cause has been rectified. Wheel sensor(s) Wheel sensor(s)
missing missing There is no signal from the tyre pressure sensor of one or several
wheels. The pressure of the affected tyre is not displayed in the
multifunction display.
X Have the faulty tyre pressure sensor replaced at a qualified spe-
cialist workshop. Tyre press. moni‐ Tyre press. moni‐
tor tor
inoperative
inoperative No
No
wheel sensors
wheel sensors The wheels fitted do not have suitable tyre pressure sensors. The
tyre pressure monitor is deactivated.
X Fit wheels with suitable tyre pressure sensors.
The tyre pressure monitor is activated automatically after driv-
ing for a few minutes. Tyre press. moni‐ Tyre press. moni‐
tor inoperative tor inoperative The tyre pressure monitor is faulty.
X Visit a qualified specialist workshop. Vehicle
Display messages
Possible causes/consequences and
M
MSolutions To start engine,
To start engine,
shift to either P shift to either P
or N or N You have attempted to start the engine with the transmission in
position
Ror D.
X Shift the transmission to position Por N. Auxiliary battery Auxiliary battery
malfunction malfunction The auxiliary battery for the transmission is no longer being
charged.
X Visit a qualified specialist workshop. Apply brake to Apply brake to
deselect Park (P) deselect Park (P)
position position You have attempted to move the transmission selector lever to
position
D,Ror Nwithout depressing the brake pedal.
X Depress the brake pedal. Display
messages
295On-board computer and displays Z
Page 300 of 413
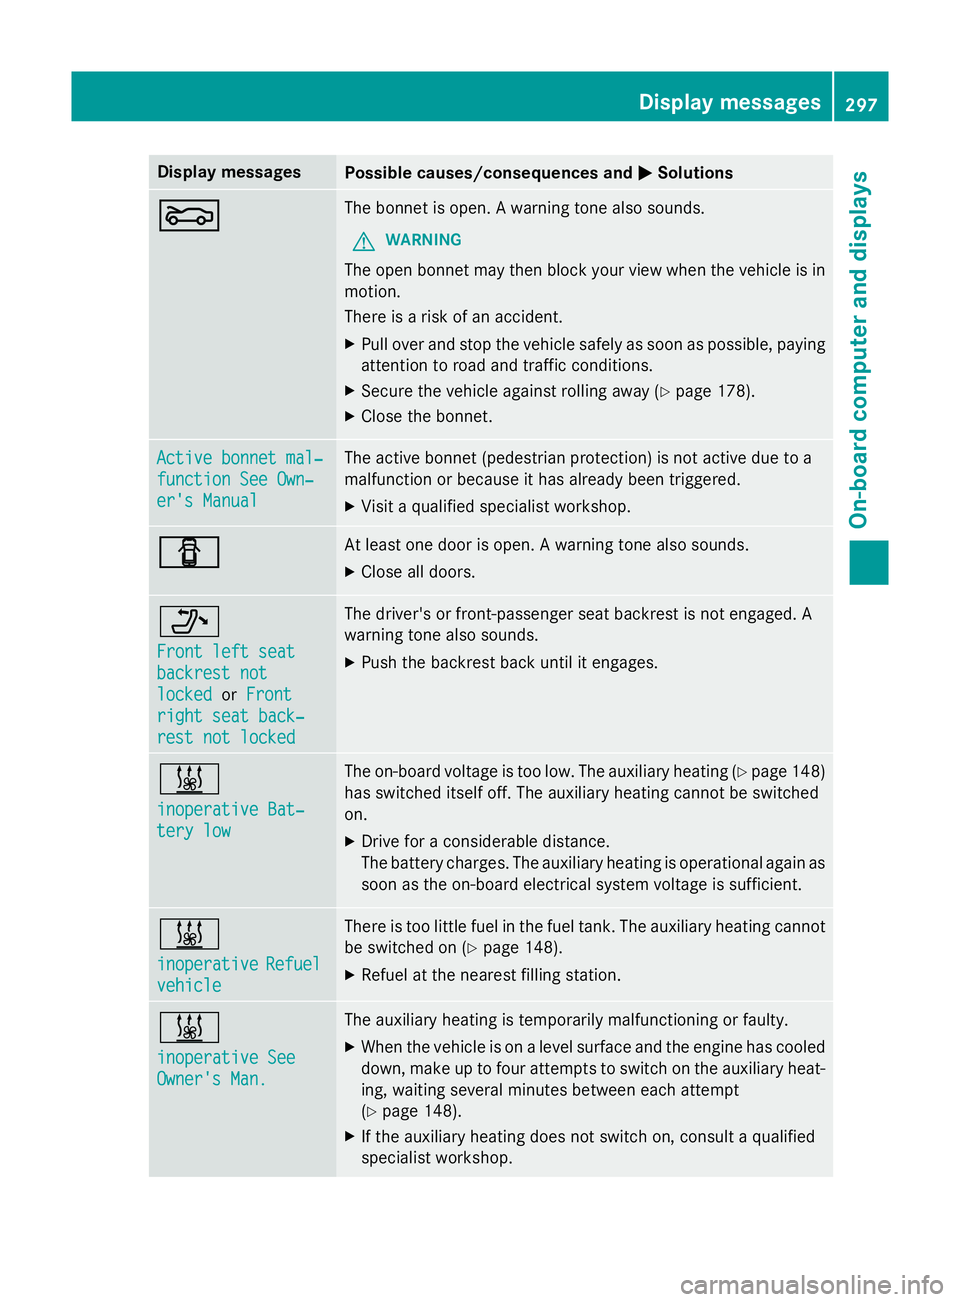
Display messages
Possible causes/consequences and
M
MSolutions M
M The bonnet is open. A warning tone also sounds.
G WARNING
The open bonnet may then block your view when the vehicle is in
motion.
There is a risk of an accident.
X Pull over and stop the vehicle safely as soon as possible, paying
attention to road and traffic conditions.
X Secure the vehicle against rolling away (Y page 178).
X Close the bonnet. Active bonnet mal‐ Active bonnet mal‐
function See Own‐ function See Own‐
er's Manual er's Manual The active bonnet (pedestrian protection) is not active due to a
malfunction or because it has already been triggered.
X Visit a qualified specialist workshop. C C At least one door is open. A warning tone also sounds.
X Close all doors. _
Front left seat Front left seat
backrest not backrest not
locked locked
orFront
Front
right seat back‐
right seat back‐
rest not locked
rest not locked The driver's or front-passenger seat backrest is not engaged. A
warning tone also sounds.
X Push the backrest back until it engages. &
inoperative Bat‐ inoperative Bat‐
tery low tery low The on-board voltage is too low. The auxiliary heating (Y
page 148)
has switched itself off. The auxiliary heating cannot be switched
on.
X Drive for a considerable distance.
The battery charges. The auxiliary heating is operational again as
soon as the on-board electrical system voltage is sufficient. &
inoperative inoperative
Refuel
Refuel
vehicle
vehicle There is too little fuel in the fuel tank. The auxiliary heating cannot
be switched on (Y page 148).
X Refuel at the nearest filling station. &
inoperative See inoperative See
Owner's Man. Owner's Man. The auxiliary heating is temporarily malfunctioning or faulty.
X When the vehicle is on a level surface and the engine has cooled
down, make up to four attempts to switch on the auxiliary heat- ing, waiting several minutes between each attempt
(Y page 148).
X If the auxiliary heating does not switch on, consult a qualified
specialist workshop. Display
messages
297On-board computer and displays Z
Page 326 of 413
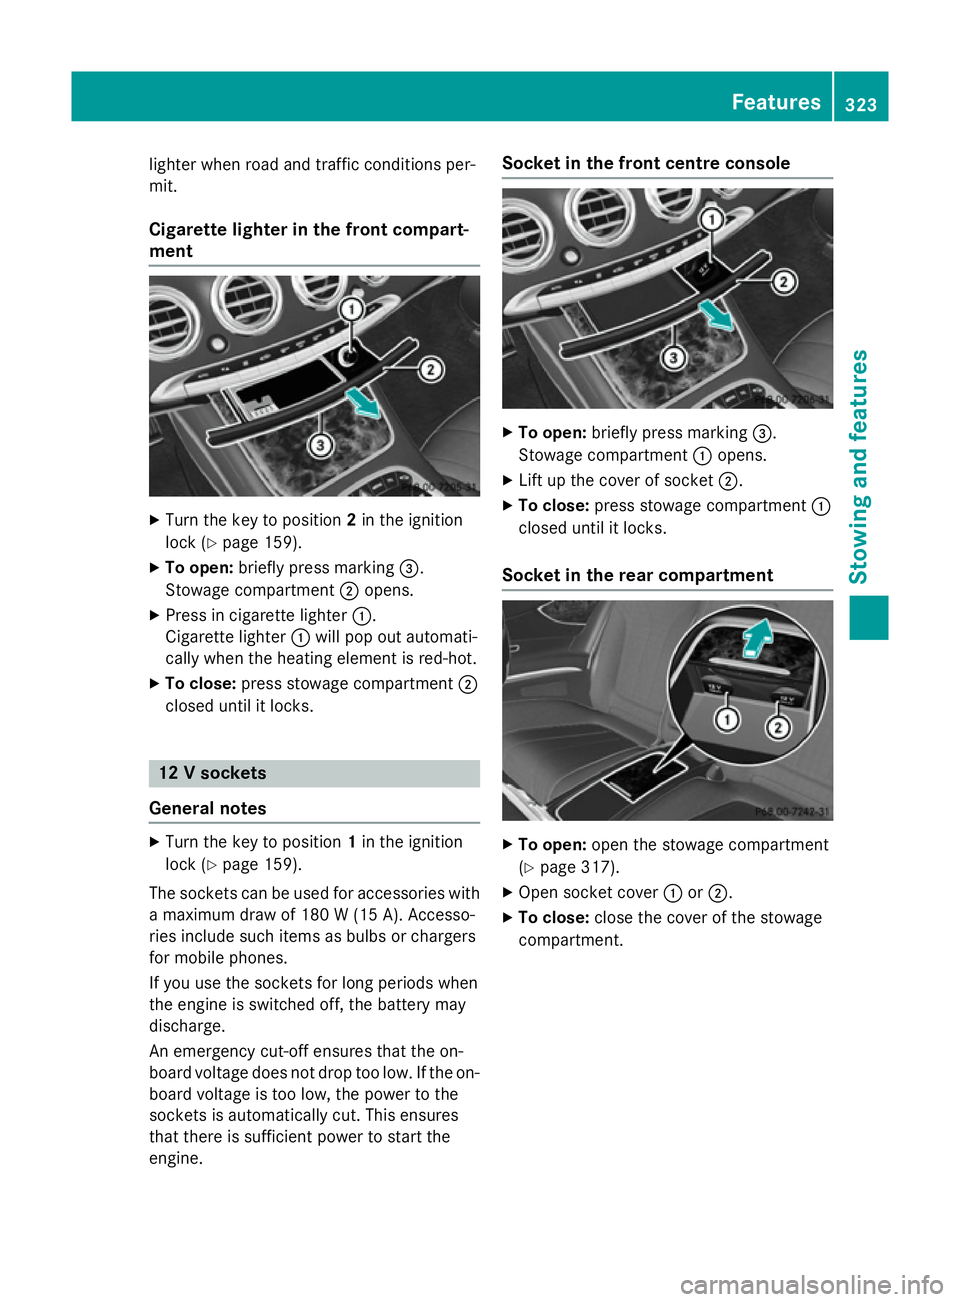
lighter when road and traffic conditions per-
mit.
Cigarette lighter in the front compart-
ment X
Turn the key to position 2in the ignition
lock (Y page 159).
X To open: briefly press marking =.
Stowage compartment ;opens.
X Press in cigarette lighter :.
Cigarette lighter :will pop out automati-
cally when the heating element is red-hot.
X To close: press stowage compartment ;
closed until it locks. 12 V sockets
General notes X
Turn the key to position 1in the ignition
lock (Y page 159).
The sockets can be used for accessories with a maximum draw of 180 W (15A). Accesso-
ries include such items as bulbs or chargers
for mobile phones.
If you use the sockets for long periods when
the engine is switched off, the battery may
discharge.
An emergency cut-off ensures that the on-
board voltage does not drop too low. If the on-
board voltage is too low, the power to the
sockets is automatically cut. This ensures
that there is sufficient power to start the
engine. Socket in the front cent
re console X
To open: briefly press marking =.
Stowage compartment :opens.
X Lift up the cover of socket ;.
X To close: press stowage compartment :
closed until it locks.
Socket in the rear compartment X
To open: open the stowage compartment
(Y page 317).
X Open socket cover :or;.
X To close: close the cover of the stowage
compartment. Features
323Stowing an d features Z
Page 327 of 413
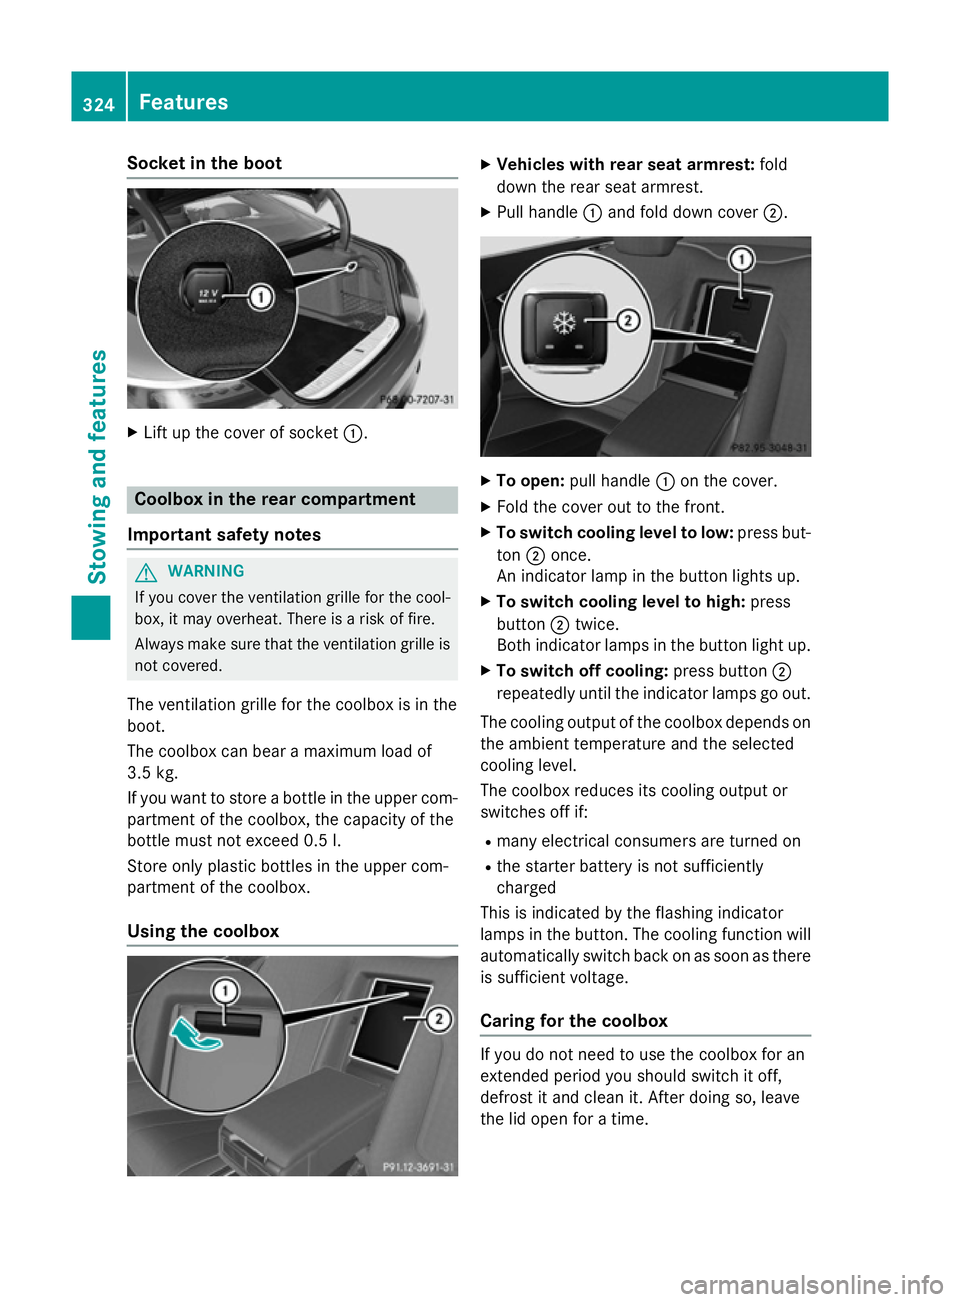
Socket in the boot
X
Lift up the cover of socket :.Coolbox in the rear compartment
Important safety notes G
WARNING
If you cover the ventilation grille for the cool-
box, it may overheat. There is a risk of fire.
Always make sure that the ventilation grille is not covered.
The ventilation grille for the coolbox is in the
boot.
The coolbox can bear a maximum load of
3.5 kg.
If you want to store a bottle in the upper com-
partment of the coolbox, the capacity of the
bottle must not exceed 0.5 l.
Store only plastic bottles in the upper com-
partment of the coolbox.
Using the coolbox X
Vehicles with rear seat armrest: fold
down the rear seat armrest.
X Pull handle :and fold down cover ;. X
To open: pull handle :on the cover.
X Fold the cover out to the front.
X To switch cooling level to low: press but-
ton ;once.
An indicator lamp in the button lights up.
X To switch cooling level to high: press
button ;twice.
Both indicator lamps in the button light up.
X To switch off cooling: press button;
repeatedly until the indicator lamps go out.
The cooling output of the coolbox depends on
the ambient temperature and the selected
cooling level.
The coolbox reduces its cooling output or
switches off if:
R many electrical consumers are turned on
R the starter battery is not sufficiently
charged
This is indicated by the flashing indicator
lamps in the button. The cooling function will automatically switch back on as soon as there
is sufficient voltage.
Caring for the coolbox If you do not need to use the coolbox for an
extended period you should switch it off,
defrost it and clean it. After doing so, leave
the lid open for a time.324
FeaturesStowing and features
Page 345 of 413
X
Top up with the premixed washer fluid.
X To close: press cap :onto the filler neck
until it engages.
If the washer fluid level drops below the rec-
ommended minimum of 1 litre, a message
appears in the multifunction display prompt-
ing you to top up the washer fluid
(Y page 298).
Further information on windscreen washer
fluid/antifreeze (Y page 407).ASSYST PLUS
Service message
The ASSYST PLUS service interval display
informs you of the next service due date.
Information on the type of service and service
intervals (see the separate Service Booklet).
You can obtain further information from a
Mercedes-Benz Service Centre.
i The ASSYST PLUS service interval display
does not show any information on the
engine oil level. Observe the notes on the
engine oil level (Y page 338).
The multifunction display shows a service
message for a few seconds, e.g.:
R Service A in .. days
Service A in .. days
R Service A due Service A due
R Service A overdue by .. days
Service A overdue by .. days
Depending on the operating conditions of the vehicle, the remaining time or distance until
the next service due date is displayed.
The letter indicates which service is due. A
A
stands for a minor service and B
B for a major
service. A number or another letter may be
displayed after the letter.
Only for certain countries: the position after
the letter A
A or B Bindicates any necessary addi-
tional maintenance work to be performed. If
you notify a qualified specialist workshop of
this display, you will receive a statement on
the associated costs. The ASSYST PLUS service interval display
does not take into account any periods of
time during which the battery is disconnec-
ted.
Maintaining the time-dependent service
schedule:
X Note down the service due date displayed
in the multifunction display before discon-
necting the battery.
or X After reconnecting the battery, subtract
the battery disconnection periods from the
service date shown on the display. Hiding service messages
X Press the aor% button on the steer-
ing wheel. Displaying service messages
X Switch the ignition on.
X Use ò on the steering wheel to call up
the list of menus.
X Press the 9or: button on the steer-
ing wheel to select the Service Servicemenu and
press ato confirm.
X Press the 9or: button on the steer-
ing wheel to select the ASSYST PLUS
ASSYST PLUSsub-
menu and press ato confirm.
The service due date appears in the multi-
function display. Information about Service
Resetting the ASSYST PLUS service
interval display !
If the ASSYST PLUS service interval dis-
play has been inadvertently reset, this set-
ting can be corrected at a qualified special-
ist workshop.
Have service work carried out as described in the Service Booklet. This may otherwise 342
ASSYST PLUSMaintenance and care