2014 MERCEDES-BENZ S-CLASS COUPE warning lights
[x] Cancel search: warning lightsPage 148 of 413
Problems with the rear window heating
Problem
Possible causes/consequences and
M
MSolutions The rear window heat-
ing has switched off
prematurely or cannot
be activated. The battery has not been sufficiently charged.
X Switch off any consumers that are not required, e.g. reading
lamps, interior lighting or the seat heating.
When the battery is sufficiently charged, the rear window heat-
ing can be activated again. Activating/deactivating air-recircula-
tion mode
General notes You can also temporarily deactivate the flow
of fresh air manually if unpleasant odours are
entering the vehicle from outside. The air
already inside the vehicle will then be recir-
culated.
If you switch on air-recirculation mode, the
windows can mist up more quickly, in partic-
ular at low temperatures. Only use air-recir-
culation mode briefly to prevent the windows misting up.
Activating/deactivating X
Turn the key to position 2in the ignition
lock (Y page 159).
X To activate: press thegrocker switch
up or down.
The indicator lamp in the rocker switch
g lights up.
Air-recirculation mode is automatically acti-
vated at high levels of pollution or at high out- side temperatures. The indicator lamp in the
g rocker switch is not lit when automatic
air-recirculation mode is activated. Outside
air is added after about 30 minutes.
X To deactivate: press thegrocker
switch up or down.
The indicator lamp in the rocker switch
g goes out. Air-recirculation mode is deactivated auto-
matically:
R after approximately five minutes at outside
temperatures below approximately 5 †
R after approximately five minutes if cooling
with air dehumidification is deactivated
R after approximately 30 minutes at outside
temperatures above approximately 5 † if
the cooling with air dehumidification func-
tion is activated Convenience opening/closing using
the air-recirculation button
G
WARNING
When using convenience closing, you could
become trapped within the sweep of the clos- ing window. There is a risk of injury.
Monitor the entire closing procedure when
using convenience closing. When closing,
make sure that no one has any parts of the
body within the closing area. G
WARNING
During convenience opening parts of the body could be drawn in or become trapped
between the side window and window frame.
There is a risk of injury.
When opening, make sure that nobody is
touching the side window. If someone
becomes trapped, press the Wswitch
immediately to open/close the side window
in the door. The side window stops. To con- Operating the climate control system
145Climate control
Z
Page 149 of 413
tinue closing the side window, pull on the
W switch.
X Convenience closing feature: press and
hold the grocker switch up or down
until the side windows start to close auto-
matically.
The indicator lamp in the grocker
switch lights up. Air-recirculation mode is
activated.
If you open the side windows manually after closing them with the convenience closing
feature, they will remain in this position
when opened using the convenience open-
ing feature.
If parts of the body are in the closing area
during convenience closing, proceed as fol-
lows:
X Press the Wbutton for opening/closing
the side windows.
The side windows stop.
X To then open the side window, press the
W button again.
Observe the notes on the automatic reversing
feature for the side windows (Y page 99).
X Convenience opening feature: press and
hold the grocker switch up or down
until the side windows start to open auto-
matically.
The indicator lamp in rocker switch g
goes out. Air-recirculation mode is deacti-
vated. Activating/deactivating the residual
heat function
General notes Once the engine is switched off, it is possible
to make use of the residual heat of the engine to continue heating or ventilating the front
compartment of the vehicle for approximately
30 minutes.
The heating or ventilation time depends on
the temperature that has been set. Activating/deactivating X
Turn the key to position 0in the ignition
lock or remove it (Y page 159).
X To activate (vehicles with auxiliary
heating): press the!rocker switch up
or down.
The indicator lamp in rocker switch !
lights up.
X To activate (vehicles without auxiliary
heating): press theÁrocker switch up
or down.
The indicator lamp in rocker switch Á
lights up.
The blower will run at a low speed regardless of the airflow setting.
If you activate the residual heat function at
high temperatures, only the ventilation will be
activated. The blower runs at medium speed.
X To deactivate (vehicles with auxiliary
heating): press the!rocker switch up
or down.
The indicator lamp in the !rocker
switch goes out.
X To deactivate (vehicles without auxili-
ary heating): press theÁrocker switch
up or down.
The indicator lamp in the Árocker
switch goes out.
Residual heat is deactivated automatically:
R after approximately 30 minutes
R when the ignition is switched on
R if the battery voltage drops
R when the auxiliary heating is switched on Perfume atomizer
Operating the perfume atomizer G
WARNING
If children open the perfume vial, they could
drink the perfume or it could come into con-
tact with their eyes. There is a risk of injury. Do not leave children unsupervised in the vehicle. 146
Operating the climate control systemClimate control
Page 155 of 413
X
Press the uand^ buttons simulta-
neously.
The Îsymbol in the remote control dis-
play flashes.
X Press the ,or. button to set the
desired departure time.
i The longer you press the
,or.
button, the faster the time changes.
X Press the uand^ buttons simulta-
neously.
The new departure time is stored.
When setting the departure time, observe the important safety notes (Y page 148).
Activating the set departure time X Briefly press the ubutton.
X Press the ,or. button repeatedly
until the desired departure time appears in
the display.
X Press the ubutton.
The Ísymbol, the departure time and,
depending on the selected departure time, the letter A, BorCappear in the display.
Deactivating the set departure time
X Briefly press the ubutton.
X Press the ,or. button.
The status of the auxiliary heating is shown in the display.
X Press the .button.
The first departure time stored appears in
the display.
X Press the ^button.
OFF
OFF is shown in the remote control display.
Switching the heater booster function
on/off The heater booster function helps the engine
reach its operating temperature faster during
its warm-up phase. This helps to heat the
vehicle interior faster. The heater booster
function switches on at lower outside tem-
peratures and lower coolant temperatures.
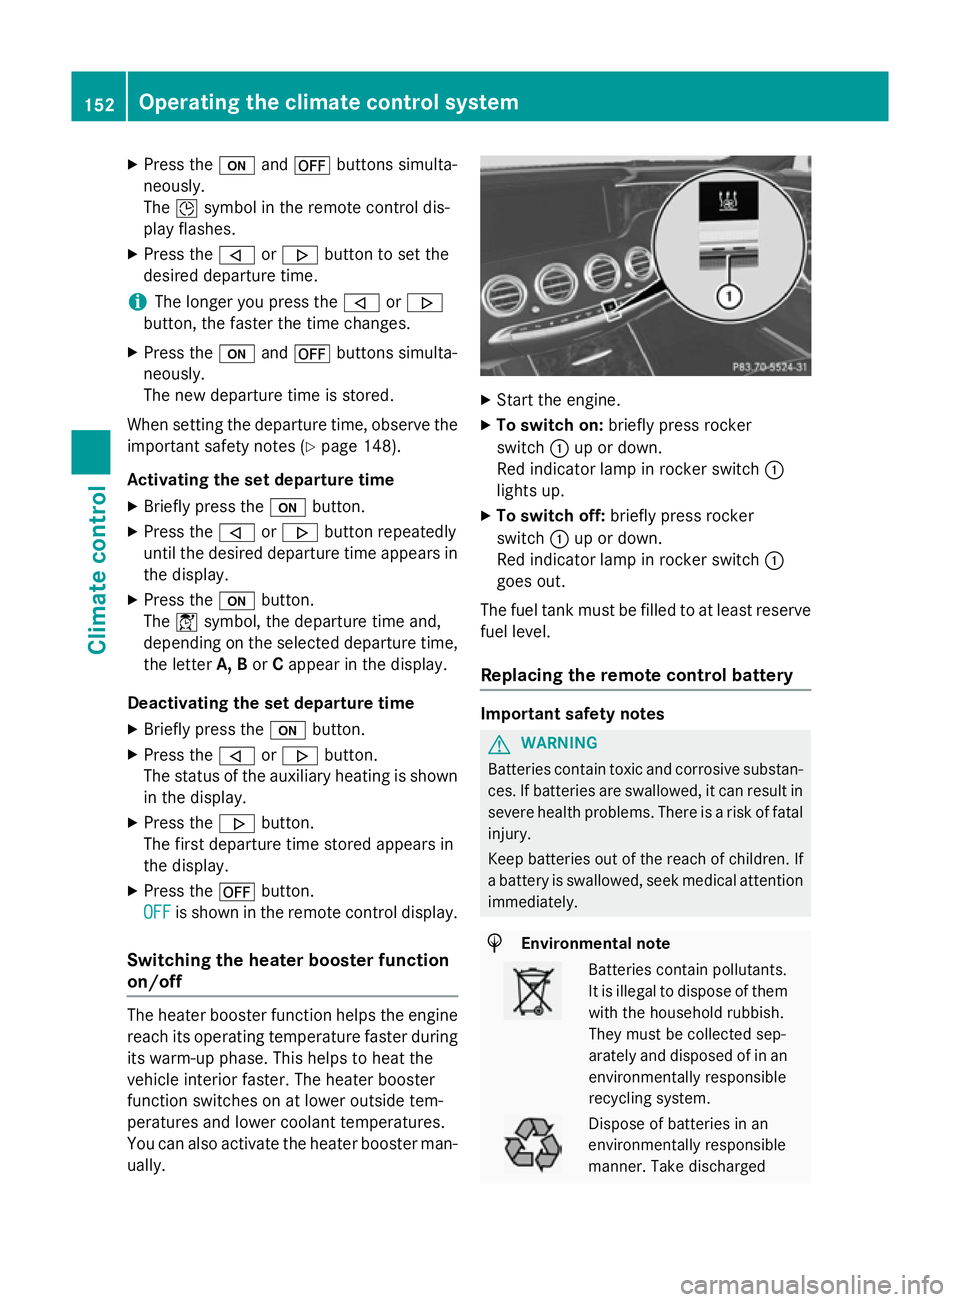
You can also activate the heater booster man- ually. X
Start the engine.
X To switch on: briefly press rocker
switch :up or down.
Red indicator lamp in rocker switch :
lights up.
X To switch off: briefly press rocker
switch :up or down.
Red indicator lamp in rocker switch :
goes out.
The fuel tank must be filled to at least reserve fuel level.
Replacing the remote control battery Important safety notes
G
WARNING
Batteries contain toxic and corrosive substan- ces. If batteries are swallowed, it can result in
severe health problems. There is a risk of fatal injury.
Keep batteries out of the reach of children. If
a battery is swallowed, seek medical attention immediately. H
Environmental note Batteries contain pollutants.
It is illegal to dispose of them
with the household rubbish.
They must be collected sep-
arately and disposed of in anenvironmentally responsible
recycling system. Dispose of batteries in an
environmentally responsible
manner. Take discharged152
Operating the climate control systemClimate control
Page 183 of 413
Electric parking brake
General notes G
WARNING
If you leave children unattended in the vehi-
cle, they may be able to set the vehicle in
motion if, for example, they:
R release the parking brake
R shift the automatic transmission out of park
position P
R start the engine
In addition, they may operate vehicle equip-
ment and become trapped. There is a risk of
an accident and injury.
When leaving the vehicle, always take the key
with you and lock the vehicle. Never leave
children unattended in the vehicle.
The function of the electric parking brake is
dependent on the on-board voltage. If the on-
board voltage is low or if there is a malfunc-
tion in the system, it may not be possible to
apply the released parking brake.
X If this is the case, only park the vehicle on
level ground and secure it to prevent it from
rolling away.
X Shift the automatic transmission to posi-
tion P.
It may not be possible to release an applied
parking brake if the on-board voltage is low or
if there is a malfunction in the system. Con-
tact a qualified specialist workshop.
The electric parking brake carries out a func-
tion check at regular intervals when the
engine is switched off. Noises that occur are
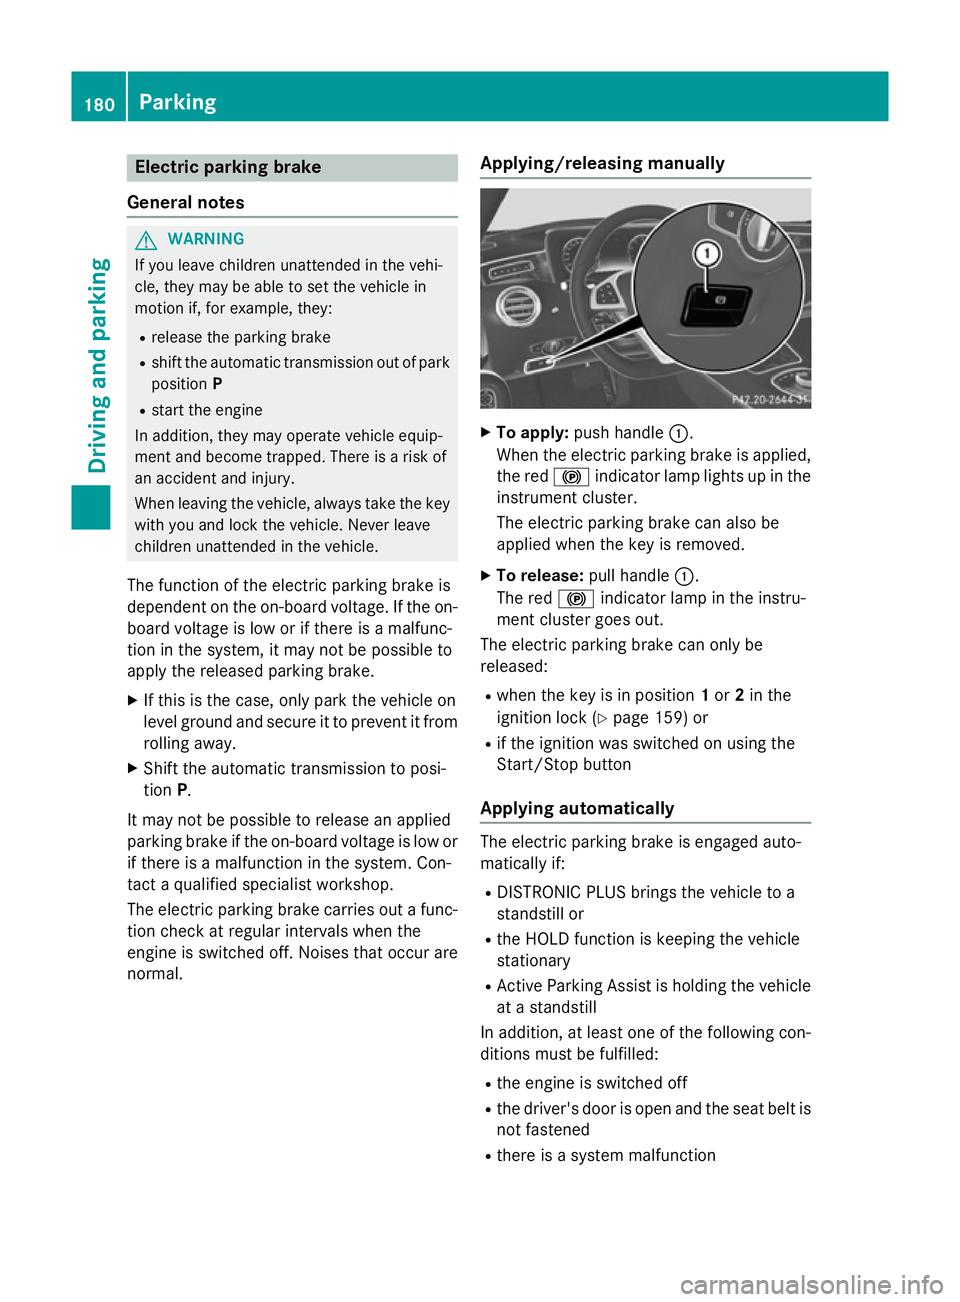
normal. Applying/releasing manually X
To apply: push handle :.
When the electric parking brake is applied, the red !indicator lamp lights up in the
instrument cluster.
The electric parking brake can also be
applied when the key is removed.
X To release: pull handle:.
The red !indicator lamp in the instru-
ment cluster goes out.
The electric parking brake can only be
released:
R when the key is in position 1or 2in the
ignition lock (Y page 159) or
R if the ignition was switched on using the
Start/Stop button
Applying automatically The electric parking brake is engaged auto-
matically if:
R DISTRONIC PLUS brings the vehicle to a
standstill or
R the HOLD function is keeping the vehicle
stationary
R Active Parking Assist is holding the vehicle
at a standstill
In addition, at least one of the following con-
ditions must be fulfilled:
R the engine is switched off
R the driver's door is open and the seat belt is
not fastened
R there is a system malfunction 180
ParkingDriving and parking
Page 184 of 413
R
the power supply is insufficient
R the vehicle is stationary for a lengthy period
The red !indicator lamp in the instrument
cluster lights up.
The electric parking brake is not automati-
cally applied if the engine is switched off by
the ECO start/stop function.
Releasing automatically The electric parking brake is released auto-
matically when all of the following conditions
are fulfilled:
R the engine is running
R the transmission is in position Dor R.
R the seat belt is fastened
R you depress the accelerator pedal
If the automatic transmission is in position R,
the boot lid must be closed.
If your seat belt is not fastened, the following conditions must be fulfilled to automatically
release the electric parking brake:
R the driver's door is closed
R you have shifted out of transmission posi-
tion Por you have previously driven faster
than 3 km/h.
Ensure that you do not depress the acceler-
ator pedal unintentionally. Otherwise, the
parking brake will be released and the vehicle will start to move.
Emergency braking The vehicle can also be braked during an
emergency by using the electric parking
brake.
X While driving, push handle :of the elec-
trical parking brake (Y page 180).
The vehicle is braked as long as you keep
handle :of the electric parking brake
pressed. The longer electric parking brake
handle :is depressed, the greater the brak-
ing force. During braking:
R a warning tone sounds
R the Release parking brake
Release parking brake message
appears
R the red !indicator lamp in the instru-
ment cluster flashes
When the vehicle has been braked to a stand- still, the electric parking brake is applied. Parking up the vehicle
If you leave the vehicle parked up for longer
than four weeks, the battery may be damaged by exhaustive discharging and further dam-
aged in the event of this occurring again.
X Disconnect the battery or connect it to a
trickle charger.
i You can obtain information about trickle
chargers from a qualified specialist work-
shop.
If you leave the vehicle parked up for longer
than six weeks, it may suffer from lack of use.
X Visit a qualified specialist workshop and
seek advice. Driving tips
General driving tips
G
WARNING
If you switch off the ignition while driving,
safety-relevant functions are only available
with limitations, or not at all. This could affect, for example, the power steering and the brake
boosting effect. You will require considerably
more effort to steer and brake. There is a risk of an accident.
Do not switch off the ignition while driving. Driving
tips
181Driving an d parking Z
Page 193 of 413
Storing the current speed
You can use the cruise control lever to limit
the speed to any speed above 30 km/hw hile
the engine is running.
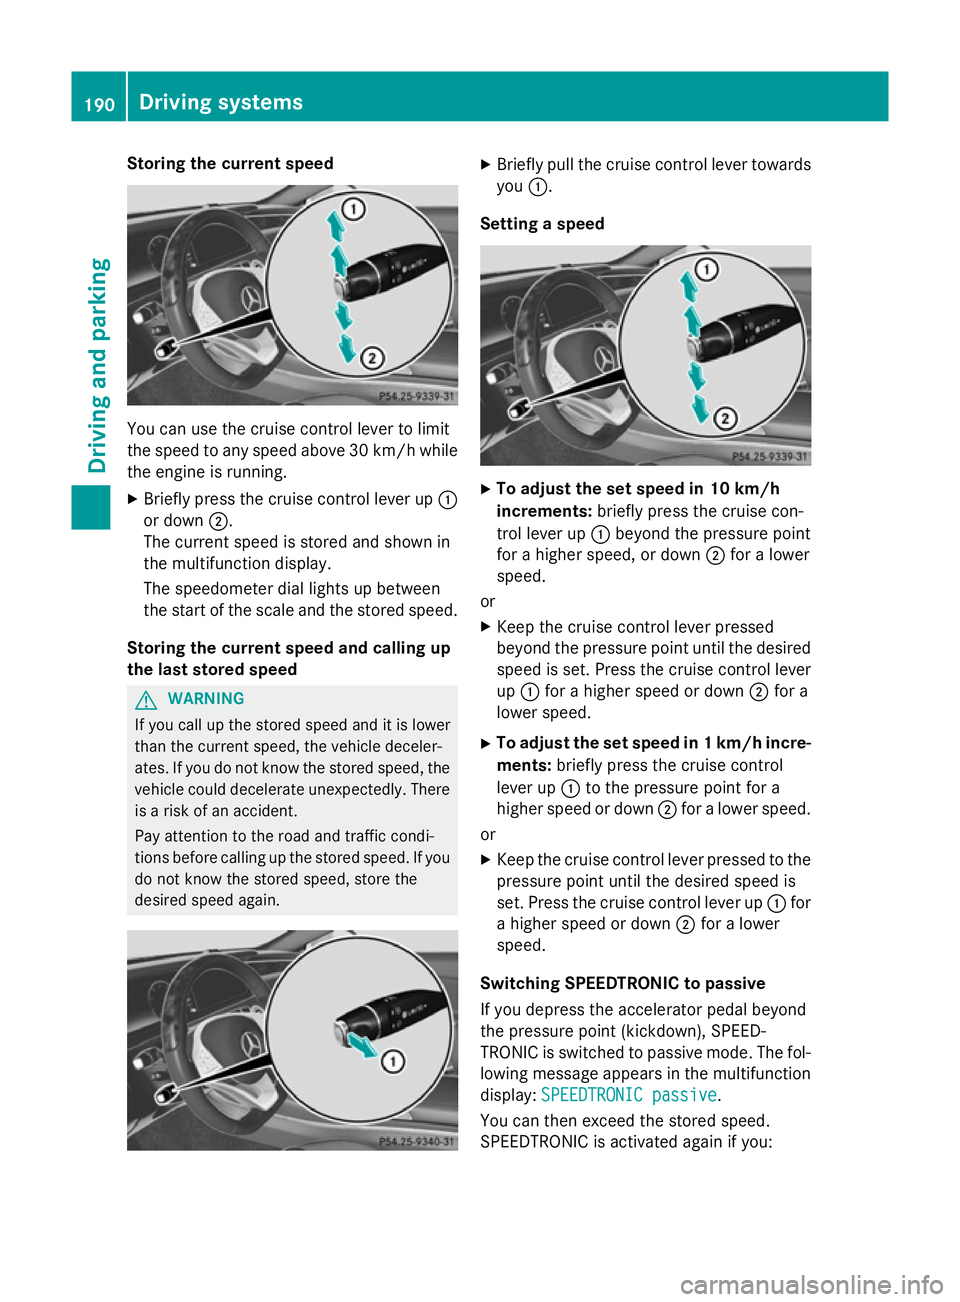
X Briefly press the cruise control lever up :
or down ;.
The current speed is stored and shown in
the multifunction display.
The speedometer dial lights up between
the start of the scale and the stored speed.
Storing the current speed and calling up
the last stored speed G
WARNING
If you call up the stored speed and it is lower
than the current speed, the vehicle deceler-
ates. If you do not know the stored speed, the vehicle could decelerate unexpectedly. There
is a risk of an accident.
Pay attention to the road and traffic condi-
tions before calling up the stored speed. If you do not know the stored speed, store the
desired speed again. X
Briefly pull the cruise control lever towards
you :.
Setting a speed X
To adjust the set speed in 10 km/h
increments: briefly press the cruise con-
trol lever up :beyond the pressure point
for a higher speed, or down ;for a lower
speed.
or X Keep the cruise control lever pressed
beyond the pressure point until the desired
speed is set. Press the cruise control lever
up : for a higher speed or down ;for a
lower speed.
X To adjust the set speed in 1 km/h incre-
ments: briefly press the cruise control
lever up :to the pressure point for a
higher speed or down ;for a lower speed.
or
X Keep the cruise control lever pressed to the
pressure point until the desired speed is
set. Press the cruise control lever up :for
a higher speed or down ;for a lower
speed.
Switching SPEEDTRONIC to passive
If you depress the accelerator pedal beyond
the pressure point (kickdown), SPEED-
TRONIC is switched to passive mode. The fol-
lowing message appears in the multifunction
display: SPEEDTRONIC passive SPEEDTRONIC passive.
You can then exceed the stored speed.
SPEEDTRONIC is activated again if you: 190
Driving systemsDriving and parking
Page 205 of 413
The steering interventions are carried out
with a limited steering moment. The system
requires the driver to keep his hands on the
steering wheel and to steer himself.
If you do not steer yourself or if you take your
hands off the steering wheel for a prolonged
period of time, the system will first alert you
with a visual warning. A steering wheel sym-
bol appears in the multifunction display. If you have still not started to steer and have not
taken hold of the steering wheel after five
seconds at the latest, a warning tone also
sounds to remind you to take control of the
vehicle. Steering Assist and Stop&Go Pilot are switched to passive. DISTRONIC PLUS
remains active.
Activating Steering Assist and Stop&Go
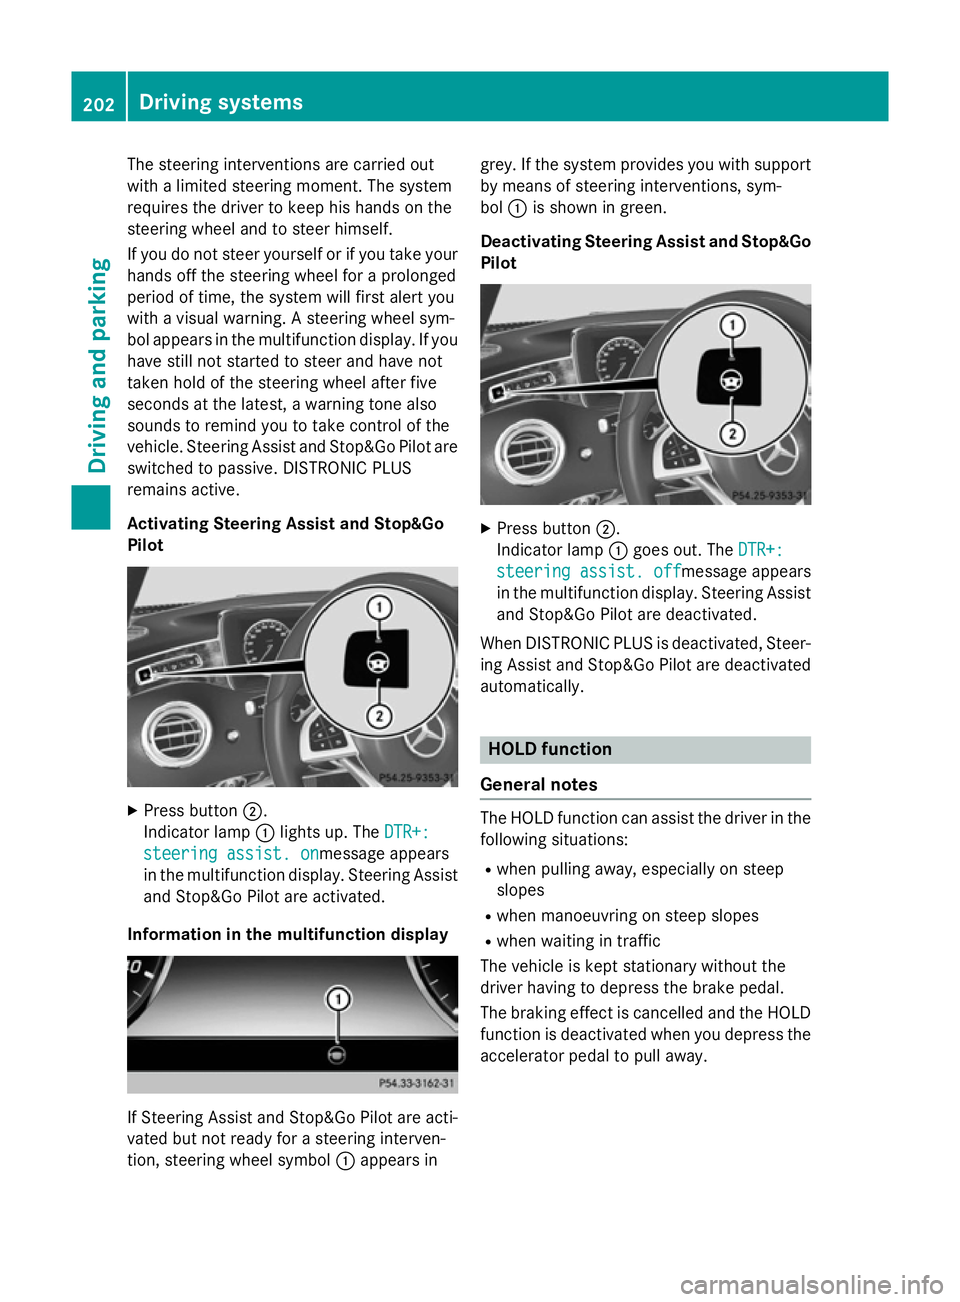
Pilot X
Press button ;.
Indicator lamp :lights up. The DTR+: DTR+:
steering assist. on
steering assist. onmessage appears
in the multifunction display. Steering Assist and Stop&Go Pilot are activated.
Information in the multifunction display If Steering Assist and Stop&Go Pilot are acti-
vated but not ready for a steering interven-
tion, steering wheel symbol :appears in grey. If the system provides you with support
by means of steering interventions, sym-
bol :is shown in green.
Deactivating Steering Assist and Stop&Go Pilot X
Press button ;.
Indicator lamp :goes out. The DTR+: DTR+:
steering assist. off
steering assist. off message appears
in the multifunction display. Steering Assist and Stop&Go Pilot are deactivated.
When DISTRONIC PLUS is deactivated, Steer- ing Assist and Stop&Go Pilot are deactivated
automatically. HOLD function
General notes The HOLD function can assist the driver in the
following situations:
R when pulling away, especially on steep
slopes
R when manoeuvring on steep slopes
R when waiting in traffic
The vehicle is kept stationary without the
driver having to depress the brake pedal.
The braking effect is cancelled and the HOLD function is deactivated when you depress theaccelerator pedal to pull away. 202
Driving systemsDriving and parking
Page 210 of 413
R
there is glare, e.g. from the sun or from
oncoming traffic
R the windscreen is dirty, misted up or cov-
ered, for instance by a sticker, in the vicinity of the camera
R the road surface has no texture or is reflec-
tive, e.g. in the case of newly laid asphalt,
concrete slabs or puddles
R the distance to the vehicle in front is too
short
R sections of the route have a very small
radius of curvature
R you accelerate hard or brake sharply AIRMATIC
General notes AIRMATIC is an air suspension system with
variable damping for improved driving com-
fort. All-round level control ensures the best
possible suspension and constant ground
clearance, even with a laden vehicle. When
you drive fast, the vehicle is lowered auto-
matically to improve driving safety and to
reduce fuel consumption. There is also the
option to manually adjust the vehicle level.
AIRMATIC consists of level setting, level con-
trol and the Adaptive Damping System ADS
PLUS.
Important safety notes G
WARNING
People's limbs may become trapped if they
are located underneath the vehicle or
between the vehicle body and the tyres when the vehicle is lowering. There is a danger of
injury.
When lowering the vehicle, make sure no one
is underneath the vehicle or in the immediate vicinity of the wheel arches. Vehicle level Setting the raised vehicle level
It is possible to choose between the "Normal"
and "Raised" vehicle levels. Select the "Nor-
mal" setting for normal road surfaces and
"Raised" for driving with snow chains or on
particularly poor road surfaces. Your selec-
tion remains stored even if you remove the
key from the ignition lock.
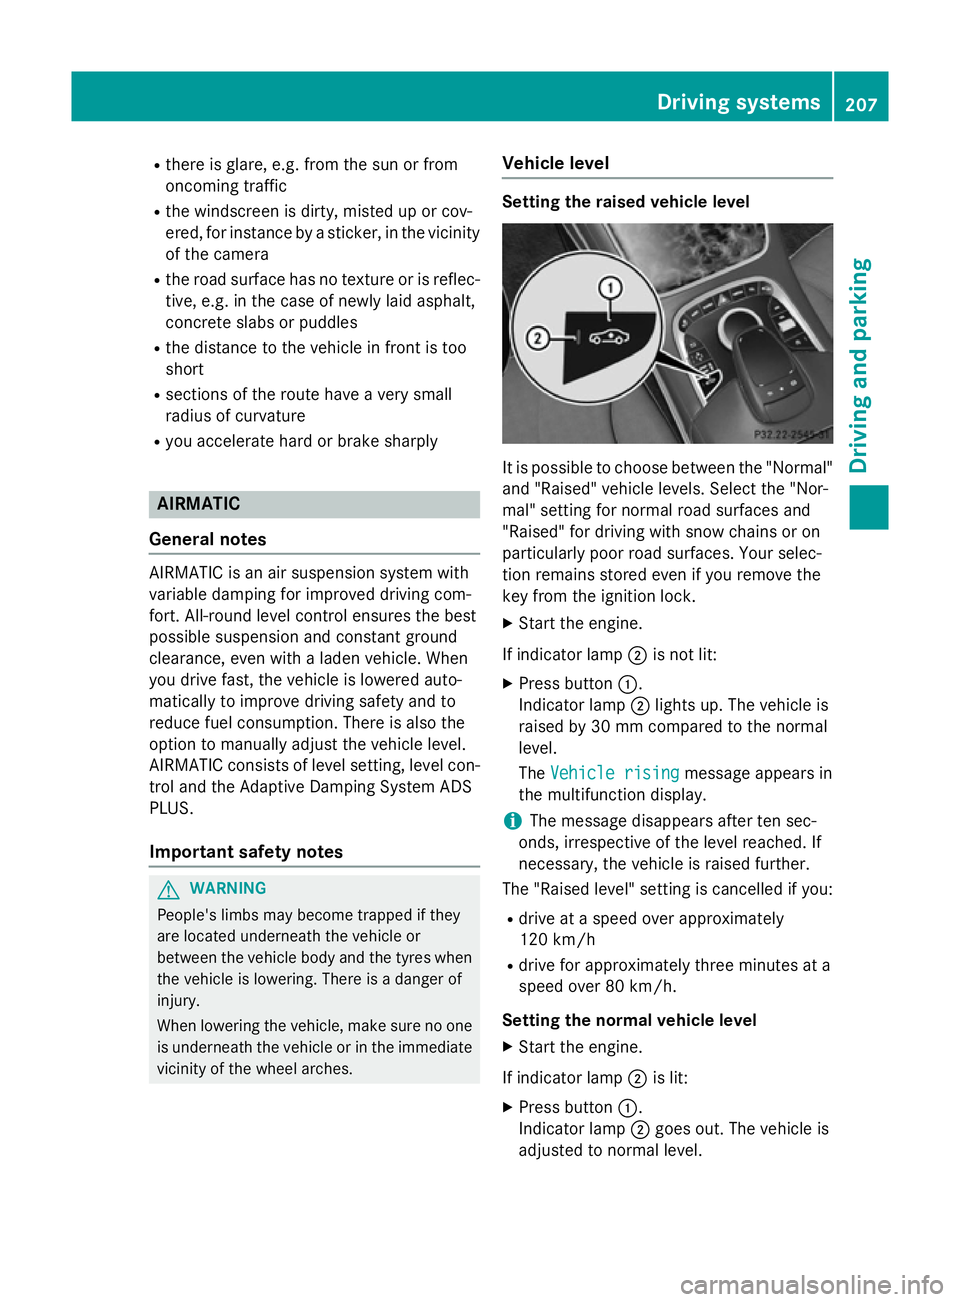
X Start the engine.
If indicator lamp ;is not lit:
X Press button :.
Indicator lamp ;lights up. The vehicle is
raised by 30 mm compared to the normal
level.
The Vehicle rising
Vehicle rising message appears in
the multifunction display.
i The message disappears after ten sec-
onds, irrespective of the level reached. If
necessary, the vehicle is raised further.
The "Raised level" setting is cancelled if you:
R drive at a speed over approximately
120 km/h
R drive for approximately three minutes at a
speed over 80 km/h.
Setting the normal vehicle level X Start the engine.
If indicator lamp ;is lit:
X Press button :.
Indicator lamp ;goes out. The vehicle is
adjusted to normal level. Driving systems
207Driving and parking Z