2014 MERCEDES-BENZ S-CLASS COUPE navigation
[x] Cancel search: navigationPage 250 of 413
=
Upshift indicator
? Currently selected gear, gearshift options when shifting manually
If Traffic Sign Assist is activated in the head-up display sub-menu, detected traffic signs are
also shown in the AMG display.
In the Settings menu, in the submenu head-up display, you have the following settings options:
R Switching other displays on/off (Y page 259)
R Setting the position (Y page 260)
R Adjusting the brightness (Y page 260)Menus and submenus
Menu overview
Press the òbutton on the steering wheel
to call up the list of menus and select a menu.
Operating the on-board computer
(Y page 243).
Depending on the equipment fitted in the
vehicle, you can call up the following menus:
R Trip Trip menu (Y page 247)
R Navi
Navi menu (navigation instructions)
(Y page 249)
R Radio
Radio menu (Y page 251)
R Media
Media menu (Y page 252)
R Telephone
Telephone menu (Ypage 254)
R Assistance graphic Assistance graphic menu
(Y page 256)
R Service Service menu (Ypage 256)
R Settings
Settings menu (Ypage 257)
R AMG
AMG menu in AMG vehicles (Y page 263) Trip menu
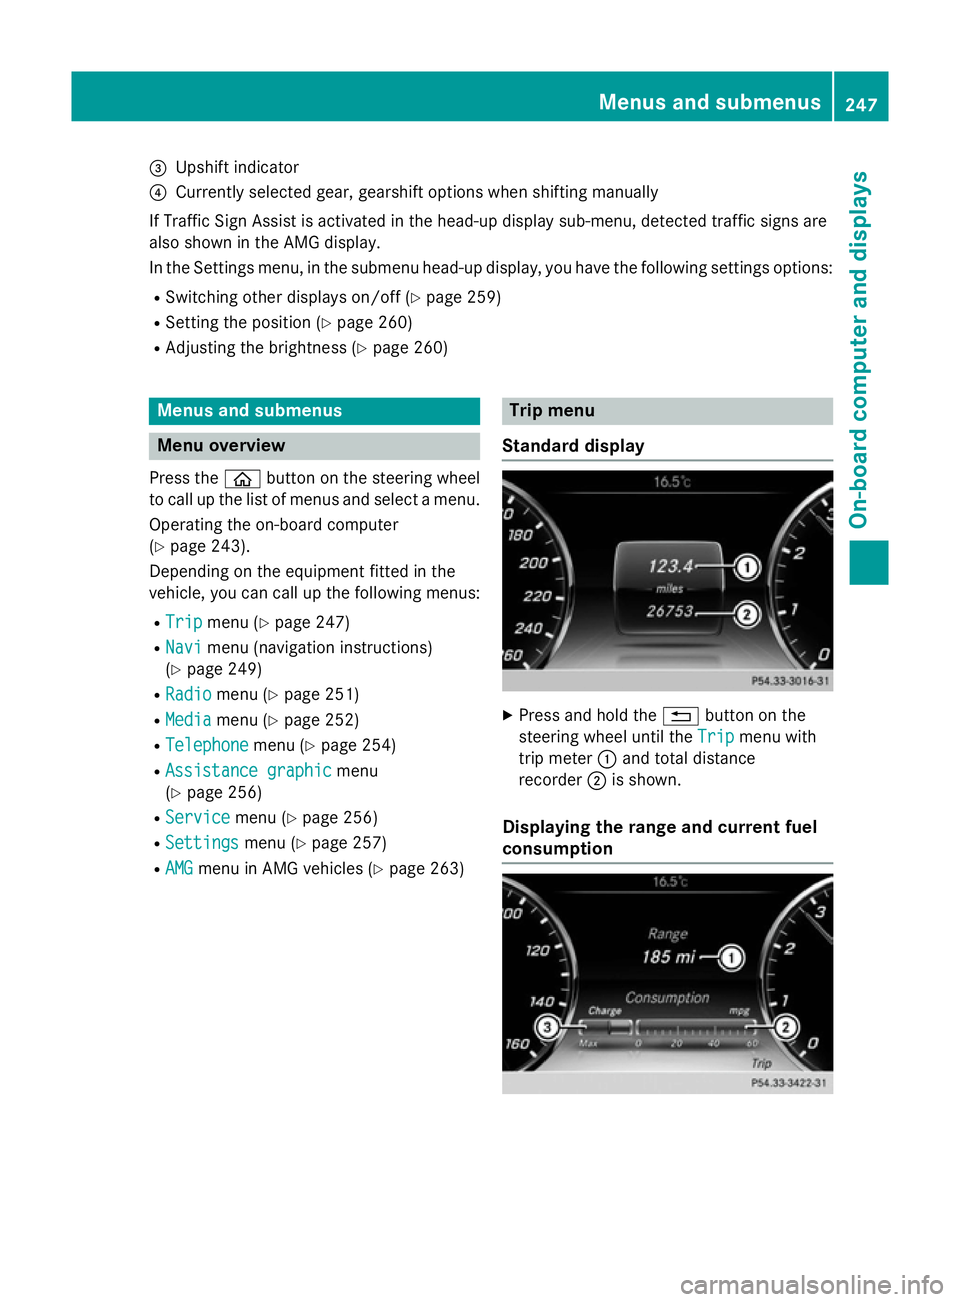
Standard display X
Press and hold the %button on the
steering wheel until the Trip
Tripmenu with
trip meter :and total distance
recorder ;is shown.
Displaying the range and current fuel
consumption Menus and submenus
247On-board computer and displays Z
Page 252 of 413
The
From reset
From reset trip computer is automati-
cally reset if the value exceeds 9999 hours or 99,999 kilometres.
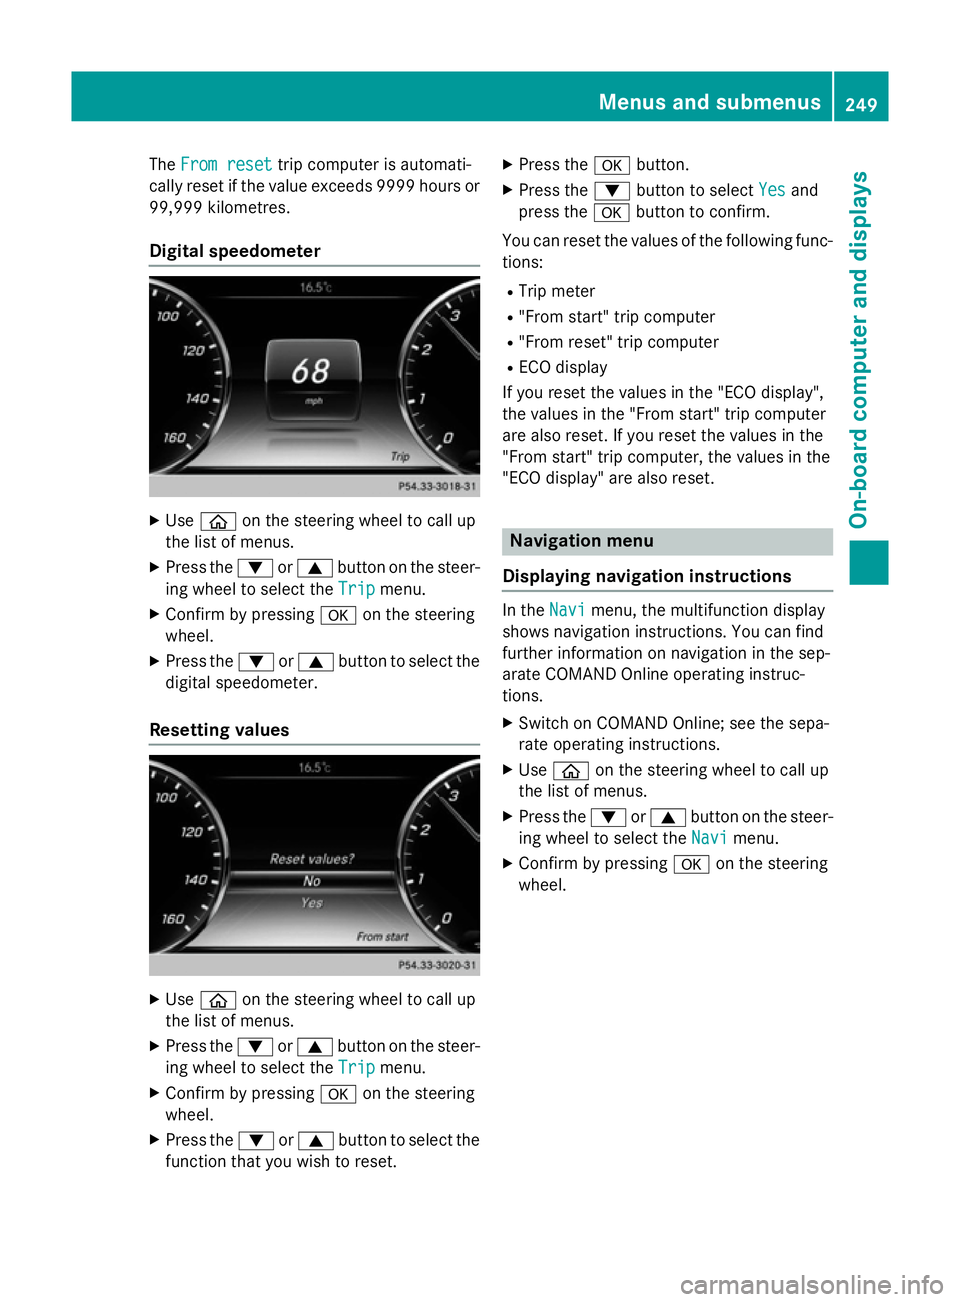
Digital speedometer X
Use ò on the steering wheel to call up
the list of menus.
X Press the :or9 button on the steer-
ing wheel to select the Trip
Trip menu.
X Confirm by pressing aon the steering
wheel.
X Press the :or9 button to select the
digital speedometer.
Resetting values X
Use ò on the steering wheel to call up
the list of menus.
X Press the :or9 button on the steer-
ing wheel to select the Trip
Tripmenu.
X Confirm by pressing aon the steering
wheel.
X Press the :or9 button to select the
function that you wish to reset. X
Press the abutton.
X Press the :button to select Yes Yesand
press the abutton to confirm.
You can reset the values of the following func-
tions:
R Trip meter
R "From start" trip computer
R "From reset" trip computer
R ECO display
If you reset the values in the "ECO display",
the values in the "From start" trip computer
are also reset. If you reset the values in the
"From start" trip computer, the values in the
"ECO display" are also reset. Navigation menu
Displaying navigation instructions In the
Navi Navimenu, the multifunction display
shows navigation instructions. You can find
further information on navigation in the sep-
arate COMAND Online operating instruc-
tions.
X Switch on COMAND Online; see the sepa-
rate operating instructions.
X Use ò on the steering wheel to call up
the list of menus.
X Press the :or9 button on the steer-
ing wheel to select the Navi
Navi menu.
X Confirm by pressing aon the steering
wheel. Menus and submenus
249On-board computer and displays Z
Page 262 of 413
Activating/deactivating Active Blind Spot
Assist
X Use ò on the steering wheel to call up
the list of menus.
X Press the :or9 button on the steer-
ing wheel to select the Settings
Settingsmenu.
X Confirm by pressing aon the steering
wheel.
X Use : or9 to select the Assis‐
Assis‐
tance
tance submenu.
X Press ato confirm.
X Press the :or9 button to select
Blind Spot Assist
Blind Spot Assist .
X Press ato confirm.
The current selection is displayed.
X To activate/deactivate: press thea
button again.
When Active Blind Spot Assist is activated, grey radar waves propagating backwards
appear next to the vehicle in the Assis‐ Assis‐
tance graphic
tance graphic menu in the multifunction
display.
For further information about Active Blind
Spot Assist, see (Y page 233).
Setting ATTENTION ASSIST X Use ò on the steering wheel to call up
the list of menus.
X Press the :or9 button on the steer-
ing wheel to select the Settings
Settings menu.
X Confirm by pressing aon the steering
wheel.
X Use : or9 to select the Assis‐ Assis‐
tance
tance submenu.
X Press ato confirm.
X Press the :or9 button to select
Attention Assist
Attention Assist .
X Press ato confirm.
X Press the :or9 button to set Off
Off,
Standard
Standard orSensitive
Sensitive .
X Press the abutton to confirm the selec-
tion.
When ATTENTION ASSIST is deactivated, the
é symbol appears in the Assistance
Assistancegraphic
graphic
menu in the multifunction display
when the ignition is on.
For further information about ATTENTION
ASSIST, see (Y page 225).
Activating/deactivating Active Lane
Keeping Assist X Use ò on the steering wheel to call up
the list of menus.
X Press the :or9 button on the steer-
ing wheel to select the Settings Settingsmenu.
X Confirm by pressing aon the steering
wheel.
X Use : or9 to select the Assis‐
Assis‐
tance
tance submenu.
X Press ato confirm.
X Press the :or9 button to select
Lane Keeping Assist
Lane Keeping Assist .
X Press ato confirm.
The current selection Standard
StandardorAdap‐
Adap‐
tive tive is displayed.
X To change the setting: pressaagain.
For further information about Active Lane
Keeping Assist; see (Y page 236).
Head-up display menu Switching other displays on/off
This function is only available if the vehicle is
equipped with Navigation and/or Traffic Sign
Assist.
In the on-board computer, you can select
which contents are shown on the windscreen when the head-up display is activated
(Y page 245).
X Use ò on the steering wheel to call up
the list of menus.
X Press the :or9 button on the steer-
ing wheel to select the Settings Settingsmenu.
X Confirm by pressing aon the steering
wheel.
X Press the :or9 button to select the
Head-up display
Head-up display submenu.
X Press ato confirm. Menus and submenus
259On-board computer and displays Z
Page 263 of 413
X
Press the :or9 buttons to select
Display content Display content.
X Press ato confirm.
Switching the Traffic Sign Assist display
on/off X Press the abutton to save the setting.
When you switch on the Traffic Sign Traffic Sign
Assist
Assist display, recognised traffic signs are
shown on the windscreen when the head-
up display is activated.
Switching the navigation messages dis-
play on/off X Vehicles with Traffic Sign Assist:
press :to select Navigation mes‐ Navigation mes‐
sages
sages.
X Press the abutton to save the setting.
When you switch on the Navigation Navigationmes‐ mes‐
sages
sages display, navigation messages are
shown on the windscreen when the head-
up display is activated.
For more information on navigation, see the
separate operating instructions.
For further information about Traffic Sign
Assist, see (Y page 227).
Setting the position
You can adjust the position of the head-up
display. This allows you to compensate for
differences in the seat position.
X Switch on the Head-up display
(Y page 245).
X Use ò on the steering wheel to call up
the list of menus.
X Press the :or9 button on the steer-
ing wheel to select the Settings Settingsmenu.
X Confirm by pressing aon the steering
wheel.
X Press the :or9 button to select the
Head-up display
Head-up display submenu.
X Press ato confirm.
X Use the :or9 button to select the
Position
Position function.
X Press the abutton to save the setting. X
Press the :or9 button to set the
position from Level
Level+5
+5 (high) to Level
Level-5
-5
(low).
X Press the aor% button to save the
setting.
Using the Memory function, you can save and
call up the position of the head-up display as a single memory preset (Y page 120).
Adjusting the brightness
The brightness of the head-up display is auto-
matically adjusted to the surrounding light
conditions. You can also individually adjust
the brightness of the head-up display.
X Switch on the Head-up display
(Y page 245).
X Use ò on the steering wheel to call up
the list of menus.
X Press the :or9 button on the steer-
ing wheel to select the Settings Settingsmenu.
X Confirm by pressing aon the steering
wheel.
X Use the :or9 button to select the
Head-up display
Head-up display submenu.
X Press ato confirm.
X Press the :or9 button to select the
Brightness
Brightness function.
X Press the abutton to save the setting.
X Press the :or9 button to set the
brightness from Level +5
Level +5(bright) to
Level -5 Level -5 (dark).
X Press the aor% button to save the
setting.
Light submenu Switching the Intelligent Light System
on/off
X Use ò on the steering wheel to call up
the list of menus.
X Press the :or9 button on the steer-
ing wheel to select the Settings Settingsmenu.
X Confirm by pressing aon the steering
wheel. 260
Menus and submenusOn-board computer and displays
Page 265 of 413
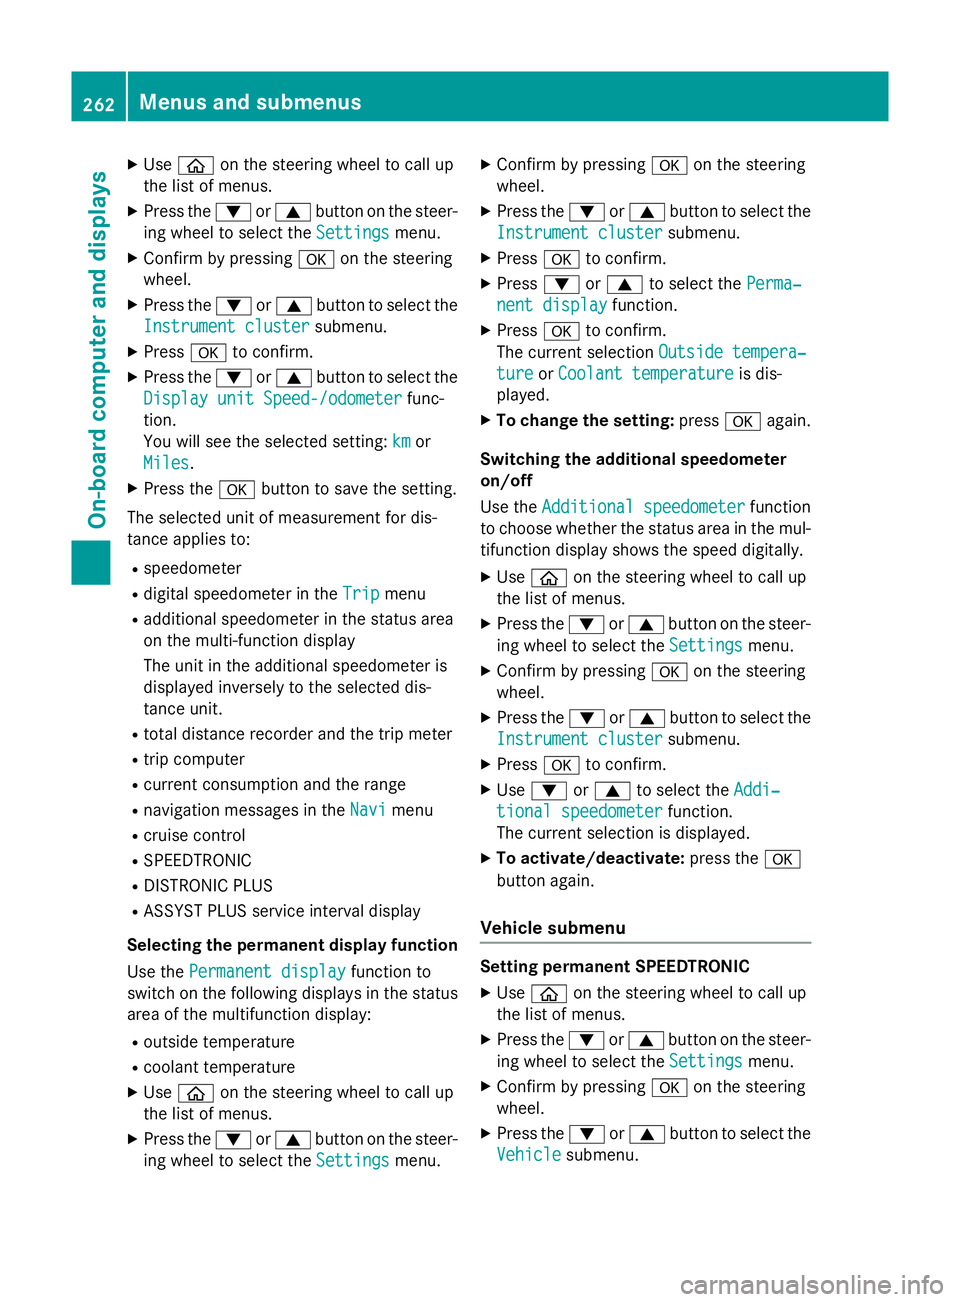
X
Use ò on the steering wheel to call up
the list of menus.
X Press the :or9 button on the steer-
ing wheel to select the Settings
Settingsmenu.
X Confirm by pressing aon the steering
wheel.
X Press the :or9 button to select the
Instrument cluster
Instrument cluster submenu.
X Press ato confirm.
X Press the :or9 button to select the
Display unit Speed-/odometer
Display unit Speed-/odometer func-
tion.
You will see the selected setting: km
km or
Miles Miles.
X Press the abutton to save the setting.
The selected unit of measurement for dis-
tance applies to:
R speedometer
R digital speedometer in the Trip
Trip menu
R additional speedometer in the status area
on the multi-function display
The unit in the additional speedometer is
displayed inversely to the selected dis-
tance unit.
R total distance recorder and the trip meter
R trip computer
R current consumption and the range
R navigation messages in the Navi Navimenu
R cruise control
R SPEEDTRONIC
R DISTRONIC PLUS
R ASSYST PLUS service interval display
Selecting the permanent display function
Use the Permanent display
Permanent display function to
switch on the following displays in the status area of the multifunction display:
R outside temperature
R coolant temperature
X Use ò on the steering wheel to call up
the list of menus.
X Press the :or9 button on the steer-
ing wheel to select the Settings
Settings menu. X
Confirm by pressing aon the steering
wheel.
X Press the :or9 button to select the
Instrument cluster Instrument cluster submenu.
X Press ato confirm.
X Press :or9 to select the Perma‐ Perma‐
nent display
nent display function.
X Press ato confirm.
The current selection Outside tempera‐
Outside tempera‐
ture
ture orCoolant temperature
Coolant temperature is dis-
played.
X To change the setting: pressaagain.
Switching the additional speedometer
on/off
Use the Additional speedometer Additional speedometer function
to choose whether the status area in the mul- tifunction display shows the speed digitally.
X Use ò on the steering wheel to call up
the list of menus.
X Press the :or9 button on the steer-
ing wheel to select the Settings
Settingsmenu.
X Confirm by pressing aon the steering
wheel.
X Press the :or9 button to select the
Instrument cluster
Instrument cluster submenu.
X Press ato confirm.
X Use : or9 to select the Addi‐
Addi‐
tional speedometer
tional speedometer function.
The current selection is displayed.
X To activate/deactivate: press thea
button again.
Vehicle submenu Setting permanent SPEEDTRONIC
X Use ò on the steering wheel to call up
the list of menus.
X Press the :or9 button on the steer-
ing wheel to select the Settings Settingsmenu.
X Confirm by pressing aon the steering
wheel.
X Press the :or9 button to select the
Vehicle Vehicle submenu. 262
Menus and submenusOn-board computer and displays
Page 305 of 413
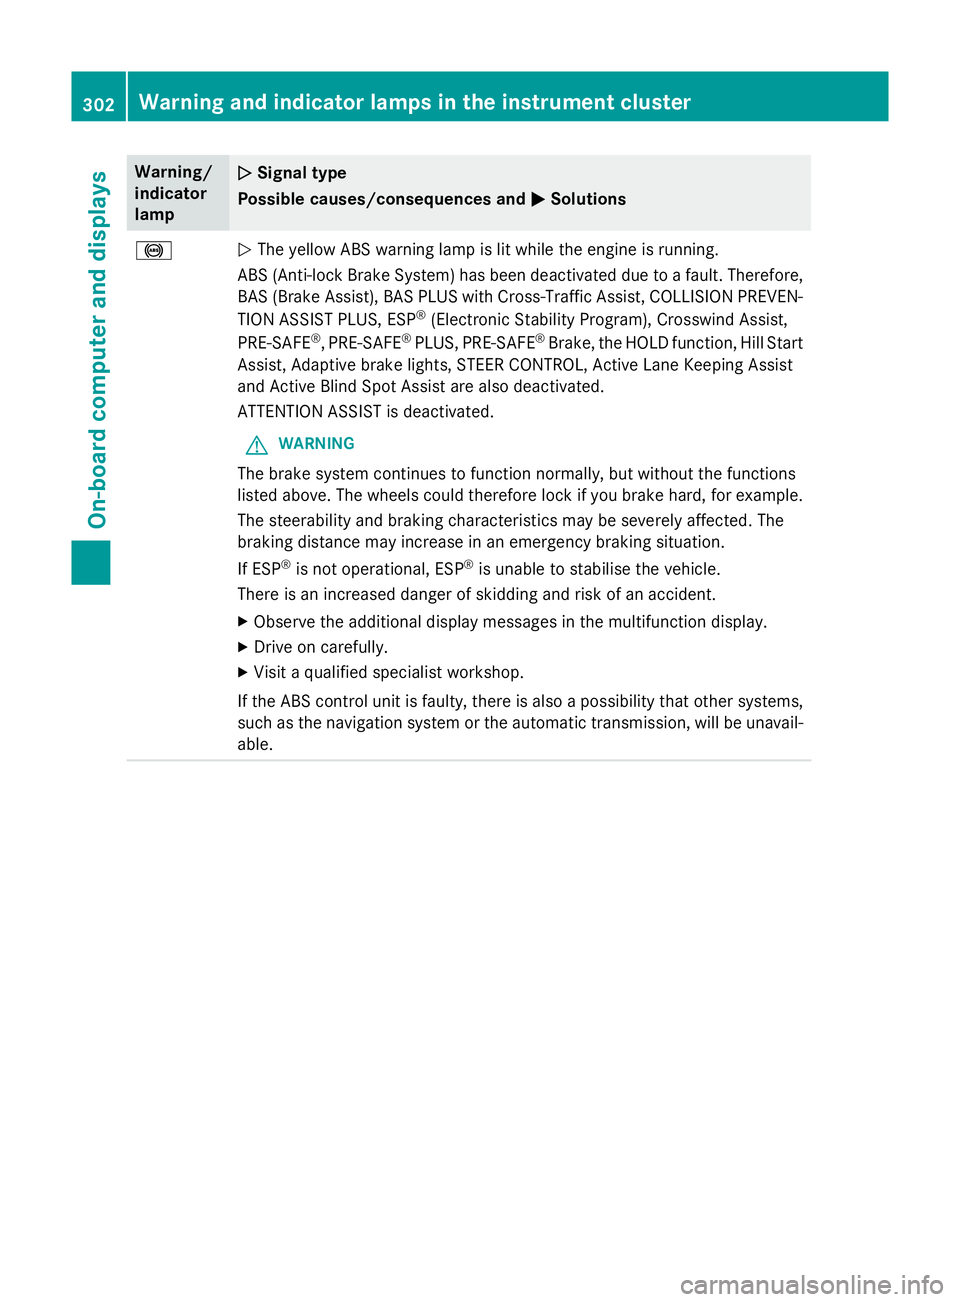
Warning/
indicator
lamp
N N
Signal type
Possible causes/consequences and M
MSolutions !
N
The yellow ABS warning lamp is lit while the engine is running.
ABS (Anti-lock Brake System) has been deactivated due to a fault. Therefore,
BAS (Brake Assist), BAS PLUS with Cross-Traffic Assist, COLLISION PREVEN-
TION ASSIST PLUS, ESP ®
(Electronic Stability Program), Crosswind Assist,
PRE‑SAFE ®
, PRE‑SAFE ®
PLUS, PRE‑SAFE ®
Brake, the HOLD function, Hill Start
Assist, Adaptive brake lights, STEER CONTROL, Active Lane Keeping Assist
and Active Blind Spot Assist are also deactivated.
ATTENTION ASSIST is deactivated.
G WARNING
The brake system continues to function normally, but without the functions
listed above. The wheels could therefore lock if you brake hard, for example.
The steerability and braking characteristics may be severely affected. The
braking distance may increase in an emergency braking situation.
If ESP ®
is not operational, ESP ®
is unable to stabilise the vehicle.
There is an increased danger of skidding and risk of an accident.
X Observe the additional display messages in the multifunction display.
X Drive on carefully.
X Visit a qualified specialist workshop.
If the ABS control unit is faulty, there is also a possibility that other systems,
such as the navigation system or the automatic transmission, will be unavail- able. 302
Warning and indicator lamps in the instrument clusterOn-board computer and displays
Page 328 of 413
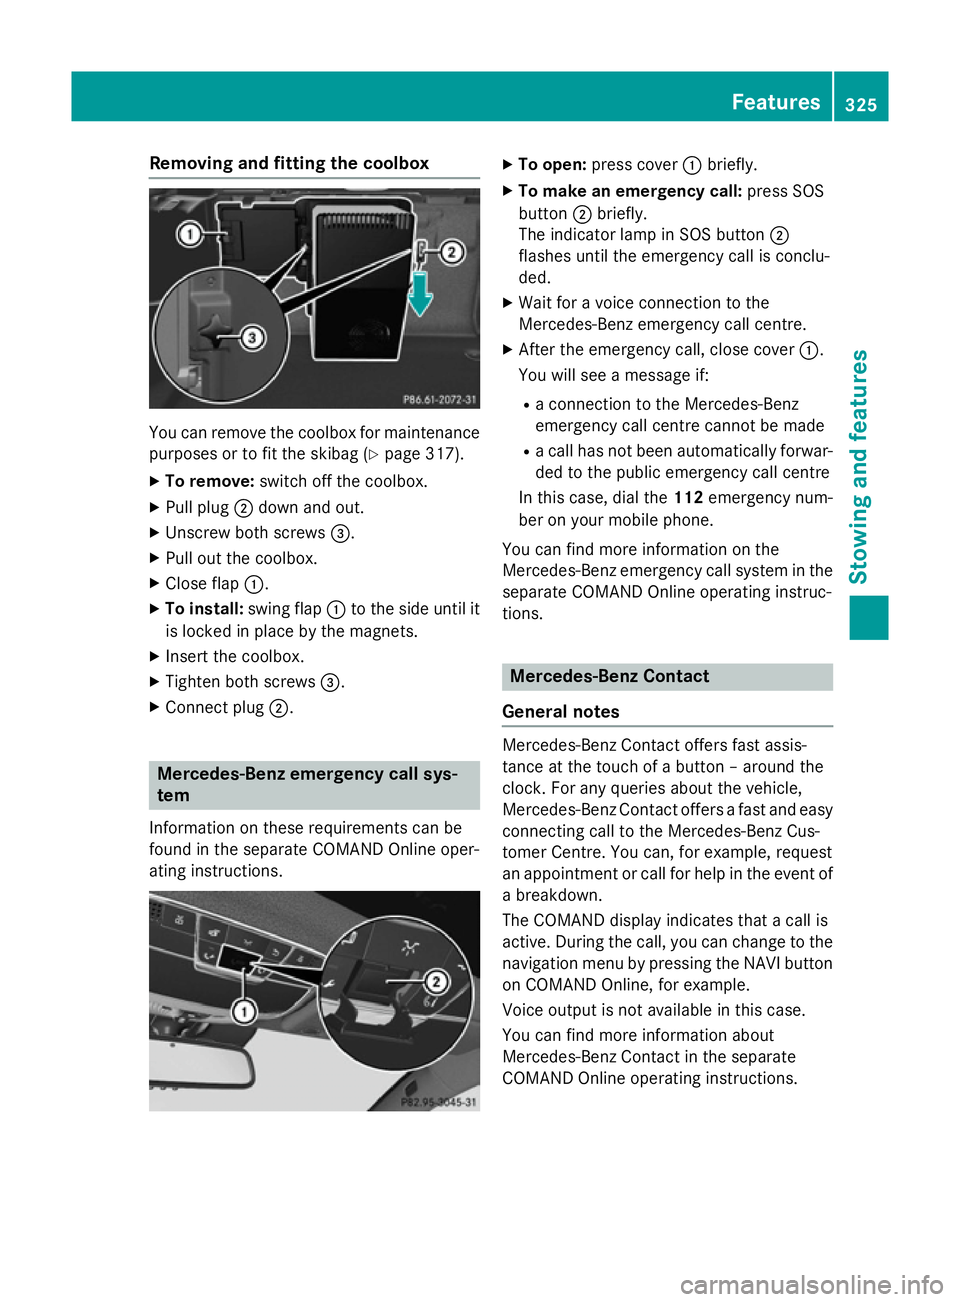
Removing and fitting the coolbox
You can remove the coolbox for maintenance
purposes or to fit the skibag (Y page 317).
X To remove: switch off the coolbox.
X Pull plug ;down and out.
X Unscrew both screws =.
X Pull out the coolbox.
X Close flap :.
X To install: swing flap:to the side until it
is locked in place by the magnets.
X Insert the coolbox.
X Tighten both screws =.
X Connect plug ;. Mercedes-Benz emergency call sys-
tem
Information on these requirements can be
found in the separate COMAND Online oper-
ating instructions. X
To open: press cover :briefly.
X To make an emergency call: press SOS
button ;briefly.
The indicator lamp in SOS button ;
flashes until the emergency call is conclu-
ded.
X Wait for a voice connection to the
Mercedes-Benz emergency call centre.
X After the emergency call, close cover :.
You will see a message if:
R a connection to the Mercedes-Benz
emergency call centre cannot be made
R a call has not been automatically forwar-
ded to the public emergency call centre
In this case, dial the 112emergency num-
ber on your mobile phone.
You can find more information on the
Mercedes-Benz emergency call system in the separate COMAND Online operating instruc-
tions. Mercedes-Benz Contact
General notes Mercedes-Benz Contact offers fast assis-
tance at the touch of a button – around the
clock. For any queries about the vehicle,
Mercedes-Benz Contact offers a fast and easy
connecting call to the Mercedes-Benz Cus-
tomer Centre. You can, for example, request
an appointment or call for help in the event of a breakdown.
The COMAND display indicates that a call is
active. During the call, you can change to the
navigation menu by pressing the NAVI button
on COMAND Online, for example.
Voice output is not available in this case.
You can find more information about
Mercedes-Benz Contact in the separate
COMAND Online operating instructions. Features
325Stowing and features Z