2014 MERCEDES-BENZ G-CLASS SUV fuel
[x] Cancel search: fuelPage 137 of 272

Couple and uncouple the trailer carefully. If
you do not couple the trailer to the towing
vehicle correctly, the trailer could become
detached.
Make sure that the following values are not
exceeded:
R the permissible trailer drawbar noseweight
R the permissible trailer load
R the permissible rear axle load of the towing
vehicle
R the maximum permissible gross vehicle
weight of both the towing vehicle and the
trailer
When towing a trailer, your vehicle's handling
characteristics will be different in comparison
with when driving without a trailer.
The vehicle/trailer combination:
R is heavier
R is restricted in its acceleration and
gradient-climbing capability
R has an increased braking distance
R is affected more by strong crosswinds
R demands more sensitive steering
R has a larger turning circle
This could impair the handling
characteristics.
When towing a trailer, always adjust your
speed to the current road and weather
conditions. Do not exceed the maximum
permissible speed for your vehicle/trailer
combination.
Driving tips X
On long and steep downhill gradients,
select shift range 1,2or 3(Y page 101) in
good time.
i This also applies if you have activated
cruise control or SPEEDTRONIC.
X If necessary, shift the transfer case to LOW
RANGE(Y page 130).
This will use the braking effect of the
engine, so that less braking will be required
to maintain the speed. This relieves the load on the brake system and prevents the
brakes from overheating and wearing too
quickly. If you need additional braking,
depress the brake pedal repeatedly rather
than continuously.
The maximum permissible speed for vehicle/
trailer combinations depends on the type of
trailer. Before beginning the journey, check
the trailer's documents to see what the
maximum permissible speed is. Observe the
legally prescribed maximum speed in the
relevant country.
For certain Mercedes-Benz vehicles, the
maximum permissible rear axle load is
increased when towing a trailer. Refer to the
"Technical data" section to find out whether
this applies to your vehicle. If you utilize any
of the added maximum rear axle load when
towing a trailer, the vehicle/trailer
combination may not exceed a maximum
speed of 60 mph (100 km/h) for reasons
concerning the operating permit. This also
applies in countries in which the permissible
maximum speed for vehicle/trailer
combinations is above 60 mph (100 km/h).
When towing a trailer, your vehicle's handling
characteristics will be different in comparison
to when driving without a trailer and it will
consume more fuel.
On long and steep downhill gradients, you
must select shift range 1,2or 3in good time.
i This also applies if you have activated
cruise control or DISTRONIC PLUS.
This will use the braking effect of the engine,
so that less braking will be required to
maintain the speed. This relieves the load on
the brake system and prevents the brakes
from overheating and wearing too quickly. If
you need additional braking, depress the
brake pedal repeatedly rather than
continuously. Towing a trailer
135Driving and parking Z
Page 177 of 272
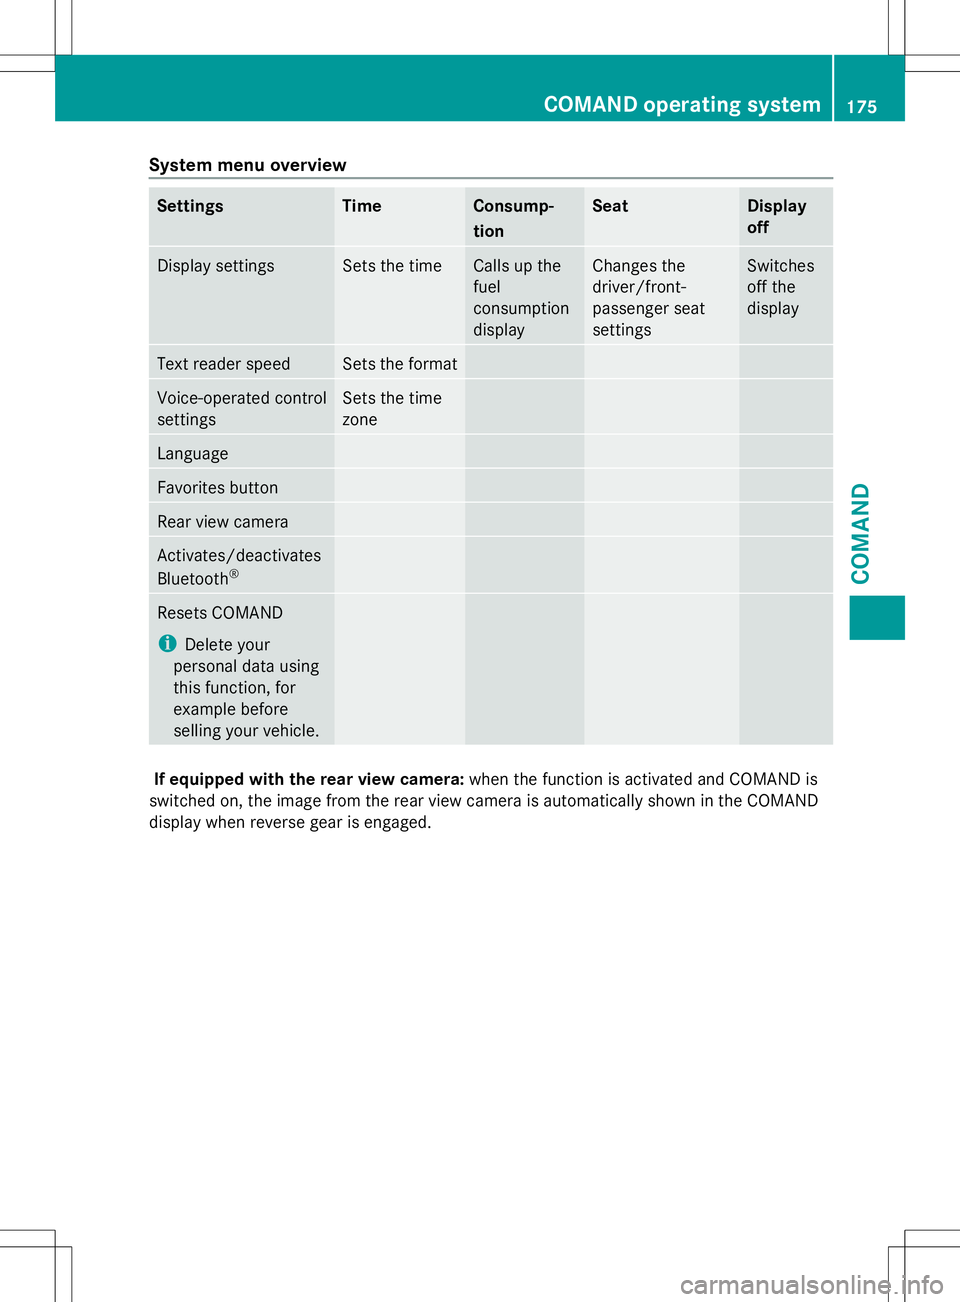
System menu overview
Settings Time Consump-
tion Seat Display
off
Display settings Sets the time Calls up the
fuel
consumption
display Changes the
driver/front-
passenger seat
settings Switches
off the
display
Text reader speed Sets the format
Voice-operated control
settings Sets the time
zone
Language
Favorites button
Rear view camera
Activates/deactivates
Bluetooth
® Resets COMAND
i
Delete your
personal data using
this function, for
example before
selling your vehicle. If equipped with the rear view camera:
when the function is activated and COMAND is
switched on, the image from the rear view camera is automatically shown in the COMAND
display when reverse gear is engaged. COMAND operating system
175COMAND Z
Page 186 of 272

Useful information
i This Operator's Manual describes all
models and all standard and optional
equipment of your vehicle available at the
time of publication of the Operator's
Manual. Country-specific differences are
possible. Please note that your vehicle may
not be equipped with all features
described. This also applies to safety-
related systems and functions.
i Read the information on qualified
specialist workshops: (Y page 27).Loading guidelines
G
WARNING
Always fasten items being carried as securely
as possible using cargo tie-down rings and
fastening materials appropriate for the weight
and size of the load.
In an accident, during hard braking or sudden
maneuvers, loose items will be thrown around
inside the vehicle. This can cause injury to
vehicle occupants unless the items are
securely fastened in the vehicle.
To help avoid personal injury during a collision
or sudden maneuver, exercise care when
transporting cargo. Do not pile luggage or
cargo higher than the seat backrests.
Never drive a vehicle with the tailgate open.
Deadly carbon monoxide (CO) gases may
enter vehicle interior resulting in
unconsciousness and death. Driving, braking and steering characteristics
change depending on:
R
type of load
R weight
R the center of gravity of the load
You should therefore load your vehicle as
shown in the illustrations.
The gross vehicle weight (GVW) is the vehicle
weight including fuel, vehicle tool kit, spare
wheel, installed accessories, vehicle
occupants and luggage/cargo.
The gross load limit and the gross vehicle
weight rating (GVWR) for your vehicle must
never be exceeded. The gross load limit and
the GVWR are specified on the vehicle
identification plate on the B-pillar of the
driver's door (Y page 258).
The load must also be distributed so that the
weight on each axle never exceeds the gross
axle weight rating (GAWR) for the front and
rear axles. The specifications for GVWR and
GAWR are on the vehicle identification plate
on the B-pillar of the driver's door
(Y page 258).
Further information can be found in the
"Loading the vehicle" section ( Ypage 237).
Observe the following notes when
transporting a load:
R Position heavy loads as far forwards as
possible and as low down in the cargo
compartment as possible.
i Transport loads when possible in the
cargo compartment. You should only use
the cargo compartment enlargement if the
load does not fit in the cargo compartment.
R Always place the load against the front or
rear seat backrests. 184
Loading guidelinesStowage and features
Page 194 of 272

the multifunction display and the COMAND
system is muted.
If a connection can be made, the Call
Call
Connected
Connected message appears in the
multifunction display.
If a mobile phone network is available and
there is sufficient GPS reception, the mbrace
system transmits data to the Response
Center, for example:
R Current location of the vehicle
R Vehicle identification number
R Vehicle model
R Vehicle color
i The COMAND display shows that an
mbrace call is active. You can switch to the
navigation menu during the call by pressing
the NAVI button on COMAND. Voice output
is not available.
A voice connection is established between
the Mercedes-Benz Roadside Assistance
Representative and the vehicle occupants.
The Mercedes-Benz Roadside Assistance
Representative either sends a qualified
Mercedes-Benz technician or makes
arrangements for your vehicle to be
transported to the nearest authorized
Mercedes-Benz Center. You may be charged
for services such as repair work and/or
towing. Further details are available in your
mbrace manual.
X Describe the type of assistance needed.
i If the indicator lamp in Roadside
Assistance button :is flashing
continuously and no voice connection with
the Response center has been established,
then the mbrace system has not been able
to initiate a Roadside Assistance call (e.g.
the relevant mobile phone network is not
available). The Call Failed
Call Failed message
appears in the multifunction display. X
To end a call: press the~button on the
multifunction steering wheel.
or
X Press the corresponding button for ending
a phone call on COMAND.
i Sign and drive services 2
: you are not
charged for services such as jump-starting,
providing a few gallons of fuel for a fuel tank
that has been run dry or changing a faulty
tire with the vehicle's own spare wheel.
MB Info call button X
Open the stowage compartment under the
armrest (Y page 185).
X Press Roadside Assistance button :for
more than two seconds.
A call to a Mercedes-Benz Roadside
Assistance Representative is initiated.
Indicator lamp ;in Roadside Assistance
button :flashes while the call is active.
The Connecting Connecting Call
Callmessage appears in
the multifunction display and the COMAND
system is muted.
If a connection can be made, the Call Call
Connected
Connected message appears in the
multifunction display.
If a mobile phone network is available and
there is sufficient GPS reception, the mbrace
system transmits data to the Response
Center, for example:
R Current location of the vehicle
R Vehicle identification number
2 USA only. 192
FeaturesSto
wage an d features
Page 207 of 272

The multifunction display shows a service
message for several seconds, e.g.:
Service A in 99999 Miles
Service A in 99999 Miles
Service A Due Now Service A Due Now
Service A Exceeded By 99999 Miles Service A Exceeded By 99999 Miles
Maintaining the time-dependent service
schedule:
X Before disconnecting the battery, note
down the service due date displayed.
or:
X After reconnecting the battery, subtract
the battery disconnection periods from the
service date shown on the display.
i The service interval display should not be
confused with the 4engine oil level
display.
The symbol and the letter indicate which type
of service is due:
¯ Minor service A
A
± Major service B B
The ASSYST service interval display does not
take into account any periods of time during
which the battery is disconnected.
Hiding a service message X
To hide the service message, press the
% back button on the multifunction
steering wheel (Y page 33).
Displaying service messages Use the buttons on the multifunction steering
wheel.
X Switch on the ignition.
X Press VorU to select the standard
display menu on the steering wheel
(Y page 144).
X Select &or* to select the service
interval display.
The ¯ or± service symbol and the
service due date are displayed. Points to remember The specified maintenance interval takes only
the normal operation of the vehicle into
account. Under arduous operating conditions
or increased load on the vehicle,
maintenance work must be carried out more
frequently, for example:
R
regular city driving with frequent
intermediate stops
R if the vehicle is primarily used to travel
short distances
R use in mountainous terrain or on poor road
surfaces
R if the engine is often left idling for long
periods
Under these or similar conditions, have, for
example, the air filter, engine oil and oil filter
replaced or changed more frequently. Under
arduous operating conditions, the tires must
be checked more often. Further information
can be obtained at a qualified specialist
workshop, e.g. an authorized Mercedes-Benz
Center. Fuel/water separator
H
Environmental note
Dispose of service products in an
environmentally responsible manner.
! If you continue driving without having the
fuel/water separator serviced, this could
cause damage to the engine. Any resulting
damage is not covered by the warranty.
If the fuel/water separator needs servicing,
the following message appears in the
multifunction display: You will also hear a brief warning tone. Maintenance
205Maintenance and care Z
Page 210 of 272
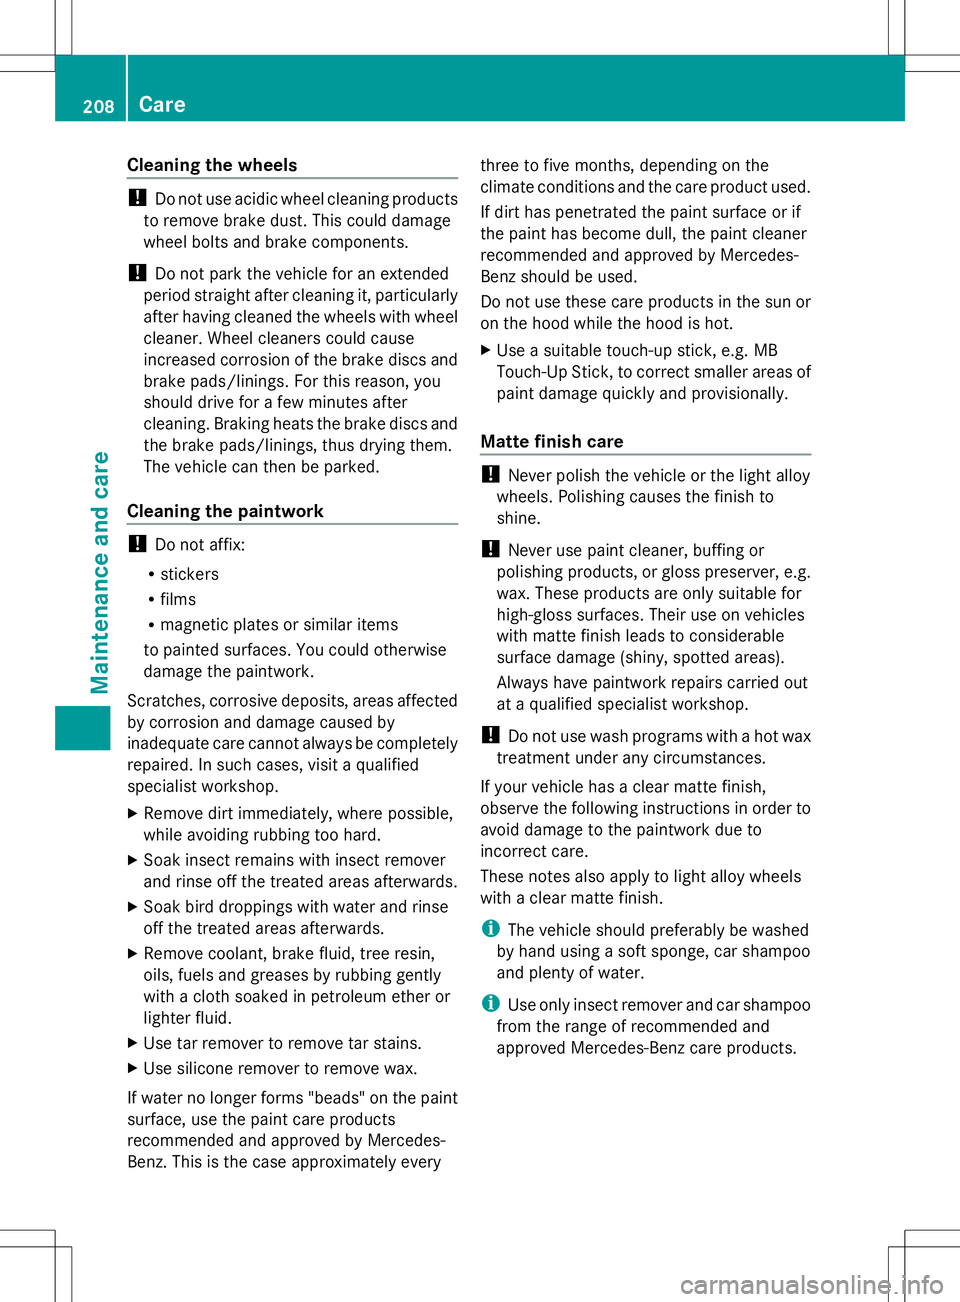
Cleaning the wheels
!
Do not use acidic wheel cleaning products
to remove brake dust. This could damage
wheel bolts and brake components.
! Do not park the vehicle for an extended
period straight after cleaning it, particularly
after having cleaned the wheels with wheel
cleaner. Wheel cleaners could cause
increased corrosion of the brake discs and
brake pads/linings. For this reason, you
should drive for a few minutes after
cleaning. Braking heats the brake discs and
the brake pads/linings, thus drying them.
The vehicle can then be parked.
Cleaning the paintwork !
Do not affix:
R stickers
R films
R magnetic plates or similar items
to painted surfaces. You could otherwise
damage the paintwork.
Scratches, corrosive deposits, areas affected
by corrosion and damage caused by
inadequate care cannot always be completely
repaired. In such cases, visit a qualified
specialist workshop.
X Remove dirt immediately, where possible,
while avoiding rubbing too hard.
X Soak insect remains with insect remover
and rinse off the treated areas afterwards.
X Soak bird droppings with water and rinse
off the treated areas afterwards.
X Remove coolant, brake fluid, tree resin,
oils, fuels and greases by rubbing gently
with a cloth soaked in petroleum ether or
lighter fluid.
X Use tar remover to remove tar stains.
X Use silicone remover to remove wax.
If water no longer forms "beads" on the paint
surface, use the paint care products
recommended and approved by Mercedes-
Benz. This is the case approximately every three to five months, depending on the
climate conditions and the care product used.
If dirt has penetrated the paint surface or if
the paint has become dull, the paint cleaner
recommended and approved by Mercedes-
Benz should be used.
Do not use these care products in the sun or
on the hood while the hood is hot.
X
Use a suitable touch-up stick, e.g. MB
Touch-Up Stick, to correct smaller areas of
paint damage quickly and provisionally.
Matte finish care !
Never polish the vehicle or the light alloy
wheels. Polishing causes the finish to
shine.
! Never use paint cleaner, buffing or
polishing products, or gloss preserver, e.g.
wax. These products are only suitable for
high-gloss surfaces. Their use on vehicles
with matte finish leads to considerable
surface damage (shiny, spotted areas).
Always have paintwork repairs carried out
at a qualified specialist workshop.
! Do not use wash programs with a hot wax
treatment under any circumstances.
If your vehicle has a clear matte finish,
observe the following instructions in order to
avoid damage to the paintwork due to
incorrect care.
These notes also apply to light alloy wheels
with a clear matte finish.
i The vehicle should preferably be washed
by hand using a soft sponge, car shampoo
and plenty of water.
i Use only insect remover and car shampoo
from the range of recommended and
approved Mercedes-Benz care products. 208
CareMaintenance and care
Page 221 of 272

Jump-starting
G
WARNING
Battery acid is caustic. There is a risk of injury.
Avoid contact with the skin, eyes or clothing. Do not inhale any battery gases. Do not lean over
the battery. Keep children away from batteries. Wash battery acid immediately with water and
seek medical attention. G
WARNING
During charging and jump-starting, explosive gases can escape from the battery. There is a risk
of an explosion.
Particularly avoid fire, open flames, creating sparks and smoking. Ensure there is sufficient
ventilation while charging and jump-starting. Do not lean over a battery. G
WARNING
During the charging process, a battery produces hydrogen gas. If a short circuit occurs or sparks
are created, the hydrogen gas can ignite. There is a risk of an explosion.
R Make sure that the positive terminal of a connected battery does not come into contact with
vehicle parts.
R Never place metal objects or tools on a battery.
R It is important that you observe the described order of the battery terminals when connecting
and disconnecting a battery.
R When jump-starting, make sure that the battery poles with identical polarity are connected.
R It is particularly important to observe the described order when connecting and disconnecting
the jumper cables.
R Never connect or disconnect the battery terminals while the engine is running. G
WARNING
A discharged battery can freeze at temperatures below freezing point. When jump-starting the
vehicle or charging the battery, gases can escape from the battery. There is a risk of an explosion.
Allow the frozen battery to thaw out before charging it or jump-starting. G
WARNING
Non-combusted fuel can collect in the exhaust system and ignite. There is a risk of fire. Avoid
repeated and lengthy starting attempts.
! Avoid repeated and lengthy starting attempts. Otherwise, non-combusted fuel may
damage the catalytic converter and create a risk of fire.
Do not use a rapid charging device to start the vehicle.
Make sure the jumper cables are not damaged.
Make sure the jumper cables are not touching any other metal objects when they are
connected to the battery. Jump-starting
219Breakdown assistance Z
Page 231 of 272

Information on the dimensions and types of
wheels and tires for your vehicle can be found
in the "Wheel/tire combinations" section
(Y page 253).
Information on air pressure for the tires on
your vehicle can be found:
R on the tire pressure label on the fuel filler
flap
R in the "Tire pressure" section
i Further information on wheels and tires
can be obtained at any qualified specialist
workshop. Operation
Notes on driving
If the vehicle is heavily loaded, check the tire
pressures and correct them if necessary.
When parking your vehicle, make sure that
the tires do not get deformed by the curb or
other obstacles. If it is necessary to drive over
curbs, speed humps or similar elevations, try
to do so slowly and at an obtuse angle.
Otherwise, the tires, particularly the
sidewalls, may be damaged. Regular checking of wheels and tires
G
WARNING
Regularly check the tires for damage.
Damaged tires can cause tire inflation
pressure loss. As a result, you could lose
control of your vehicle.
Worn, old tires can cause accidents. If the tire
tread is worn to minimum tread depth, or if
the tires have sustained damage, replace
them.
R Regularly check the wheels and tires of
your vehicle for damage at least once a
month, as well as after driving off-road or
on rough roads. Damage includes bulges
and deformation on tires, cuts, punctures,
cracks or severe corrosion on wheels, for example. Damaged wheels can cause a
loss of tire pressure.
R Regularly check the tire tread depth and
the condition of the tread across the whole
width of the tire (Y page 229). In order to
inspect the inner side of the tire surface,
turn the steering wheel to full lock.
R All wheels must have a valve cap to protect
the valve against dirt and moisture. Do not
install anything onto the valve other than
the standard valve cap or a valve cap
approved by Mercedes-Benz for your
vehicle.
Do not install anything onto the valve, such
as tire pressure monitoring systems.
R You should regularly check the pressure of
all your tires including the spare wheel,
particularly prior to long trips. Adjust the
tire pressure as necessary (Y page 236).
The service life of tires depends, among other
things, on the following factors:
R driving style
R tire pressure
R distance covered Tire tread
G
WARNING
Although the applicable federal motor vehicle
safety laws consider a tire to be worn when
the treadwear indicators (TWI) become visible
at approximately áinches (1.6 mm), we
recommend that you do not allow your tires
to wear down to that level. As tread depth
approaches âinches (3 mm) the adhesion
properties on a wet road are sharply reduced.
Depending upon the weather and/or road
surface (conditions), the tire traction varies
widely. Operation
229Wheels and tires Z