2014 MERCEDES-BENZ E-SEDAN key
[x] Cancel search: keyPage 331 of 430
However, only the law enforcement agency
is informed of the location of the vehicle.
i If the anti-theft alarm system is activated
for longer than 30 second s,the Mercedes-
Benz Customer Assistance Center is
automatically informed.
Vehicle remote malfunction diagnosis With the vehicle remote malfunction
diagnosis (Vehicle Health Check), the
Customer Assistance center can provide
improved support for problems with your
vehicle. During an existing call, vehicle data
is transferred to the Customer Assistance
center. The customer service representative
can use the received data to decide what kind
of assistance is required. You are then, for
example, guided to the nearest authorized
Mercedes-Benz Center or a recovery vehicle
is called.
If vehicle data needs to be transferred during
an MB Info call or a Roadside Assistance call,
this is initiated by the Customer Assistance
center. You will see the
Roadside Roadside
Assistance Connected
Assistance Connected message in the
COMAND display. If the vehicle remote
malfunction diagnosis can be started, the
Request for vehicle diagnosis Request for vehicle diagnosis
received. Start vehicle diagnosis? received. Start vehicle diagnosis?
message appears in the display.
X Confirm the message with Yes Yes.
X When the Vehicle Diagnosis Please
Vehicle Diagnosis Please
start ignition
start ignition message appears, turn
the SmartKey to position 2in the ignition
lock (Y page 159).
X When the Please follow the
Please follow the
instructions
instructions received
receivedby
byphone
phone and
and
move your vehicle to a safe
move your vehicle to a safe
position. position. message appears, follow the
customer service representative's
instructions.
The message in the display disappears.
If you select Cancel Cancel, the vehicle remote
malfunction diagnosis is canceled
completely. The vehicle operating state check begins.
You will see the
Vehicle diagnosis Vehicle diagnosis
activated. activated. message.
When the diagnosis is completed, the Send
Send
vehicle diagnostics data//(Voice
vehicle diagnostics data//(Voice
connection may be//interrupted connection may be//interrupted
during during data
datatransfer)
transfer) message appears.
The vehicle data can now be sent to the
Customer Assistance center.
X Press OK OKto confirm the message.
The voice connection with the Customer
Assistance center is terminated.
You will see the Vehicle Diagnosis: Vehicle Diagnosis:
Transferring data...
Transferring data... message.
The vehicle data is sent to the Customer
Assistance center.
Depending on what the customer service
representative agreed with you, the voice
connection is re-established after the transfer
is complete. If necessary, you will be
contacted at a later time by another means,
e.g. by e-mail or phone.
Further functions of the vehicle remote
malfunction diagnosis include, for example:
R transfer of service data to the Customer
Assistance center. If a service is overdue,
the COMAND display shows a message
about various special offers at your
workshop.
R monthly status information e-mail on oil
level, air pressure, maintenance, brakes,
etc. If applicable, you will receive
information on special offers in the e-mail.
USA only: this information can also be
called up under "Owners Online" at http://
www.mbusa.com.
Information on the data stored in the vehicle
(Y page 28).
Information on Roadside Assistance
(Y page 24). Features
329Stowage an d features Z
ProCarManuals.com
Page 333 of 430
Garage door opener
Important safety notes G
WARNING
When you operate or program the garage door
with the integrated garage door opener,
persons in the range of movement of the
garage door can become trapped or struck by
the garage door. There is a risk of injury.
When using the integrated garage door
opener, always make sure that nobody is
within the range of movement of the garage
door. G
WARNING
Combustion engines emit poisonous exhaust
gases such as carbon monoxide. Inhaling
these exhaust gases leads to poisoning. There
is a risk of fatal injury. Therefore never leave
the engine running in enclosed spaces
without sufficient ventilation.
The HomeLink ®
garage door opener
integrated in the rear-view mirror allows you
to operate up to three different door and gate
systems.
Use the integrated garage door opener only
on garage doors that:
R have safety stop and reverse features and
R meet current U.S. federal safety standards
When programming a garage door opener,
park the vehicle outside the garage.
i Certain garage door drives are
incompatible with the integrated garage
door opener. If you have difficulty
programming the integrated garage door
opener, contact an authorized Mercedes-
Benz Center. Alternatively, you can call the following
telephone assistance services:
R
USA: Mercedes-Benz Customer
Assistance Center at
1-800-FOR-MERCedes
R Canada: Customer Service at
1-800-387-0100
R HomeLink ®
hotline 1-800-355-3515
(free of charge)
More information on HomeLink ®
and/or
compatible products is also available
online at http://www.homelink.com.
i Notes on the declaration of conformity
(Y page 26).
USA: FCC ID: CB2HMIHL4
Canada: IC: 279B-HMIHL4
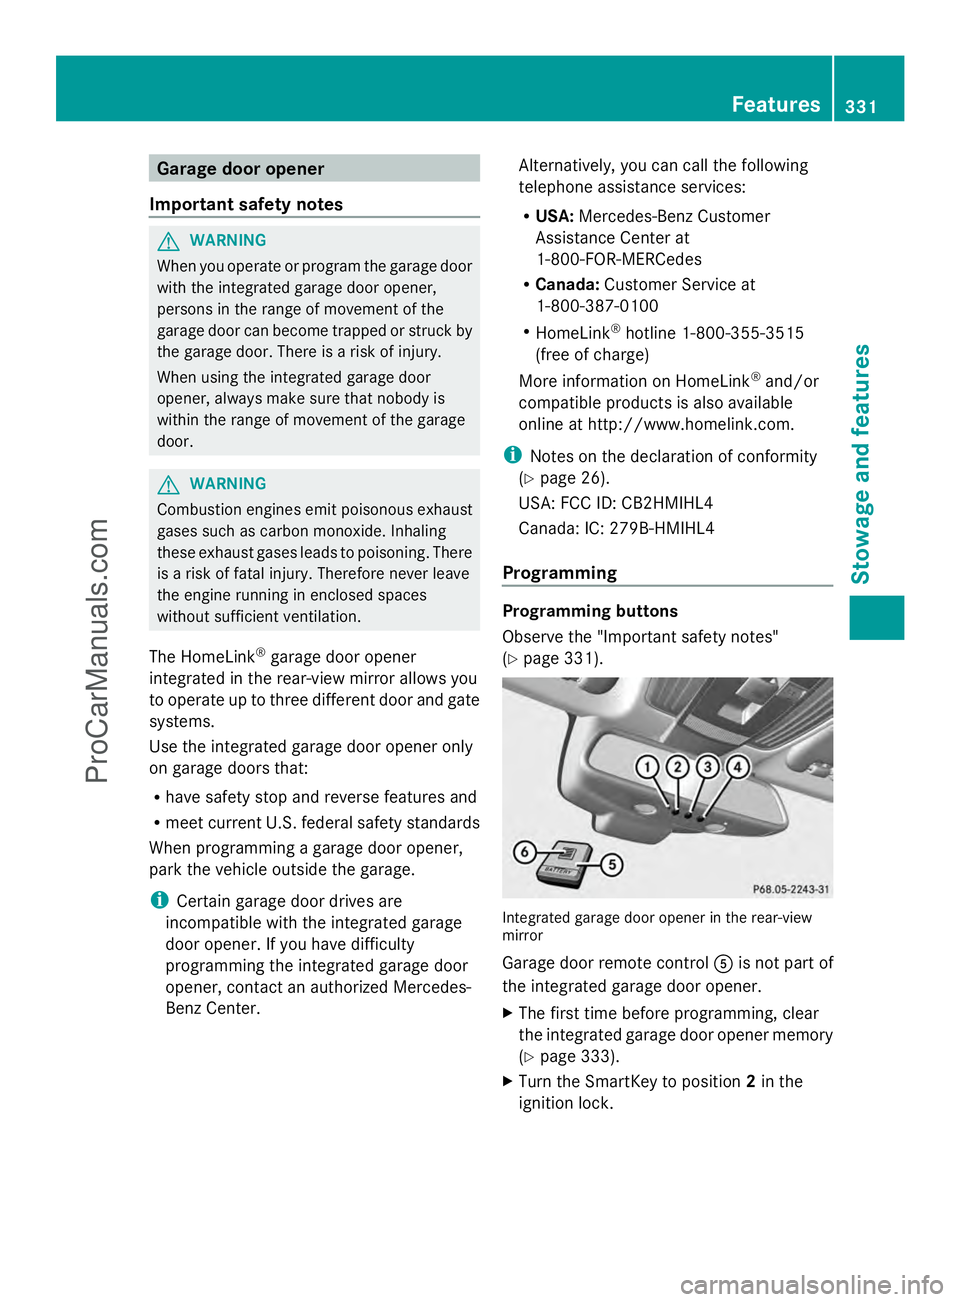
Programming Programming buttons
Observe the "Important safety notes"
(Y
page 331). Integrated garage door opener in the rear-view
mirror
Garage door remote control
Ais not part of
the integrated garage door opener.
X The first time before programming, clear
the integrated garage door opener memory
(Y page 333).
X Turn the SmartKey to position 2in the
ignition lock. Features
331Stowage and features Z
ProCarManuals.com
Page 334 of 430
X
Press and hold one of buttons ;to? on
the integrated garage door opener.
After a short time, indicator lamp :lights
up yellow.
i Indicator lamp :lights up yellow as soon
as button ;,=or? is programmed for
the first time. If the selected button has
already been programmed, indicator
lamp :will only light up yellow after ten
seconds have elapsed.
X Release button ;,=or?. Indicator
lamp :flashes yellow.
X Point garage door remote control A
towards buttons ;to? on the rear-view
mirror at a distance of 2 to 8 inches (5 to
20 cm).
i The required distance between remote
control Aand the integrated garage door
opener depends on the garage door drive
system. Several attempts might be
necessary. You should test every position
for at least 25 seconds before trying
another position.
X Press and hold button Bon remote control
A until indicator lamp :lights up green.
If indicator lamp :lights up green or
flashes, then programming has been
successful.
X Release button Bon remote control Afor
the garage door drive system.
X If indicator lamp :lights up red: repeat
the programming procedure for the
corresponding button on the rear-view
mirror. When doing so, vary the distance
between remote control Aand the rear-
view mirror.
i If the indicator lamp flashes green after
successful programming, the garage door
system is using a rolling code. After
programming, you must synchronize the
garage door opener integrated in the rear-
view mirror with the receiver of the garage
door system. Synchronizing the rolling code
Observe the "Important safety notes"
(Y
page 331).
Your vehicle must be within reach of the
garage door or exterior gate drive. Make sure
that neither your vehicle nor any persons/
objects are present within the sweep of the
door or gate.
X Turn the SmartKey to position 2in the
ignition lock.
X Press the program button of the door or
gate drive (see the door or gate drive
operating instructions, e.g. under
"programming of additional remote
controls").
i Usually, you now have 30seconds to
initiate the next step.
X Press previously programmed button ;,
= or? of the integrated garage door
opener until the door closes.
The rolling code synchronization is then
complete.
Notes on programming the remote
control
Canadian radio frequency laws require a
"break" (or interruption) of the transmission
signals after broadcasting for a few seconds.
Therefore, these signals may not last long
enough for the integrated garage door
opener. The signal is not recognized during
programming. Comparable with Canadian
law, some U.S. garage door openers also
feature a "break".
Proceed as follows:
R if you live in Canada
R if you have difficulties programming the
garage door opener (regardless of where
you live) when using the programming
steps 332
FeaturesStowage and features
ProCarManuals.com
Page 335 of 430
X
Press and hold one of buttons ;to? on
the integrated garage door opener.
After a short time, indicator lamp :lights
up yellow.
X Release the button.
Indicator lamp :flashes yellow.
X Press button Bof garage door remote
control Afor two seconds, then release it
for two seconds.
X Press button Bagain for two seconds.
X Repeat this sequence on button Bof
remote control Auntil indicator lamp :
lights up green.
If indicator lamp :turns red, repeat the
process.
X Continue with the other programming
steps (see above).
Problems when programming
If you are experiencing problems
programming the integrated garage door
opener on the rear-view mirror, take note of
the following instructions:
R Check the transmitter frequency of garage
door drive remote control A. This can
usually be found on the back of the remote
control.
The integrated garage door opener is
compatible with devices that have units
which operate in the frequency range of
280to 433MHz.
R Replace the batteries in garage door
remote control A. This increases the
likelihood that garage door remote control
A will transmit a strong and precise signal
to the integrated garage door opener in the
rear-view mirror.
R When programming, hold remote control
A at varying distances and angles from the
button that you are programming. Try
various angles at a distance between 2and
12 inches (5to 30 cm) or at the same angle
but at varying distances.
R If another remote control for the same
garage door drive is available, repeat the same programming steps with this remote
control. Before performing these steps,
make sure that new batteries have been
installed in garage door drive remote
control
A.
R Note that some remote controls only
transmit for a limited amount of time (the
indicator lamp on the remote control goes
out). Press button Bon remote control
A again before transmission ends.
R Align the antenna cable of the garage door
opener unit. This can improve signal
reception/transmission.
Opening/closing the garage door After it has been programmed, the integrated
garage door opener performs the function of
the garage door system remote control.
Please also read the operating instructions
for the garage door system.
X
Turn the SmartKey to position 2in the
ignition lock.
X Press button ;,=or? which you have
programmed to operate the garage door.
Garage door system with a fixed code:
indicator lamp :lights up green.
Garage door system with a rolling code:
indicator lamp :flashes green.
i The transmitter will transmit a signal as
long as the button is pressed. The
transmission is halted after a maximum of
ten seconds and indicator lamp :lights
up yellow. Press button ;,=or? again
if necessary.
Clearing the memory X
Turn the SmartKey to position 2in the
ignition lock.
X Press buttons ;and ?.
The indicator lamp lights up yellow.
X Press and hold buttons ;and ?until the
indicator lamp turns green. Features
333Stowage and features Z
ProCarManuals.com
Page 341 of 430
engine or to the catalytic converter. Have
excess engine oil siphoned off.
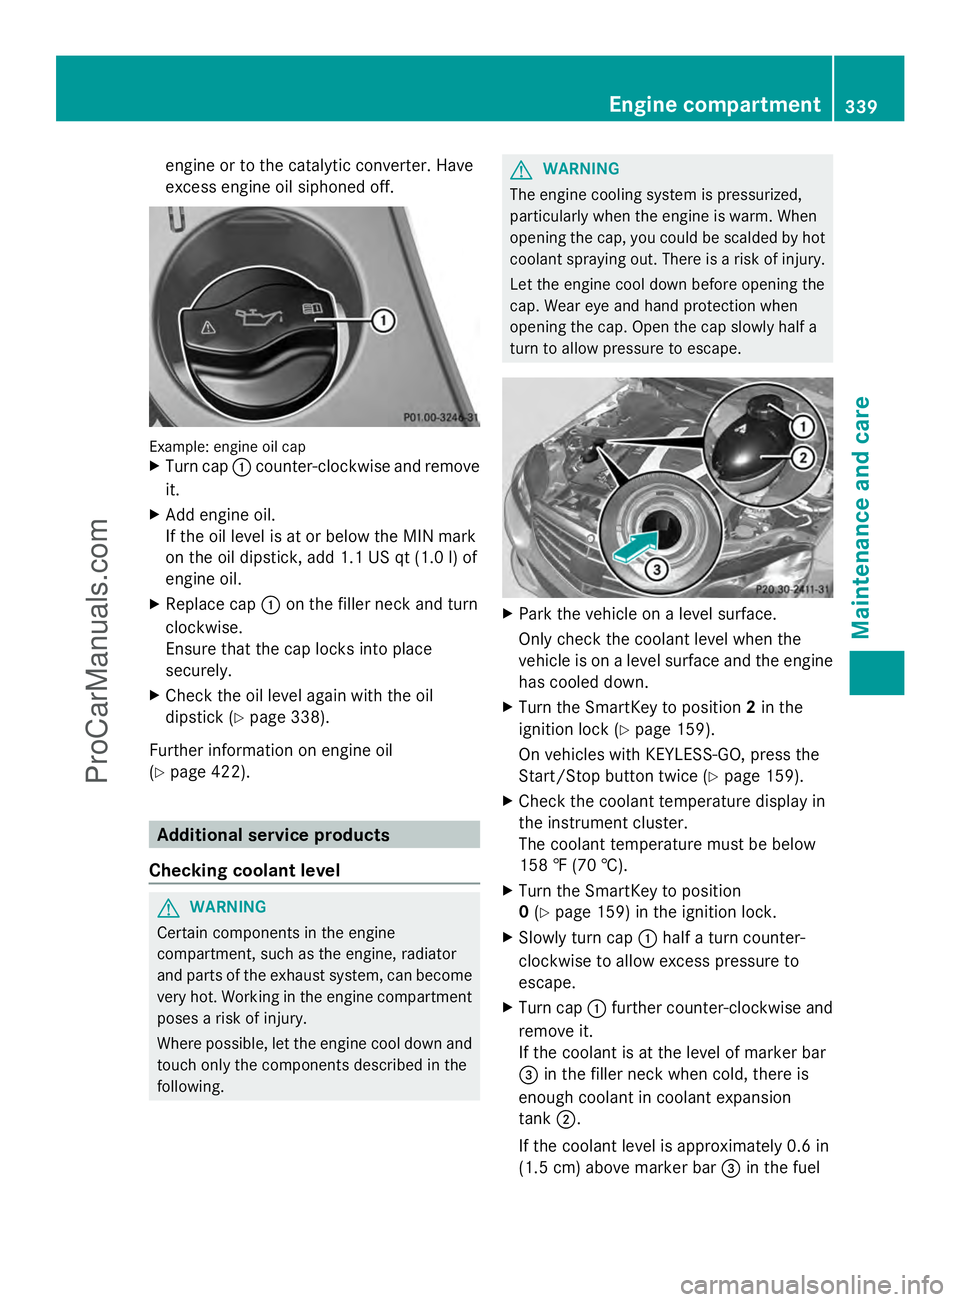
Example: engine oil cap
X
Turn cap :counter-clockwise and remove
it.
X Add engine oil.
If the oil level is at or below the MIN mark
on the oil dipstick, add 1.1 US qt (1.0 l) of
engine oil.
X Replace cap :on the filler neck and turn
clockwise.
Ensure that the cap locks into place
securely.
X Check the oil level again with the oil
dipstick (Y page 338).
Further information on engine oil
(Y page 422). Additional service products
Checking coolant level G
WARNING
Certain components in the engine
compartment, such as the engine, radiator
and parts of the exhaust system, can become
very hot. Working in the engine compartment
poses a risk of injury.
Where possible, let the engine cool down and
touch only the components described in the
following. G
WARNING
The engine cooling system is pressurized,
particularly when the engine is warm. When
opening the cap, you could be scalded by hot
coolant spraying out. There is a risk of injury.
Let the engine cool down before opening the
cap. Wear eye and hand protection when
opening the cap. Open the cap slowly half a
turn to allow pressure to escape. X
Park the vehicle on a level surface.
Only check the coolant level when the
vehicle is on a level surface and the engine
has cooled down.
X Turn the SmartKey to position 2in the
ignition lock (Y page 159).
On vehicles with KEYLESS-GO, press the
Start/Stop button twice (Y page 159).
X Check the coolant temperature display in
the instrument cluster.
The coolant temperature must be below
158 ‡ (70 †).
X Turn the SmartKey to position
0 (Y page 159) in the ignition lock.
X Slowly turn cap :half a turn counter-
clockwise to allow excess pressure to
escape.
X Turn cap :further counter-clockwise and
remove it.
If the coolant is at the level of marker bar
= in the filler neck when cold, there is
enough coolant in coolant expansion
tank ;.
If the coolant level is approximately 0.6 in
(1.5 cm) above marker bar =in the fuel Engine compartment
339Maintenance and care Z
ProCarManuals.com
Page 344 of 430
Do not scrub.
Do not touch the surfaces or protective
films with hard objects, e.g. a ring or ice
scraper. You could otherwise scratch or
damage the surfaces and protective film.
! Do not park the vehicle for an extended
period straight after cleaning it, particularly
after having cleaned the wheels with wheel
cleaner. Wheel cleaners could cause
increased corrosion of the brake discs and
brake pads/linings. For this reason, you
should drive for a few minutes after
cleaning. Braking heats the brake discs and
the brake pads/linings, thus drying them.
The vehicle can then be parked.
Regular care of your vehicle is a condition for
retaining the quality in the long term.
Use care products and cleaning agents
recommended and approved by Mercedes-
Benz. Washing the vehicle and cleaning the
paintwork
Automatic car wash G
WARNING
Braking efficiency is reduced after washing
the vehicle. There is a risk of an accident.
After the vehicle has been washed, brake
carefully while paying attention to the traffic
conditions until full braking power is restored.
! If DISTRONIC PLUS or the HOLD function
is activated, the vehicle brakes
automatically in certain situations. To
prevent damage to the vehicle, deactivate
DISTRONIC PLUS and the HOLD function in
the following or other similar situations:
R when towing the vehicle
R in the car wash
! Never clean your vehicle in a Touchless
Automatic Car Wash as these use special
cleaning agents. These cleaning agents can
damage the paintwork or plastic parts. !
Make sure that:
R the side windows and the sliding sunroof
are fully closed.
R the ventilation/heating is switched off
(the OFF button has been pressed).
R the windshield wiper switch is in position
0.
Otherwise, the vehicle might be damaged.
! In car washes with a towing mechanism,
make sure that the automatic transmission
is in transmission position N, otherwise the
vehicle could be damaged.
R Vehicles with a SmartKey:
Do not remove the SmartKey from the
ignition lock. Do not open the driver's
door or front-passenger door when the
engine is switched off. Otherwise, the
automatic transmission selects park
position Pautomatically and locks the
wheels. You can prevent this by shifting
the automatic transmission to N
beforehand.
R Vehicles with KEYLESS-GO:
Do not open the driver's door or front-
passenger door when the engine is
switched off. Otherwise, the automatic
transmission selects park position P
automatically and locks the wheels.
! If the SmartKey is within the rear
detection range of KEYLESS-GO, the
following situations, for example, could
lead to the unintentional opening of the
trunk lid/tailgate:
R using a car wash
R using a power washer
Make sure that the SmartKey is at least
6.5 ft (2 m) away from the vehicle.
Observe the following to make sure that the
automatic transmission stays in position N:342
CareMaintenance and care
ProCarManuals.com
Page 345 of 430
X
Make sure the vehicle is stationary and the
ignition is switched off.
X Turn the SmartKey to position 2in the
ignition lock (Y page 159).
Use the SmartKey instead of the Start/
Stop button on vehicles with KEYLESS-GO.
X Depress and hold the brake pedal.
X Shift the automatic transmission to
position N.
X Release the brake pedal.
X Release the parking brake.
X Switch off the ignition and leave the
SmartKey in the ignition lock.
You can wash the vehicle in an automatic car
wash from the very start.
If the vehicle is very dirty, pre-wash it before
cleaning it in an automatic car wash.
After using an automatic car wash, wipe off
wax from the windshield and the wiper
blades. This will prevent smears and reduce
wiping noises caused by residue on the
windshield.
Washing by hand In some countries, washing by hand is only
allowed at specially equipped washing bays.
Observe the legal requirements in all
countries concerned.
X Do not use hot water and do not wash the
vehicle in direct sunlight.
X Use a soft sponge to clean.
X Use a mild cleaning agent, such as a car
shampoo approved by Mercedes-Benz.
X Thoroughly hose down the vehicle with a
gentle jet of water.
X Do not point the water jet directly towards
the air inlet.
X Use plenty of water and rinse out the
sponge frequently.
X Rinse the vehicle with clean water and dry
thoroughly with a chamois.
X Do not let the cleaning agent dry on the
paintwork. When using the vehicle in winter, remove all
traces of road salt deposits carefully and as
soon as possible.
Power washers G
WARNING
The water jet from a circular jet nozzle (dirt
blasters) can cause invisible exterior damage
to the tires or chassis components.
Components damaged in this way may fail
unexpectedly. There is a risk of an accident.
Do not use power washers with circular jet
nozzles to clean the vehicle. Have damaged
tires or chassis components replaced
immediately.
! Always maintain a distance of at least
11.8 in (30 cm) between the vehicle and the
power washer nozzle. Information about
the correct distance is available from the
equipment manufacturer.
Move the power washer nozzle around
when cleaning your vehicle.
Do not aim directly at any of the following:
R tires
R door gaps, roof gaps, joints, etc.
R electrical components
R battery
R connectors
R lights
R seals
R trim
R ventilation slots
Damaged seals or electrical components
can lead to leaks or failures.
! If the SmartKey is within the rear
detection range of KEYLESS-GO, the
following situations, for example, could
lead to the unintentional opening of the
trunk lid/tailgate:
R using a car wash
R using a power washer Care
343Maintenance and care Z
ProCarManuals.com
Page 346 of 430
Make sure that the SmartKey is at least
6.5 ft (2 m) away from the vehicle.
Cleaning the paintwork !
Do not affix:
R stickers
R films
R magnetic plates or similar items
to painted surfaces. You could otherwise
damage the paintwork.
Scratches, corrosive deposits, areas affected
by corrosion and damage caused by
inadequate care cannot always be completely
repaired. In such cases, visit a qualified
specialist workshop.
X Remove dirt immediately, where possible,
while avoiding rubbing too hard.
X Soak insect remains with insect remover
and rinse off the treated areas afterwards.
X Soak bird droppings with water and rinse
off the treated areas afterwards.
X Remove coolant, brake fluid, tree resin,
oils, fuels and greases by rubbing gently
with a cloth soaked in petroleum ether or
lighter fluid.
X Use tar remover to remove tar stains.
X Use silicone remover to remove wax.
If water no longer forms "beads" on the paint
surface, use the paint care products
recommended and approved by Mercedes-
Benz. This is the case approximately every
three to five months, depending on the
climate conditions and the care product used.
If dirt has penetrated the paint surface or if
the paint has become dull, the paint cleaner
recommended and approved by Mercedes-
Benz should be used.
Do not use these care products in the sun or
on the hood while the hood is hot.
X Use a suitable touch-up stick, e.g. MB
Touch-Up Stick, to repair slight damage to
the paintwork quickly and provisionally. Matte finish care !
Never polish the vehicle or the light alloy
wheels. Polishing causes the finish to
shine.
! The following may cause the paint to
become shiny and thus reduce the matte
effect:
R Vigorous rubbing with unsuitable
materials.
R Frequent use of car washes.
R Washing the vehicle in direct sunlight.
! Never use paint cleaner, buffing or
polishing products, or gloss preserver, e.g.
wax. These products are only suitable for
high-gloss surfaces. Their use on vehicles
with matte finish leads to considerable
surface damage (shiny, spotted areas).
Always have paintwork repairs performed
at a qualified specialist workshop, e.g. an
authorized Mercedes-Benz Center.
! Do not use wash programs with a hot wax
treatment under any circumstances.
Observe these notes if your vehicle has a
clear matte finish. This will help you to avoid
damage to the paintwork due to incorrect
treatment.
These notes also apply to light alloy wheels
with a clear matte finish.
i The vehicle should preferably be washed
by hand using a soft sponge, car shampoo
and plenty of water.
i Use only insect remover and car shampoo
from the range of recommended and
approved Mercedes-Benz care products. Cleaning the vehicle parts
Cleaning the wheels !
Do not use acidic wheel cleaning products
to remove brake dust. This could damage
wheel bolts and brake components. 344
CareMaintenance and care
ProCarManuals.com