2014 MERCEDES-BENZ CLS COUPE service reset
[x] Cancel search: service resetPage 8 of 417

Switching the function on/off
(ATA) ................................................ 78
Alarm system
see ATA (Anti-Theft Alarm system)
Ambient lighting
Setting the brightness (on-board
computer) ...................................... 253
Setting the colour (on-board com-
puter) ............................................. 254
AMG RIDE CONTROL sports sus-
pension ............................................... 204
Anti-glare film .................................... 326
Anti-lock braking system
see ABS (Anti-lock Braking System)
Anti-Theft Alarm system
see ATA (Anti-Theft Alarm system)
Aquaplaning ....................................... 185
Ashtray ............................................... 315
Assistance display (on-board com-
puter) .................................................. 249
Assistance menu (on-board com-
puter) .................................................. 249
ASSYST PLUS
Displaying a service message ........ 333
Hiding a service message .............. 333
Notes ............................................. 332
Resetting the service interval dis-
play ................................................ 333
Service message ............................ 332
Special service requirements ......... 333
ATA (Anti-Theft Alarm system)
Activating/deactivating ................... 78
Function ........................................... 78
Interior motion sensor ..................... 79
Switching off the alarm .................... 78
Tow-away protectio n ........................79
ATTENTION ASSIST
Activating/deactivating ................. 250
Display message ............................ 274
Function/notes ............................ .218
Authorised workshop
see Qualified specialist workshop
AUTO lights
Display message ............................ 269
see Lights
Automatic engine start (ECO start/
stop function) ................................... .164 Automatic engine switch-off (ECO
start/stop function)
.......................... 163
Automatic headlamp mode .............. 123
Automatic transmission
Accelerator pedal position ............. 171
Automatic drive program .............. .173
Changing gear ............................... 171
DIRECT SELECT lever ..................... 168
Display message ............................ 282
Drive program displa y.................... 169
Driving tips .................................... 171
Emergency running mod e.............. 177
Engaging drive position .................. 170
Engaging neutral ............................ 170
Engaging park position (AMG vehi- cles) ............................................... 168
Engaging reverse gear ................... 169
Engaging the park position ............ 169
Kickdown ....................................... 171
Manual drive progra m.................... 174
Manual drive program (AMG vehi-
cles) ............................................... 175
Manual drive program (vehicles
with Sports package AMG) ............ 175
Overview ........................................ 167
Problem (fault) ............................... 177
Program selector button ................ 171
Pulling away ................................... 162
Selector lever ................................ 168
Starting the engine ........................ 161
Steering wheel gearshift paddle s... 173
Trailer towing ................................. 171
Transmission position display ........ 168
Transmission position display
(DIRECT SELECT lever) ................... 169
Transmission positions .................. 170
Automatic transmission emer-
gency running mode ......................... 177
Auxiliary heating
Activating/deactivating ................. 150
Activating/deactivating (on the
centre console ).............................. 151
Display message ............................ 284
Important safety notes .................. 150
Problem (display message) ............ 154
Remote control .............................. 151
Setting ........................................... 256
Setting the departure time ............. 152 Index
5
Page 18 of 417
Notes/placing in the bracket .........3
19
Transmission output (maximum) .... 396
Modifying the programming (key) ..... 84
MOExtended tyres .............................347
Motorway mode ................................ 128
MP3
Operating ....................................... 246
see Separate operating instructions
Multicontour seat
Adjusting (on the seat) .................. 109
Multifunction display
Function/notes ............................ .242
Permanent display ......................... 252
Multifunction steering wheel
Operating the on-board computer .. 241
Overview .......................................... 35 N
Navigation Menu (on-board computer) ............ 245
NECK-PRO head restraints
Operation ......................................... 53
Resetting after being triggered ....... .53
NECK-PRO luxury head restraints
Important safety note s.................... 53
Operation ......................................... 53
Resetting after being triggered ........ 54
Night View Assist Plus
Activating/deactivating ................. 221
Cleaning ......................................... 339
Function/note s............................. 220
Problem (fault) ............................... 223
Notes on running in a new vehicle .. 158O
Occupant safety Automatic measures after an acci-
dent ................................................. 55
Children in the vehicle ..................... 55
Important safety notes .................... 43
Pets in the vehicle ........................... 69
PRE-SAFE® (anticipatory occu-
pant protection) ............................... 54
Odometer ........................................... 243
Oil
see Engine oil On-board computer
AMG menu ..................................... 258
Assistance menu ........................... 249
Audio menu ................................... 246
Convenience submenu .................. 257
Display messages .......................... 261
Displaying a service message ........ 333
DISTRONIC PLUS ........................... 197
Factory setting submenu ............... 258
Heating submenu ........................... 256
Important safety notes .................. 240
Instrument cluster submenu .......... 252
Light submenu ............................... 252
Menu overview .............................. 243
Message memory .......................... 261
Navigation menu ............................ 245
Operating the TV ............................ 247
Operating video DVD ..................... 247
Operation ....................................... 241
RACETIMER ................................... 259
Service menu ................................. 251
Settings menu ............................... 251
Standard display ............................ 243
Telephone menu ............................ 247
Trip menu ...................................... 243
Vehicle submenu ........................... 255
Operating instructions
Vehicle equipment ........................... 24
Operating safety
Declaration of conformity ................ 25
Important safety note ...................... 24
Operating system
see On-board computer
Outside temperature display ........... 240
Overhead control panel ...................... 39
Override feature
Rear side window s........................... 69 P
Paint code .......................................... 398
Paintwork (cleaning instructions) ... 336
Panic alarm .......................................... 42
Parking
Important safety notes .................. 180
Parking brake ................................ 181
Position of exterior mirror, front-
passenger side ............................... 118 Index
15
Page 21 of 417

Important safety notes .................. 105
Overview ........................................ 105
Seat heating problem .................... 112
Seat ventilation problem ................ 113
Storing settings (memory func-
tion) ............................................... 119
Switching seat heating on/off ....... 111
Switching the seat ventilation on/
off .................................................. 112
Selector lever
Cleaning .........................................3 40
Sensors (cleaning instructions) ....... 337
Service
see ASSYST PLUS
Service Centre
see Qualified specialist workshop
Service menu (on-board com-
puter) ................................................. .251
Service products
AdBlue® special additive s............. 403
Brake fluid ..................................... 405
Coolant (engine) ............................ 405
Engine oil ....................................... 404
Fuel ................................................ 399
Important safety notes .................. 399
Washer fluid ................................... 406
Setting the air distribution ............... 145
Setting the airflow ............................ 146
Settings
Factory (on-board computer) ......... 258
On-board compute r....................... 251
SETUP (on-board computer) ............. 258
Side lamps
Switching on/of f........................... 124
Side windows
Convenience closing ........................ 97
Convenience opening ...................... 97
Important safety notes .................... 96
Opening/closing .............................. 96
Problem (malfunction) ..................... 99
Resetting ......................................... 98
Sidebag ................................................ 50
Sliding sunroof
Important safety information ........... 99
Opening/closing ............................ 100
Problem (malfunction) ................... 102
Rain closing feature ....................... 101 Resetting ....................................... 101
Snow chains ...................................... 367
Socket
Luggage compartment ................... 319
Under the armrest ......................... 318
Sockets
Centre console .............................. 318
General notes ................................ 317
Rear compartment ......................... 318
Spare wheel
Storing ........................................... 392
Specialist workshop ............................ 26
Spectacles compartment ................. 301
Speed Limit Assist
Activating/deactivating the warn-ing function .................................... 249
Display message ............................ 275
Display message in the multifunc- tion display .................................... 220
Important safety notes .................. 219
Speed, controlling
see Cruise control
Speedometer
Digital ............................................ 244
In the Instrument cluster ................. 32
Segments ...................................... 241
Selecting the unit of measure-
ment .............................................. 252
see Instrument cluster
SPEEDTRONIC
Deactivating variable ..................... 191
Display message ............................ 278
Function/note s............................. 189
Important safety notes .................. 189
LIM indicator lamp ......................... 189
Permanent ..................................... 191
Selecting ........................................ 190
Storing the current speed .............. 190
Variabl e......................................... 189
SPORT handling mode
Activating/deactivating (AMG
vehicles) .......................................... 74
Warning lamp ................................. 292
Start/stop function
see ECO start/stop function
Starting (engine) ................................ 161
Steering (display message) .............. 28518
Index
Page 23 of 417

Deactivating ....................................
.79
Function ........................................... 79
Tow-starting
Emergency engine starting ............ 360
Important safety notes .................. 357
Towing
Important safety notes .................. 357
With the rear axle raised ................ 359
Towing a trailer
Active Blind Spot Assist ................ .229
Active Lane Keeping Assist ............ 232
Active Parking Assist ..................... 213
Axle load, permissible .................... 410
Bulb failure indicator for LED
lamps ............................................. 237
ESP® (Electronic Stability Pro-
gram) ............................................... 75
Towing away
Fitting the towing eye .................... 358
Removing the towing eye .............. .359
With both axles on the ground ....... 359
Trailer
Display message ............................ 284
Trailer coupling
see Towing a trailer
Trailer towing
7-pin connector ............................ .237
Blind Spot Assist ............................ 225
Cleaning the trailer tow hitch ......... 338
Coupling up a trailer ..................... .235
Decoupling a trailer ....................... 235
Driving tips ................................... .233
Folding in the ball coupling ............ 236
Folding out the ball coupling .......... 234
Important safety notes .................. 232
Lights display message .................. 267
Mounting dimensions .................... 409
Parktronic ...................................... 209
Power supply ................................. 236
Trailer loads ................................... 410
Transmission
see Automatic transmission
Transmission position display ......... 169
Transmission position display
(DIRECT SELECT lever) ......................169
Transporting the vehicle .................. 359
Trim pieces (cleaning instruc-
tions) ................................................. .340 Trip computer (on-board com-
puter)
................................................. .243
Trip meter
Calling up ....................................... 243
Resetting (on-board computer) ...... 244
Turn signals
Switching on/off ........................... 125
TV
Operating (on-board computer) ..... 247
see Separate operating instructions
Two-way radio
Frequencies ................................... 396
Installation ..................................... 396
Transmission output (maximum) .... 396
Type identification plate
see Vehicle identification plate
Tyre pressure
Calling up (on-board computer) ..... 370
Display message ............................ 280
Important safety notes .................. 370
Not reached (TIREFIT) .................... 350
Reached (TIREFIT) .......................... 350
Recommended ............................... 367
Tyre pressure loss warning
General notes ................................ 369
Important safety notes .................. 369
Restarting ...................................... 369
Tyre pressure monitor
Checking the tyre pressure elec-
tronically ........................................ 371
Function/notes ............................ .370
General notes ................................ 370
Important safety notes .................. 370
Radio type approval for the tyre
pressure monitor ........................... 373
Restarting ...................................... 372
Warning lamp ................................. 298
Warning message .......................... 372
Tyres
Changing a wheel .......................... 373
Checking ........................................ 365
Direction of rotatio n...................... 374
Display message ............................ 280
Important safety notes .................. 364
MOExtended tyre s......................... 366
Replacing ....................................... 373
Service life ..................................... 365
Storing ........................................... 374 20
Index
Page 29 of 417
G
WARNING
If you connect equipment to a diagnostics
connection in the vehicle, it can affect the
operation of the vehicle systems. This may
affect the operating safety of the vehicle.
There is a risk of an accident.
Do not connect any equipment to a diagnos-
tics connection in the vehicle. G
WARNING
Objects in the driver's footwell may restrict
the clearance around the pedals or block a
depressed pedal. This jeopardises the oper-
ating and road safety of the vehicle. There is a risk of an accident.
Stow all objects securely in the vehicle so that
they do not get into the driver's footwell.
Always fit the floormats securely and as pre-
scribed in order to ensure that there is always sufficient room for the pedals. Do not use
loose floormats and do not place several floor- mats on top of one another.
! If the engine is switched off and equip-
ment on the diagnostics connection is
used, the starter battery may discharge.
Connecting equipment to the diagnostics
connection can lead to emissions monitoring information being reset, for example. This
may lead to the vehicle failing to meet the
requirements of the next emissions test dur-
ing the main inspection. Qualified specialist workshop
A qualified specialist workshop has the nec-
essary special skills, tools and qualifications
to correctly carry out any necessary work on
your vehicle. This particularly applies to work
relevant to safety.
Observe the notes in the Service Booklet.
Always have the following work carried out at a qualified specialist workshop:
R work relevant to safety
R service and maintenance work R
repair work
R modifications, installations and conver-
sions
R work on electronic components
Mercedes-Benz recommends that you use a
Mercedes-Benz Service Centre. Vehicle registration
Mercedes-Benz may ask its Service Centres
to carry out technical inspections on certain
vehicles. The quality or safety of the vehicle is
improved as a result of the inspection.
Mercedes-Benz can only inform you about
vehicle checks if it has your registration data.
It is possible that your vehicle has not yet
been registered in your name in the following
cases:
R if your vehicle was not purchased at an
authorised specialist dealer.
R if your vehicle has not yet been examined at
a Mercedes-Benz Service Centre.
It is advisable to register your vehicle with a
Mercedes-Benz Service Centre.
Inform Mercedes-Benz as soon as possible
about any change in address or vehicle own-
ership. You can do this at a Mercedes-Benz
Service Centre, for example. Correct use
If you remove any warning stickers, you or
others could fail to recognise certain dangers.
Leave warning stickers in position.
Observe the following information when driv- ing your vehicle:
R the safety notes in this manual
R the technical data in this manual
R traffic rules and regulations
R laws and safety standards pertaining to
motor vehicles 26
Introduction
Page 56 of 417
NECK-PRO head restraint/NECK-PRO
luxury head restraints
Important safety notes G
WARNING
The function of the head restraint may be
impaired if you:
R attach objects such as coat hangers to the
head restraints, for example
R use unsuitable head restraint covers
If you do so, the head restraints cannot fulfil
their intended protective function in the event of an accident. In addition, objects attached
to the head restraints could endanger other
vehicle occupants. This poses an increased
risk of injury.
Do not attach any objects to the head
restraints and only use suitable head restraint
covers.
Consult a Mercedes-Benz Service Centre
regarding the availability of suitable seat or
head restraint covers.
Operation NECK-PRO head restraints/NECK-PRO luxury
head restraints offer additional protection
against head and chest injuries. In the event
of a rear collision of a certain severity, the
NECK-PRO head restraints/NECK-PRO luxury
head restraints on the driver's and front-
passenger seats are moved forwards and
upwards. This provides better head support.
If the NECK-PRO head restraints/NECK-PRO
luxury head restraints have been triggered in
an accident, reset the NECK-PRO head
restraints/NECK-PRO luxury head restraints
on the driver's and front-passenger seats
(Y page 54). Otherwise, the additional pro-
tection will not be available in the event of
another rear-end collision. NECK-PRO head
restraints/NECK-PRO luxury head restraints
that have been triggered are moved forwards and can no longer be adjusted. Mercedes-Benz recommends that you have
the functionality of the NECK-PRO head
restraints/NECK-PRO luxury head restraints
checked at a qualified specialist workshop
after a rear-end collision.
Resetting a triggered NECK-PRO head
restraint/NECK-PRO luxury head
restraint NECK-PRO head restraints
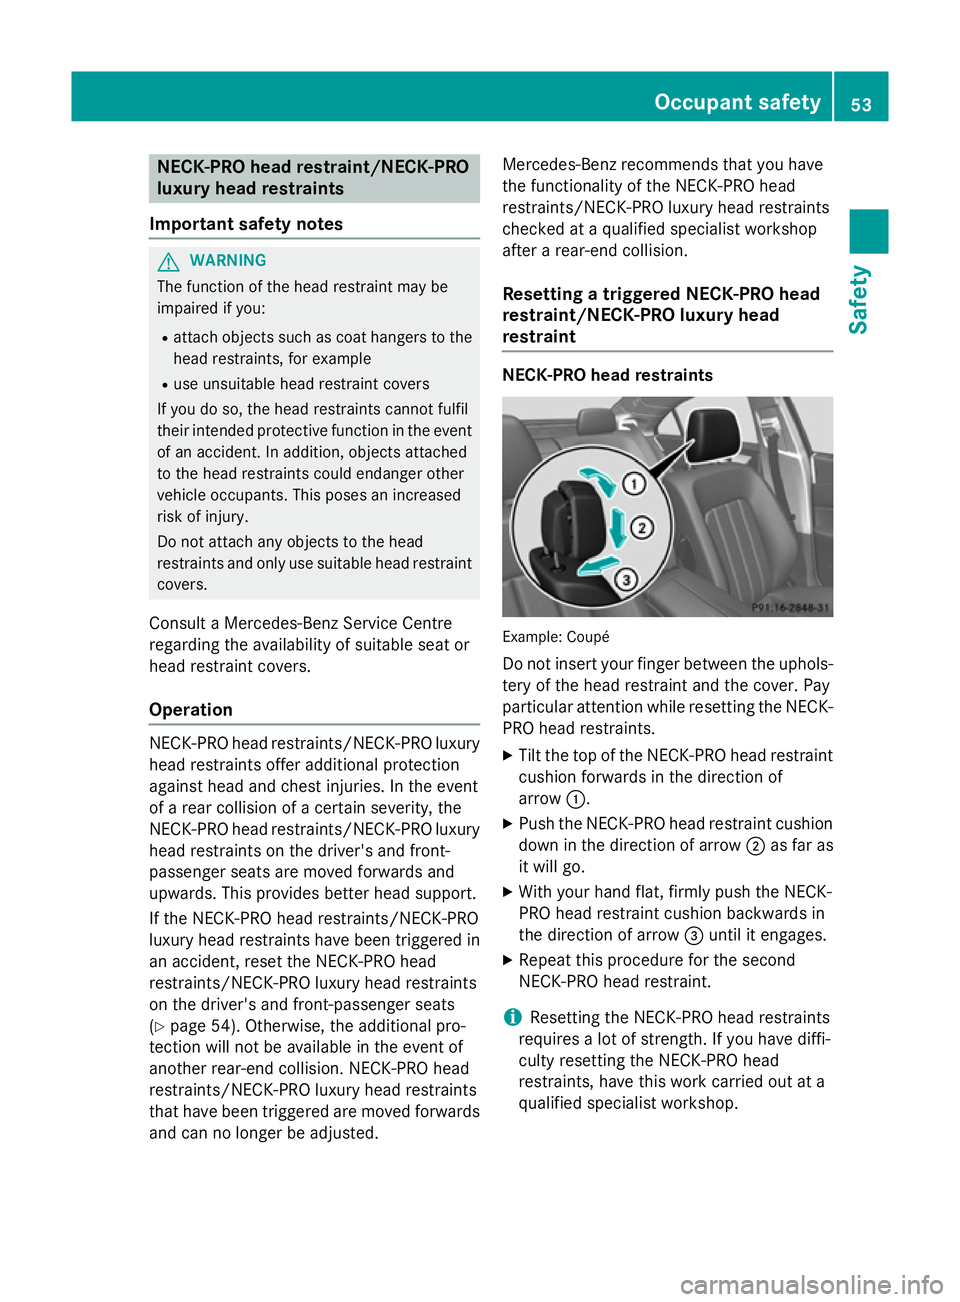
Example: Coupé
Do not insert your finger between the uphols- tery of the head restraint and the cover. Pay
particular attention while resetting the NECK-PRO head restraints.
X Tilt the top of the NECK-PRO head restraint
cushion forwards in the direction of
arrow :.
X Push the NECK-PRO head restraint cushion
down in the direction of arrow ;as far as
it will go.
X With your hand flat, firmly push the NECK-
PRO head restraint cushion backwards in
the direction of arrow =until it engages.
X Repeat this procedure for the second
NECK-PRO head restraint.
i Resetting the NECK-PRO head restraints
requires a lot of strength. If you have diffi-
culty resetting the NECK-PRO head
restraints, have this work carried out at a
qualified specialist workshop. Occupant safety
53Safety Z
Page 336 of 417
Maintaining the time-dependent service
schedule:
X Note down the service due date displayed
in the multifunction display before discon-
necting the battery.
or X After reconnecting the battery, subtract
the battery disconnection periods from the service date shown on the display.
Hiding service messages X
Press the aor% button on the steer-
ing wheel.
Displaying service messages X
Switch the ignition on.
X Press the =or; button on the steer-
ing wheel to select the Service
Service menu.
X Press the 9or: button to select the
ASSYST PLUS
ASSYST PLUS submenu and confirm by
pressing the abutton.
The service due date appears in the multi-
function display.
Information about Service Resetting the ASSYST PLUS service inter-
val display
! If the ASSYST PLUS service interval dis-
play has been inadvertently reset, this set-
ting can be corrected at a qualified special-
ist workshop.
Have service work carried out as described in the Service Booklet. This may otherwise
lead to increased wear and damage to the
major assemblies or the vehicle.
A qualified specialist workshop, e.g. a
Mercedes-Benz Service Centre, will reset the ASSYST PLUS service interval display after
the service work has been carried out. You
can also obtain further information on main-
tenance work, for example. Special service requirements
The prescribed service interval is based on
normal operation of the vehicle. Service work
will need to be performed more often if the
vehicle is operated under arduous conditions or increased loads, for example:
R regular city driving with frequent intermedi-
ate stops
R if the vehicle is primarily used to travel
short distances
R for frequent operation in mountainous ter-
rain or on poor road surfaces
R if the engine is often left idling for long peri-
ods
In these or similar operating conditions, have,
for example, the air filter, engine oil and oil
filter changed more frequently. The tyres
must be checked more frequently if the vehi-
cle is operated under increased loads. Fur-
ther information can be obtained at a quali-
fied specialist workshop, e.g. a Mercedes-
Benz Service Centre.
Driving abroad
An extensive Mercedes-Benz Service network is also available in other countries. You can
obtain further information from any
Mercedes-Benz Service Centre. AdBlue
®
service indicator
i For BlueTEC vehicles only.
To function properly, BlueTEC exhaust gas
aftertreatment must be operated with the
reducing agent AdBlue ®
. AdBlue ®
is topped
up as part of the service. Under normal oper-
ating conditions, a full tank of AdBlue ®
should
last until the next service due date.
Depending on how and where the vehicle is
used, there may be an increase in the
AdBlue ®
consumption, resulting in the next
service due date being brought forward.
Certain display messages show that AdBlue ®
must be topped up, e.g.: Service
333Maintenance and care Z
Page 356 of 417
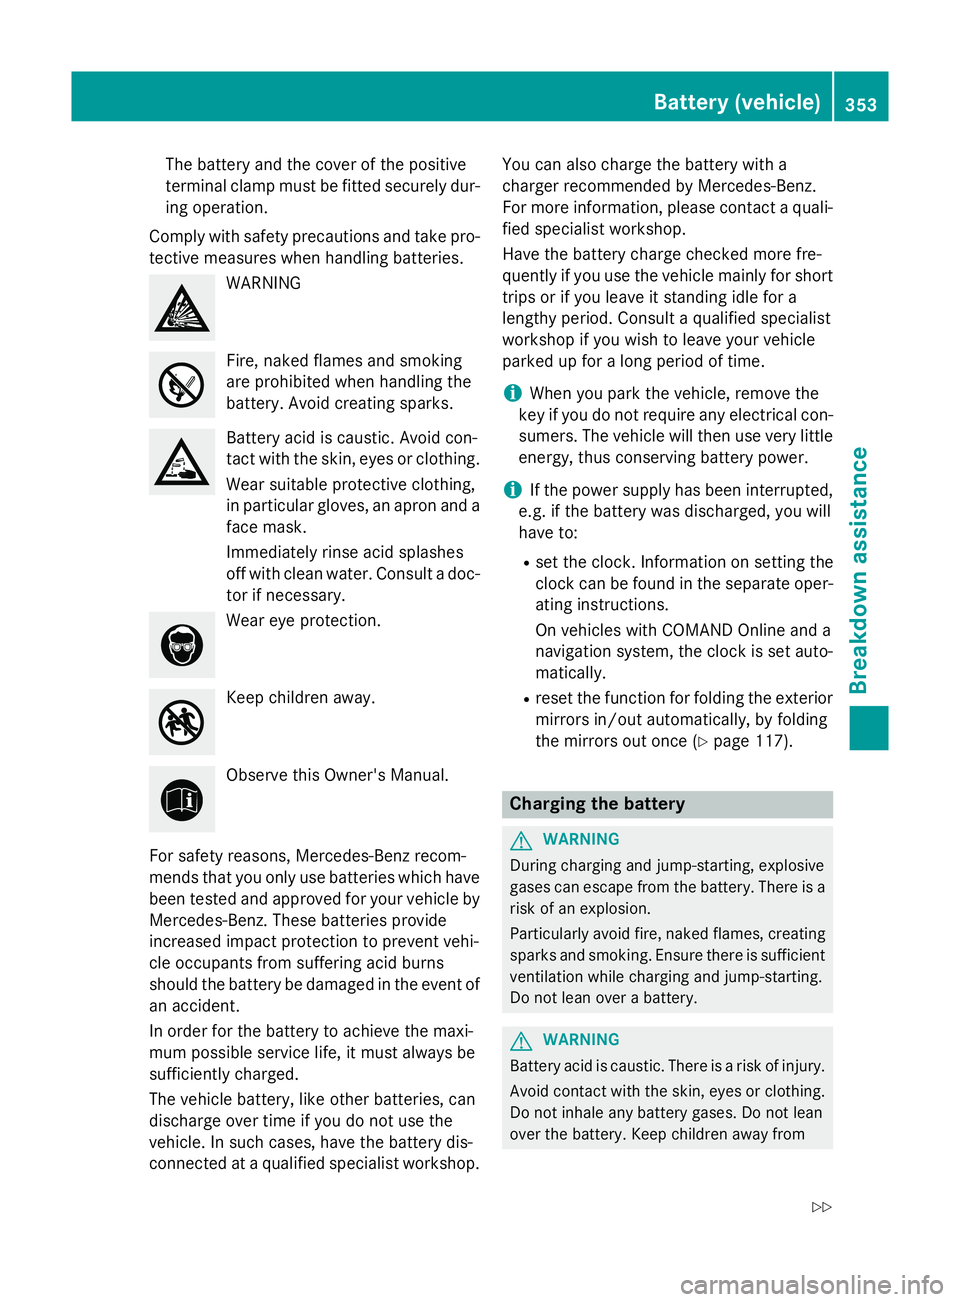
The battery and the cover of the positive
terminal clamp must be fitted securely dur-
ing operation.
Comply with safety precautions and take pro-
tective measures when handling batteries. WARNING
Fire, naked flames and smoking
are prohibited when handling the
battery. Avoid creating sparks.
Battery acid is caustic. Avoid con-
tact with the skin, eyes or clothing.
Wear suitable protective clothing,
in particular gloves, an apron and a
face mask.
Immediately rinse acid splashes
off with clean water. Consult a doc-
tor if necessary. Wear eye protection.
Keep children away.
Observe this Owner's Manual.
For safety reasons, Mercedes-Benz recom-
mends that you only use batteries which have been tested and approved for your vehicle by
Mercedes-Benz. These batteries provide
increased impact protection to prevent vehi-
cle occupants from suffering acid burns
should the battery be damaged in the event of
an accident.
In order for the battery to achieve the maxi-
mum possible service life, it must always be
sufficiently charged.
The vehicle battery, like other batteries, can
discharge over time if you do not use the
vehicle. In such cases, have the battery dis-
connected at a qualified specialist workshop. You can also charge the battery with a
charger recommended by Mercedes-Benz.
For more information, please contact a quali-
fied specialist workshop.
Have the battery charge checked more fre-
quently if you use the vehicle mainly for short
trips or if you leave it standing idle for a
lengthy period. Consult a qualified specialist
workshop if you wish to leave your vehicle
parked up for a long period of time.
i When you park the vehicle, remove the
key if you do not require any electrical con-
sumers. The vehicle will then use very little energy, thus conserving battery power.
i If the power supply has been interrupted,
e.g. if the battery was discharged, you will
have to:
R set the clock. Information on setting the
clock can be found in the separate oper-
ating instructions.
On vehicles with COMAND Online and a
navigation system, the clock is set auto- matically.
R reset the function for folding the exterior
mirrors in/out automatically, by folding
the mirrors out once (Y page 117). Charging the battery
G
WARNING
During charging and jump-starting, explosive
gases can escape from the battery. There is a risk of an explosion.
Particularly avoid fire, naked flames, creating
sparks and smoking. Ensure there is sufficient
ventilation while charging and jump-starting.
Do not lean over a battery. G
WARNING
Battery acid is caustic. There is a risk of injury. Avoid contact with the skin, eyes or clothing.
Do not inhale any battery gases. Do not lean
over the battery. Keep children away from Battery (vehicle)
353Breakdown assistance
Z