2014 MERCEDES-BENZ CLS COUPE door lock
[x] Cancel search: door lockPage 165 of 417
Using KEYLESS-GO to start the engine
i
The Start/Stop button can be used to
start the vehicle manually without inserting
the key into the ignition lock. The key must be in the vehicle and the Start/Stop button
must be inserted in the ignition lock. This
mode for starting the engine operates inde- pendently of the ECO start/stop automatic engine start function.
X Depress the brake pedal and keep it
depressed.
X Press the Start/Stop button once
(Y page 159).
Vehicles with a petrol engine: the engine
starts.
Vehicles with a diesel engine: preglow is
activated and the engine starts. Pulling away
General notes G
WARNING
If the engine speed is above the idling speed
and you engage transmission position Dor R,
the vehicle could pull away suddenly. There is a risk of an accident.
When engaging transmission position Dor R,
always firmly depress the brake pedal and do not simultaneously accelerate.
! If a warning tone sounds and the
Release park. brake
Release park. brake message appears
in the multifunction display, the parking
brake is still applied. Release the parking
brake.
i Depress the accelerator carefully when
pulling away.
i The vehicle locks centrally once you have
pulled away. The locking knobs in the doors drop down.
You can open the doors from the inside at
any time. You can also deactivate the automatic lock-
ing feature (Y page 255).
i It is only possible to shift the transmission
from position Pto the desired position if
you depress the brake pedal. If the brake
pedal is not depressed, the DIRECT SELECT
lever can still be moved, but the parking
lock remains engaged.
i Upshifts take place at higher engine
speeds after a cold start. This helps the
catalytic converter to reach its operating
temperature more quickly.
Hill start assist Hill start assist helps you when pulling away
forwards or in reverse on an uphill gradient. It holds the vehicle for a short time after you
have removed your foot from the brake pedal.
This gives you enough time to move your foot from the brake pedal to the accelerator pedal
and depress it before the vehicle begins to
roll. G
WARNING
After a short time, hill start assist will no lon-
ger brake your vehicle and it could roll away.
There is a risk of an accident and injury.
Therefore, quickly move your foot from the
brake pedal to the accelerator pedal. Never
leave the vehicle when it is held by hill start
assist.
Hill start assist is not active if: R you are pulling away on a level road or a
downhill gradient
R the transmission is in position N
R the parking brake is applied
R ESP ®
is malfunctioning 162
DrivingDriving and parking
Page 172 of 417
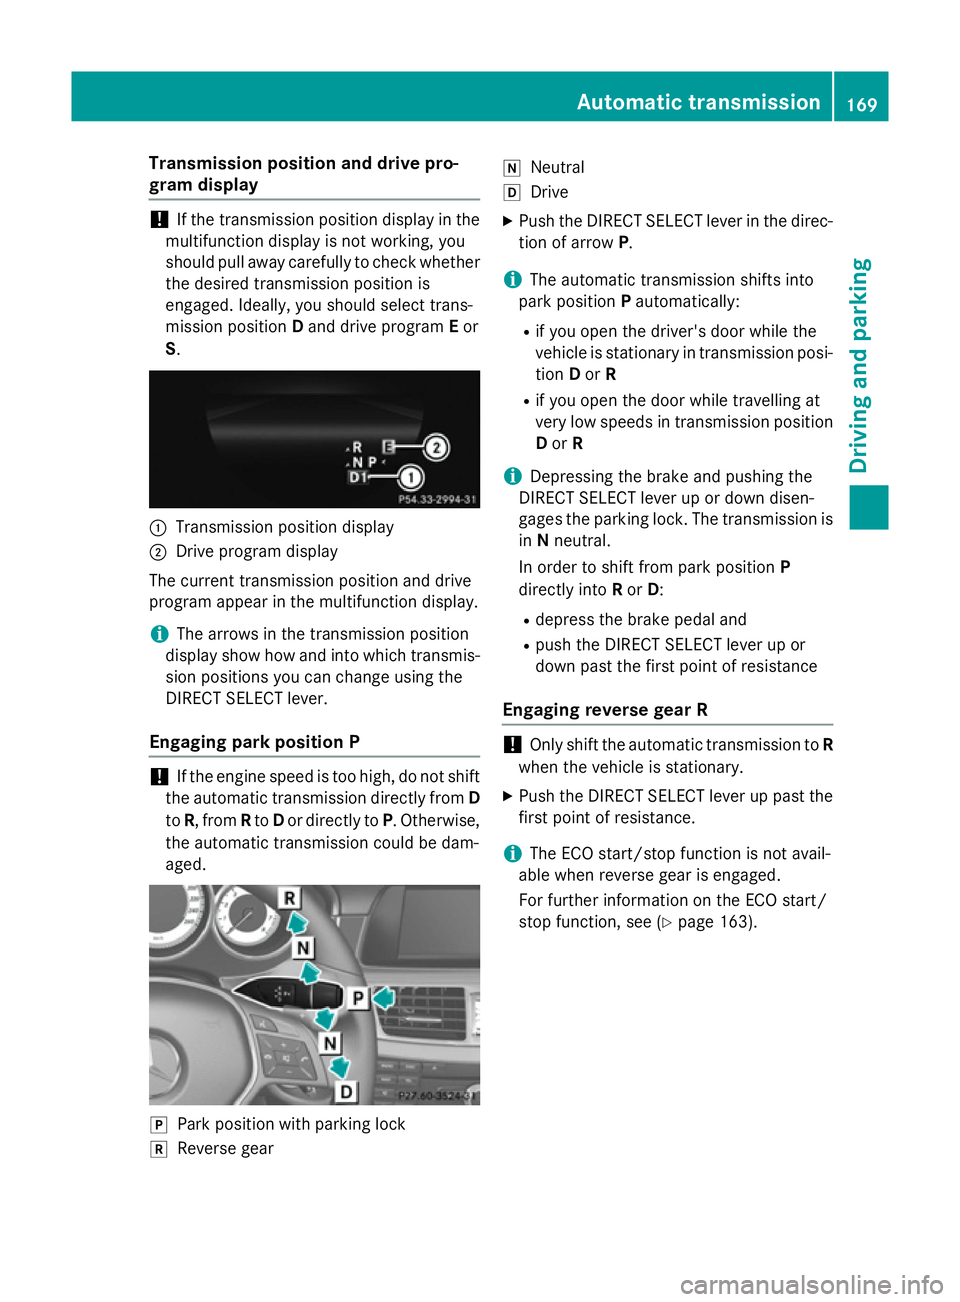
Transmission position and drive pro-
gram display !
If the transmission position display in the
multifunction display is not working, you
should pull away carefully to check whether the desired transmission position is
engaged. Ideally, you should select trans-
mission position Dand drive program Eor
S. :
Transmission position display
; Drive program display
The current transmission position and drive
program appear in the multifunction display.
i The arrows in the transmission position
display show how and into which transmis-
sion positions you can change using the
DIRECT SELECT lever.
Engaging park position P !
If the engine speed is too high, do not shift
the automatic transmission directly from D
to R, from Rto Dor directly to P. Otherwise,
the automatic transmission could be dam-
aged. j
Park position with parking lock
k Reverse gear i
Neutral
h Drive
X Push the DIRECT SELECT lever in the direc-
tion of arrow P.
i The automatic transmission shifts into
park position Pautomatically:
R if you open the driver's door while the
vehicle is stationary in transmission posi-
tion Dor R
R if you open the door while travelling at
very low speeds in transmission position
D or R
i Depressing the brake and pushing the
DIRECT SELECT lever up or down disen-
gages the parking lock. The transmission is in Nneutral.
In order to shift from park position P
directly into Ror D:
R depress the brake pedal and
R push the DIRECT SELECT lever up or
down past the first point of resistance
Engaging reverse gear R !
Only shift the automatic transmission to
R
when the vehicle is stationary.
X Push the DIRECT SELECT lever up past the
first point of resistance.
i The ECO start/stop function is not avail-
able when reverse gear is engaged.
For further information on the ECO start/
stop function, see (Y page 163). Automatic transmission
169Driving and parking Z
Page 173 of 417
Shifting to neutral N
G
WARNING
If children are left unsupervised in the vehicle, they can:
R open doors and endanger other persons or
road users
R climb out and be injured by the traffic
R operate vehicle equipment and, for exam-
ple, trap themselves.
Children could also set the vehicle in motion, for example by:
R releasing the parking brake
R shifting the automatic transmission out of
park position P
R starting the engine.
There is a risk of an accident and injury.
When leaving the vehicle, always take the key
with you and lock the vehicle. Never leave
children unattended in the vehicle. Always
keep the key out of reach of children.
X Push the DIRECT SELECT lever up or down
to the first point of resistance.
Engaging drive position D X
Push the DIRECT SELECT lever down past
the first point of resistance. Transmission positions
B Park position
This prevents the vehicle from roll-
ing away when stopped. Do not
shift the transmission into position
P (Y page 180) unless the vehicle
is stationary.
The automatic transmission shifts
to Pautomatically if you:
R remove the key
R switch off the engine when in R
or Dand open one of the front
doors C Reverse gear
Only shift the transmission to
R
when the vehicle is stationary. A Neutral
Do not shift the transmission to
N
while driving. Otherwise, the auto-
matic transmission could be dam-
aged.
If ESP ®
is deactivated or faulty:
only shift the transmission to posi- tion Nif the vehicle is in danger of
skidding, e.g. on icy roads.
If you switch off the engine using
the key or the Start/Stop button,
the automatic transmission shifts
to neutral Nautomatically.
! Rolling in neutral
Ncan lead to
damage to the transmission. 7 Drive
The automatic transmission
changes gear automatically. All
forward gears are available.170
Automatic transmissionDriving and parking
Page 181 of 417
If you mix diesel fuel with petrol, the flash
point of this fuel mixture is lower than that of pure diesel fuel. When the engine is running,
components in the exhaust system may over-
heat unnoticed. There is a risk of fire.
Never refuel with petrol. Never add petrol to
diesel fuel.
! Do not use petrol to refuel vehicles with a
diesel engine. Do not use diesel to refuel
vehicles with a petrol engine. Do not switch on the ignition if you accidentally refuel
with the wrong fuel. Otherwise, the fuel will enter the fuel system. Even small amounts
of the wrong fuel could result in damage to the fuel system and the engine. The repair
costs are high. Notify a qualified specialist
workshop and have the fuel tank and fuel
lines drained completely.
! Overfilling the fuel tank could damage the
fuel system.
! Take care not to spill any fuel on painted
surfaces. You could otherwise damage the
paintwork.
! Use a filter when adding fuel from a fuel
can. The fuel lines and/or the diesel injec-
tion system could otherwise be blocked by
particles from the fuel can.
Do not get into the vehicle again during the
refuelling process. Otherwise, electrostatic
charge could build up again.
If you overfill the fuel tank, some fuel may
spray out when you remove the fuel pump
nozzle.
For further information on fuel and fuel quality (Y page 399). Refuelling
General notes Observe the important safety notes
(Y
page 177). The fuel filler flap is unlocked or locked auto-
matically when you open or close the vehicle
with the key or using KEYLESS-GO.
The position of the 8fuel filler cap is dis-
played in the instrument cluster. The arrow
next to the filling pump indicates the side of
the vehicle.
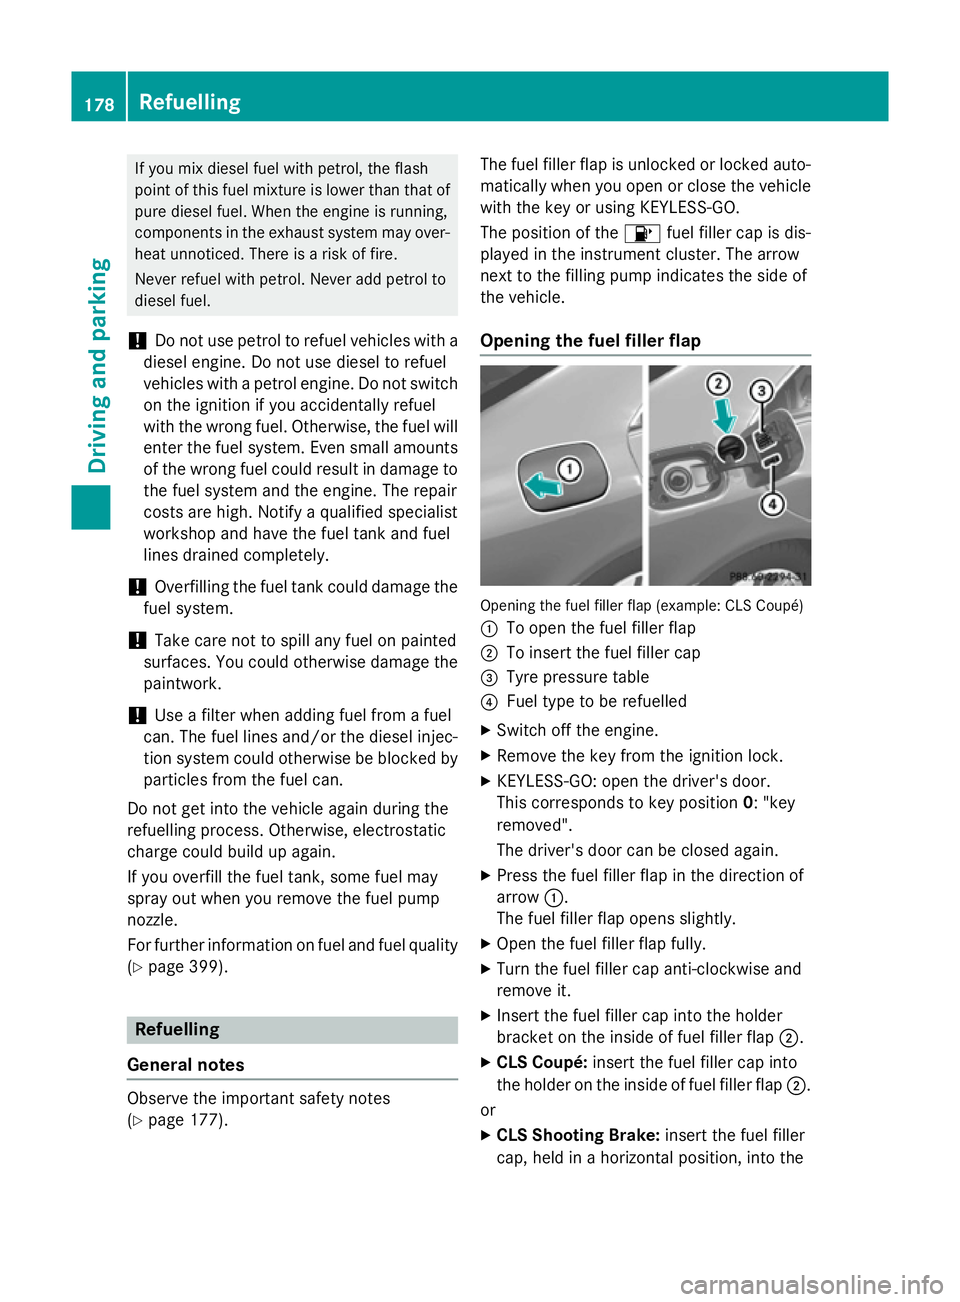
Opening the fuel filler flap Opening the fuel filler flap (example: CLS Coupé)
:
To open the fuel filler flap
; To insert the fuel filler cap
= Tyre pressure table
? Fuel type to be refuelled
X Switch off the engine.
X Remove the key from the ignition lock.
X KEYLESS-GO: open the driver's door.
This corresponds to key position 0: "key
removed".
The driver's door can be closed again.
X Press the fuel filler flap in the direction of
arrow :.
The fuel filler flap opens slightly.
X Open the fuel filler flap fully.
X Turn the fuel filler cap anti-clockwise and
remove it.
X Insert the fuel filler cap into the holder
bracket on the inside of fuel filler flap ;.
X CLS Coupé: insert the fuel filler cap into
the holder on the inside of fuel filler flap ;.
or
X CLS Shooting Brake: insert the fuel filler
cap, held in a horizontal position, into the 178
RefuellingDriving and parking
Page 184 of 417
Switching off the engine
Important safety notes G
WARNING
The automatic transmission switches to neu-
tral position Nwhen you switch off the engine.
The vehicle may roll away. There is a risk of an
accident.
After switching off the engine, always switch
to parking position P. Prevent the parked vehi-
cle from rolling away by applying the parking
brake.
Vehicles with automatic transmission X
Firmly depress the parking brake.
X All vehicles (except AMG vehicles): shift
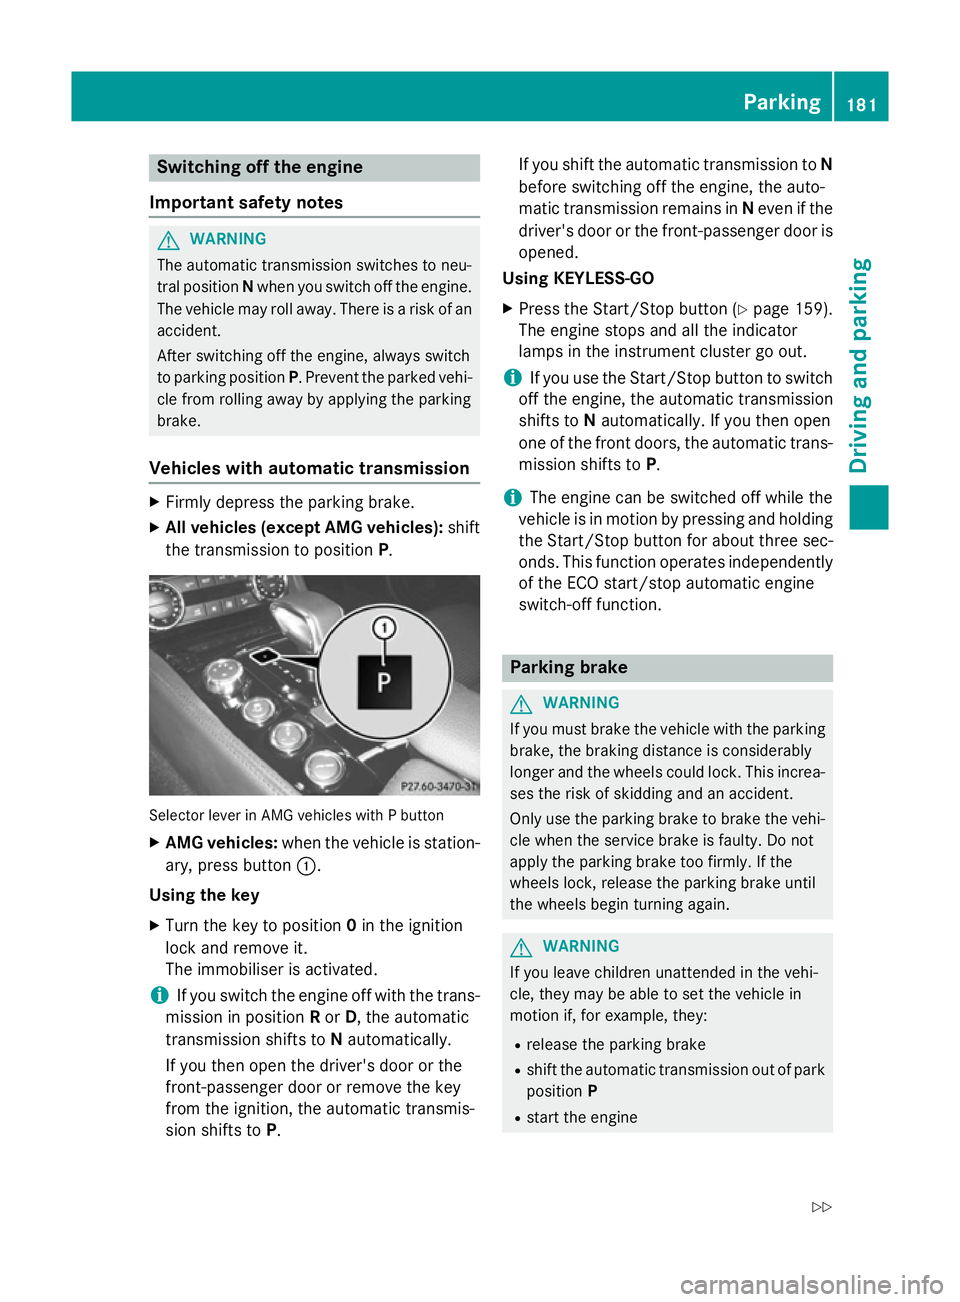
the transmission to position P.Selector lever in AMG vehicles with P button
X AMG vehicles: when the vehicle is station-
ary, press button :.
Using the key X Turn the key to position 0in the ignition
lock and remove it.
The immobiliser is activated.
i If you switch the engine off with the trans-
mission in position Ror D, the automatic
transmission shifts to Nautomatically.
If you then open the driver's door or the
front-passenger door or remove the key
from the ignition, the automatic transmis-
sion shifts to P. If you shift the automatic transmission to
N
before switching off the engine, the auto-
matic transmission remains in Neven if the
driver's door or the front-passenger door is
opened.
Using KEYLESS-GO
X Press the Start/Stop button (Y page 159).
The engine stops and all the indicator
lamps in the instrument cluster go out.
i If you use the Start/Stop button to switch
off the engine, the automatic transmission
shifts to Nautomatically. If you then open
one of the front doors, the automatic trans-
mission shifts to P.
i The engine can be switched off while the
vehicle is in motion by pressing and holding
the Start/Stop button for about three sec- onds. This function operates independently
of the ECO start/stop automatic engine
switch-off function. Parking brake
G
WARNING
If you must brake the vehicle with the parking brake, the braking distance is considerably
longer and the wheels could lock. This increa-
ses the risk of skidding and an accident.
Only use the parking brake to brake the vehi- cle when the service brake is faulty. Do not
apply the parking brake too firmly. If the
wheels lock, release the parking brake until
the wheels begin turning again. G
WARNING
If you leave children unattended in the vehi-
cle, they may be able to set the vehicle in
motion if, for example, they:
R release the parking brake
R shift the automatic transmission out of park
position P
R start the engine Parking
181Driving and parking
Z
Page 209 of 417
Vehicle level
Important safety notes
G
WARNING
People's limbs may become trapped if they
are located underneath the vehicle or
between the vehicle body and the tyres when the vehicle is lowering. There is a danger of
injury.
When lowering the vehicle, make sure no one
is underneath the vehicle or in the immediate vicinity of the wheel arches.
The vehicle may be lowered if you press the
suspension tuning selector button or the
AMG button. The vehicle is lowered even if the
vehicle is at a standstill.
! If Sport or Sport + suspension tuning has
been selected, the vehicle's ground clear-
ance decreases. Make sure that no objects
become trapped or that the vehicle has not
been damaged, for example, on the kerb.
i The vehicle level at the rear axle may
change visibly if you park the vehicle and
the outside temperature changes. If the
temperature drops, the vehicle level low-
ers; with an increase in temperature, the
vehicle level rises.
Changing the rear axle level
This function is only available for the CLS 63
AMG 4MATIC and CLS 63 AMG Shooting
Brake.
The vehicle level at the rear axle depends on
the selected suspension mode and the vehi-
cle speed.
The vehicle level at the rear axle changes
while driving depending on which suspension mode is selected:
R Comfort: +10 mm
R Sport + and Sport: -15 mm
When changing from Comfort to Sport or
Sport +, the axle is lowered approximately
25 mm. When changing from Sport or Sport +
to Comfort, the axle is raised approximately 25 mm. The level change also occurs when
stationary.
If you drive faster than 170 km/h, the rear
axle level is set to a middle level. This increa- ses road safety and reduces air resistance. If
you then drive slower than 150 km/h, the
level of the rear axle is again adjusted to cor- respond to the selected suspension mode.
Load compensation
The vehicle can compensate differences in
the vehicle level by raising or lowering the
rear axle. This is the case, for example, when
people get out of the vehicle or when luggage is removed.
A load compensation occurs if:
R a door or the boot lid/tailgate is opened
R the parked vehicle is unlocked
The engine needs to be running for larger level
changes. 4MATIC (permanent all-wheel drive)
If you fail to adapt your driving style, 4MATIC
can neither reduce the risk of accident nor
override the laws of physics. 4MATIC cannot
take account of road, weather and traffic con- ditions. 4MATIC is only an aid. You are
responsible for the distance to the vehicle in
front, for vehicle speed, for braking in good
time, and for staying in the lane.
If a drive wheel spins due to insufficient grip:
R when pulling away, only depress the accel-
erator pedal as far as is necessary
R accelerate less when driving
! Never tow the vehicle with one axle
raised. This may damage the transfer case.
Damage of this sort is not covered by the
Mercedes-Benz implied warranty. All
wheels must remain either on the ground or be fully raised. Observe the instructions for
towing the vehicle with all wheels in full
contact with the ground.
i In wintry driving conditions, the maximum
effect of 4MATIC can only be achieved if 206
Driving systemsDriving an
d parking
Page 257 of 417
X
Press the :or9 button to select the
Amb. light +/-
Amb. light +/- function.
You will see the selected setting.
X Press ato confirm.
X Press the :or9 button to adjust the
brightness to any level from Off
OfftoLevel 5
Level 5
(bright).
X Press the aor% button to save the
setting.
Setting the ambient lighting colour X Press the =or; button on the steer-
ing wheel to select the Settings
Settings menu.
X Press the :or9 button to select the
Lights
Lights submenu.
X Press ato confirm.
X Press the :or9 button to select the
Amb. light col.
Amb. light col. function.
X Press ato confirm.
X Press the :or9 button to set the
colour to SOLAR
SOLAR, NEUTRAL
NEUTRAL orPOLAR
POLAR.
X Press the aor% button to save the
setting.
Activating/deactivating the surround
lighting and exterior lighting delayed
switch-off
X Press the =or; button on the steer-
ing wheel to select the Settings Settingsmenu.
X Press the :or9 button to select the
Light
Light submenu.
X Press ato confirm.
X Press the :or9 button to select the
Surround lighting
Surround lighting function.
If the Surround
Surround lighting
lightingfunction is acti-
vated, the light cone and the area around
the vehicle are displayed in orange in the
multifunction display.
X Press the abutton to save the setting. Deactivating delayed switch-off of the exte-
rior lighting temporarily:
X Before leaving the vehicle, turn the key to
position 0in the ignition lock.
X Turn the key to position 2in the ignition
lock.
The exterior lighting delayed switch-off is
deactivated.
Delayed switch-off of the exterior lighting is
reactivated the next time you start the
engine.
If you have activated the Surround light‐
Surround light‐
ing ing function and the light switch is set to
Ã, the following functions are activated
when it is dark:
R surround lighting: the exterior lighting
remains lit for 40 seconds after unlocking
with the key. If you start the engine, the
surround lighting is switched off and auto-
matic headlamp mode is activated
(Y page 123).
R exterior lighting delayed switch-off: the
exterior lighting remains lit for 60 seconds
after the engine is switched off. If you close all the doors and the boot lid/tailgate, the
exterior lighting goes off after 5 seconds.
i Depending on your vehicle's equipment,
when the surround lighting and delayed
switch-off exterior lighting are on, the fol-
lowing light up:
R side lamps
R dipped-beam headlamps
R daytime driving lights
R surround lighting in the exterior mirrors
Activating/deactivating the interior light-
ing delayed switch-off
If you activate the Light. delay Switch Light. delay Switch
off
off function, the interior lighting remains on
for 20 seconds after you remove the key from the ignition lock. 254
Menus and submenusOn-board computer and displays
Page 258 of 417
X
Press the =or; button on the steer-
ing wheel to select the Settings Settingsmenu.
X Press the :or9 button to select the
Light
Light submenu.
X Press ato confirm.
X Press the :or9 button to select the
Light. delay Light. delay function.
If the Light. delay
Light. delay function has been
switched on, the vehicle interior is dis-
played in orange in the multifunction dis-
play.
X Press the abutton to save the setting.
Vehicle Setting permanent SPEEDTRONIC
X Press the =or; button on the steer-
ing wheel to select the Settings Settingsmenu.
X Press the :or9 button to select the
Vehicle
Vehicle submenu.
X Press ato confirm.
X Press :or9 to select the Limit
Limit
speed (winter tyres):
speed (winter tyres): function.
You will see the current setting.
X Press ato confirm.
X Press the :or9 button to adjust
permanent SPEEDTRONIC in increments of
ten (230 km/h 230 km/h to160 km/h
160 km/h). The Off
Offset-
ting switches permanent SPEEDTRONIC
off.
X Press the abutton to store the entry.
For further information on permanent SPEED- TRONIC (Y page 191).
Switching the automatic locking feature
on/off
X Press the =or; button on the steer-
ing wheel to select the Settings Settingsmenu.
X Press the :or9 button to select the
Vehicle
Vehicle submenu.
X Press ato confirm.
X Press the :or9 button to select the
Auto. door locks
Auto. door locks function.
When the Auto. door locks
Auto. door locks function is
switched on, the vehicle doors are dis- played in orange in the multifunction dis-
play.
X Press the abutton to save the setting.
If you activate the Auto. door locks Auto. door locks func-
tion, the vehicle is centrally locked above a
speed of around 15 km/h.
Further information on the automatic locking feature (Y page 90).
Activating/deactivating the acoustic
locking confirmation
If you switch on the Acoustic AcousticLock
Lockfunction,
an acoustic signal sounds when you lock the
vehicle.
X Press the =or; button on the steer-
ing wheel to select the Settings
Settingsmenu.
X Press the :or9 button to select the
Vehicle
Vehicle submenu.
X Press ato confirm.
X Press the :or9 button to select the
Acoustic Lock
Acoustic Lock function.
If the Acoustic
Acoustic Lock
Lockfunction is activated,
the & symbol in the multifunction dis-
play lights up orange.
X Press the abutton to save the setting.
Activating/deactivating the radar sensor
system X Press the =or; button on the steer-
ing wheel to select the Settings Settingsmenu.
X Press the :or9 button to select the
Vehicle
Vehicle submenu.
X Press ato confirm.
X Press the 9or: button to select
Radar sensor (See Owner's Man.):
Radar sensor (See Owner's Man.):.
You will see the selected setting: on onoroff
off.
X Press the abutton to save the setting.
The following systems are switched off when
the radar sensor system is deactivated:
R DISTRONIC PLUS (Y page 191)
R BAS PLUS (Y page 71)
R PRE-SAFE ®
Brake (Y page 76)
R Blind Spot Assist (Y page 223)
R Active Blind Spot Assist (Y page 227) Menus and submenus
255On-board computer and displays Z