2014 MERCEDES-BENZ CLS COUPE low oil pressure
[x] Cancel search: low oil pressurePage 7 of 417

1, 2, 3 ...
4ETS see ETS/4ETS (Electronic Trac-
tion System)
4MATIC (permanent four-wheel
drive) .................................................. 206
4MATIC off-road system ...................206
12 V socket
see Sockets A
ABS (Anti-lock Braking System) Display message ............................ 262
Function/notes ................................ 70
Important safety notes .................... 70
Warning lamp ................................. 289
Accident
Automatic measures after an acci-
dent ................................................. 55
Activating/deactivating air-recir-
culation mode ................................... .148
Activating/deactivating cooling
with air dehumidification ................. 143
Active Blind Spot Assist
Activating/deactivating (on-
board computer) ............................ 250
Display message ............................ 276
Function/notes ............................ .227
Towing a trailer .............................. 229
Active Driving Assistance package .. 227
Active Lane Keeping Assist
Activating/deactivating (on-
board computer) ............................ 251
Display message ............................ 275
Function/notes ............................ .229
Towing a trailer .............................. 232
Active light function ......................... 127
Active multicontour seat
Adjusting (on the seat) .................. 110
Active Parking Assist
Detecting parking spaces .............. 211
Display message ............................ 277
Function/notes ............................ .210
Important safety notes .................. 210
Parking .......................................... 212
Towing a trailer .............................. 213 ADAPTIVE BRAKE
................................. 76
Adaptive brake lights .......................... 72
Adaptive Damping System (ADS) ..... 204
Adaptive Highbeam Assist
Display message ............................ 270
Function/notes ............................ .128
Switching on/off ........................... 129
AdBlue®
Display message ............................ 273
Filling capacity ............................... 404
Important safety notes .................. 403
Service indicator ............................ 333
AdBlue® service indicator ................ 333
Additives (engine oil) ........................ 404
Air filter (white display message) .... 273
AIR FLOW .......................................... .144
Air pressure
see Tyre pressure
Air vents
Glove compartment ....................... 155
Important safety notes .................. 154
Rear ............................................... 155
Setting .......................................... .154
Setting the centre air vents ........... 155
Setting the side air vents .............. .155
Air-conditioning system
see Climate control
Airbag
Introduction ..................................... 48
PASSENGER AIR BAG OFF indica-
tor lamp .......................................... .43
Airbags
Front airbag (driver, front
passenger) ...................................... .49
Important safety guidelines .............48
Kneebag ........................................... 49
Pelvis airbag .................................... 50
Sidebag ............................................ 50
Triggering .........................................51
Windowbag ...................................... 50
AIRMATIC
Display message ............................2 74
Function/notes ............................ .202
Alarm
ATA (Anti-Theft Alarm system) ......... 78
Switching off (ATA) .......................... 78 4
Index
Page 334 of 417

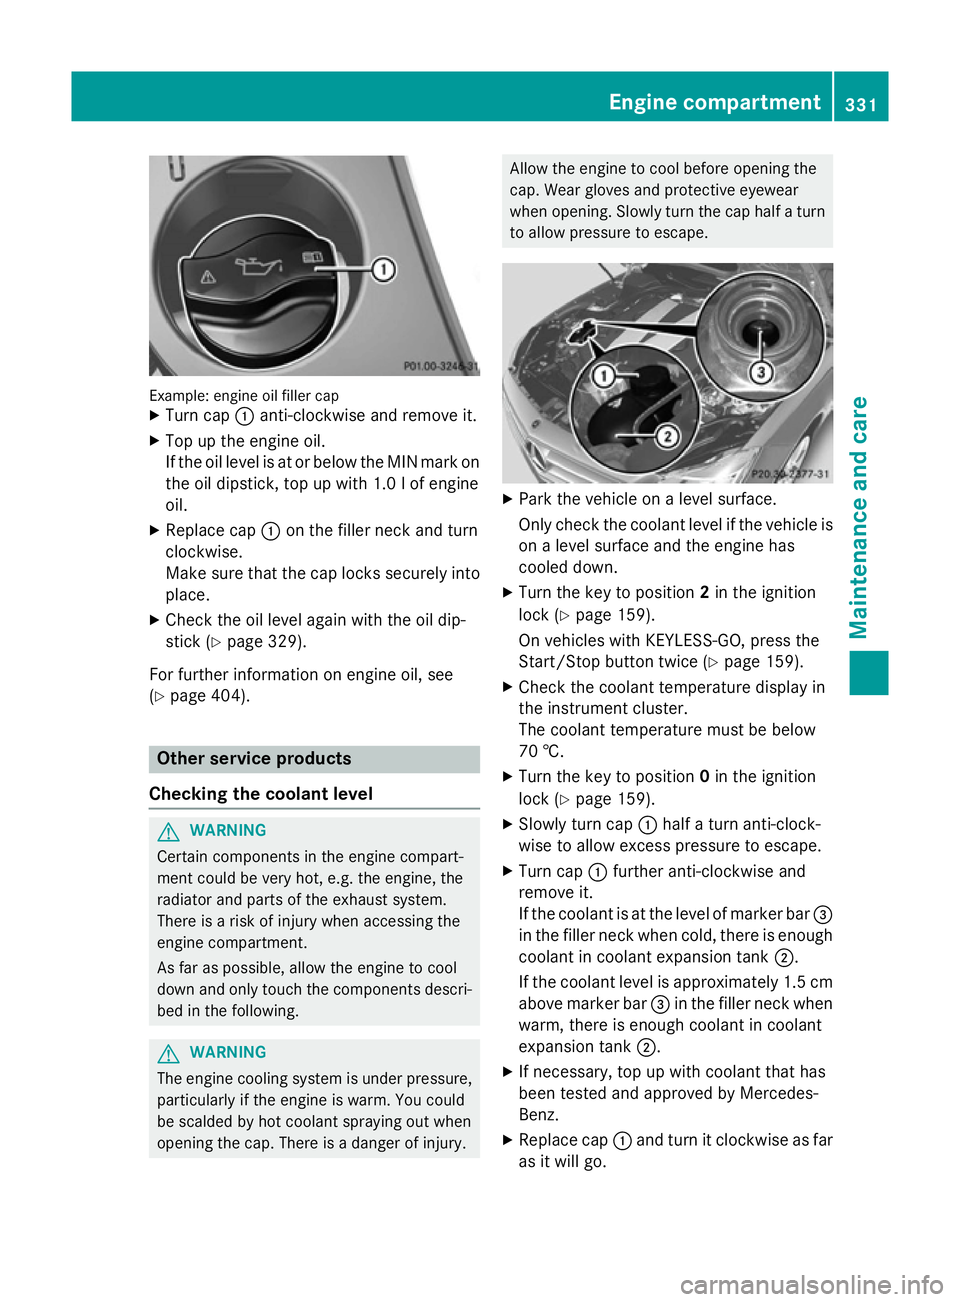
Example: engine oil filler cap
X Turn cap :anti-clockwise and remove it.
X Top up the engine oil.
If the oil level is at or below the MIN mark on
the oil dipstick, top up with 1.0 lof engine
oil.
X Replace cap :on the filler neck and turn
clockwise.
Make sure that the cap locks securely into place.
X Check the oil level again with the oil dip-
stick (Y page 329).
For further information on engine oil, see
(Y page 404). Other service products
Checking the coolant level G
WARNING
Certain components in the engine compart-
ment could be very hot, e.g. the engine, the
radiator and parts of the exhaust system.
There is a risk of injury when accessing the
engine compartment.
As far as possible, allow the engine to cool
down and only touch the components descri- bed in the following. G
WARNING
The engine cooling system is under pressure, particularly if the engine is warm. You could
be scalded by hot coolant spraying out when
opening the cap. There is a danger of injury. Allow the engine to cool before opening the
cap. Wear gloves and protective eyewear
when opening. Slowly turn the cap half a turn
to allow pressure to escape. X
Park the vehicle on a level surface.
Only check the coolant level if the vehicle is
on a level surface and the engine has
cooled down.
X Turn the key to position 2in the ignition
lock (Y page 159).
On vehicles with KEYLESS-GO, press the
Start/Stop button twice (Y page 159).
X Check the coolant temperature display in
the instrument cluster.
The coolant temperature must be below
70 †.
X Turn the key to position 0in the ignition
lock (Y page 159).
X Slowly turn cap :half a turn anti-clock-
wise to allow excess pressure to escape.
X Turn cap :further anti-clockwise and
remove it.
If the coolant is at the level of marker bar =
in the filler neck when cold, there is enough coolant in coolant expansion tank ;.
If the coolant level is approximately 1.5 cm above marker bar =in the filler neck when
warm, there is enough coolant in coolant
expansion tank ;.
X If necessary, top up with coolant that has
been tested and approved by Mercedes-
Benz.
X Replace cap :and turn it clockwise as far
as it will go. Engine compartment
331Maintenance and care Z
Page 342 of 417

Interior care
Cleaning the display !
For cleaning, do not use any of the fol-
lowing:
R alcohol-based thinner or petrol
R abrasive cleaning agents
R commercially-available household clean-
ing agents
These may damage the display surface. Do not put pressure on the display surface
when cleaning. This could lead to irrepara-
ble damage to the display.
X Before cleaning the display, make sure that
it is switched off and has cooled down.
X Clean the display surface using a commer-
cially available microfibre cloth and
TFT/LCD display cleaner.
X Dry the display surface using a dry micro-
fibre cloth.
Cleaning Night View Assist Plus !
Never clean the camera lens. When clean-
ing the field of vision of the driving systems, make sure that you do not spray glass
cleaner on the camera lens. If the camera
lens is dirty, visit a qualified specialist work-
shop. X
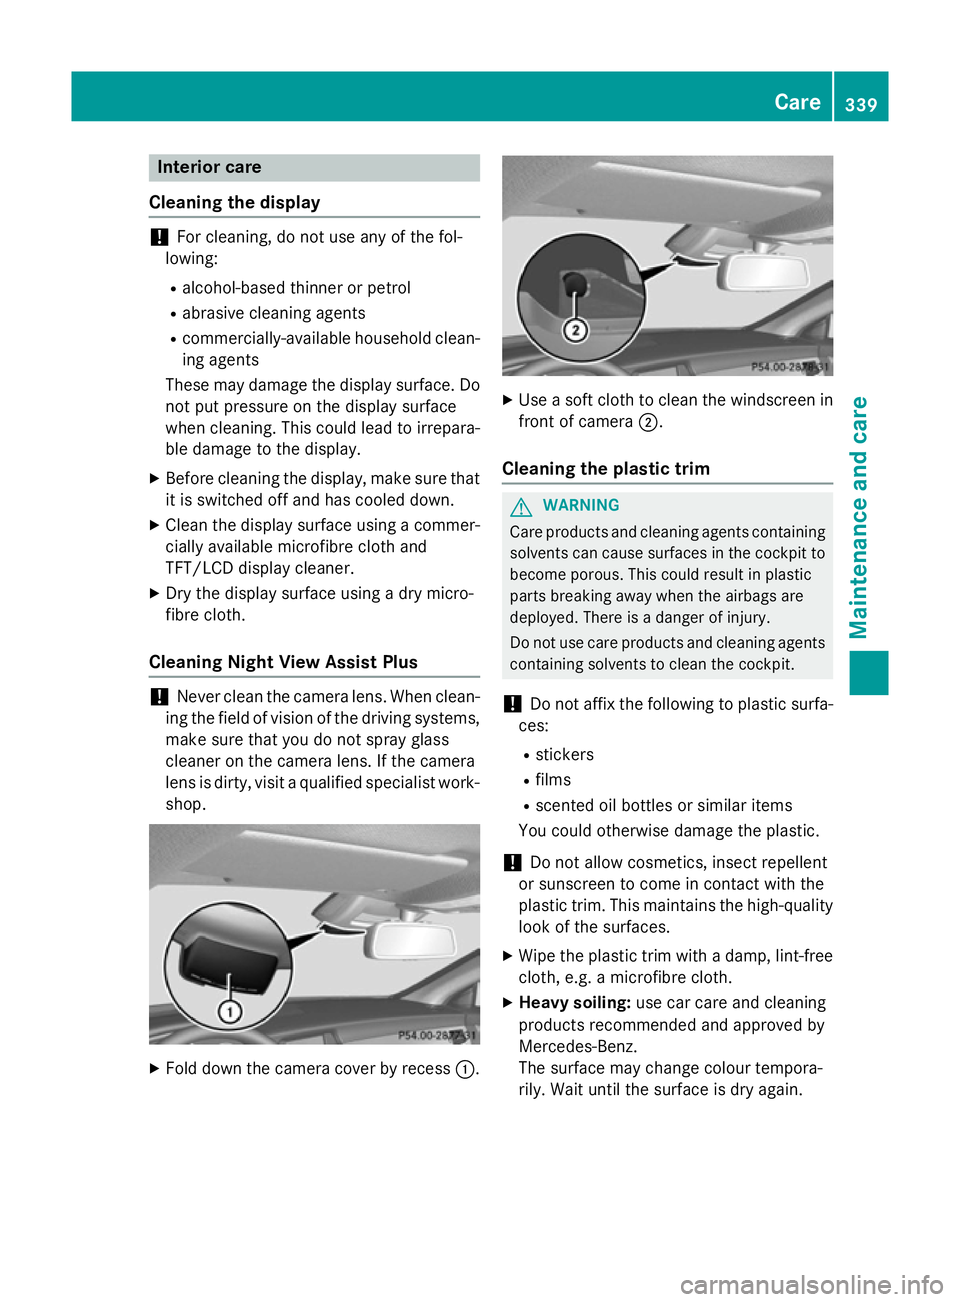
Fold down the camera cover by recess :. X
Use a soft cloth to clean the windscreen in
front of camera ;.
Cleaning the plastic trim G
WARNING
Care products and cleaning agents containing solvents can cause surfaces in the cockpit to
become porous. This could result in plastic
parts breaking away when the airbags are
deployed. There is a danger of injury.
Do not use care products and cleaning agents containing solvents to clean the cockpit.
! Do not affix the following to plastic surfa-
ces:
R stickers
R films
R scented oil bottles or similar items
You could otherwise damage the plastic.
! Do not allow cosmetics, insect repellent
or sunscreen to come in contact with the
plastic trim. This maintains the high-quality look of the surfaces.
X Wipe the plastic trim with a damp, lint-free
cloth, e.g. a microfibre cloth.
X Heavy soiling: use car care and cleaning
products recommended and approved by
Mercedes-Benz.
The surface may change colour tempora-
rily. Wait until the surface is dry again. Care
339Maintenance and care Z