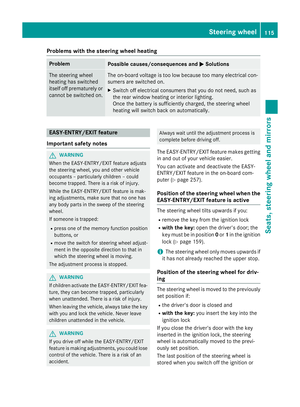
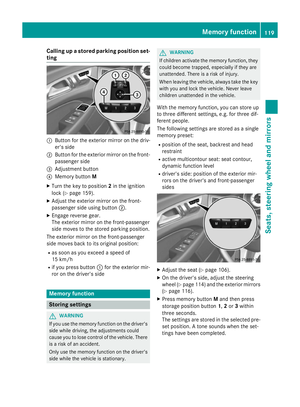
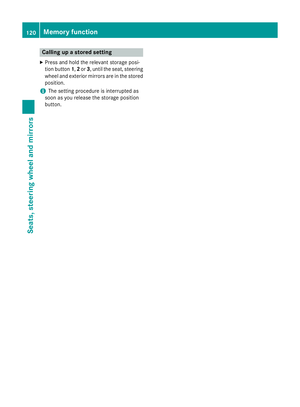
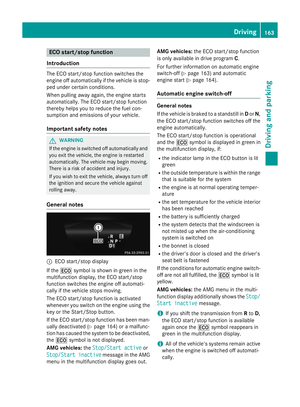
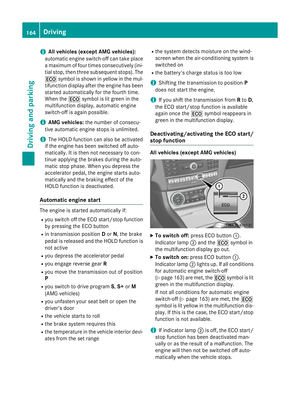
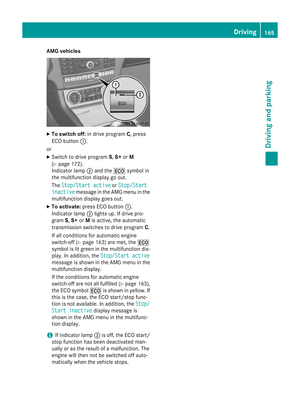
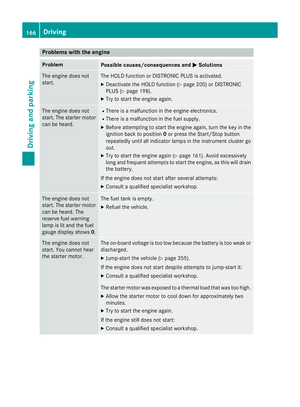
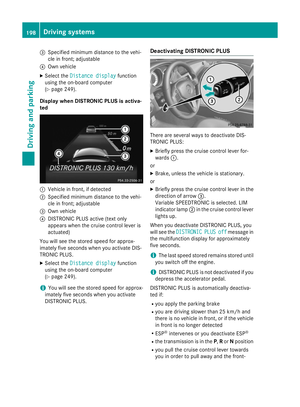
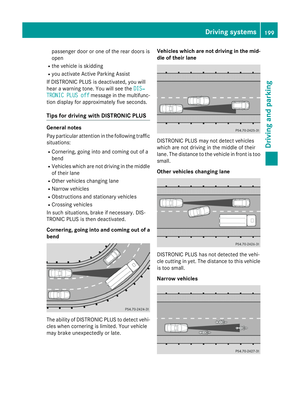
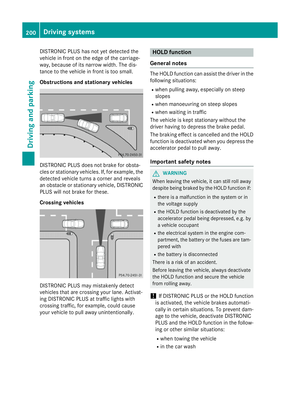
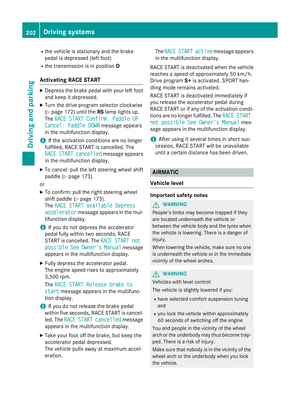
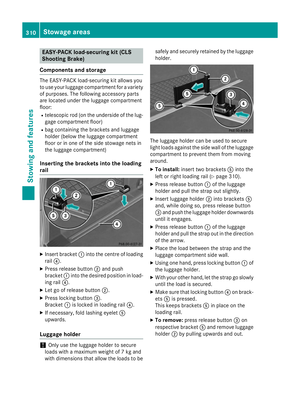
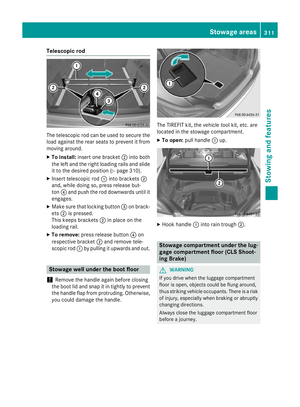
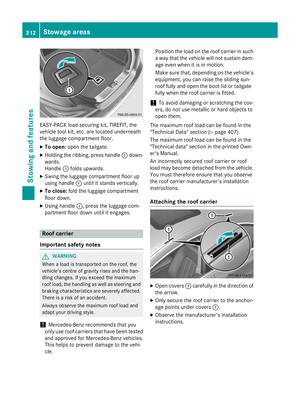
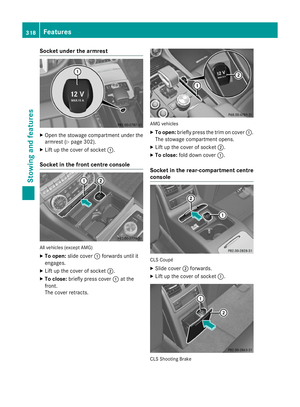
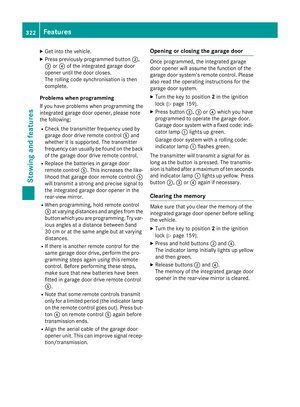
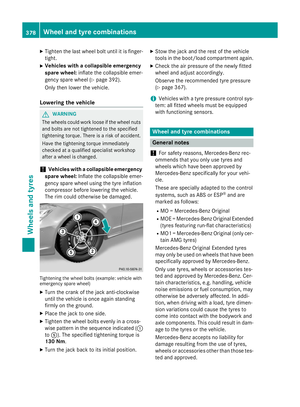
Page 305 of 417

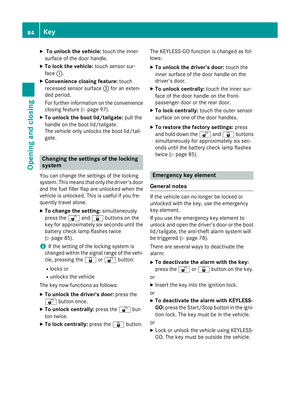
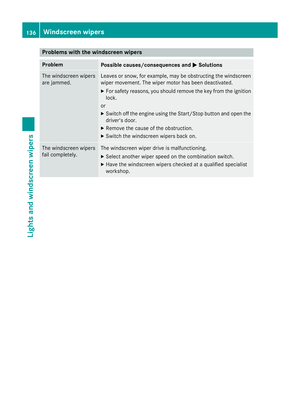
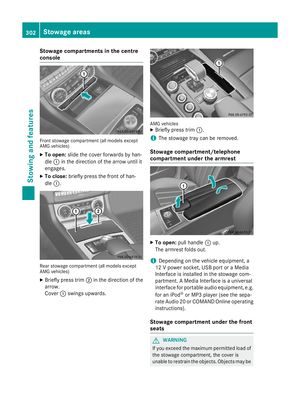
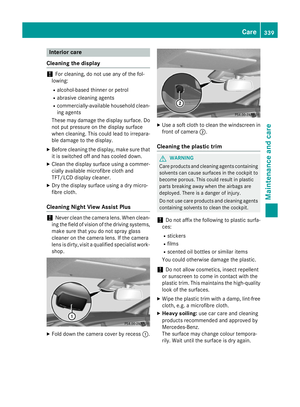
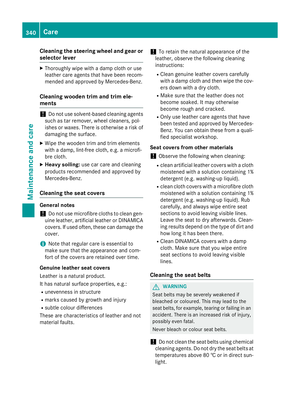
Stowage compartments in the centre
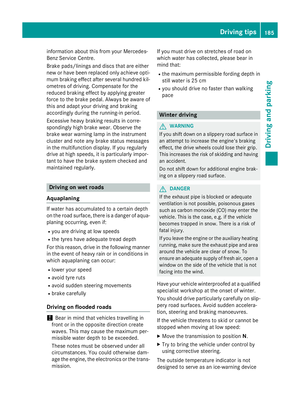
console Front stowage compartment (all models except
AMG vehicles)
X To open: slide the cover forwards by han-
dle :in the direction of the arrow until it
engages.
X To close: briefly press the front of han-
dle :. Rear stowage compartment (all models except
AMG vehicles)
X Briefly press trim ;in the direction of the
arrow.
Cover :swings upwards. AMG vehicles
X
Briefly press trim :.
i The stowage tray can be removed.
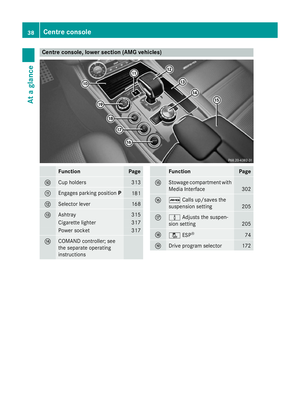
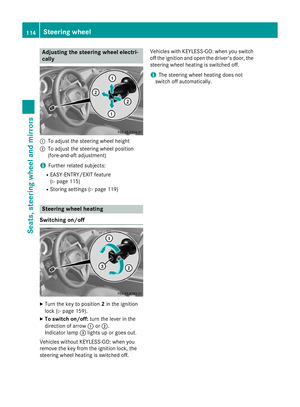
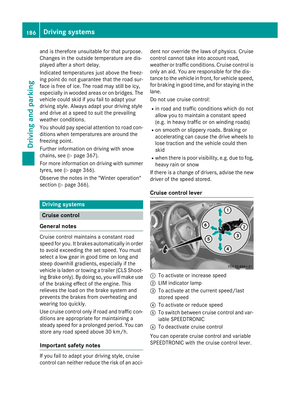
Stowage compartment/telephone
compartment under the armrest X
To open: pull handle :up.
The armrest folds out.
i Depending on the vehicle equipment, a
12 V power socket, USB port or a Media
Interface is installed in the stowage com-
partment. A Media Interface is a universal
interface for portable audio equipment, e.g.
for an iPod ®
or MP3 player (see the sepa-
rate Audio 20 or COMAND Online operating
instructions).
Stowage compartment under the front
seats G
WARNING
If you exceed the maximum permitted load of the stowage compartment, the cover is
unable to restrain the objects. Objects may be 302
Stowage areasStowing and features
Page 306 of 417

thrown out of the stowage compartment and
hit vehicle occupants as a result. There is a
risk of injury, particularly in the event of sud-
den braking or a sudden change in direction.
Always observe the maximum load of the
stowage compartment. Stow and secure
heavy objects in the boot/luggage compart-
ment.
The maximum permissible load of the stow-
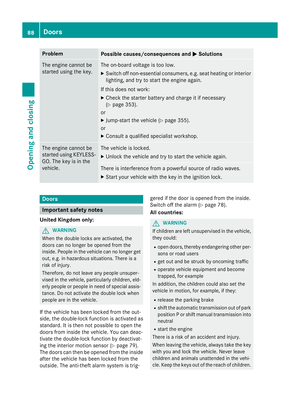
age compartment is 1.5 kg. X
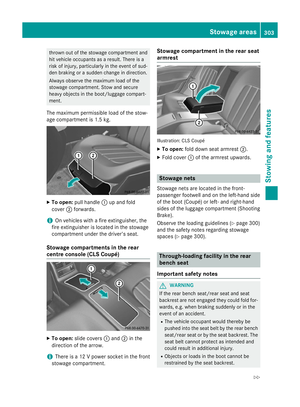
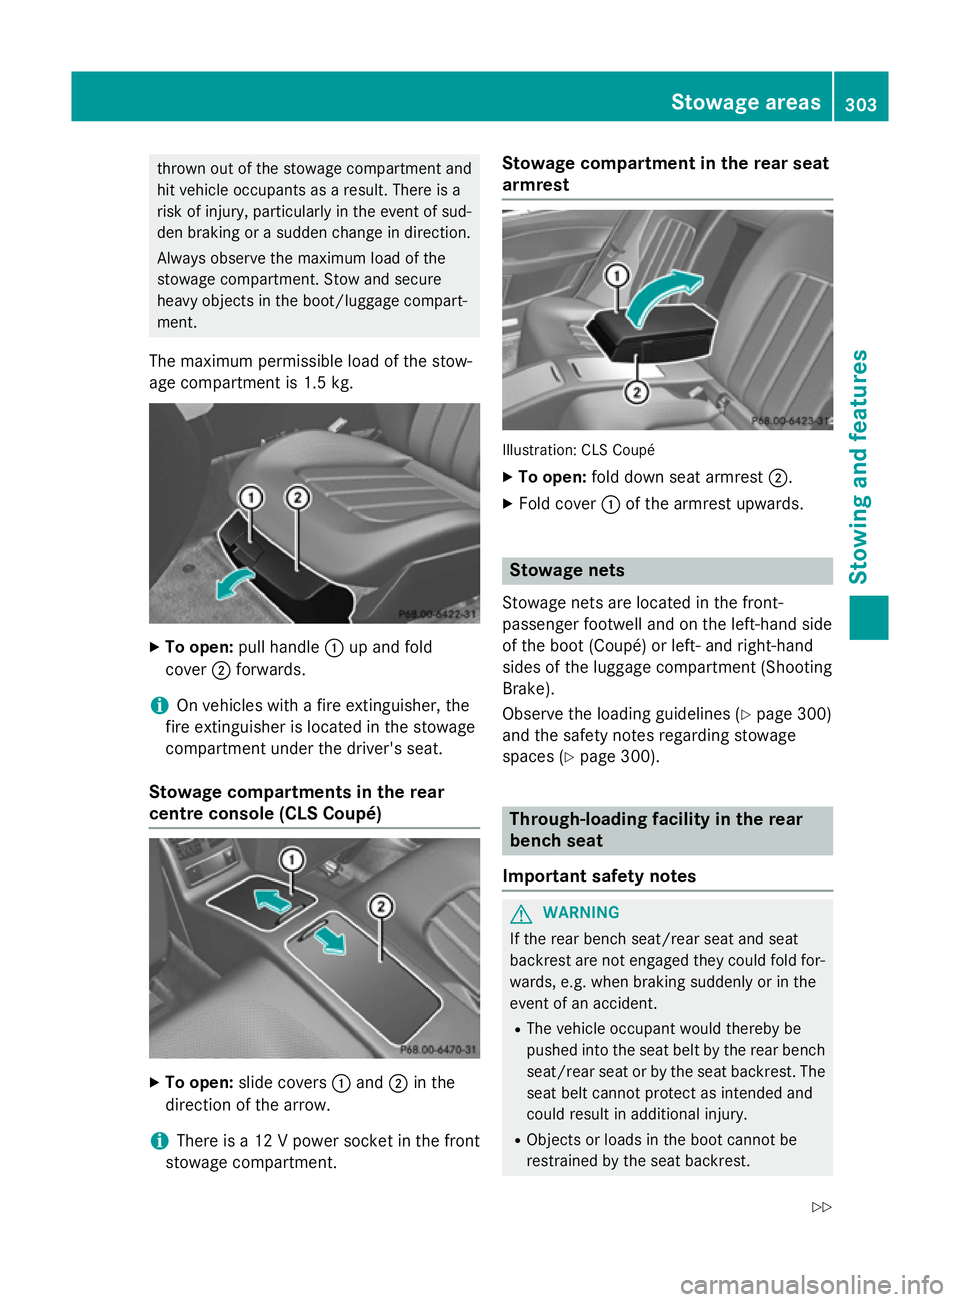
To open: pull handle :up and fold
cover ;forwards.
i On vehicles with a fire extinguisher, the
fire extinguisher is located in the stowage
compartment under the driver's seat.
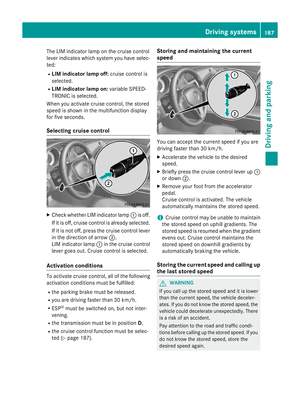
Stowage compartments in the rear
centre console (CLS Coupé) X
To open: slide covers :and ;in the
direction of the arrow.
i There is a 12 V power socket in the front
stowage compartment. Stowage compartment in the rear seat
armrest
Illustration: CLS Coupé
X To open: fold down seat armrest ;.
X Fold cover :of the armrest upwards. Stowage nets
Stowage nets are located in the front-
passenger footwell and on the left-hand side
of the boot (Coupé) or left- and right-hand
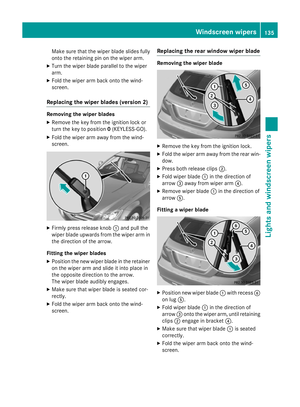
sides of the luggage compartment (Shooting
Brake).
Observe the loading guidelines (Y page 300)
and the safety notes regarding stowage
spaces (Y page 300). Through-loading facility in the rear
bench seat
Important safety notes G
WARNING
If the rear bench seat/rear seat and seat
backrest are not engaged they could fold for- wards, e.g. when braking suddenly or in the
event of an accident.
R The vehicle occupant would thereby be
pushed into the seat belt by the rear bench
seat/rear seat or by the seat backrest. The
seat belt cannot protect as intended and
could result in additional injury.
R Objects or loads in the boot cannot be
restrained by the seat backrest. Sto
wage areas
303Stowing and features
Z
Page 307 of 417

This poses an increased risk of injury.
Before every trip, make sure that the seat
backrests and the rear bench seat/rear seat
are engaged before every trip.
Observe the loading guidelines (Y page 300).
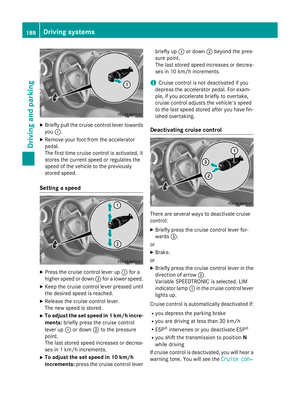
The left-hand and right-hand rear seat backr- ests can be folded down separately to
increase the boot capacity.
Folding the seat backrest forwards i
Vehicles with memory function: when you
fold one or both parts of the rear seat back- rest forwards, the respective front seat
moves forward slightly, when necessary, in
order to avoid contact.
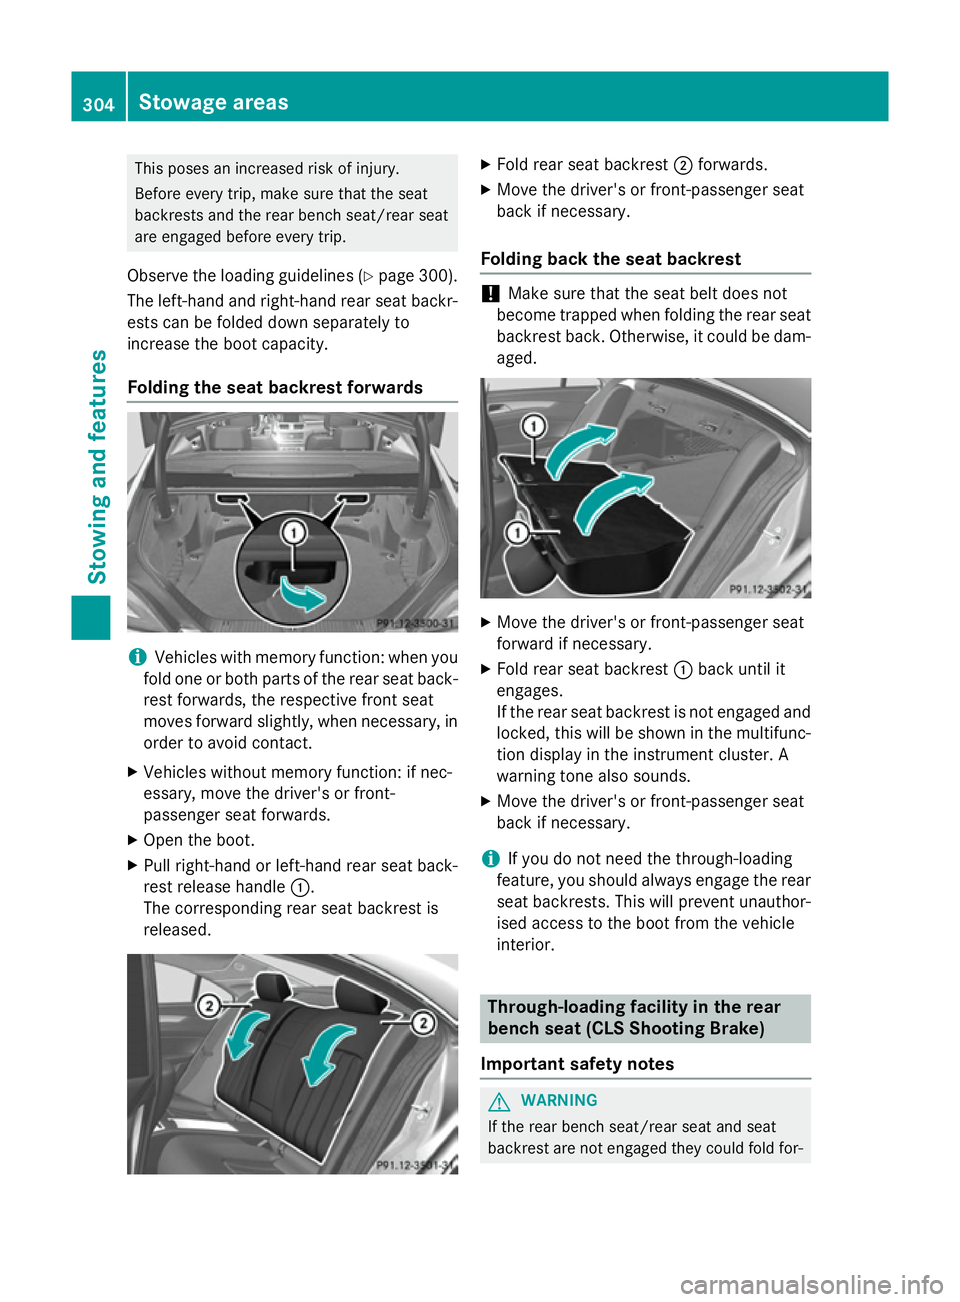
X Vehicles without memory function: if nec-
essary, move the driver's or front-
passenger seat forwards.
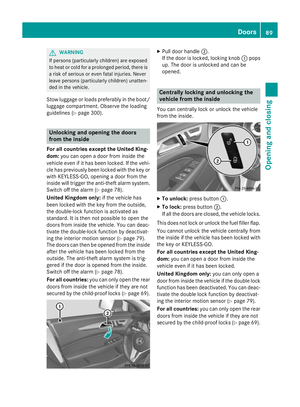
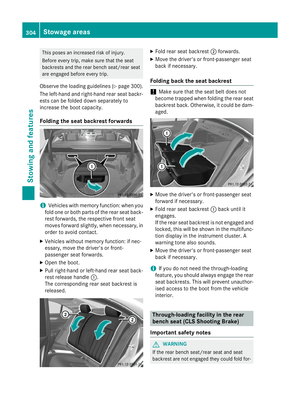
X Open the boot.
X Pull right-hand or left-hand rear seat back-
rest release handle :.
The corresponding rear seat backrest is
released. X
Fold rear seat backrest ;forwards.
X Move the driver's or front-passenger seat
back if necessary.
Folding back the seat backrest !
Make sure that the seat belt does not
become trapped when folding the rear seat backrest back. Otherwise, it could be dam- aged. X
Move the driver's or front-passenger seat
forward if necessary.
X Fold rear seat backrest :back until it
engages.
If the rear seat backrest is not engaged and
locked, this will be shown in the multifunc-
tion display in the instrument cluster. A
warning tone also sounds.
X Move the driver's or front-passenger seat
back if necessary.
i If you do not need the through-loading
feature, you should always engage the rear seat backrests. This will prevent unauthor-
ised access to the boot from the vehicle
interior. Through-loading facility in the rear
bench seat (CLS Shooting Brake)
Important safety notes G
WARNING
If the rear bench seat/rear seat and seat
backrest are not engaged they could fold for- 304
Stowage areasStowing and features
Page 308 of 417

wards, e.g. when braking suddenly or in the
event of an accident.
R The vehicle occupant would thereby be
pushed into the seat belt by the rear bench
seat/rear seat or by the seat backrest. The
seat belt cannot protect as intended and
could result in additional injury.
R Objects or loads in the boot/luggage com-
partment cannot be restrained by the seat
backrest.
This poses an increased risk of injury.
Before every trip, make sure that the seat
backrests and the rear bench seat/rear seat
are engaged before every trip.
Observe the loading guidelines (Y page 300).
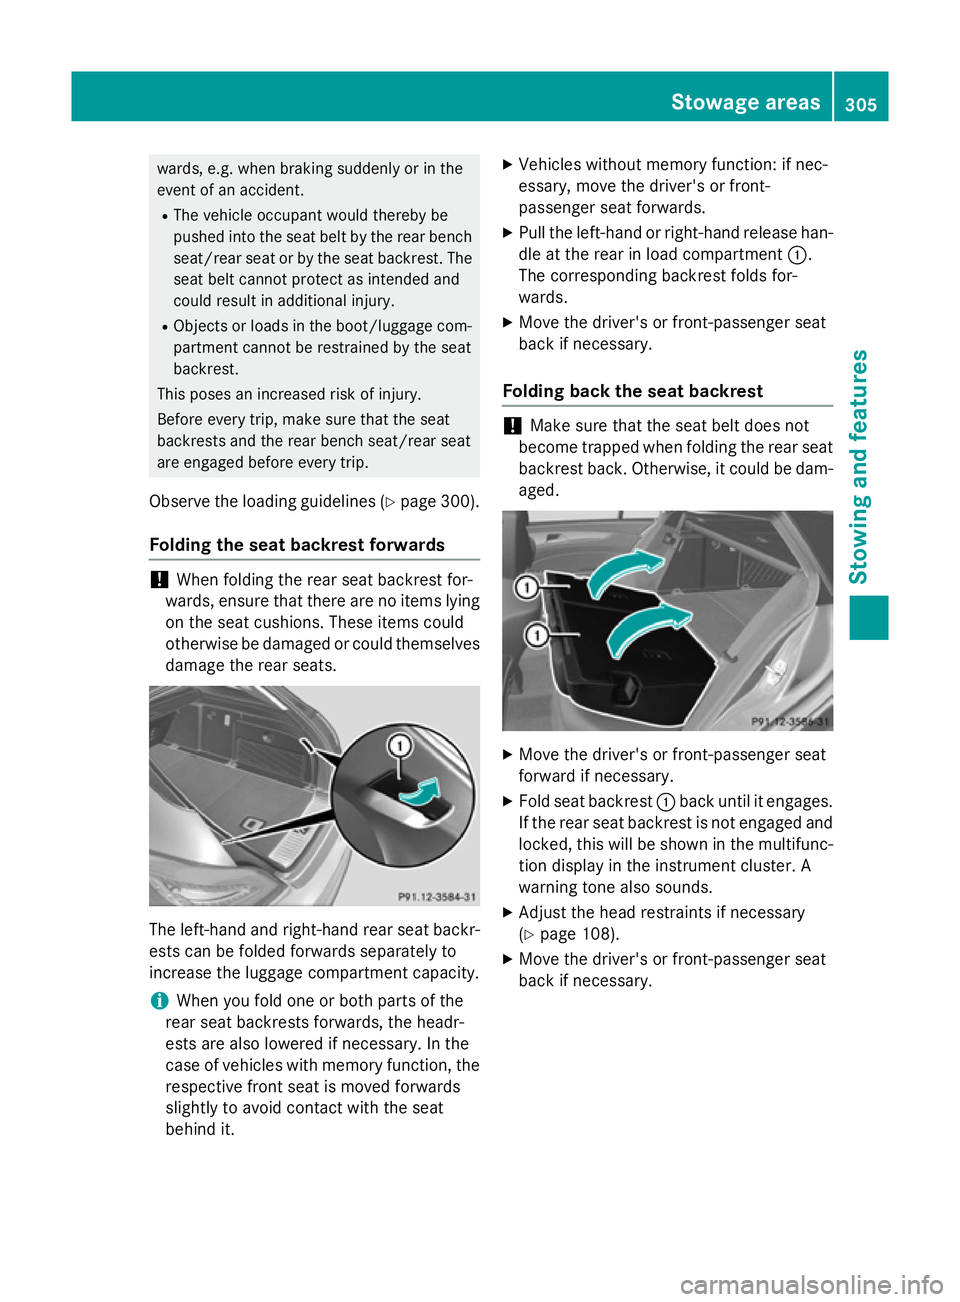
Folding the seat backrest forwards !
When folding the rear seat backrest for-
wards, ensure that there are no items lying on the seat cushions. These items could
otherwise be damaged or could themselves
damage the rear seats. The left-hand and right-hand rear seat backr-
ests can be folded forwards separately to
increase the luggage compartment capacity.
i When you fold one or both parts of the
rear seat backrests forwards, the headr-
ests are also lowered if necessary. In the
case of vehicles with memory function, the respective front seat is moved forwards
slightly to avoid contact with the seat
behind it. X
Vehicles without memory function: if nec-
essary, move the driver's or front-
passenger seat forwards.
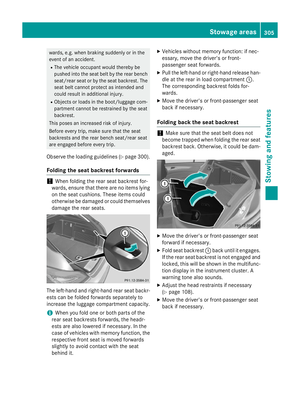
X Pull the left-hand or right-hand release han-
dle at the rear in load compartment :.
The corresponding backrest folds for-
wards.
X Move the driver's or front-passenger seat
back if necessary.
Folding back the seat backrest !
Make sure that the seat belt does not
become trapped when folding the rear seat backrest back. Otherwise, it could be dam- aged. X
Move the driver's or front-passenger seat
forward if necessary.
X Fold seat backrest :back until it engages.
If the rear seat backrest is not engaged and locked, this will be shown in the multifunc-
tion display in the instrument cluster. A
warning tone also sounds.
X Adjust the head restraints if necessary
(Y page 108).
X Move the driver's or front-passenger seat
back if necessary. Stowage areas
305Stowing and features Z
Page 309 of 417

Securing a load
Lashing eyelets General notes
Observe the following notes on securing
loads:
R Observe the loading guidelines
(Y page 300).
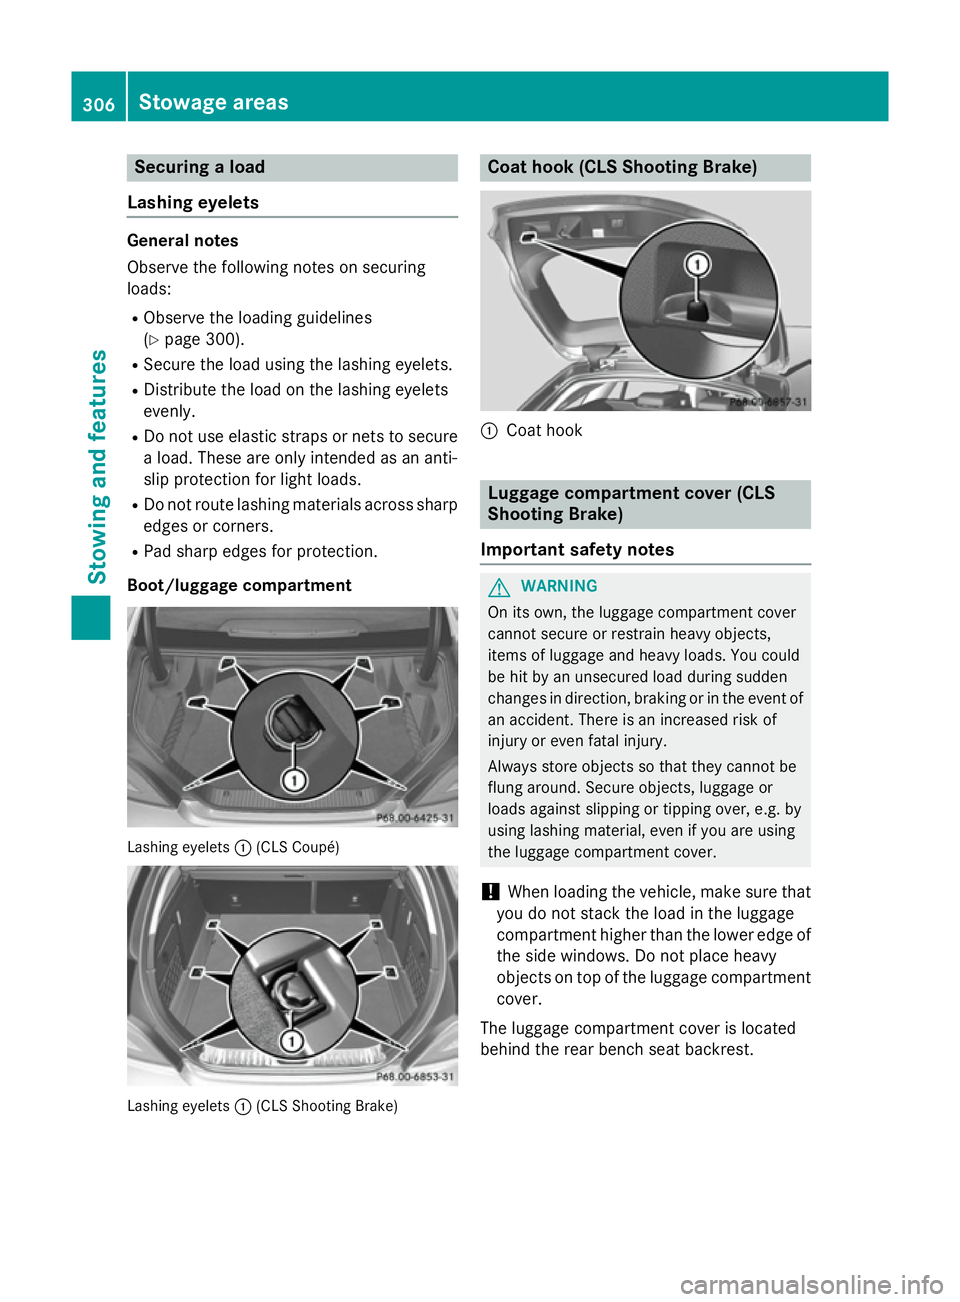
R Secure the load using the lashing eyelets.
R Distribute the load on the lashing eyelets
evenly.
R Do not use elastic straps or nets to secure
a load. These are only intended as an anti-
slip protection for light loads.
R Do not route lashing materials across sharp
edges or corners.
R Pad sharp edges for protection.
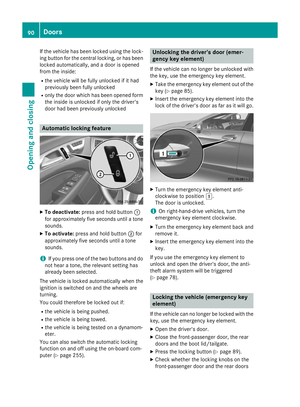
Boot/luggage compartment Lashing eyelets
:(CLS Coupé) Lashing eyelets
:(CLS Shooting Brake) Coat hook (CLS Shooting Brake)
:
Coat hook Luggage compartment cover (CLS
Shooting Brake)
Important safety notes G
WARNING
On its own, the luggage compartment cover
cannot secure or restrain heavy objects,
items of luggage and heavy loads. You could
be hit by an unsecured load during sudden
changes in direction, braking or in the event of an accident. There is an increased risk of
injury or even fatal injury.
Always store objects so that they cannot be
flung around. Secure objects, luggage or
loads against slipping or tipping over, e.g. by
using lashing material, even if you are using
the luggage compartment cover.
! When loading the vehicle, make sure that
you do not stack the load in the luggage
compartment higher than the lower edge of the side windows. Do not place heavy
objects on top of the luggage compartment
cover.
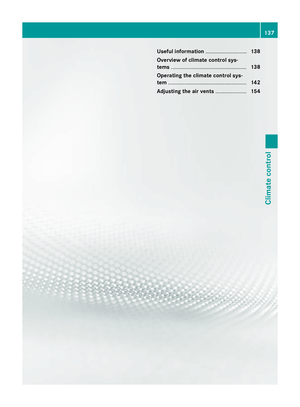
The luggage compartment cover is located
behind the rear bench seat backrest. 306
Stowage areasStowing and features
Page 310 of 417

Extending and retracting the luggage
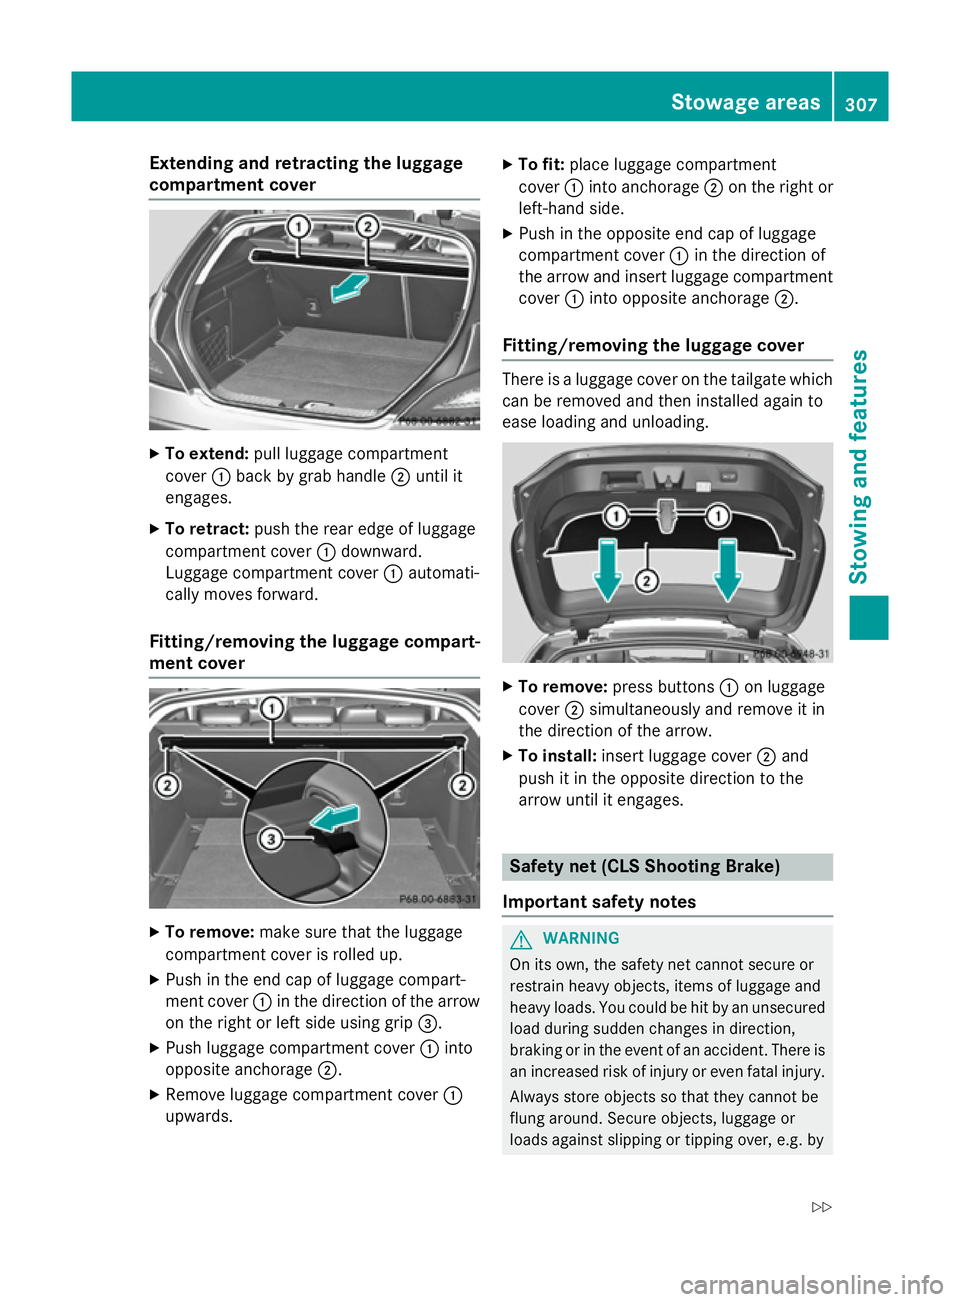
compartment cover X
To extend: pull luggage compartment
cover :back by grab handle ;until it
engages.
X To retract: push the rear edge of luggage
compartment cover :downward.
Luggage compartment cover :automati-
cally moves forward.
Fitting/removing the luggage compart-
ment cover X
To remove: make sure that the luggage
compartment cover is rolled up.
X Push in the end cap of luggage compart-
ment cover :in the direction of the arrow
on the right or left side using grip =.
X Push luggage compartment cover :into
opposite anchorage ;.
X Remove luggage compartment cover :
upwards. X
To fit: place luggage compartment
cover :into anchorage ;on the right or
left-hand side.
X Push in the opposite end cap of luggage
compartment cover :in the direction of
the arrow and insert luggage compartment cover :into opposite anchorage ;.
Fitting/removing the luggage cover There is a luggage cover on the tailgate which
can be removed and then installed again to
ease loading and unloading. X
To remove: press buttons :on luggage
cover ;simultaneously and remove it in
the direction of the arrow.
X To install: insert luggage cover ;and
push it in the opposite direction to the
arrow until it engages. Safety net (CLS Shooting Brake)
Important safety notes G
WARNING
On its own, the safety net cannot secure or
restrain heavy objects, items of luggage and
heavy loads. You could be hit by an unsecured load during sudden changes in direction,
braking or in the event of an accident. There isan increased risk of injury or even fatal injury.
Always store objects so that they cannot be
flung around. Secure objects, luggage or
loads against slipping or tipping over, e.g. by Stowage areas
307Stowing and features
Z
Page 311 of 417

using lashing material, even if you are using
the safety net.
It is important to use a safety net if you load
the vehicle with small objects above the seat backrests. For safety reasons, always use a
safety net when transporting a load.
The safety net is located in the stowage space under the luggage compartment floor
(Y page 311).
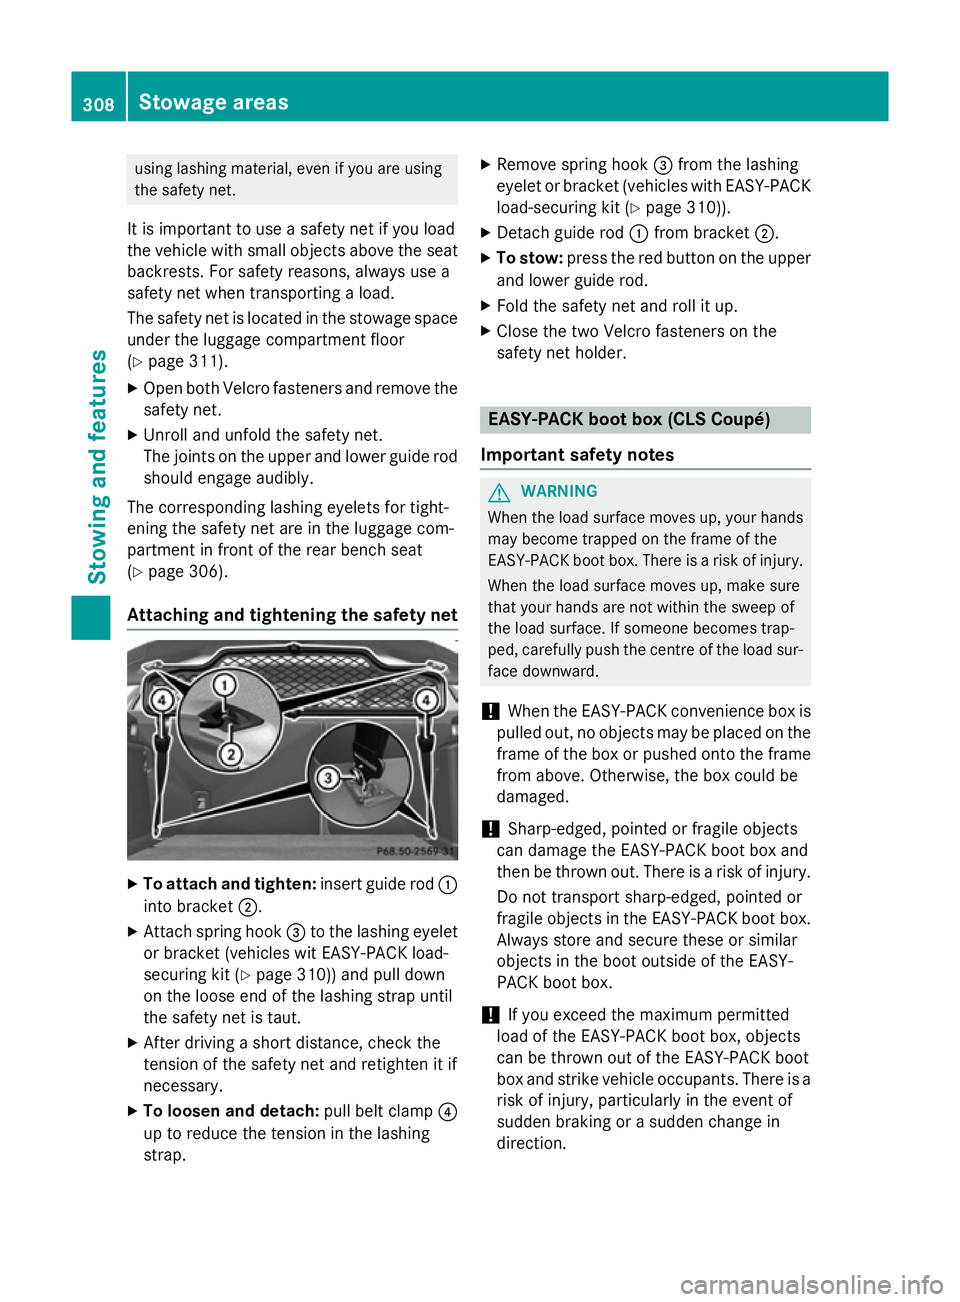
X Open both Velcro fasteners and remove the
safety net.
X Unroll and unfold the safety net.
The joints on the upper and lower guide rod
should engage audibly.
The corresponding lashing eyelets for tight-
ening the safety net are in the luggage com-
partment in front of the rear bench seat
(Y page 306).
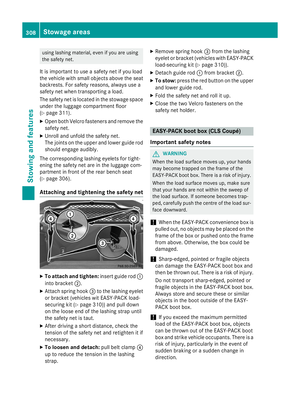
Attaching and tightening the safety net X
To attach and tighten: insert guide rod:
into bracket ;.
X Attach spring hook =to the lashing eyelet
or bracket (vehicles wit EASY-PACK load-
securing kit (Y page 310)) and pull down
on the loose end of the lashing strap until
the safety net is taut.
X After driving a short distance, check the
tension of the safety net and retighten it if
necessary.
X To loosen and detach: pull belt clamp?
up to reduce the tension in the lashing
strap. X
Remove spring hook =from the lashing
eyelet or bracket (vehicles with EASY-PACK
load-securing kit (Y page 310)).
X Detach guide rod :from bracket ;.
X To stow: press the red button on the upper
and lower guide rod.
X Fold the safety net and roll it up.
X Close the two Velcro fasteners on the
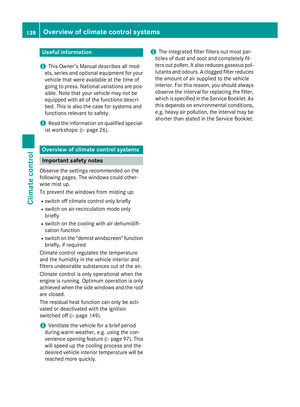
safety net holder. EASY-PACK boot box (CLS Coupé)
Important safety notes G
WARNING
When the load surface moves up, your hands may become trapped on the frame of the
EASY-PACK boot box. There is a risk of injury.
When the load surface moves up, make sure
that your hands are not within the sweep of
the load surface. If someone becomes trap-
ped, carefully push the centre of the load sur- face downward.
! When the EASY-PACK convenience box is
pulled out, no objects may be placed on the
frame of the box or pushed onto the frame
from above. Otherwise, the box could be
damaged.
! Sharp-edged, pointed or fragile objects
can damage the EASY-PACK boot box and
then be thrown out. There is a risk of injury.
Do not transport sharp-edged, pointed or
fragile objects in the EASY-PACK boot box. Always store and secure these or similar
objects in the boot outside of the EASY-
PACK boot box.
! If you exceed the maximum permitted
load of the EASY-PACK boot box, objects
can be thrown out of the EASY-PACK boot
box and strike vehicle occupants. There is a risk of injury, particularly in the event of
sudden braking or a sudden change in
direction. 308
Stowage areasStowing and featu
res
Page 312 of 417

Always observe the maximum permitted
load of the EASY-PACK boot box. Always
store and secure heavy objects in the boot outside of the EASY-PACK boot box.
The maximum permitted load of the EASY-
PACK boot box is 10 kg. With a load of above approximately 5 kg, the bottom of the box
moves downward until it rests on the mat of
the boot floor. Thus, overloading of the box is
avoided.
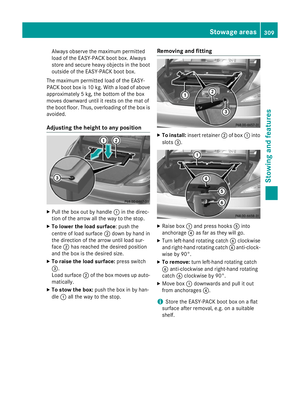
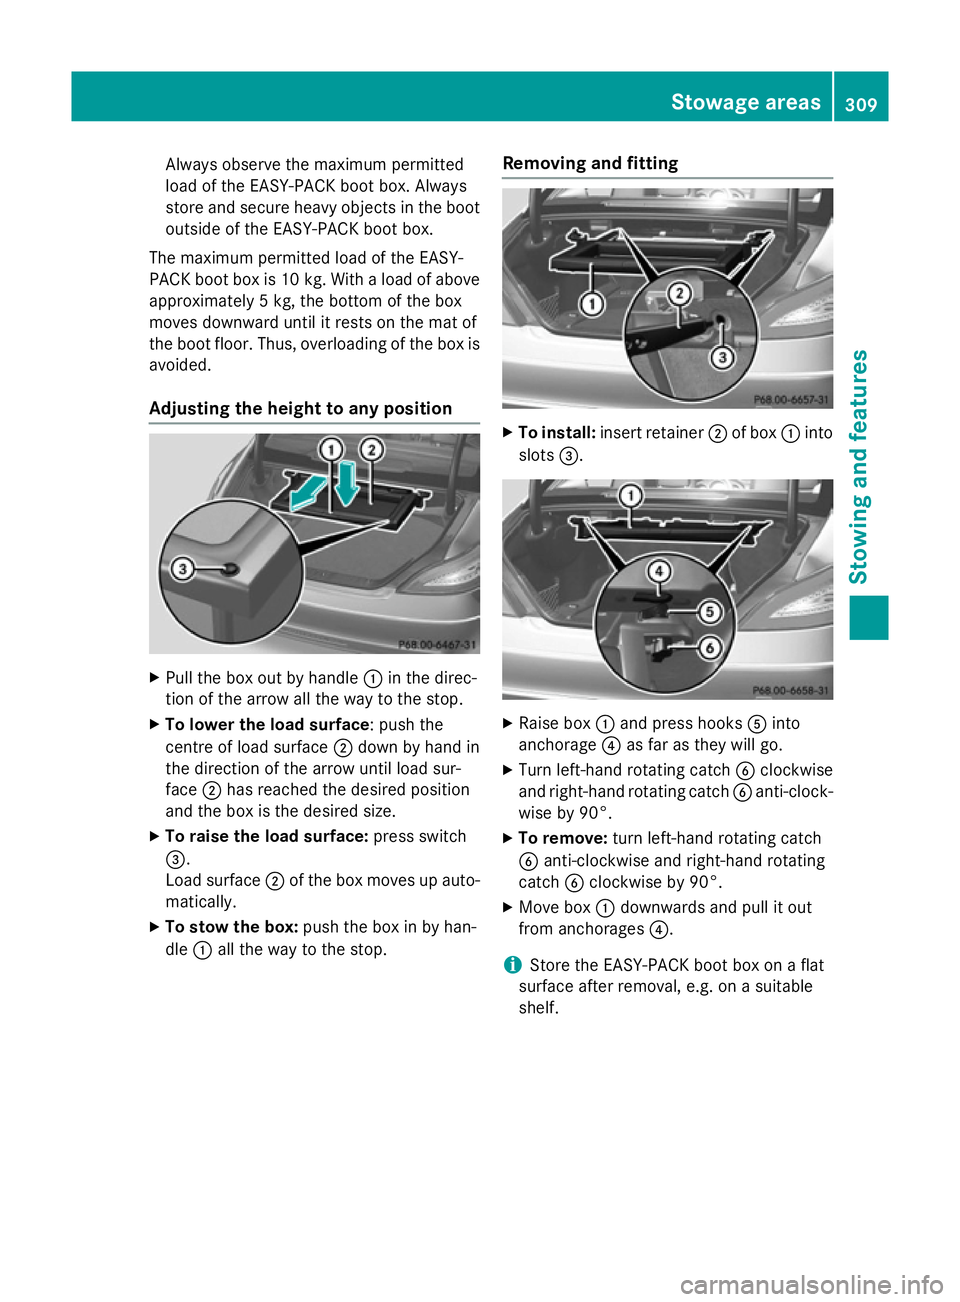
Adjusting the height to any position X
Pull the box out by handle :in the direc-
tion of the arrow all the way to the stop.
X To lower the load surface: push the
centre of load surface ;down by hand in
the direction of the arrow until load sur-
face ;has reached the desired position
and the box is the desired size.
X To raise the load surface: press switch
=.
Load surface ;of the box moves up auto-
matically.
X To stow the box: push the box in by han-
dle :all the way to the stop. Removing and fitting X
To install: insert retainer ;of box :into
slots =. X
Raise box :and press hooks Ainto
anchorage ?as far as they will go.
X Turn left-hand rotating catch Bclockwise
and right-hand rotating catch Banti-clock-
wise by 90°.
X To remove: turn left-hand rotating catch
B anti-clockwise and right-hand rotating
catch Bclockwise by 90°.
X Move box :downwards and pull it out
from anchorages ?.
i Store the EASY-PACK boot box on a flat
surface after removal, e.g. on a suitable
shelf. Stowage areas
309Stowing an d features Z