2014 MERCEDES-BENZ CLS COUPE trailer
[x] Cancel search: trailerPage 23 of 417

Deactivating ....................................
.79
Function ........................................... 79
Tow-starting
Emergency engine starting ............ 360
Important safety notes .................. 357
Towing
Important safety notes .................. 357
With the rear axle raised ................ 359
Towing a trailer
Active Blind Spot Assist ................ .229
Active Lane Keeping Assist ............ 232
Active Parking Assist ..................... 213
Axle load, permissible .................... 410
Bulb failure indicator for LED
lamps ............................................. 237
ESP® (Electronic Stability Pro-
gram) ............................................... 75
Towing away
Fitting the towing eye .................... 358
Removing the towing eye .............. .359
With both axles on the ground ....... 359
Trailer
Display message ............................ 284
Trailer coupling
see Towing a trailer
Trailer towing
7-pin connector ............................ .237
Blind Spot Assist ............................ 225
Cleaning the trailer tow hitch ......... 338
Coupling up a trailer ..................... .235
Decoupling a trailer ....................... 235
Driving tips ................................... .233
Folding in the ball coupling ............ 236
Folding out the ball coupling .......... 234
Important safety notes .................. 232
Lights display message .................. 267
Mounting dimensions .................... 409
Parktronic ...................................... 209
Power supply ................................. 236
Trailer loads ................................... 410
Transmission
see Automatic transmission
Transmission position display ......... 169
Transmission position display
(DIRECT SELECT lever) ......................169
Transporting the vehicle .................. 359
Trim pieces (cleaning instruc-
tions) ................................................. .340 Trip computer (on-board com-
puter)
................................................. .243
Trip meter
Calling up ....................................... 243
Resetting (on-board computer) ...... 244
Turn signals
Switching on/off ........................... 125
TV
Operating (on-board computer) ..... 247
see Separate operating instructions
Two-way radio
Frequencies ................................... 396
Installation ..................................... 396
Transmission output (maximum) .... 396
Type identification plate
see Vehicle identification plate
Tyre pressure
Calling up (on-board computer) ..... 370
Display message ............................ 280
Important safety notes .................. 370
Not reached (TIREFIT) .................... 350
Reached (TIREFIT) .......................... 350
Recommended ............................... 367
Tyre pressure loss warning
General notes ................................ 369
Important safety notes .................. 369
Restarting ...................................... 369
Tyre pressure monitor
Checking the tyre pressure elec-
tronically ........................................ 371
Function/notes ............................ .370
General notes ................................ 370
Important safety notes .................. 370
Radio type approval for the tyre
pressure monitor ........................... 373
Restarting ...................................... 372
Warning lamp ................................. 298
Warning message .......................... 372
Tyres
Changing a wheel .......................... 373
Checking ........................................ 365
Direction of rotatio n...................... 374
Display message ............................ 280
Important safety notes .................. 364
MOExtended tyre s......................... 366
Replacing ....................................... 373
Service life ..................................... 365
Storing ........................................... 374 20
Index
Page 78 of 417
X
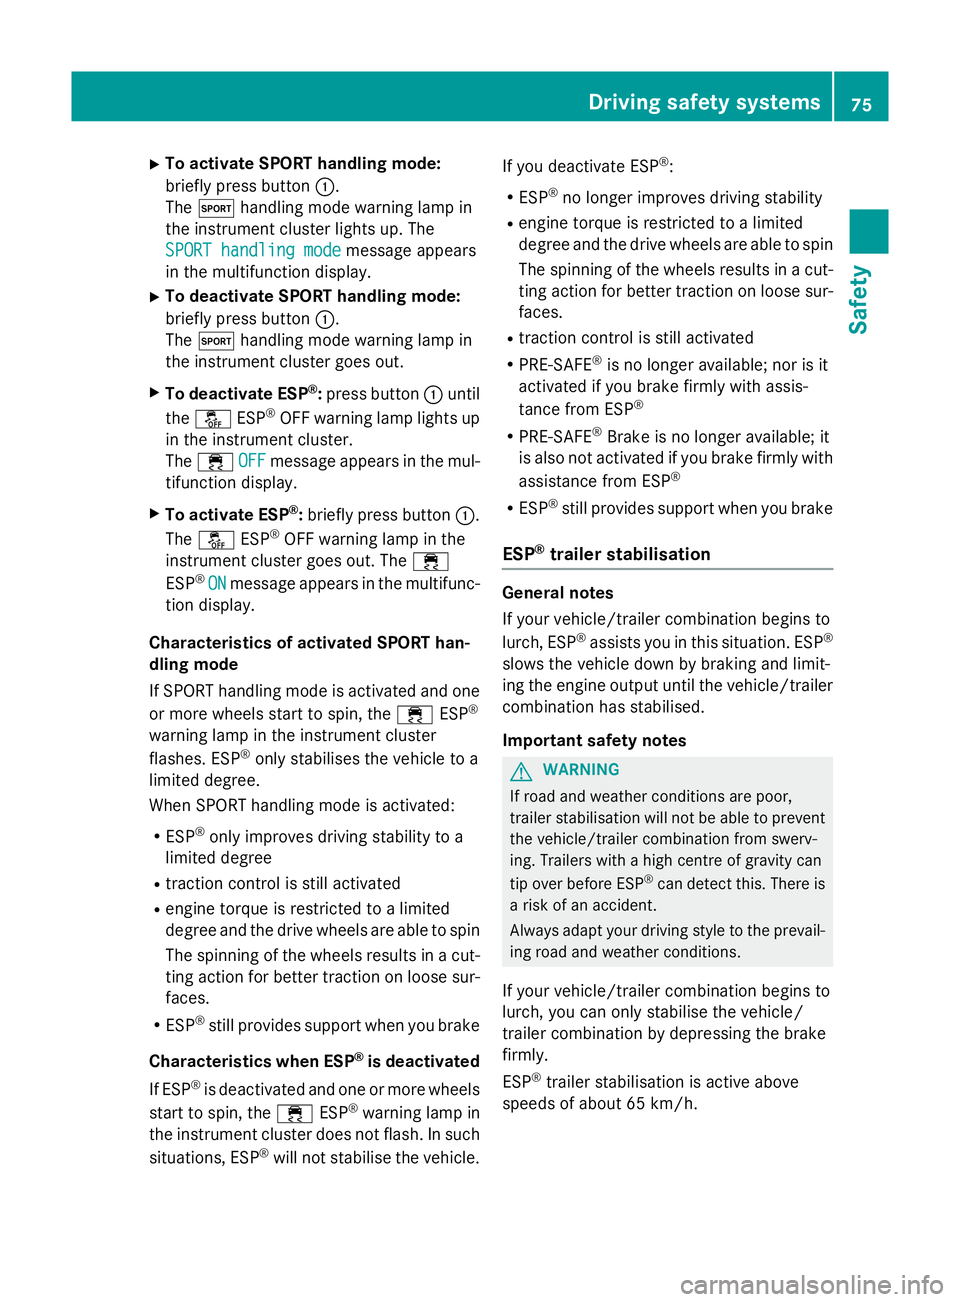
To activate SPORT handling mode:
briefly press button :.
The M handling mode warning lamp in
the instrument cluster lights up. The
SPORT handling mode
SPORT handling mode message appears
in the multifunction display.
X To deactivate SPORT handling mode:
briefly press button :.
The M handling mode warning lamp in
the instrument cluster goes out.
X To deactivate ESP ®
:press button :until
the å ESP®
OFF warning lamp lights up
in the instrument cluster.
The ÷ OFF
OFF message appears in the mul-
tifunction display.
X To activate ESP ®
:briefly press button :.
The å ESP®
OFF warning lamp in the
instrument cluster goes out. The ÷
ESP ®
ON
ON message appears in the multifunc-
tion display.
Characteristics of activated SPORT han-
dling mode
If SPORT handling mode is activated and one
or more wheels start to spin, the ÷ESP®
warning lamp in the instrument cluster
flashes. ESP ®
only stabilises the vehicle to a
limited degree.
When SPORT handling mode is activated:
R ESP ®
only improves driving stability to a
limited degree
R traction control is still activated
R engine torque is restricted to a limited
degree and the drive wheels are able to spin
The spinning of the wheels results in a cut-
ting action for better traction on loose sur- faces.
R ESP ®
still provides support when you brake
Characteristics when ESP ®
is deactivated
If ESP ®
is deactivated and one or more wheels
start to spin, the ÷ESP®
warning lamp in
the instrument cluster does not flash. In such
situations, ESP ®
will not stabilise the vehicle. If you deactivate ESP
®
:
R ESP ®
no longer improves driving stability
R engine torque is restricted to a limited
degree and the drive wheels are able to spin
The spinning of the wheels results in a cut-
ting action for better traction on loose sur- faces.
R traction control is still activated
R PRE-SAFE ®
is no longer available; nor is it
activated if you brake firmly with assis-
tance from ESP ®
R PRE-SAFE ®
Brake is no longer available; it
is also not activated if you brake firmly with
assistance from ESP ®
R ESP ®
still provides support when you brake
ESP ®
trailer stabilisation General notes
If your vehicle/trailer combination begins to
lurch, ESP
®
assists you in this situation. ESP ®
slows the vehicle down by braking and limit-
ing the engine output until the vehicle/trailer combination has stabilised.
Important safety notes G
WARNING
If road and weather conditions are poor,
trailer stabilisation will not be able to prevent the vehicle/trailer combination from swerv-
ing. Trailers with a high centre of gravity can
tip over before ESP ®
can detect this. There is
a risk of an accident.
Always adapt your driving style to the prevail-
ing road and weather conditions.
If your vehicle/trailer combination begins to
lurch, you can only stabilise the vehicle/
trailer combination by depressing the brake
firmly.
ESP ®
trailer stabilisation is active above
speeds of about 65 km/h. Driving safety systems
75Safety Z
Page 79 of 417
ESP
®
trailer stabilisation does not work if
ESP ®
is deactivated or disabled because of a
malfunction. EBD (electronic brake force distribu-
tion)
General notes EBD monitors and controls the brake pres-
sure on the rear wheels to improve driving
stability while braking.
Important safety notes i
Observe the "Important safety notes" sec-
tion for driving safety systems (Y page 70).G
WARNING
If EBD has malfunctioned, the rear wheels can still lock, e.g. under full braking. This increa-
ses the risk of skidding and an accident.
You should therefore adapt your driving style
to the different handling characteristics. Have the brake system checked at a qualified spe-
cialist workshop.
Observe information regarding indicator and
warning lamps (Y page 289) as well as dis-
play messages (Y page 264).ADAPTIVE BRAKE
i Observe the "Important safety notes" sec-
tion (Y page 70).
ADAPTIVE BRAKE enhances braking safety
and offers increased braking comfort. In addi-
tion to the braking function, ADAPTIVE BRAKE also has the HOLD function (Y page 200)and
hill start assist (Y page 162). PRE-SAFE
®
Brake
General notes i
Observe the "Important safety notes" sec-
tion (Y page 70).
PRE-SAFE ®
Brake is only available on vehicles
with DISTRONIC PLUS.
For PRE-SAFE ®
Brake to assist you when driv-
ing, the radar sensor system must be:
R activated (Y page 255)
R operational
With the help of the radar sensor system,
PRE-SAFE ®
Brake can detect obstacles that
are in front of your vehicle for an extended
period of time.
PRE-SAFE ®
Brake can help you to minimise
the risk of a collision with a vehicle ahead or
reduce the effects of such a collision. If PRE-
SAFE ®
Brake has detected a risk of collision,
you will be warned visually and acoustically as
well as by automatic braking. PRE-SAFE ®
Brake cannot prevent a collision without your intervention.
Important safety notes G
WARNING
PRE-SAFE ®
Brake will initially brake your vehi-
cle by a partial application of the brakes if a
danger of collision is detected. There may be
a collision unless you also brake. Automatic
emergency braking cannot prevent a colli-
sion. There is a risk of an accident.
Always apply the brakes yourself and try to
take evasive action. G
WARNING
PRE-SAFE ®
Brake cannot always clearly iden-
tify objects and complex traffic conditions.
In these cases, PRE-SAFE ®
Brake may:
R give an unnecessary warning and then
brake the vehicle
R neither give a warning nor intervene
There is a risk of an accident. 76
Driving safety systemsSafety
Page 160 of 417
Useful information
............................158
Running-in notes ............................... 158
Driving ............................................... 158
Automatic transmission ...................167
Refuelling ........................................... 177
Parking ............................................... 180
Driving tips ........................................ 182
Driving systems ................................ 186
Towing a trailer ................................. 232 157Driving and parking
Page 174 of 417
Driving tips
Changing gear The automatic transmission shifts to the indi-
vidual gears automatically when it is in trans-
mission position D. Gearshifting is deter-
mined by:
R the selected drive program (Y page 171)
R the position of the accelerator pedal
(Y page 171)
R the road speed
Accelerator pedal position Your style of driving influences how the auto-
matic transmission shifts gear:
R little throttle: early upshifts
R more throttle: late upshifts
AMG vehicles When shifting down, the double-clutch func-
tion is active regardless of the currently selec- ted drive program. The double-clutch functionreduces load change reactions and is condu-cive to a sporty driving style. The sound gen-
erated by the double-clutch function depends
on the drive program selected.
Kickdown Use kickdown for maximum acceleration:
X Depress the accelerator pedal beyond the
pressure point.
The transmission shifts to a lower gear
depending on the engine speed.
X Ease off the accelerator pedal once the
desired speed is reached.
The automatic transmission shifts back up.
Towing a trailer X
Drive in the middle of the engine speed
range on uphill gradients.
X Manual drive program: depending on the
uphill or downhill gradient, shift into a gear
(Y page 174) in which the engine will run in the middle of the engine speed range. This
also applies if cruise control, DISTRONIC
PLUS or SPEEDTRONIC are activated. Program selector button
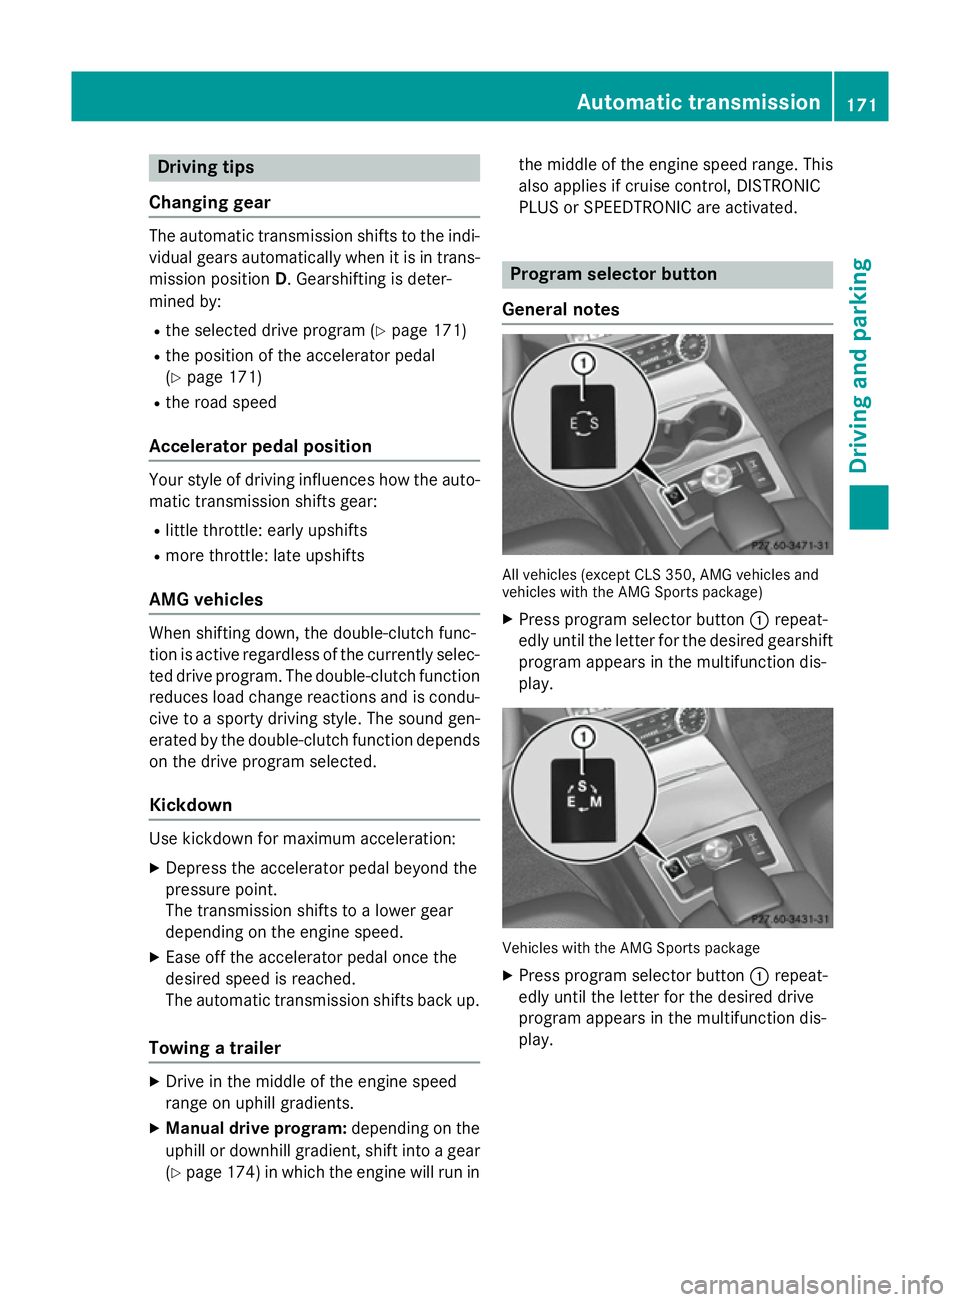
General notes All vehicles (except CLS 350, AMG vehicles and
vehicles with the AMG Sports package)
X Press program selector button :repeat-
edly until the letter for the desired gearshift
program appears in the multifunction dis-
play. Vehicles with the AMG Sports package
X Press program selector button :repeat-
edly until the letter for the desired drive
program appears in the multifunction dis-
play. Automatic transmission
171Driving and parking Z
Page 186 of 417
In addition to driving style, the consumption is
affected by many other factors, such as:
R load
R tyre pressure
R cold start
R choice of route
R the use of electrical consumers
These factors are not included in the ECO dis-
play.
The evaluation of your driving style takes the following three categories into consideration:
R Acceleration
Acceleration (evaluation of all accelera-
tion processes):
- the bar fills up: moderate acceleration,
especially at higher speeds
- the bar empties: sporty acceleration
R Constant
Constant (assessment of driving behav-
iour at all times):
- the bar fills up: constant speed and
avoidance of unnecessary acceleration
and deceleration
- the bar empties: fluctuations in speed
R Coasting
Coasting (assessment of all deceleration
processes):
- the bar fills up: anticipatory driving, keep-
ing your distance and early release of the
accelerator. The vehicle can coast with-
out use of the brakes
- the bar empties: frequent braking
i An economical driving style involves driv-
ing at a moderate engine speed.
To achieve a higher value in the categories
Acceleration
Acceleration andConstant Constant:
R observe the gearshift recommendation
R drive the vehicle in drive program E
i On long journeys at a constant speed, e.g.
on the motorway, only the bar for Constant
Constant
will change.
i The ECO display summarises the driving
characteristics from the start of the journey
to its completion. Therefore, there are
dynamic changes in the bars at the start of a journey. During a prolonged driving time,
these changes are smaller. For more
dynamic changes, perform a manual reset.
Further information on the ECO display
(Y page 244). Brakes
Important safety notes G
WARNING
If you shift down on a slippery road surface in an attempt to increase the engine's braking
effect, the drive wheels could lose their grip.
This increases the risk of skidding and having
an accident.
Do not shift down for additional engine brak-
ing on a slippery road surface.
Downhill gradients Do not depress the brake pedal continuously
while the vehicle is in motion, e.g. never
cause the brakes to rub by constantly apply-
ing light pressure to the pedal. This results in
excessive and premature wear to the brake
pads.
Change into a lower gear in good time on long
and steep downhill gradients. Take particular note of this when driving a laden vehicle and
when towing a trailer.
i This also applies if you have activated
cruise control, SPEEDTRONIC or DIS-
TRONIC PLUS.
This will use the braking effect of the engine,
so less braking will be required to maintain
vehicle speed. This relieves the load on the
brake system and prevents the brakes from
overheating and wearing too quickly.
Heavy and light loads G
WARNING
The braking system can overheat if you leave your foot on the brake pedal while driving.
This increases the braking distance and could Driving tips
183Driving and parking
Z
Page 189 of 417
and is therefore unsuitable for that purpose.
Changes in the outside temperature are dis-
played after a short delay.
Indicated temperatures just above the freez-
ing point do not guarantee that the road sur-
face is free of ice. The road may still be icy,
especially in wooded areas or on bridges. The vehicle could skid if you fail to adapt your
driving style. Always adapt your driving style
and drive at a speed to suit the prevailing
weather conditions.
You should pay special attention to road con-
ditions when temperatures are around the
freezing point.
Further information on driving with snow
chains, see (Y page 367).
For more information on driving with summer tyres, see (Y page 366).
Observe the notes in the "Winter operation"
section (Y page 366). Driving systems
Cruise control
General notes Cruise control maintains a constant road
speed for you. It brakes automatically in order to avoid exceeding the set speed. You must
select a low gear in good time on long and
steep downhill gradients, especially if the
vehicle is laden or towing a trailer (CLS Shoot-
ing Brake only). By doing so, you will make use of the braking effect of the engine. This
relieves the load on the brake system and
prevents the brakes from overheating and
wearing too quickly.
Use cruise control only if road and traffic con-
ditions are appropriate for maintaining a
steady speed for a prolonged period. You can store any road speed above 30 km/h.
Important safety notes If you fail to adapt your driving style, cruise
control can neither reduce the risk of an acci- dent nor override the laws of physics. Cruise
control cannot take into account road,
weather or traffic conditions. Cruise control is
only an aid. You are responsible for the dis-
tance to the vehicle in front, for vehicle speed, for braking in good time, and for staying in thelane.
Do not use cruise control:
R in road and traffic conditions which do not
allow you to maintain a constant speed
(e.g. in heavy traffic or on winding roads)
R on smooth or slippery roads. Braking or
accelerating can cause the drive wheels to lose traction and the vehicle could then
skid
R when there is poor visibility, e.g. due to fog,
heavy rain or snow
If there is a change of drivers, advise the new
driver of the speed stored.
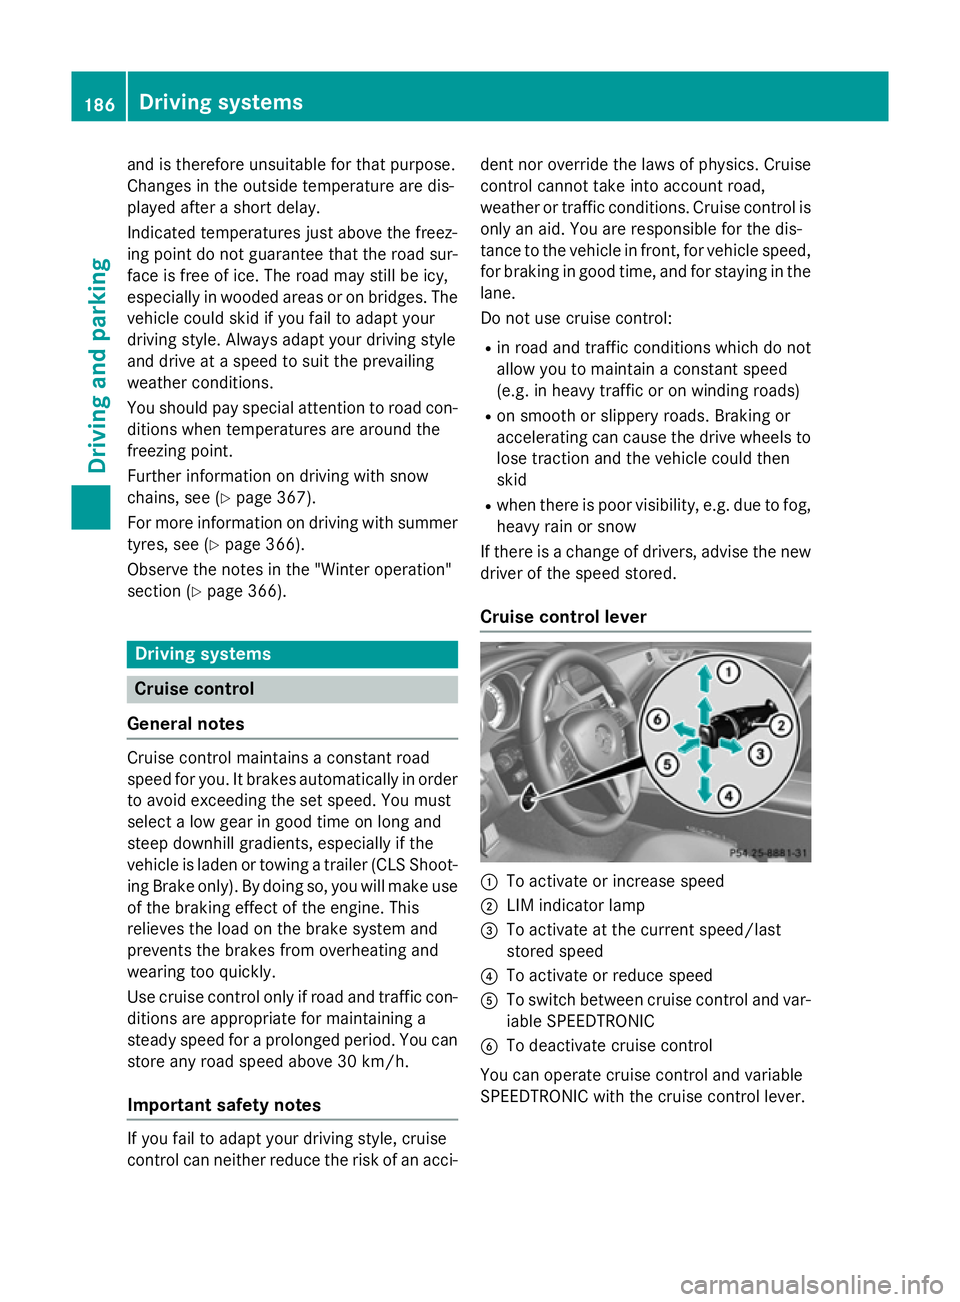
Cruise control lever :
To activate or increase speed
; LIM indicator lamp
= To activate at the current speed/last
stored speed
? To activate or reduce speed
A To switch between cruise control and var-
iable SPEEDTRONIC
B To deactivate cruise control
You can operate cruise control and variable
SPEEDTRONIC with the cruise control lever. 186
Driving systemsDriving and parking
Page 206 of 417
!
The vehicle is lowered by about 15 mm if:
R you have selected "Comfort tuning"
R you switch off the engine and
R you lock the vehicle within approximately
60 seconds
When parking, position your vehicle so that it does not make contact with the kerb as
the vehicle is lowered. Your vehicle could
otherwise be damaged.
If you unlock the vehicle within 60 seconds of
having switched the engine off, the vehicle is
lowered slightly when Comfort suspension
mode is selected.
Observe the notes on driving with a trailer
(Y page 233).
Your vehicle regulates its height automati-
cally. All-round level control ensures the best
possible suspension and constant ground
clearance, even with a laden vehicle. When
you drive fast, the vehicle is lowered auto-
matically to improve driving safety and to
reduce fuel consumption.
The following vehicle levels are possible:
R Normal
R Raised: the vehicle is raised by approx-
imately 25 mm when compared with the
normal level
R Lowered: the vehicle is lowered by approx-
imately 10 mm when compared with the
normal level
The "Normal" and "Raised" vehicle levels can be set manually.
The "Lowered" vehicle level is set automati-
cally:
R at speeds above 140 km/h
R if you have selected "Comfort mode"
(Y page 204) and then lock the vehicle
within 60 seconds of the engine being
switched off
R if you have selected "Sport mode"
(Y page 204) Setting the vehicle level
Select the "Normal" setting for normal road
surfaces and "Raised" for driving with snow
chains or on particularly poor road surfaces.
Your selection remains stored even if you
remove the key from the ignition lock.
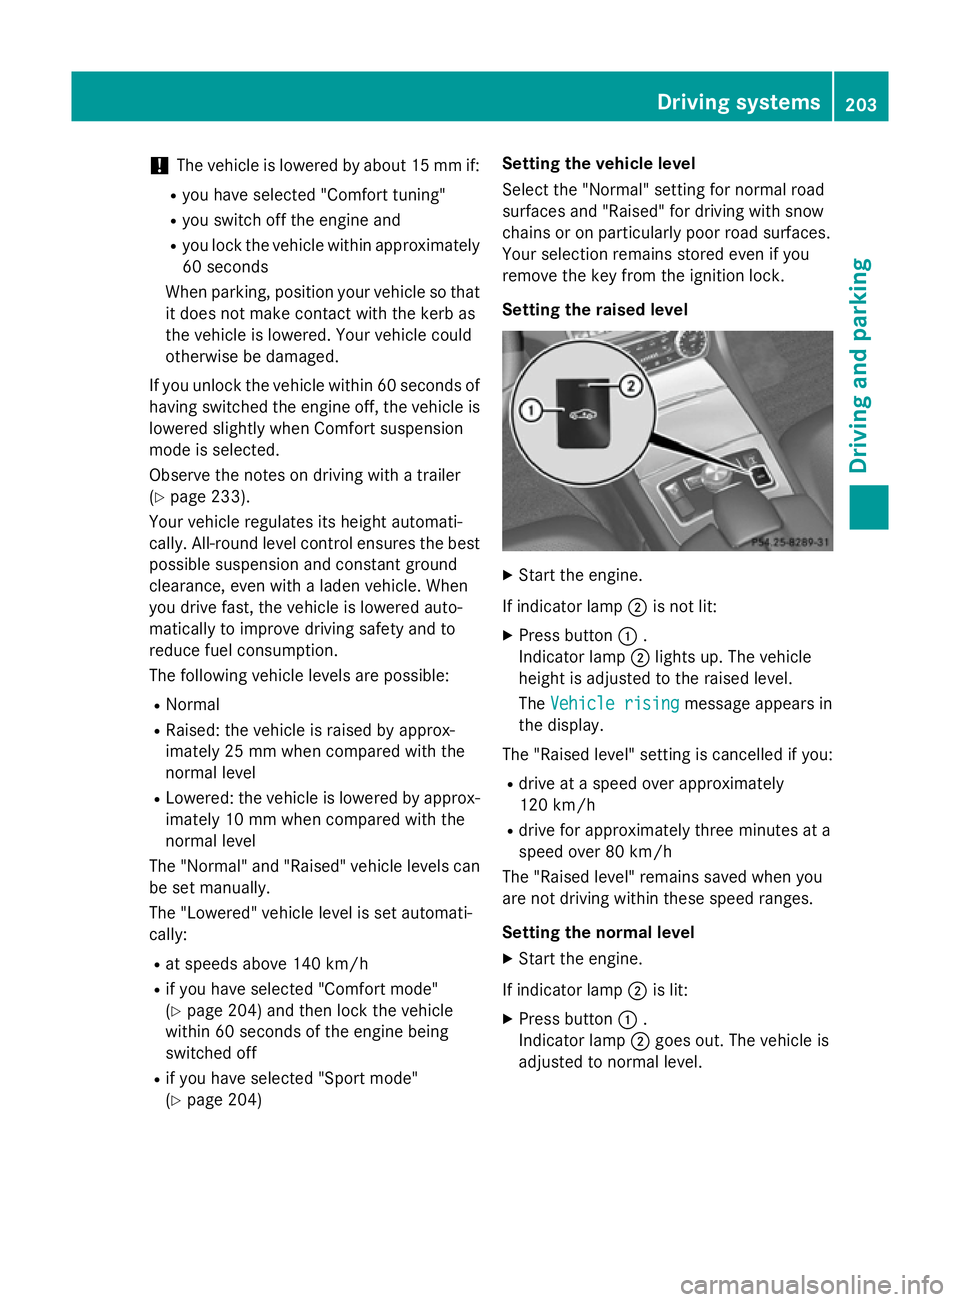
Setting the raised level X
Start the engine.
If indicator lamp ;is not lit:
X Press button :.
Indicator lamp ;lights up. The vehicle
height is adjusted to the raised level.
The Vehicle rising Vehicle rising message appears in
the display.
The "Raised level" setting is cancelled if you:
R drive at a speed over approximately
120 km/h
R drive for approximately three minutes at a
speed over 80 km/h
The "Raised level" remains saved when you
are not driving within these speed ranges.
Setting the normal level
X Start the engine.
If indicator lamp ;is lit:
X Press button :.
Indicator lamp ;goes out. The vehicle is
adjusted to normal level. Driving systems
203Driving and parking Z