2014 MERCEDES-BENZ CL-Class seat adjustment
[x] Cancel search: seat adjustmentPage 12 of 274

Adjusting the brightness
................245
Adjusting the color ........................245
Adjusting the contrast ...................245
AUX mode ...................................... 258
CD/DVD audio and MP3 mode ...... 246
Changing the batteries ..................242
Changing the picture format ..........245
Cordles sheadphones .................... 241
Multipl eusers ................................ 244
Operating with the headphones .....244
Picture settings .............................. 245
System settings ............................. 245
Using the mai nloudspeaker ..........244
Video DVD mode ........................... 251
Rear view camera
Displaying the image ........................ 55
Receiving vCards ............................... 155
Redialing (telephone) ........................135
Remote control Button lighting ............................... 240
Rear Seat Entertainment System ...239
Rese tfunction ..................................... 47
Resetting (factory settings) ...............47
Route Estimated time of arrival ..................94
Route (navigation)
Calling up the "Routes" menu ..........96
Displaying the distance to the
destination ....................................... 94
Recording ........................................ 95
Route overview ................................ 94
Selecting an alternative route ..........93
Setting route options (avoiding:
highways, toll roads, tunnels,
ferries) ............................................. 62
Setting the route type (short
route, fast route, dynamic route or
economic route) ............................... 62
Starting calculation ..........................69
Route demonstration ..........................95
Route guidance Canceling ......................................... 92
Continuing ....................................... 92
Destination reached ......................... 92
General notes .................................. 88
Lane recommendations ...................90
Off-road ........................................... 97
Traffi creports .................................. 99 S
Safety notes Audio CD/DVD and MP3 mode .....193
Using the telephone ....................... 126
Video DVD mode ........................... 228
SatRadio
Displaying information ...................193
Notes ............................................. 188
Registering .................................... 189
Selecting acategor y...................... 190
Switching to ................................... 189
Saving the crosshair position ..........109
Screen Selecting for remote operation ......239
SD memory card
Ejecting .......................................... 197
Inserting ........................................ 197
Searc h&Send...................................... 87
Seats Activ emulticontour seat ..................52
Adjusting the lumba rsupport
(COMAND )....................................... 53
Balance (sea theating) ..................... 54
Multicontour sea t............................ 52
Resetting settings ............................ 55
Seat functions (COMAND) ...............52
Selecting for adjustment
(COMAND) ....................................... 52
Selecting aprovince ........................... 64
Selecting astate .................................. 64
Selecting stations Radi o............................................. 186
Sending DTMF tones .........................136
Settings Menu overview ................................. 22
Picture (COMAND) .........................228
Sound settings ................................. 30
Setting the audio format
Rear Seat Entertainment System ...255
Setting the language
COMAND ......................................... 45
Rear Seat Entertainment System ...255
Setting the night design .....................42
Setting the text reader speed ............44
Setting the volume Telephone call s................................ 30
Video AUX ..................................... 23410
Index
Page 25 of 274

System menu overview
System Time SplitView Consumpti
on Seat Display off
Display settings 0010
Switches
the
automatic
time
settings
on/off
Operates
COMAND
functions
from the
passenger
side Calls up the
fuel
consumptio
nd
isplay Changes
the driver/
front-
passenger
seat
settings Switches
off the
display
Text reader speed Sets the
time zone
Voice-operated
control settings Switches to
summer
time
Rear view camera Manual
time setting
Language Sets the
time/date
format
Favorites button
Activates/
deactivates
Bluetooth
® Automatic volume
adjustment
Imports/exports
data
Resets COMAND
i
Delete your
personal data
using this
function, for
example before
selling your
vehicle. If equipped with the rear view camera:
when the function is activated and COMAND is
switched on, the image fro mthe rear view camera is automatically shown in the COMAND
display when reverse gear is engaged. COMAND operating system
23At a glance
Page 54 of 274

Calling up drive status regulator (ABC)
X Press 000B.
X In the system menu, slide 00360012the
COMAND controller up until the display/
selectio nwindow is selected.
X Slide 003400120035 the COMAND controller
repeatedly until the drivin gconditions
menu (ABC) appears.
The corresponding displays appear in the
COMAND display.
Details on the displays:
R for all vehicles except AMG vehicles, see
the separate vehicle Operator's Manual
R for AMG vehicles, see the separate vehicle
Operator's Manual. Exiting the display
X Slide 003400120035 the COMAND controller until
the desired display (clock or fuel
consumption) is shown. Seat functions
Overview
Using the 0011button next to the COMAND
controller or the Seat menu item in the
system menu, you can call up different setting
functions. The following settings depend on
the type of seat and the vehicle model series:
R seat cushion length
R backrest side bolsters
R lumbar
R balance
R seat cushion side bolsters
R dynamics
R massage
i You can also store and recall the current
seat function settings using the memory
button and the corresponding memory
position switch; see the separate vehicle
Operator's Manual. The massage function cannot be started or
stopped using the memory button. Selecting the seat
First select the seat which you wish to adjust.
This function is not available for all vehicles.
X
Press the 0011or000B button.
X Select Seat and press
0037to confirm.
X To switch to the lower line, for both options
slide 00120008the COMAND controller.
X Select Driver's Seat or
Passenger Seat by turning
003C0012003Dthe COMAND
controller and press 0037to confirm. Adjustment functions
Adjusting the seat cushion length The availability of this function depends on
the type of seat and the vehicle model series.
This function allows you to adjust the height
of the seat cushion.52
Seat functionsVehicle functions
Page 57 of 274

X
Turn 003C0012003D or slide 003600120008the COMAND
controller and press 0037to confirm.
The massage function runs for
approximately 15 to 25 minutes,
depending on the setting.
X To exit the menu: press the000Aback
button.
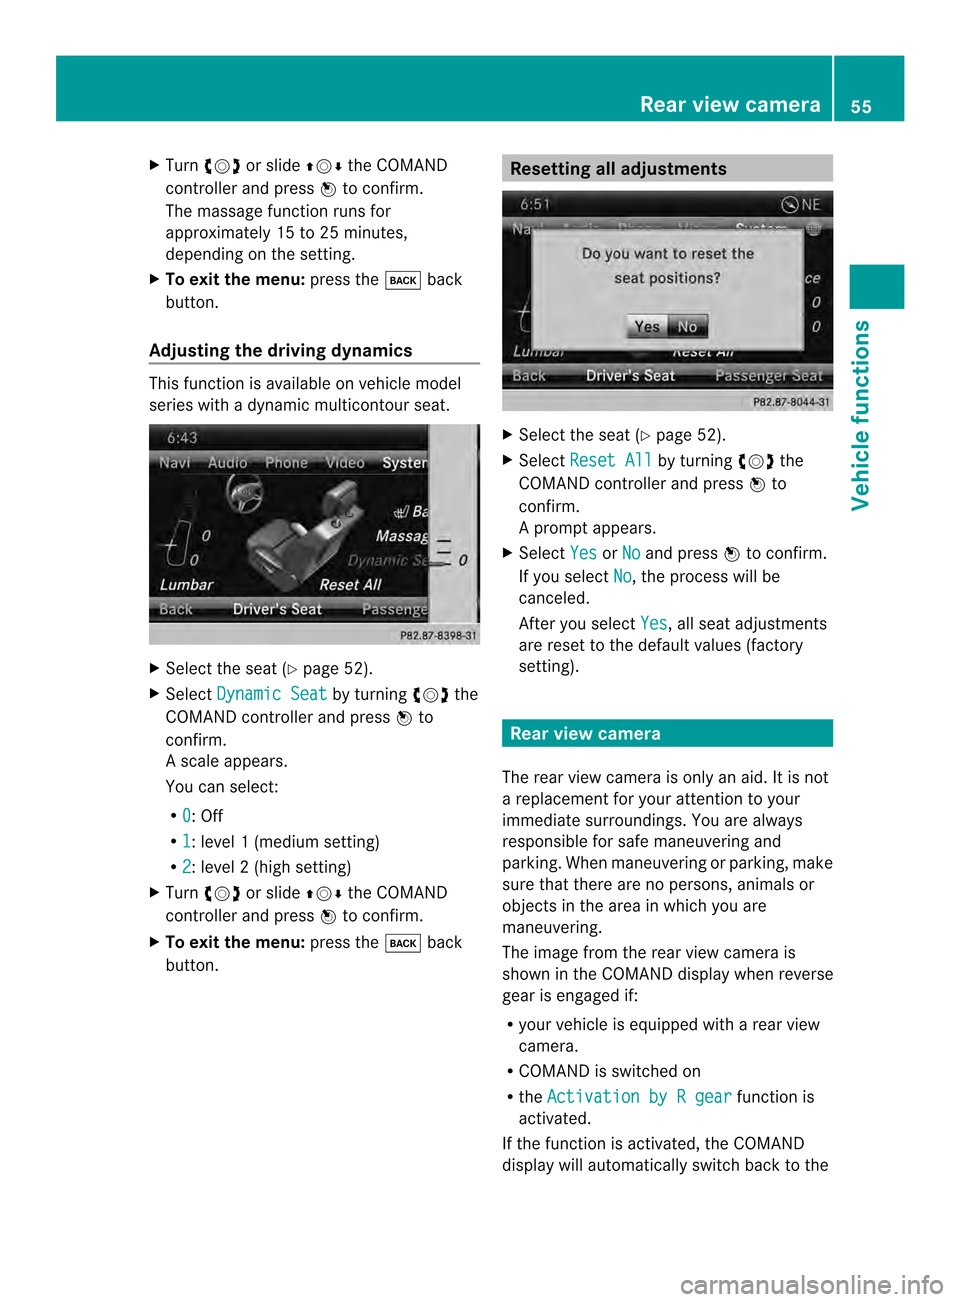
Adjusting the driving dynamics This function is available on vehicle model
series with a dynamic multicontour seat. X
Select the seat (Y page 52).
X Select Dynamic Seat by turning
003C0012003Dthe
COMAND controller and press 0037to
confirm.
As cale appears.
You can select:
R 0 : Off
R 1 :l
evel 1(mediu msetting)
R 2 :l
evel 2(high setting)
X Turn 003C0012003D or slide 003600120008the COMAND
controller and press 0037to confirm.
X To exit the menu: press the000Aback
button. Resetting all adjustments
X
Select the seat (Y page 52).
X Select Reset All by turning
003C0012003Dthe
COMAND controller and press 0037to
confirm.
Ap rompt appears.
X Select Yes or
No and press
0037to confirm.
If you select No , the process will be
canceled.
After you select Yes , all seat adjustments
are reset to the default values (factory
setting). Rear view camera
The rear view camera is only an aid.Iti s not
a replacement for your attention to your
immediate surroundings. You are always
responsible for safe maneuvering and
parking. When maneuvering or parking, make
sure that there are no persons, animals or
objects in the area in which you are
maneuvering.
The image from the rear view camera is
shown in the COMAND displayw hen reverse
gear is engaged if:
R your vehicle is equipped with a rear view
camera.
R COMAND is switched on
R the Activation by R gear function is
activated.
If the function is activated, the COMAND
display will automatically switch back to the Rear view camera
55Vehicle functions
Page 246 of 274

i
The operating duration of the headphones
with a set of batteries is up to 40 hours. Basic functions
Using headphones
You can use the cordless headphones
supplied and/or up to two sets of corded
headphones connected to the corresponding
jack of the rear-compartment screens
(Y page 239).
Information on:
R switching the cordless headphones on/off
R adjusting the volume of the headphones
R selecting a screen for the headphones
can be found under "Cordless headphones"
(Y page 241). Using the main loudspeakers
This function is available in conjunction with
COMAND.
You can use the vehicle loudspeakers to
listen to a disc inserted in the rear-
compartment drive. To do so, at least one of
the rear-compartmen tscreens mus tbe set to
disc mode.
X To set on COMAND: press the0006
function button to switch on an audio
mode.
X Select Audio by sliding
00360012the COMAND
controller and press 0037to confirm.
The Audio menu appears.
X Select Rear Audio by turning
003C0012003Dthe
COMAND controller and press 0037to
confirm.
i The headphones' volume setting does not
affect the main loudspeakers. Selecting sound settings
You can select the sound settings in the CD/
audio DVD/MP3, video DVD and AUX modes. X
Switch on an operating mode (e.g. audio
CD mode) (Y page 246).
X Select Treble or
Bass using
the 00090006000A buttons on the remote
control and press the 0016button to confirm.
An adjustment scale appears.
X Select a setting using the 00080009
buttons and press the 0016button to confirm. Multiple users
Simultaneous use of the rear-
compartment disc drive The two rear-compartment screens can be
operated almost entirely independently from
one another. However, there can be a conflict
in some menus if the two screens are used
simultaneously.
If the rear-compartment disc drive is being
used for both screens simultaneously,
selecting certain menus or settings on one of
the screens also affects the other screen.
The following functions affect both screens:
R changing playback options
R selecting a trac k(from a track lis torfolder)
R using the play, pause and stop functions
R fast forwarding/rewinding or scrolling
R calling up the DVD menu and navigating
within it
R setting the language, subtitles and camera
angle
R calling up interactive DVD content
The following functions affect only one
screen:
R audio and video functions as well as picture
settings
R switching between full screen and the
menu 244
Basic functionsRear Seat Entertainment System
Page 247 of 274

Switching between operating modes
When you exit an operating mode (e.g. audio
CD mode), the current setting is saved. If you
call up this operating mode again later, there
are two possibilities:
R the operating mode has been changed on
the other screen.
R the operating mode has not been changed.
In the first case, the operating mode appears
as it is on the other screen.
In the second case, the setting appears on the
screen as it was when you last exited the
operating mode. Picture settings
Overview You can select picture settings in video DVD
and AUX mode (Y page 258).
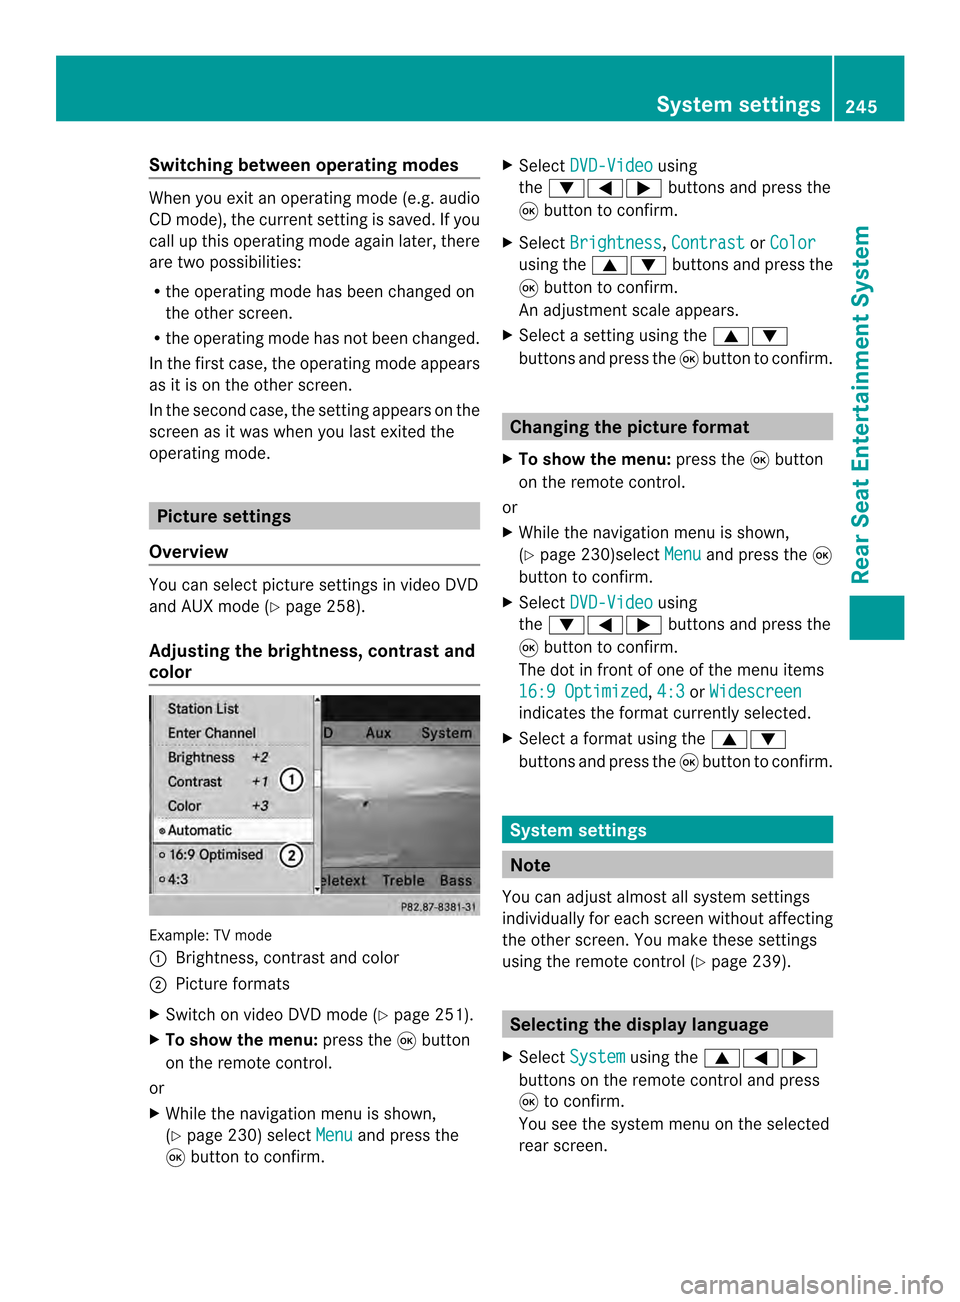
Adjusting the brightness, contrast and
color Example: TV mode
0001
Brightness, contrast and color
0002 Picture formats
X Switch on video DVD mode (Y page 251).
X To show the menu: press the0016button
on the remote control.
or
X While the navigation menu is shown,
(Y page 230) select Menu and press the
0016 button to confirm. X
Select DVD-Video using
the 00090006000A buttons and press the
0016 button to confirm.
X Select Brightness ,
Contrast or
Color using the
00080009 buttons and press the
0016 button to confirm.
An adjustment scale appears.
X Select a setting using the 00080009
buttons and press the 0016button to confirm. Changing the picture format
X To show the menu: press the0016button
on the remote control.
or
X While the navigation menu is shown,
(Y page 230)select Menu and press the
0016
button to confirm.
X Select DVD-Video using
the 00090006000A buttons and press the
0016 button to confirm.
The dot in front of one of the menu items
16:9 Optimized ,
4:3 or
Widescreen indicates the format currently selected.
X Select a format using the 00080009
buttons and press the 0016button to confirm. System settings
Note
You can adjust almost all system settings
individually for each screen without affecting
the other screen. You make these settings
using the remote control (Y page 239). Selecting the display language
X Select System using the
00080006000A
buttons on the remote control and press
0016 to confirm.
You see the system menu on the selected
rear screen. System settings
245Rear Seat Entertainment System Z
Page 261 of 274

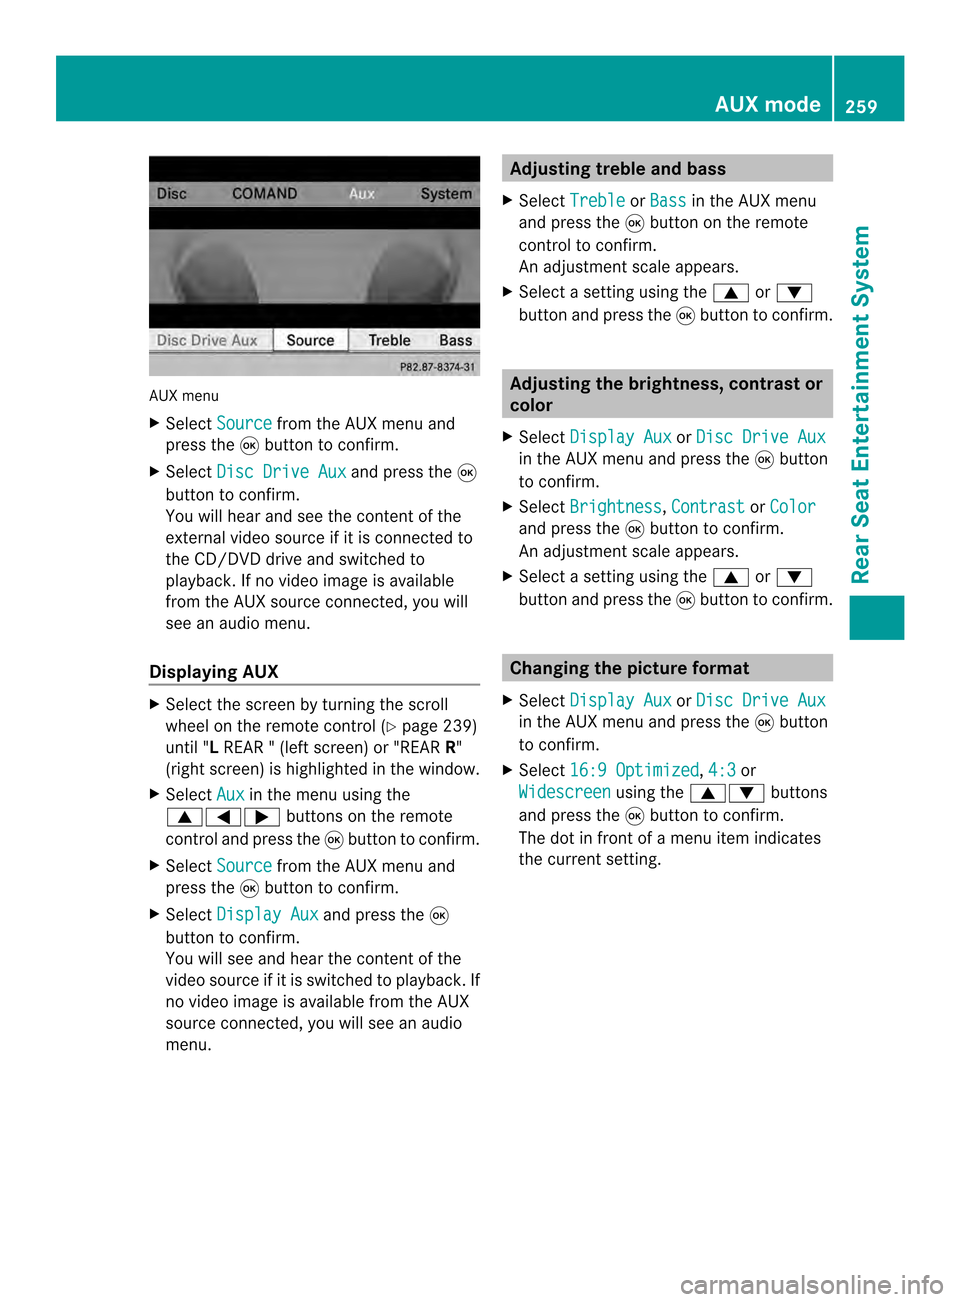
AUX menu
X
Select Source from the AUX menu and
press the 0016button to confirm.
X Select Disc Drive Aux and press the
0016
button to confirm.
You will hea rand see the content of the
external video source if it is connected to
the CD/DVD drive and switched to
playback. If no video image is available
from the AUX source connected, you will
see an audio menu.
Displaying AUX X
Select the screen by turning the scroll
wheel on the remote control ( Ypage 239)
until "L REAR " (left screen) or "REAR R"
(right screen) is highlighted in the window.
X Select Aux in the menu using the
00080006000A buttons on the remote
control and press the 0016button to confirm.
X Select Source from the AUX menu and
press the 0016button to confirm.
X Select Display Aux and press the
0016
button to confirm.
You will see and hea rthe content of the
video source if it is switched to playback. If
no video image is available from the AUX
source connected, you will see an audio
menu. Adjusting treble and bass
X Select Treble or
Bass in the AUX menu
and press the 0016button on the remote
control to confirm.
An adjustment scale appears.
X Select a setting using the 0008or0009
button and press the 0016button to confirm. Adjusting the brightness, contrast or
color
X Select Display Aux or
Disc Drive Aux in the AUX menu and press the
0016button
to confirm.
X Select Brightness ,
Contrast or
Color and press the
0016button to confirm.
An adjustment scale appears.
X Select a setting using the 0008or0009
button and press the 0016button to confirm. Changing the picture format
X Select Display Aux or
Disc Drive Aux in the AUX menu and press the
0016button
to confirm.
X Select 16:9 Optimized ,
4:3 or
Widescreen using the
00080009 buttons
and press the 0016button to confirm.
The dot in front of a menu item indicates
the current setting. AUX mode
259Rear Seat Entertainment System Z