2014 MERCEDES-BENZ CL-Class reset
[x] Cancel search: resetPage 151 of 274

X
Press 0037the COMAND controller while the
textm essage is being displayed.
X Select Save Number and press
0037to
confirm.
X Select New Entry and press
0037to confirm.
X Store the phone number (Y page 143)
Adding the sender of atext message to
an address book entry X
Press 0037the COMAND controller while the
text message is being displayed.
X Select Save Number and press
0037to
confirm.
X Select Add Phone No. and press
0037to
confirm.
X Proceed from the step "Select a number
category" ( Ypage 142).
Deleting atext message X
Select a text message in the text message
inbo xby turning 003C0012003Dthe COMAND
controller.
X Selec tthe list symbol to the right of the text
message by sliding 00120035the COMAND
controller and press 0037to confirm.
X Select Delete and press
0037to confirm.
Ad eletion prompt appears.
X Select Yes or
No and press
0037to confirm.
If you select Yes , the textm
essage is
deleted.
If you select No , the process will be
canceled.
i This delete function is not supported by
all mobile phones. The Delete failed.message appears.
Using the address book
Introduction
Always pay attention to traffic conditions. Before starting the journey, familiarize
yourself with the address book functions.
Only use COMAND when the road and traffic
conditions permit
.You could otherwise
become involved in an accident in which you
or others could be injured.
The address book organizes and stores
entries that are entered from different
sources (mobile phone, memory card, USB
device, COMAND phone book, navigation
system).
You can use these entries to make telephone
calls and for navigation.
i Number of contacts in the address
book: the address book can store a total of
4000 contacts.
1500 entries each are reserved in the
address book for:
R contacts from the mobile phone
R contacts that you create in COMAND or
import from other sources
The remaining 1,000 entries are assigned
by COMAND as necessary.
i Display of mobile phone contacts:
contacts downloaded from the mobile
phone remain in the address book even if
you disconnect the mobile phone from
COMAND. Contacts that have previously
been available can be displayed as soon as
the mobile phone is reconnected.
COMAND downloads the contacts again so
that any new contacts that have been
added to the mobile phone can be
displayed.
As soon as you connect a new mobile
phone to COMAND all the contacts from
the previous mobile phone are replaced by
those from the new phone's address book.
Address book entries remain stored when
the mobile phone is disconnected. For this
reason, delete your personal data using the
reset function before selling your vehicle,
for example (Y page 47). Using the address book
149Telephone Z
Page 155 of 274

X
Press 0037the COMAND controller to
confirm.
X Select Call and press
0037to confirm.
The phone makes the call. The display
switches to telephone mode. Storing the phone number as
aspeed
dial number
X Display details for an address boo kentry
(Y page 151).
X Select the phone numbe rdata field by
turning 003C0012003Dthe COMAND controller.
X Select the list symbol to the righ tofthe
data field by sliding 00120035the COMAND
controller and press 0037to confirm.
X Select Speed Dial and press
0037to
confirm.
You can now store the number in one of the
ten speed dial presets (Y page 145).Starting route guidance to an entry
Address book entry with navigable data This function is available as soon as you have
stored a destination in the destination
memory (Y
page 105).
X Search for an address book entry with the
0006 symbol and select it from the list
(Y page 150).
X Display details for an address book entry
(Y page 151).
X Select the address data field by turning
003C0012003D the COMAND controller and press
0037 to confirm.
Route guidance begins.
or
X Select the list symbol to the right of the
entry by sliding 00120035the COMAND
controller and press 0037to confirm.
X Select Navigate and press
0037to confirm.
Route guidance begins. Address book entry without navigable
data Route guidance can also be started for an
address book entry without the
0006symbol. If
the address data or designations do not
match the digital map, COMAND prompts you
to re-enter the address.
X Enter the destination address (Y page 63)
X Start route guidance.
The navigable address is automatically
added to the address book entry.
i This will provide you with an address book
entry that is suitable for navigation. The
next time the navigation is started, the
address data in the navigation, rather than
the postal address, is used if you have
changed address in the address entry
menu. Therefore, make sure that the
destination address is the desired
destination when starting navigation from
the address book. Voice tags
Introduction You can enter voice tags via the Voice Control
System (see the separate operating
instructions). Once you have assigned a voice
tag to an address book entry, you can call up
this entry with a voice command and dial a
phone number, for example. You can add one
voice tag per address book entry.
Adding or changing
avoice tag X
Search for an address book entry with or
without a voice tag ( ¦) (Ypage 150).
X Select the list symbol to the righ tofthe
entry by sliding 00120035the COMAND
controller and press 0037to confirm. Using the address book
153Telephone Z
Page 169 of 274

Importing
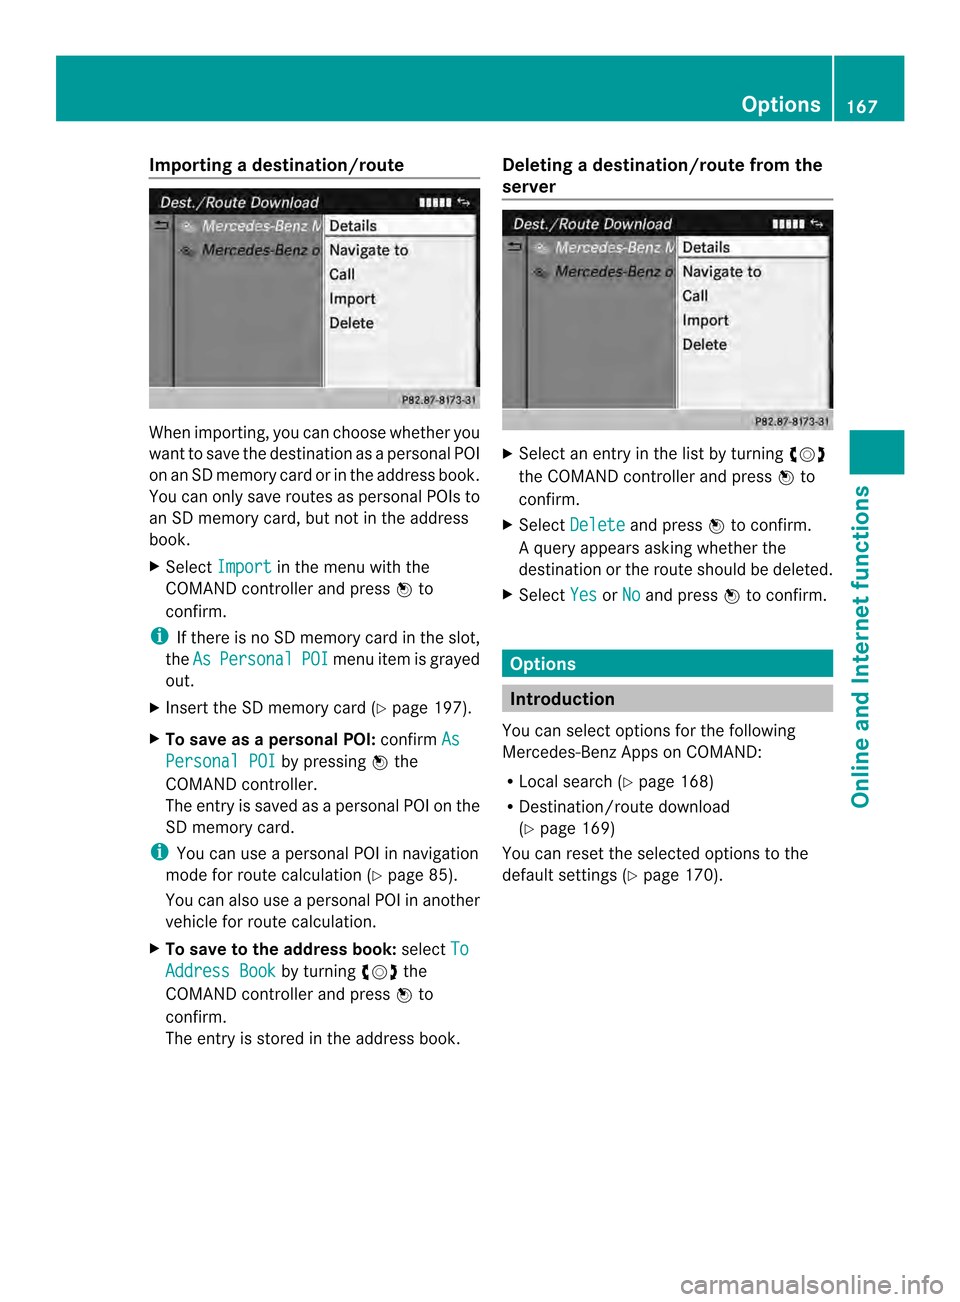
adestination/route When importing, you can choose whether you
want to save the destination as a personal POI
on an SD memory card or in the address book.
You can only save routes as personal POIs to
an SD memory card, but not in the address
book.
X Select Import in the menu with the
COMAND controller and press 0037to
confirm.
i If there is no SD memory card in the slot,
the As Personal POI menu ite
mis grayed
out.
X Insert the SD memory card (Y page 197).
X To save as apersonal POI: confirmAs Personal POI by pressing
0037the
COMAND controller.
The entry is saved as apersonal POI on the
SD memory card.
i You can use a personal POI in navigation
mode for route calculation (Y page 85).
You can also use a personal POI in another
vehicle for route calculation.
X To save to the address book: selectTo Address Book by turning
003C0012003Dthe
COMAND controller and press 0037to
confirm.
The entry is stored in the address book. Deleting
adestination/route from the
server X
Select an entry in the list by turning 003C0012003D
the COMAND controller and press 0037to
confirm.
X Select Delete and press
0037to confirm.
Aq uery appears asking whether the
destination or the route should be deleted.
X Select Yes or
No and press
0037to confirm. Options
Introduction
You can select options for the following
Mercedes-Ben zApps on COMAND:
R Local search (Y page 168)
R Destination/route download
(Y page 169)
You can reset the selected options to the
default settings (Y page 170). Options
167Online and Internet functions
Page 172 of 274

i
Routes and destinations are
automatically deleted on the server after
seven days. Conditions of use
You can review the terms of use for the
COMAND Mercedes-Ben zApps and
Google™.
X Select Terms and Conditions in the
options menu by sliding 003600120008the COMAND
controller and press 0037to confirm
(Y page 168).
X Select Mercedes-Benz Apps or
Google and press
0037to confirm.
The respective start page appears.
X Select Continue to view further content.
Resetting adjustments
With the reset function ,all Mercedes-Benz
Apps settings are reset to the factory
settings.
X Selec tthe 000C symbol in the main function
bar by turning 003C0012003Dthe COMAND
controller and press 0037to confirm.
The carousel view appears.
X Bring the Mercedes-Benz Apps panel to
the front by turning 003C0012003Dthe COMAND
controller and pressing 0037to confirm.
X Select Options by sliding
00120008and turning
003C0012003D the COMAND controller and press
0037 to confirm.
X Select Reset and press
0037to confirm.
Ap rompt appears asking whethe ryou
really wish to reset.
X Select Yes or
No and press
0037to confirm. Other services
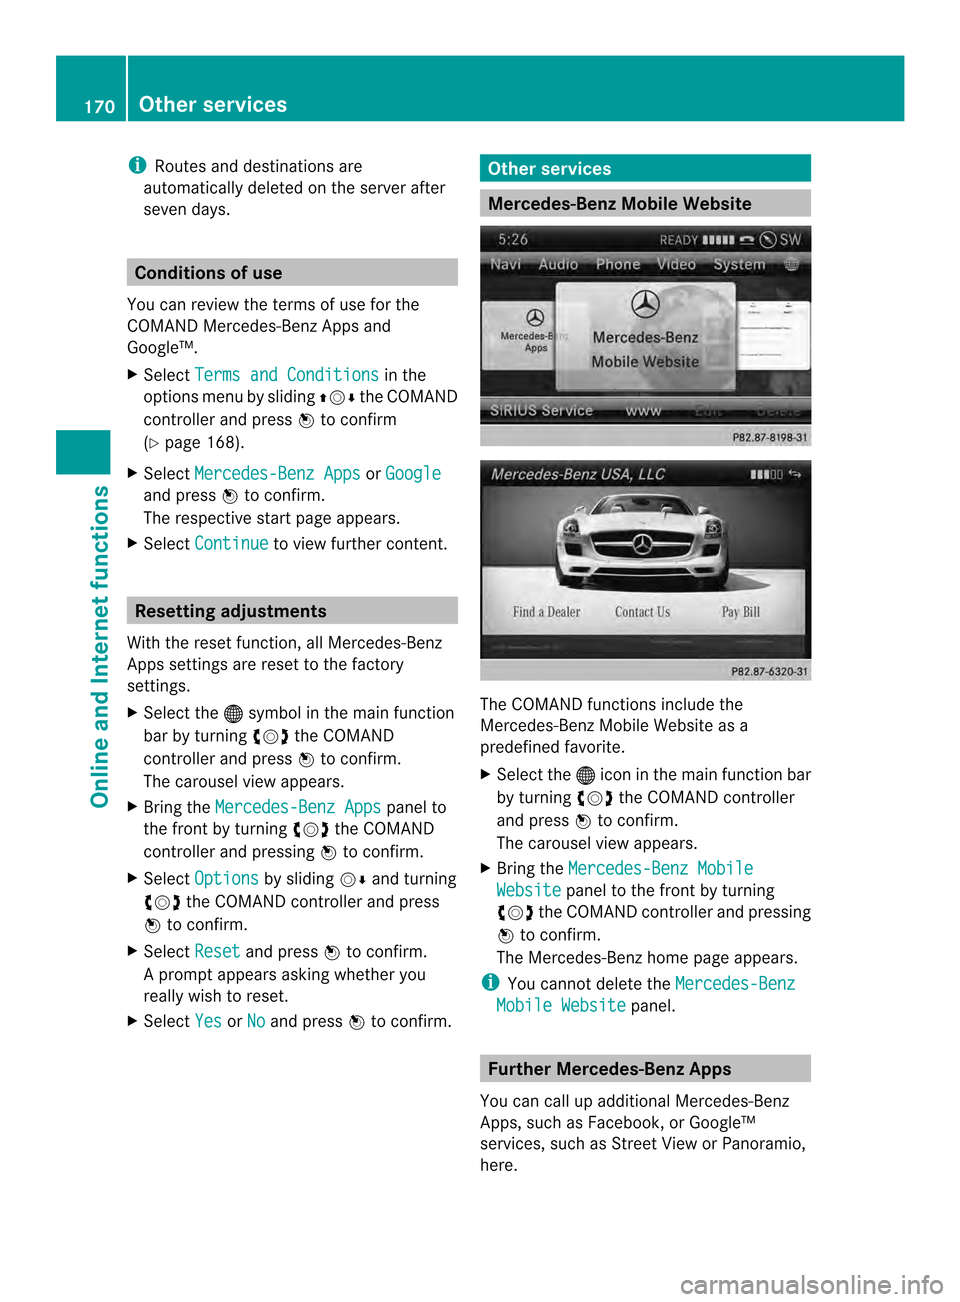
Mercedes-Benz Mobile Website
The COMAND functions include the
Mercedes-Benz Mobile Website as a
predefined favorite.
X
Select the 000Cicon in the main function bar
by turning 003C0012003Dthe COMAND controller
and press 0037to confirm.
The carousel view appears.
X Bring the Mercedes-Benz Mobile Website panel to the front by turning
003C0012003D the COMAND controller and pressing
0037 to confirm.
The Mercedes-Benz home page appears.
i You cannot delete the Mercedes-Benz Mobile Website panel.
Further Mercedes-Benz Apps
You can call up additional Mercedes-Benz
Apps, such as Facebook, or Google™
services, such as Street View or Panoramio,
here. 170
Other servicesOnline and Internet functions
Page 183 of 274

X
Select the setting by turning 003C0012003Dor sliding
003600120008 the COMAND controller and press
0037 to confirm.
The 000Fdot in front of an entry indicates
which setting is active.
or
X Select Delete All Data On Exit and
press 0037to confirm.
Switch the setting on 0010or off 0003. Option Function
All Deletes all private
data. Cache Deletes data in the
cache.
Cookies Deletes cookies that
are created by
websites which you
have called up.
URL History Deletes all websites
visited (path).
0010Delete All
Data On Exit If this function is
activated
0010, all
private data is
deleted when you
exit the Internet
browser. i
If you reset COMAND to the factory
settings (reset function), these settings are
deleted (Y page 47). Calling up the carousel view and
closing the Interne
tbrowser
X To call up the carouse lview: press the
000A back button for longer than two
seconds.
X To close the Internet browser: press the
000A back button again for longe rthan two
seconds. Internet
181Online and Internet functions
Page 186 of 274

Your COMAND equipment
These operating instructions describe all the
standard and optional equipmen tfor your
COMAND system, as available at the time of
going to print. Country-specific differences
are possible. Please note that your COMAND
system may not be equipped with all the
features described. Radio mode
Important notes
Portable electronic devices in the vehicle may
seriously impair radio reception. Switching to radio mode
Switching modes using the function
button X
Press the 0006function button.
The radio display appears. You will hear the
last station played on the last waveband.
i Repeatedly pressing this function button
switches through the wavebands in this
order: FM, AM, WB. You then call up
satellite radio mode. Pressing the button
again takes you back to FM radio mode. Switching modes via the audio menu Example: audio menu
0001
Current audio operating mode
0002 Main function bar
0014 Audio menu
X Select Audio in the main function bar by
sliding 00360012and turning 003C0012003Dthe COMAND
controller and press 0037to confirm.
If radio mode was the last mode selected,
it will now be active.
If another audio mode is switched on, you
can now switch to radio mode in the audio
menu.
X Select Audio by sliding
00360012the COMAND
controller and press 0037to confirm.
The audio menu appears. Example: HD Radio display
0001
Display window with station settings
0002 Preset position of the selected station
0014 Name of the selected station (symbol for
HD Radio™ and number of subprogram)
0013 Frequency of the selected station 184
Radio modeAudio
Page 187 of 274

0011
Sound settings
0012 FM radio, AM radio or WB radio
0005 Progra minformation
0006 Preset functions
0007 Radio functions
X Select FM/AM Radio by turning
003C0012003Dthe
COMAND controller and press 0037to
confirm. Switching HD Radio on/off
You can switch off HD Radio™ in the radio
submenu:
X
Select Radio in the radio display by sliding
00120008 the COMAND controller and press 0037
to confirm.
X Select HD Radio and press
0037to confirm.
HD Radio™ on: 0010
HD Radio™ off: 0003
i Notes on HD Radio™:
HD Radio™ is a digital radio system from
the U.S.A. Whe nHDRadio is off, you will
hear only analog programmin gonall
frequencies.
HD Radio™ provides:
R digital transmission on the same
wavebands as analog AM/FM. The
analog AM/FM stations remain in the
same position when selecting astation.
R broadcasting of several progra mstreams
over a single FM frequency (e.g. HD1,
HD2, etc.). R
clear, interference free reception.
R FM: CD quality sound.
AM: analog FM statio nsound quality.
R the display of text-based information
(e.g. artist, track name) in the display
For further information on HD Radio™, visit
http://www.hdradio.com. Switching wavebands
You can switch the radio between the FM, AM
and WB wavebands. 0001
Waveband submenu
X Option 1: press the0006function button
until the desired waveband is set.
i Repeatedly pressing this function button
switches through the wavebands in this
order: FM, AM, WB. You then call up
satellite radio mode. Pressing the button
again takes you back to FM radio mode.
X Option 2: selectFM ,
AM or
WB in the radio
display by sliding 00120008and turning 003C0012003Dthe
COMAND controller and press 0037to
confirm.
X The waveband submenu is opened.
X Select a waveband and press 0037to confirm.
You will hear the last station played on the
selected waveband. The 0027dot shows the
currently selected waveband. Radio mode
185Audio
Page 188 of 274

Selecting
astation
Selecting stations vi athe station
searc hfunction X
Press the 0001or0002 button.
or
X Turn 003C0012003D or slide 003400120035the COMAND
controlle rwhile the display/selection
window in the radio display is active.
Station search scans up or down and stops
at the next station found.
Selecting stations via the station
presets X
Quick setting: press a number key, e.g.
002A.
X Directly in the station presets: select
Presets by sliding
00120008and turning 003C0012003D
the COMAND controller and press 0037to
confirm.
or
X When the display/selection window is
active, press 0037the COMAND controller.
The station preset memory appears. The
0027 dot indicates under which preset the
currently selected station is stored.
X Select a station by turning 003C0012003Dand
pressing 0037to confirm or press a number
key, e.g. 002A.
Selecting stations by entering the
frequency manually X
Option 1: press the000Dbutton.
X Option 2: selectRadio in the radio display
by sliding 00120008and turning 003C0012003Dthe
COMAND controller and press 0037to
confirm.
X Select Enter Frequency and press
0037to
confirm.
Irrespective of the option chosen, an input
menu will appear. X
Enter a frequency using the number keys.
COMAND sets the frequency entered. Waveband Frequency
AM (MF) 530 - 1700 kHz
FM (VHF) 87.7 - 107.9 MHz
WB (Weather Band) Weather report
channels
i
You can only enter currently permitted
numbers.
i If you enter a frequency in the FM or AM
wavebands which is outside the frequency
range, COMAND sets the next lower
frequency. Storing
astation
Storing stations manually There are ten presets available for the FM and
AM wavebands.
Example: station memory
X
Quick save: press and hold a numbe rkey,
e.g. 002A, until you hear a tone.
The station is stored. 186
Radio modeAudio