2014 MERCEDES-BENZ C-Class display
[x] Cancel search: displayPage 156 of 270

Switching importing of contacts on/off
You can choose whether contacts are auto-
matically downloaded when a mobile phone is
connected to COMAND, or whether the auto-
matic download is suppressed.
Connecting a mobile phone (Y page 126)
X Select Tel
Tel in the telephone basic menu by
sliding 00520064and turning 00790052007Athe COMAND
controller and press 0098to confirm.
A menu appears.
X Select Import Contacts from
You can allow 0073or suppress 0053the auto-
matic download.
Proceed as follows if you do not want to save sensitive contacts in the address book:
X Connect the mobile phone to COMAND.
Contacts are automatically downloaded to
the address book.
X Delete sensitive contacts in the address
book.
X Switch off the Import Contacts from
Import Contacts from
The next time you connect your mobile
phone to COMAND, no more contacts will
be downloaded, not even newly-added con-
tacts.
Switching the display of contact details (privacy) on/off Using the
Hide Data Hide Data setting, you can decide
whether the phone and address book data are
to be visible on the screen. You can therefore, for example, prevent a passenger from seeing
the name of a caller.
Activating the function has the following
effects:
R The mobile phone's phone book and
address book data are hidden. They can
therefore not be used to make calls, send
text messages or to navigate.
You still have access to the phone book and
address book stored on COMAND.
R During incoming calls, the caller's name is
not displayed if there is an address book
entry for the number that is calling.
R During outgoing calls where the number is
entered manually, the recipient's name is
not displayed, even if there is an address
book entry for the entered number.
R The call list is hidden.
R Redialing is not possible.
R The received text messages list is hidden.
There is still a notification for incoming text messages. For this to be the case, the con-
nected mobile phone must support the
MAP profile. However, it is not possible
that, for example, the passenger could see the phone number or have access to the
message. Connecting a mobile phone (Y
page 126)
X Select Tel Telin the telephone basic menu by
sliding 00520064and turning 00790052007Athe COMAND
controller and press 0098to confirm.
A menu appears. 154
Using the address bookTelephone
Page 164 of 270
X
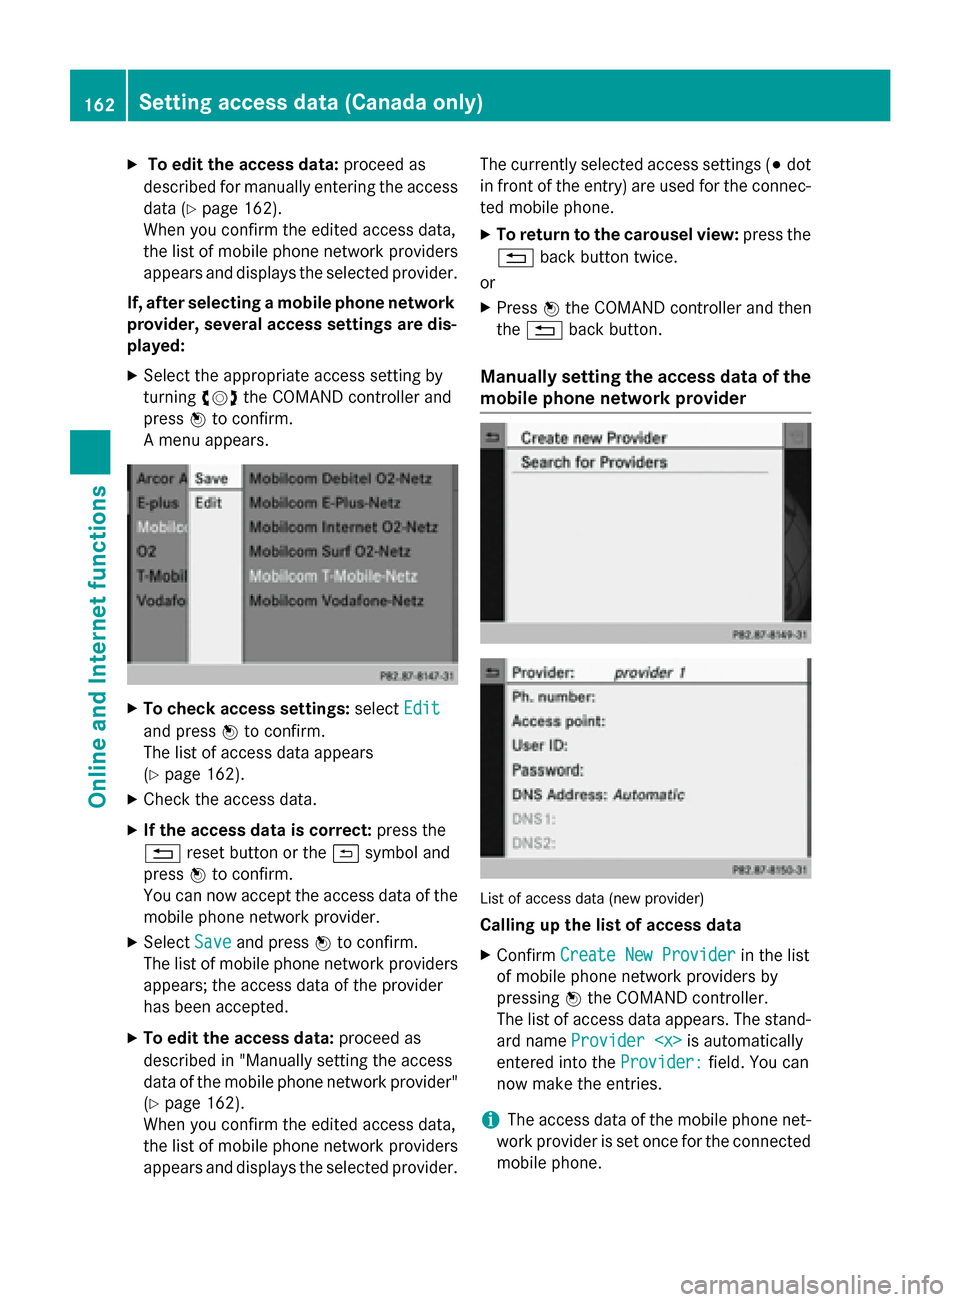
To edit the access data: proceed as
described for manually entering the access data (Y page 162).
When you confirm the edited access data,
the list of mobile phone network providers
appears and displays the selected provider.
If, after selecting a mobile phone network provider, several access settings are dis-
played:
X Select the appropriate access setting by
turning 00790052007Athe COMAND controller and
press 0098to confirm.
A menu appears. X
To check access settings: selectEdit Edit
and press 0098to confirm.
The list of access data appears
(Y page 162).
X Check the access data.
X If the access data is correct: press the
0038 reset button or the 0039symbol and
press 0098to confirm.
You can now accept the access data of the
mobile phone network provider.
X Select Save
Save and press 0098to confirm.
The list of mobile phone network providers
appears; the access data of the provider
has been accepted.
X To edit the access data: proceed as
described in "Manually setting the access
data of the mobile phone network provider" (Y page 162).
When you confirm the edited access data,
the list of mobile phone network providers
appears and displays the selected provider. The currently selected access settings (003B
dot
in front of the entry) are used for the connec- ted mobile phone.
X To return to the carousel view: press the
0038 back button twice.
or
X Press 0098the COMAND controller and then
the 0038 back button.
Manually setting the access data of the
mobile phone network provider List of access data (new provider)
Calling up the list of access data
X Confirm Create New Provider Create New Provider in the list
of mobile phone network providers by
pressing 0098the COMAND controller.
The list of access data appears. The stand-
ard name Provider
entered into the Provider:
Provider:field. You can
now make the entries.
i The access data of the mobile phone net-
work provider is set once for the connected
mobile phone. 162
Setting access data (Canada only)Online and Internet functions
Page 165 of 270
Explanation of the access data
Input field Meaning
Provider:
Provider: Name of the provider to
be displayed in the list of
mobile phone network
providers. The name can
be freely selected.
The standard entry is
Provider
Tel.
Number:
Number: Access number for estab-
lishing the connection
i The access number
depends on the mobile
phone used. For GSM/
UMTS mobile phones,
*99***1# *99***1# is used as a
standard. Access
Access
Point: Point: APN network access point
( Access PointName)
You can obtain this infor-
mation from your mobile
phone network provider.
i Entry is not necessary
for all mobile phone
network providers and
mobile phones. User ID: User ID: The user identification
can be obtained from your
mobile phone network
provider.
i Entry is not necessary
for all mobile phone
network providers. Password: Password: The password can be
obtained from your
mobile phone network
provider.
i Entry is not necessary
for all mobile phone
network providers. Input field Meaning
DNS DNS
Address:
Address: The DNS addresses
(Domain
NameService)
can be negotiated auto-
matically or entered man-
ually. The required infor-
mation can be obtained
from your mobile phone
network provider.
i Most mobile phone
network providers sup-
port the Automatic Automatic
function. If you selected
the Manual
Manual option, you
are usually required to
enter a DNS address. DNS1: DNS1:
DNS2: DNS2: Fields for entering the
DNS server addresses
manually. The address
can be obtained from your
mobile phone network
provider. Entering access data
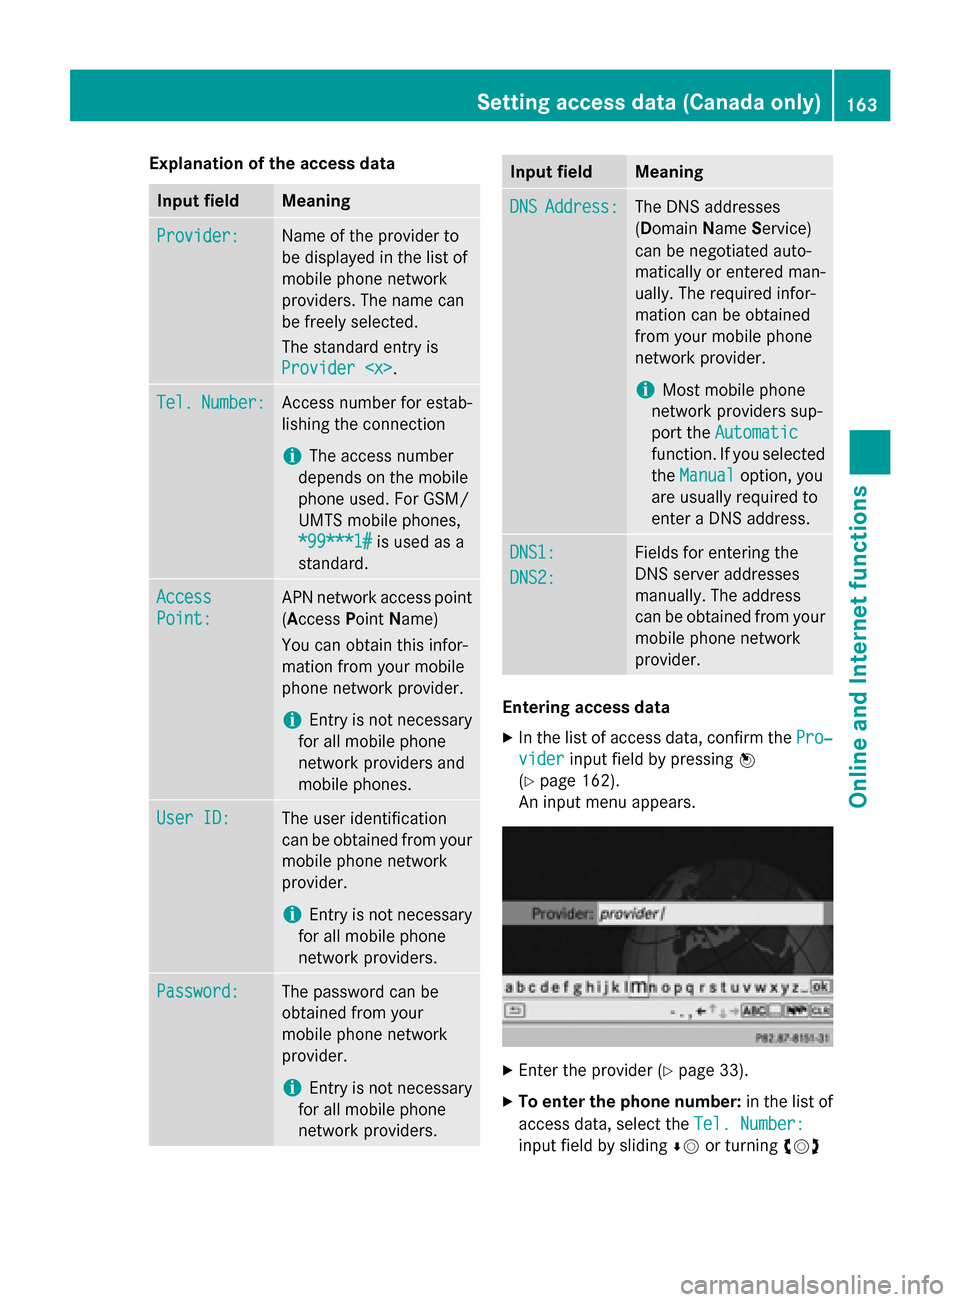
X In the list of access data, confirm the Pro‐ Pro‐
vider
vider input field by pressing 0098
(Y page 162).
An input menu appears. X
Enter the provider (Y page 33).
X To enter the phone number: in the list of
access data, select the Tel. Number:
Tel. Number:
input field by sliding 00640052or turning 00790052007A Setting access data (Canada only)
163Online and Internet functions Z
Page 167 of 270
Managing access data of the mobile
phone network provider
Overview The access data of the mobile phone network
provider can be:
R edited
R copied, then edited and accepted for a new
provider name
R deleted
i Changes that you make to the access
data of a mobile phone network provider
apply to all mobile phones that use this
access data.
i When the Internet connection is active,
you cannot edit or delete the access data of
the currently set mobile phone network
provider.
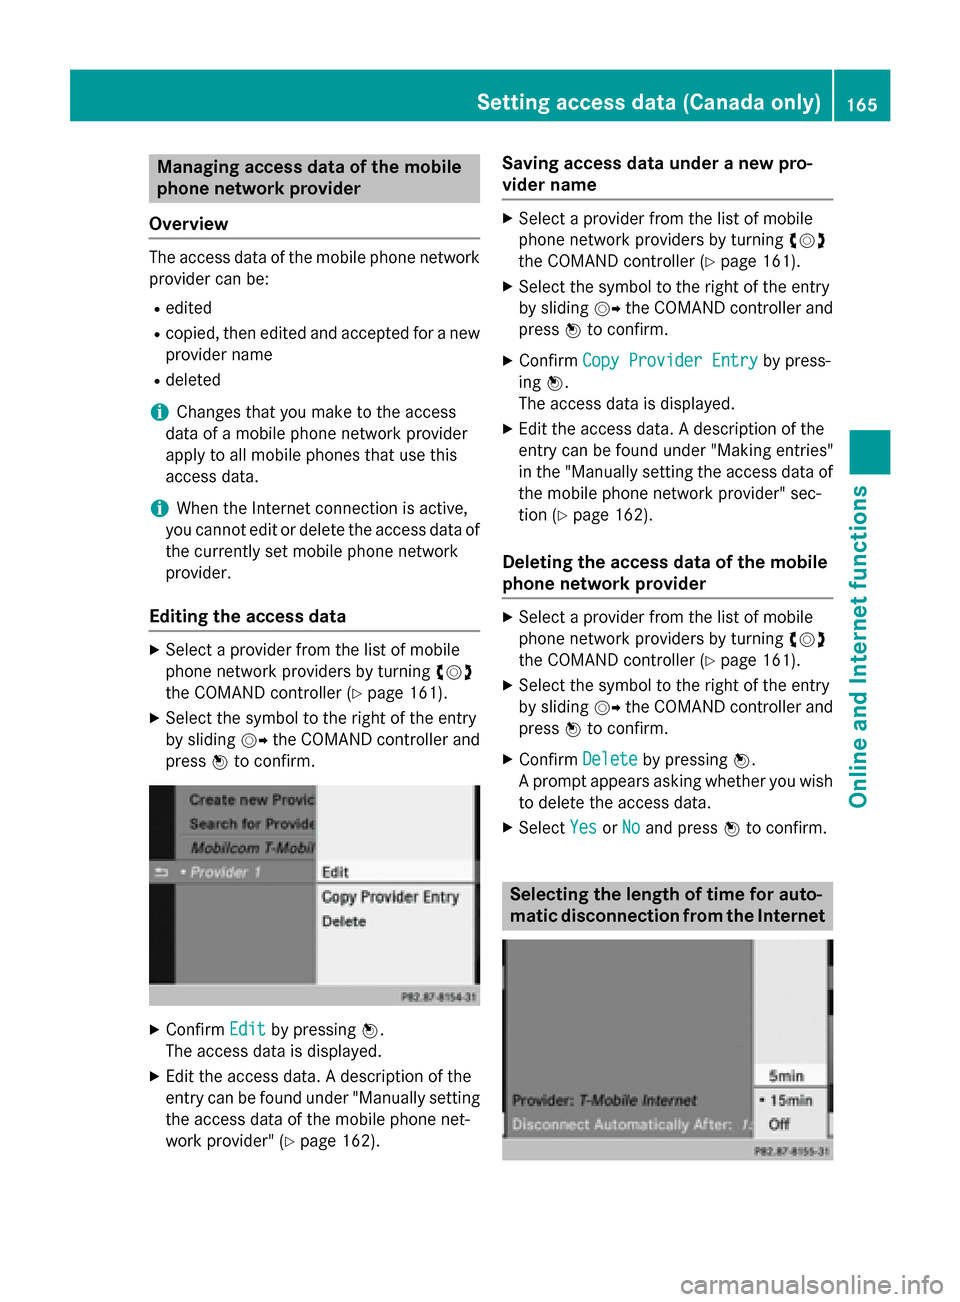
Editing the access data X
Select a provider from the list of mobile
phone network providers by turning 00790052007A
the COMAND controller (Y page 161).
X Select the symbol to the right of the entry
by sliding 00520096the COMAND controller and
press 0098to confirm. X
Confirm Edit Editby pressing 0098.
The access data is displayed.
X Edit the access data. A description of the
entry can be found under "Manually setting the access data of the mobile phone net-
work provider" (Y page 162). Saving access data under a new pro-
vider name X
Select a provider from the list of mobile
phone network providers by turning 00790052007A
the COMAND controller (Y page 161).
X Select the symbol to the right of the entry
by sliding 00520096the COMAND controller and
press 0098to confirm.
X Confirm Copy Provider Entry Copy Provider Entry by press-
ing 0098.
The access data is displayed.
X Edit the access data. A description of the
entry can be found under "Making entries"
in the "Manually setting the access data of
the mobile phone network provider" sec-
tion (Y page 162).
Deleting the access data of the mobile
phone network provider X
Select a provider from the list of mobile
phone network providers by turning 00790052007A
the COMAND controller (Y page 161).
X Select the symbol to the right of the entry
by sliding 00520096the COMAND controller and
press 0098to confirm.
X Confirm Delete Deleteby pressing 0098.
A prompt appears asking whether you wish to delete the access data.
X Select Yes
YesorNo
No and press 0098to confirm. Selecting the length of time for auto-
matic disconnection from the InternetSetting access data (Canada only)
165Online and Internet functions Z
Page 170 of 270
X
After entering the search term, select 0054
by turning 00790052007Athe COMAND controller
and press 0098to confirm.
A menu appears. Here, you can select
where the destination search should begin.
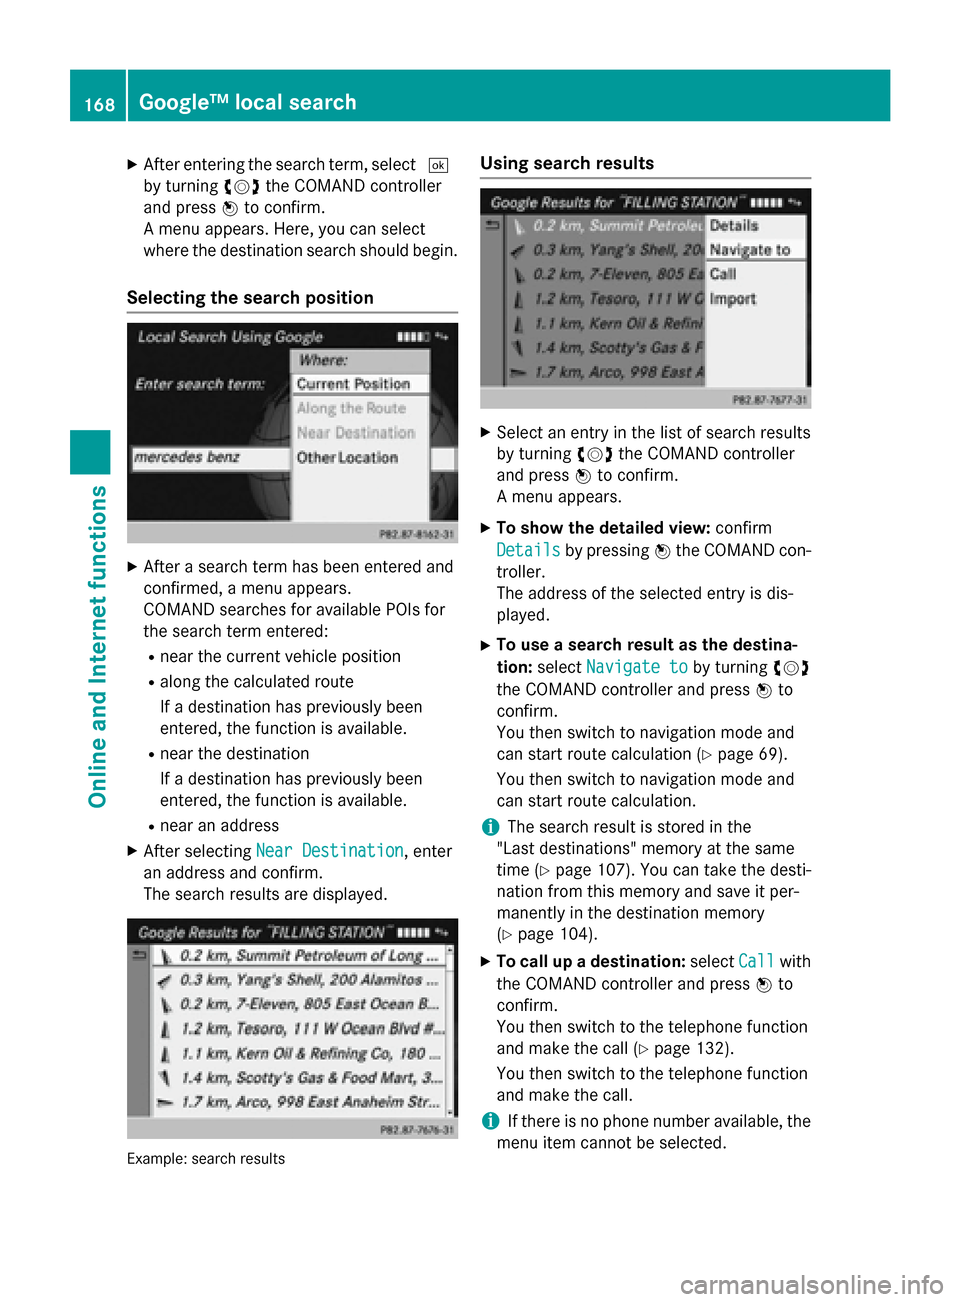
Selecting the search position X
After a search term has been entered and
confirmed, a menu appears.
COMAND searches for available POIs for
the search term entered:
R near the current vehicle position
R along the calculated route
If a destination has previously been
entered, the function is available.
R near the destination
If a destination has previously been
entered, the function is available.
R near an address
X After selecting Near Destination
Near Destination, enter
an address and confirm.
The search results are displayed. Example: search results Using search results
X
Select an entry in the list of search results
by turning 00790052007Athe COMAND controller
and press 0098to confirm.
A menu appears.
X To show the detailed view: confirm
Details Details by pressing 0098the COMAND con-
troller.
The address of the selected entry is dis-
played.
X To use a search result as the destina-
tion: select Navigate to Navigate to by turning00790052007A
the COMAND controller and press 0098to
confirm.
You then switch to navigation mode and
can start route calculation (Y page 69).
You then switch to navigation mode and
can start route calculation.
i The search result is stored in the
"Last destinations" memory at the same
time (Y page 107). You can take the desti-
nation from this memory and save it per-
manently in the destination memory
(Y page 104).
X To call up a destination: selectCall Callwith
the COMAND controller and press 0098to
confirm.
You then switch to the telephone function
and make the call (Y page 132).
You then switch to the telephone function
and make the call.
i If there is no phone number available, the
menu item cannot be selected. 168
Google™ local searchOnline and Internet functions
Page 171 of 270
X
To import a destination: selectImport
Import
with the COMAND controller and press 0098
to confirm.
You can choose whether you want to save
the POI as a personal POI on the SD mem-
ory card or in the address book.
i If there is no SD memory card in the slot,
the Save As Personal POI
Save As Personal POI menu item
cannot be selected.
X Insert the SD memory card (Y page 196).
X To save as a personal POI: confirmSave Save
As Personal POI
As Personal POI by pressing0098the
COMAND controller.
The entry is saved as a personal POI on the
SD memory card.
i You can use a personal POI in navigation
mode for route calculation (Y page 85).
If the personal POI is saved on the SD mem-
ory, you can also use it for route calculation
in another vehicle.
X To save to the address book: select
Save to Address Book
Save to Address Book by turning00790052007A
the COMAND controller and press 0098to
confirm.
The entry is stored in the address book. Popular searches
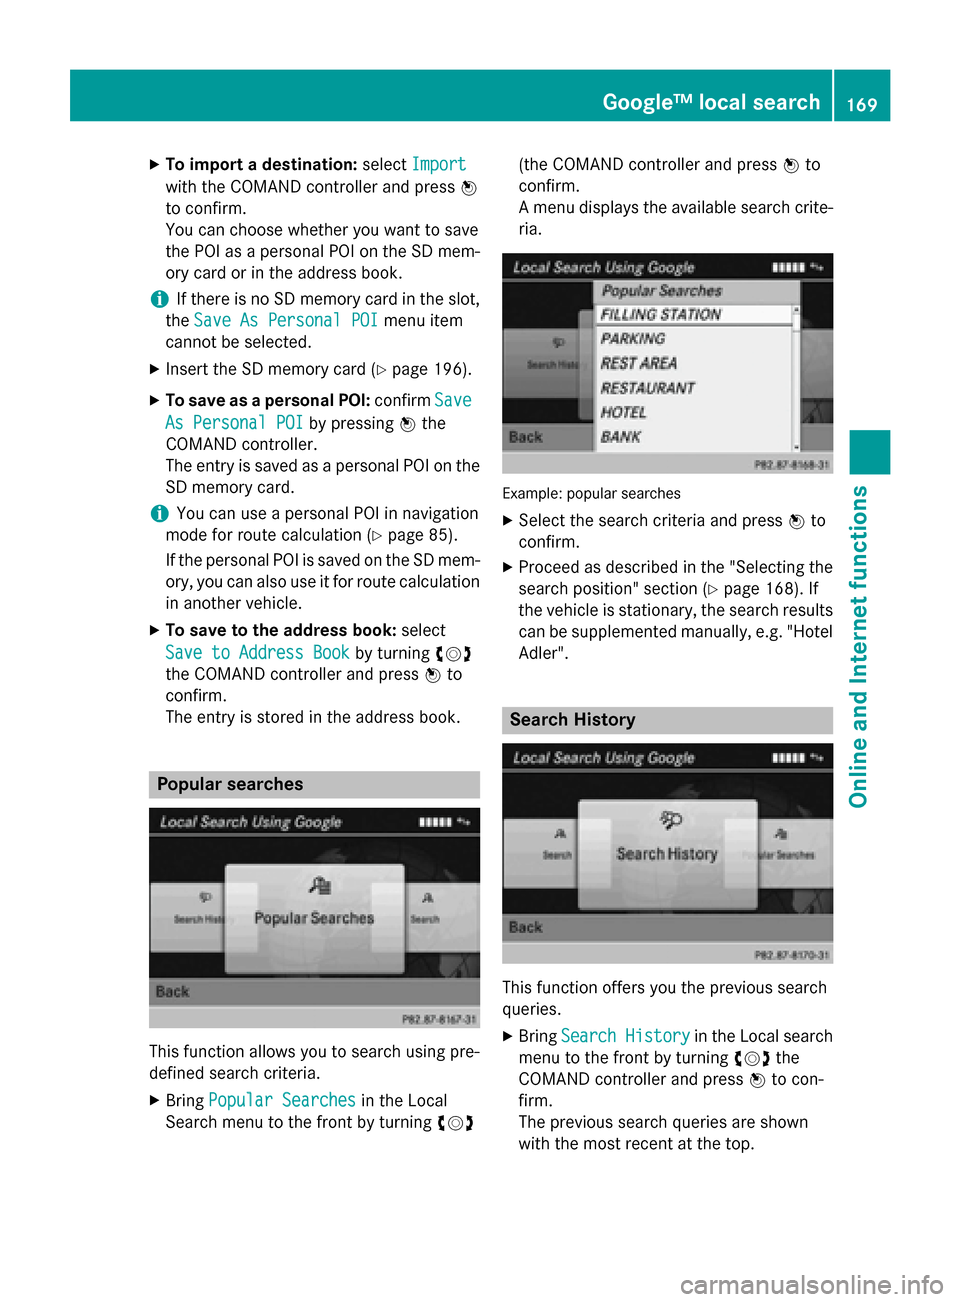
This function allows you to search using pre-
defined search criteria.
X Bring Popular Searches
Popular Searches in the Local
Search menu to the front by turning 00790052007A(the COMAND controller and press
0098to
confirm.
A menu displays the available search crite-
ria. Example: popular searches
X Select the search criteria and press 0098to
confirm.
X Proceed as described in the "Selecting the
search position" section (Y page 168). If
the vehicle is stationary, the search results
can be supplemented manually, e.g. "Hotel
Adler". Search History
This function offers you the previous search
queries.
X Bring Search History
Search History in the Local search
menu to the front by turning 00790052007Athe
COMAND controller and press 0098to con-
firm.
The previous search queries are shown
with the most recent at the top. Google™ local search
169Online and Internet functions Z
Page 173 of 270
X
Confirm the Dest./Route Download
Dest./Route Download
panel by pressing 0098.
Available routes and destinations are
shown in the list.
You can save up to 20 routes and 50 desti-
nations for your vehicle on the server and dis- play these in the list. If you send further routesor destinations to the server, the existing
entries are deleted from the list.
i The routes/destinations sent from Goo-
gle™ maps to the server are automatically
deleted from there after seven days. Using destinations
Calling up the menu X
Select an entry in the list by turning 00790052007A
the COMAND controller and press 0098to
confirm.
A menu appears.
Displaying details X
Confirm Details Details in the menu by pressing
0098 the COMAND controller.
The route or destination is displayed.
X To call up a POI: confirm the entry by
pressing 0098.
i You can use the function if:
R a mobile phone is connected
(Y page 126)
R the destination address contains a tele-
phone number
Using as the destination X
Select Navigate
Navigate to toin the menu by turning
00790052007A the COMAND controller and press 0098
to confirm.
You then switch to navigation mode and
can start route calculation (Y page 69).
i A route can only be stored as a personal
POI on an SD memory card or taken directly
for route calculation (Y page 171).Calling up the destination X
Select Call Callin the menu by turning 00790052007A
the COMAND controller and press 0098to
confirm.
You then switch to the telephone function
and make the call (Y page 132).
Importing a destination/route When importing, you can choose whether you
want to save the destination as a personal POI
on an SD memory card or in the address book. You can only save routes as personal POIs toan SD memory card, but not in the address
book.
X Select Import Import in the menu with the
COMAND controller and press 0098to con-
firm.
i If there is no SD memory card in the slot,
the As AsPersonal
Personal POI
POImenu item is grayed
out.
X Insert the SD memory card (Y page 196).
X To save as a personal POI: confirmAs
As
Personal POI
Personal POI by pressing0098the
COMAND controller.
The entry is saved as a personal POI on the SD memory card.
i You can use a personal POI in navigation
mode for route calculation (Y page 85).
You can also use a personal POI in another
vehicle for route calculation.
X To save to the address book: selectTo To
Address Book
Address Book by turning00790052007Athe
COMAND controller and press 0098to con-
firm.
The entry is stored in the address book. Destination/route download
171Online and Internet functions Z
Page 177 of 270

i
Facebook is a social network. This App
allows you to log in from your vehicle and
use Facebook's many functions.
Google™ Street View allows you to view
streets in 360-degree panoramas.
Google™ Panoramio expands Google Local Search to include photos at the selected
position. Internet radio
General notes
A good Internet connection is required to
transmit audio data efficiently. To ensure the
best-possible reception, your mobile phone
should be connected to the vehicle's exterior antenna via the phone bracket (optional).
Bear in mind that a relatively large volume of
data can be transmitted when using the Inter- net radio. An average 128 kbit per second
data transfer rate can transfer 56 MB of data
in one hour.
The data transfer rate of a station is displayed while receiving data. Calling up the Internet radio
X
Select the 00A7icon in the main function bar
by sliding 00970052and turning 00790052the COMAND controller and press
0098to con-
firm.
The carousel view appears.
X Bring the Internet Radio
Internet Radio panel to the
front by turning 00790052007Athe COMAND con-
troller and press 0098to confirm.
The Internet radio menu appears. Searching for stations
X Select Search Search in the Internet radio menu.
A list with search criteria appears.
X Select criterion and press 0098to confirm.
i For example as a search criterion, you can
set an Internet radio station that is located
close to your navigation destination. Connecting to a station
X Search for a station (Y page 175).
X Select 0065(play) in the Internet radio
menu and press 0098to confirm.
The call is placed.
If the data stream is interrupted, an automatic attempt is made to re-establish the connec-
tion.
Manually re-establishing a connection
X Select 0065(play) again in the Internet
radio menu and press 0098to confirm.
Ending data transfer: X Select 00DB(stop) in the Internet radio
menu and press 0098to confirm.
or
X Change to another audio source, for exam-
ple Disc
Disc .
If you change to a main function that is not an
audio source, e.g. navigation, the data con-
nection remains on. You can continue listen-
ing to the set station. Internet radio
175Online and Internet functions Z