Page 115 of 445

Doors and Locks
Action
Message
Displays when the door(s) listed is not completely closed and the vehicle is moving.
X Door Ajar
Displays when the door(s) listed is not completely closed.
Displays when the luggage compartment is not completely closed.
Trunk Ajar
Displays when the hood is not completely closed.
Hood ajar
Displays when the door switches have been disabled.
Switches Inhibited
Security Mode
Displays when there is a system malfunction with the child
locks. Contact your authorized dealer as soon as possible.
Child Lock Malfunction
Service Required
Displays the factory keypad code after the keypad has beenreset. See Keyless Entry (page 63).
Factory Keypad Code
XXXXX
Driver Alert Action
Message
Stop and rest as soon as it is safe to do so.
Driver Alert Warning
Rest Now
Take a rest break soon.
Driver Alert Warning
Rest Suggested
Fuel Action
Message
Displayed as an early reminder of a low fuel condition.
Fuel Level Low
Displayed when the fuel fill inlet may not be properly closed.
Check Fuel Fill Inlet
113
MKZ (CC9) Information Displays
Page 118 of 445

Maintenance
Action
Message
Stop the vehicle as soon as safely possible, turn off theengine. Check the oil level. If the warning stays on or
continues to come on with your engine running, contact your authorized dealer as soon as possible.
LOW Engine Oil Pres-
sure
Displayed when the engine oil life remaining is 10% or less.See Engine Coolant Check (page 255).
Change Engine Oil Soon
Displayed when the oil life left reaches 0%.
See Engine
Coolant Check (page 255).
Oil Change Required
Indicates the brake fluid level is low and the brake systemshould be inspected immediately.
See Brake Fluid Check
(page 260).
Brake Fluid Level LOW
Displays when the brake system needs servicing. Stop thevehicle in a safe place. Contact your authorized dealer.
Check Brake System
Displays when the engine coolant temperature is excessivelyhigh. Stop the vehicle in a safe place and contact your authorized dealer.
Engine Coolant Overtem-
perature
Displays when the motor electronics are overheating. Stopthe vehicle as soon as safely possible, turn off the vehicle
and let it cool. If the warning stays on or continues to come on, contact your authorized dealer as soon as possible.
Motor Coolant Overtem-
perature
Displays when the washer fluid is low and needs to be refilled.
Washer Fluid Level Low
Displays when the engine has reduced power in order tohelp reduce high coolant temperatures.
Power Reduced to
Lower Engine Temp
Displayed when the kit needs service. See your authorized dealer.
Service Tire Mobility Kit
Displays to indicate that the vehicle is still in Transport or
Factory mode. This may not allow some features to operate properly. See your authorized dealer.
Transport / Factory
Mode
Informs the driver that the powertrain needs service due toa powertrain malfunction.
See Manual
116
MKZ (CC9) Information Displays
Page 120 of 445

Park Aid
Action
Message
Displays when the system has detected a condition that
requires service. Contact your authorized dealer. See Parking Aid (page 182).
Check Front Park Aid
Displays when the system has detected a condition that
requires service. Contact your authorized dealer. See Parking Aid
(page 182).
Check Rear Park Aid
Displays the park aid status.
Front Park Aid On Off
Displays the park aid status.
Rear Park Aid On Off
Park Brake Action
Message
Displays when the parking brake is set, the engine is runningand the vehicle is driven more than 3 mph (5 km/h). If the
warning stays on after the parking brake is released, contact your authorized dealer.
Park Brake Engaged
The electric parking brake system has detected a conditionthat requires service. See your authorized dealer.
Park Brake Malfunction
Service Now
Displays when the electric parking brake is not set.
Park Brake Not Applied
Displays when the electric parking brake is running adiagnostic check.
Park Brake Maintenance
Mode
Displays when the electric parking brake is set but has not been released.
Park Brake Use Switch
to Release
Displays when the electric parking brake is set but has notbeen released and the vehicle is moving.
Press Brake to Release
Park Brake and switch
The electric park brake system has detected a condition thatrequires service. See your authorized dealer.
Park Brake Limited
Function Service Required
Displays when the electric parking brake was not releasedcausing it to overheat.
Park Brake System
Overheated
118
MKZ (CC9) Information Displays
Page 122 of 445

Starting System
Action
Message
Displays when starting the vehicle as a reminder to apply the brake.
Press Brake to Start
Displays when the starter has exceeded its cranking time inattempting to start the vehicle.
Cranking Time
Exceeded
Displays when the starter is attempting to start the vehicle.
Engine Start Pending
Please Wait
Displays when the pending start has been cancelled.
Pending Start Cancelled
Tire Pressure Monitoring System Action
Message
Displays when one or more tires on your vehicle have low
tire pressure. See Tire Pressure Monitoring System (page
296).
LOW Tire Pressure
Displays when the tire pressure monitoring system is
malfunctioning. If the warning stays on or continues to come on, contact your authorized dealer.
See Tire Pressure
Monitoring System (page 296).
Tire Pressure Monitor
Fault
Displayed when a tire pressure sensor is malfunctioning, oryour spare tire is in use. For more information on how the
system operates under these conditions, See Tire Pressure Monitoring System
(page 296). If the warning stays on or
continues to come on, contact your authorized dealer as soon as possible.
Tire Pressure Sensor
Fault
120
MKZ (CC9) Information Displays
Page 131 of 445

SITTING IN THE CORRECT
POSITION
WARNINGS
Sitting improperly, out of position or
with the seat back reclined too far
can take weight off the seat cushion and
affect the decision of the passenger
sensing system, resulting in serious injury
or death in the event of a crash. Always
sit upright against your seat back, with
your feet on the floor. Do not recline the seat back as this
can cause the occupant to slide
under the safety belt, resulting in serious
injury in the event of a crash. Do not place objects higher than the
seat back to reduce the risk of
serious injury in the event of a crash or
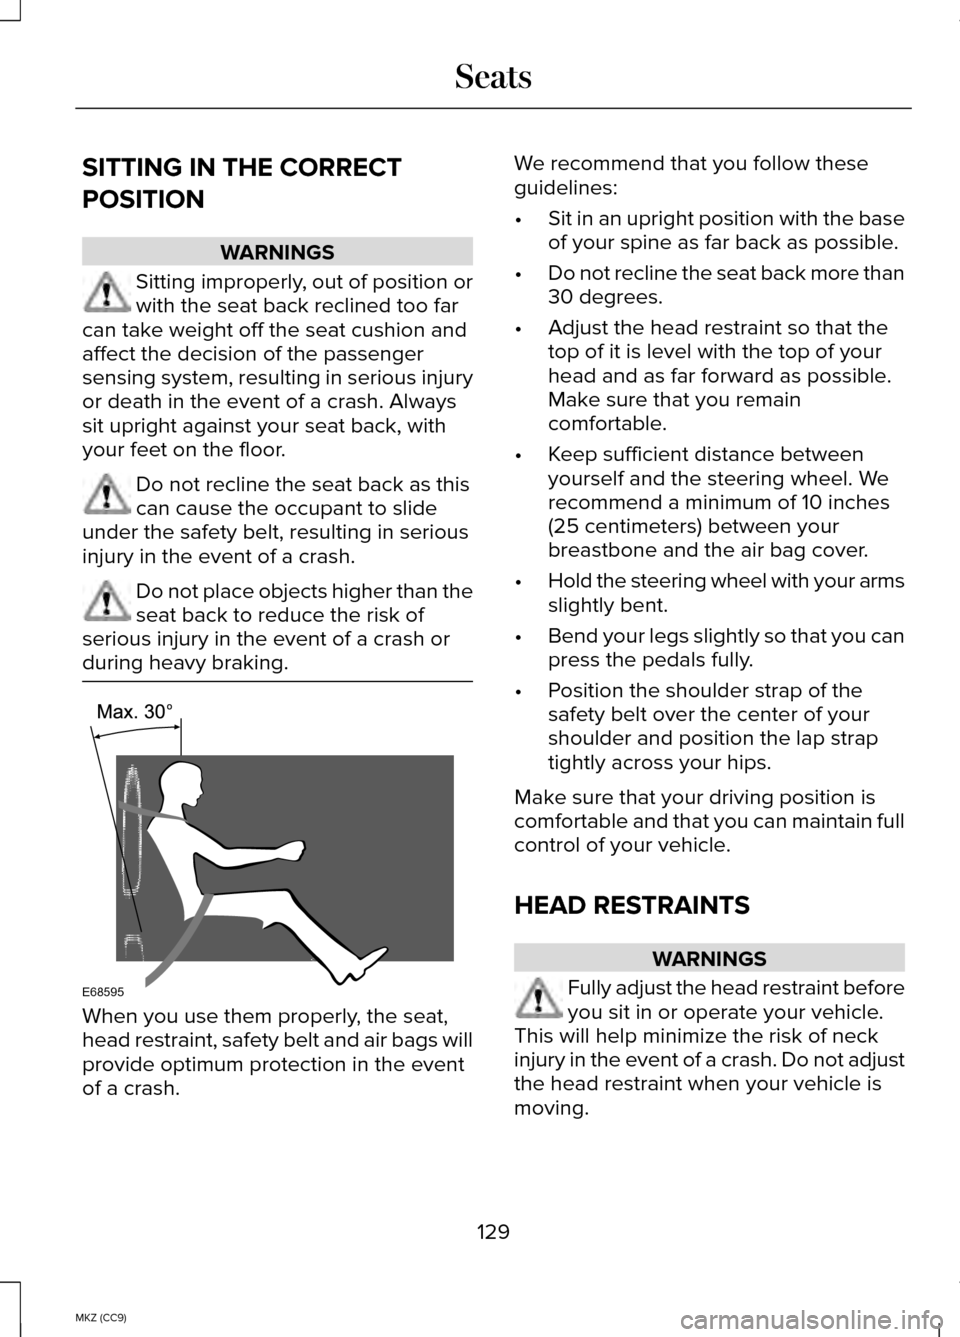
during heavy braking. When you use them properly, the seat,
head restraint, safety belt and air bags will
provide optimum protection in the event
of a crash. We recommend that you follow these
guidelines:
•
Sit in an upright position with the base
of your spine as far back as possible.
• Do not recline the seat back more than
30 degrees.
• Adjust the head restraint so that the
top of it is level with the top of your
head and as far forward as possible.
Make sure that you remain
comfortable.
• Keep sufficient distance between
yourself and the steering wheel. We
recommend a minimum of 10 inches
(25 centimeters) between your
breastbone and the air bag cover.
• Hold the steering wheel with your arms
slightly bent.
• Bend your legs slightly so that you can
press the pedals fully.
• Position the shoulder strap of the
safety belt over the center of your
shoulder and position the lap strap
tightly across your hips.
Make sure that your driving position is
comfortable and that you can maintain full
control of your vehicle.
HEAD RESTRAINTS WARNINGS
Fully adjust the head restraint before
you sit in or operate your vehicle.
This will help minimize the risk of neck
injury in the event of a crash. Do not adjust
the head restraint when your vehicle is
moving.
129
MKZ (CC9) SeatsE68595
Page 132 of 445
WARNINGS
The head restraint is a safety device.
Whenever possible it should be
installed and properly adjusted when the
seat is occupied. Install the head restraint properly to
help minimize the risk of neck injury
in the event of a crash. Note:
Adjust the seatback to an upright
driving position before adjusting the head
restraint. Adjust the head restraint so that
the top of it is level with the top of your
head and as far forward as possible. Make
sure that you remain comfortable. If you
are extremely tall, adjust the head
restraint to its highest position.
Front seat head restraint Rear seat outboard head restraints
Rear center head restraint
The head restraints consist of:
an energy absorbing head
restraint
A
two steel stems
B
guide sleeve adjust and unlock
button
C
guide sleeve unlock and remove
button
D
Adjusting the Head Restraint
Raising the Head Restraint
Pull the head restraint up.
130
MKZ (CC9) SeatsE138642 E153105 E138645
Page 133 of 445

Lowering the Head Restraint
1. Press and hold button C.
2. Push the head restraint down.
Removing the Head Restraint
1. Pull the head restraint up until it
reaches its highest position.
2. Press and hold buttons C and D.
3. Pull the head restraint up.
Installing the Head Restraint
Align the steel stems into the guide
sleeves and push the head restraint down
until it locks.
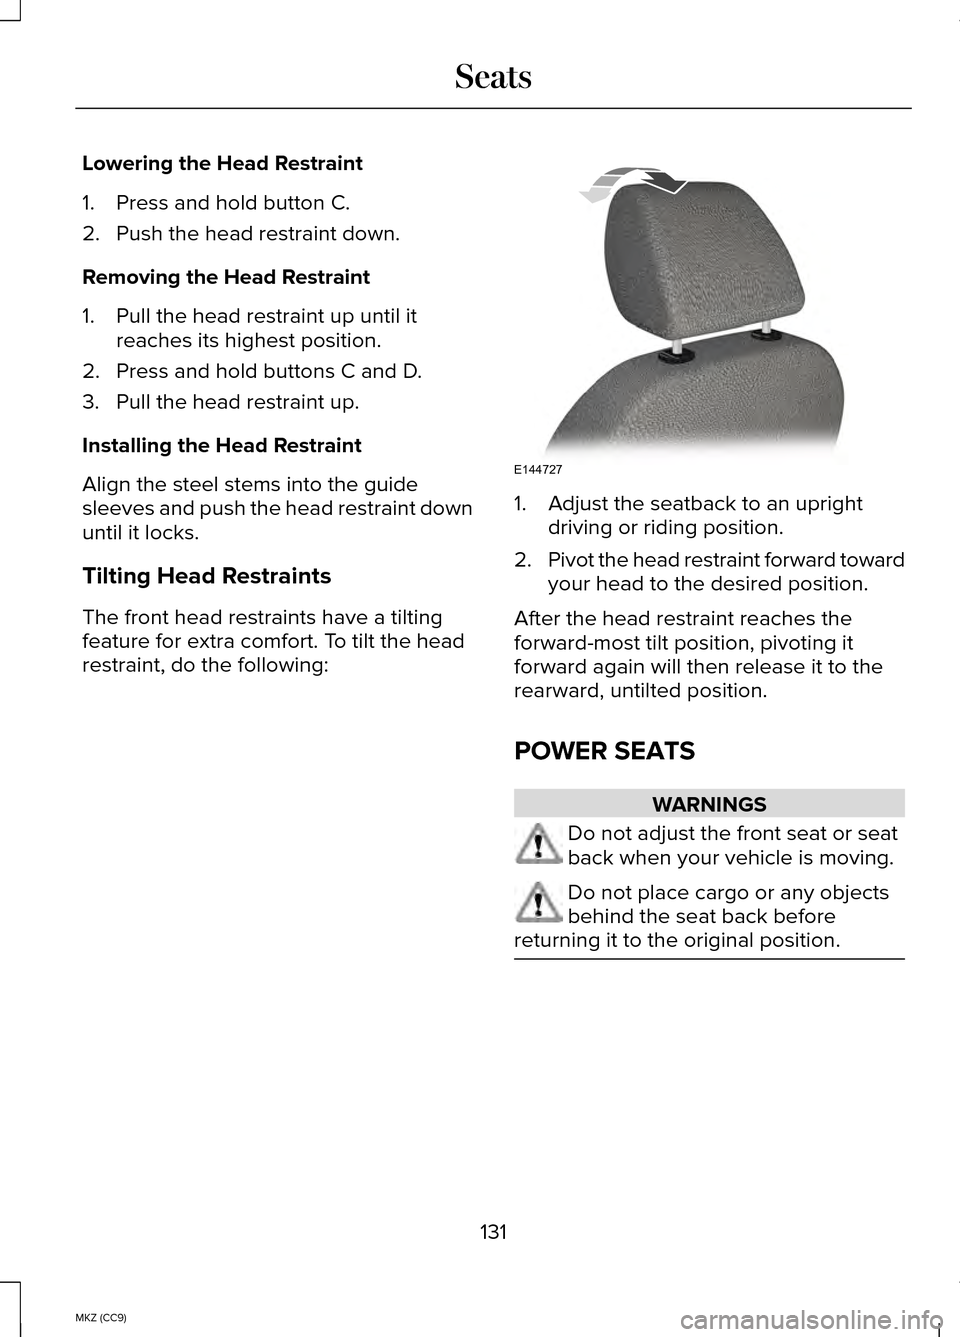
Tilting Head Restraints
The front head restraints have a tilting
feature for extra comfort. To tilt the head
restraint, do the following: 1. Adjust the seatback to an upright
driving or riding position.
2. Pivot the head restraint forward toward
your head to the desired position.
After the head restraint reaches the
forward-most tilt position, pivoting it
forward again will then release it to the
rearward, untilted position.
POWER SEATS WARNINGS
Do not adjust the front seat or seat
back when your vehicle is moving.
Do not place cargo or any objects
behind the seat back before
returning it to the original position. 131
MKZ (CC9) SeatsE144727
Page 135 of 445

Lumbar and bolster mode
Massage mode
Upper lumbar
Back massage intensity
adjustment
A
Lumbar decrease
Massage intensity decrease
and off1
B
Lower lumbar2
Cushion massage intensity
adjustment
C
Lumbar increase
Massage intensity increase
D
-
On and off
E
1 The massage feature will default to an
alternating massage mode with back
massage intensity adjustment. The lumbar
and bolster feature will default to the
middle lumbar mode.
2 Press C a second time to adjust the back
bolster. Press C a third time to adjust the
cushion bolster.
You can also adjust this feature through
the touch screen. When switched on, the
system displays directions for you to adjust
the lumbar settings in your seat or to set
the massage function. To access and
make adjustments to the lumbar setting:
1. Press the Menu Settings icon > Vehicle
> Multi-contour Seat.
2. Choose the desired seat to adjust.
3. Press the + or - to adjust the lumbar intensity.
To access and make adjustments to the
massage setting:
1. Press the Menu Settings icon > Vehicle
>Multi-contour Seat. 2. Choose the desired seat to adjust.
3. Press Off, Lo or Hi.
MEMORY FUNCTION
WARNINGS
Before activating the seat memory,
make sure that the area immediately
surrounding the seat is clear of
obstructions and that all occupants are
clear of moving parts. Do not use the memory function
when your vehicle is moving.
This feature will automatically recall the
position of the driver's seat, power mirrors
and optional power steering column. The
memory control is located on the driver’
s
door.
133
MKZ (CC9) Seats