2014 Lancia Voyager fog light bulb
[x] Cancel search: fog light bulbPage 137 of 364

come on. Press the switch a second
time and the rear fog lights will come
on (front fog lights stay on). Press the
switch a third time and the rear fog
lights turn off (front fog stays on).
Press the switch a fourth times and
the front fog turns off. For vehicles
without front fog, rear fog will acti-
vate on the first press.
An indicator light in the instrument
cluster illuminates when the fog lights
are turned on.
NOTE: The headlight switch must
be in parking lights or headlights
position to activate the front and
rear fog lamps.
BATTERY PROTECTION
This feature provides battery protec-
tion to avoid wearing down the bat-
tery if the headlights, parking lights,
or front fog lights are left on for ex-
tended periods of time when the igni-
tion switch is in the LOCK position.
After eight minutes of the ignition
switch being in the LOCK position
and the headlight switch in any posi-
tion other than OFF or AUTO, thelights will turn off automatically until
the next cycle of the ignition switch or
headlight switch.
The battery protection feature will be
disabled if the ignition switch is
turned to any other position other
than LOCK during the eight minute
delay.
MULTIFUNCTION LEVER
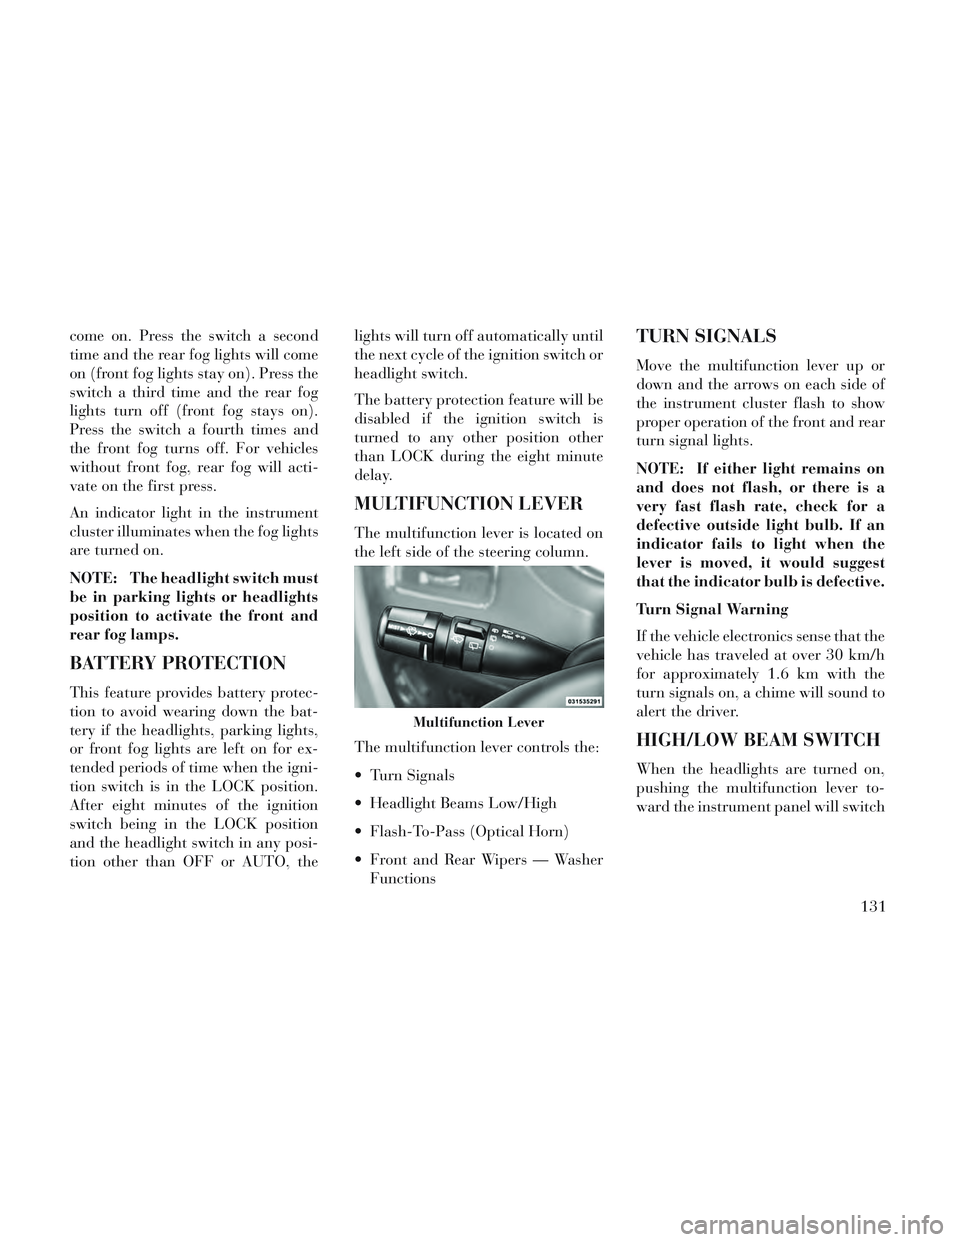
The multifunction lever is located on
the left side of the steering column.
The multifunction lever controls the:
Turn Signals
Headlight Beams Low/High
Flash-To-Pass (Optical Horn)
Front and Rear Wipers — Washer
Functions
TURN SIGNALS
Move the multifunction lever up or
down and the arrows on each side of
the instrument cluster flash to show
proper operation of the front and rear
turn signal lights.
NOTE: If either light remains on
and does not flash, or there is a
very fast flash rate, check for a
defective outside light bulb. If an
indicator fails to light when the
lever is moved, it would suggest
that the indicator bulb is defective.
Turn Signal Warning
If the vehicle electronics sense that the
vehicle has traveled at over 30 km/h
for approximately 1.6 km with the
turn signals on, a chime will sound to
alert the driver.
HIGH/LOW BEAM SWITCH
When the headlights are turned on,
pushing the multifunction lever to-
ward the instrument panel will switch
Multifunction Lever
131
Page 178 of 364

INSTRUMENT CLUSTER
DESCRIPTIONS
1. Tachometer
The red segments indicate the maxi-
mum permissible engine revolutions
per minute (RPM x 1000) for each
gear range. Before reaching the red
area, ease up on the accelerator.
2. Front Fog Light Indicator (for
versions/markets, where provided)This indicator will illumi-
nate when the front fog
lights are on.
3. Park/Headlight ON Indicator
This indicator will illumi-
nate when the park lights or
headlights are turned on.
4. Turn Signal Indicators The arrow will flash with
the exterior turn signal
when the turn signal lever is
operated.
If the vehicle is driven 1.6 km with
either turn signal on, a continuous
chime will sound to alert you to turn the signal off. If either indicator
flashes at a rapid rate, check for a
defective outside light bulb.
5. High Beam Indicator
This indicator shows that the
high beam headlights are on.
Push the multifunction lever forward
to switch the headlights to high beam,
and pull toward yourself (normal po-
sition) to return to low beam.
6. Odometer Display / Electronic
Vehicle Information Center (EVIC)
Display
Odometer Display / Trip Odometer
Display (for versions/markets,
where provided) The odometer dis-
play shows the total distance the ve-
hicle has been driven.
NOTE: Some warnings will be
displayed in the Electronic Vehicle
Information Center Display Area
located in the instrument cluster.
Refer to ”Electronic Vehicle Infor-
mation Center (EVIC) Display”
(for versions/markets, where pro-
vided) for further information. LoW tirE
When the appropriate condition ex-
ists, the odometer display will toggle
between LoW and tirE for three
cycles.
gASCAP
If the vehicle diagnostic system deter-
mines that the fuel filler cap is loose,
improperly installed, or damaged, a
“gASCAP” message will display in the
odometer display area. Tighten the
fuel filler cap properly and press the
STEP button on the steering wheel to
turn off the message. If the problem
continues, the message will appear
the next time the vehicle is started.
noFUSE
If the vehicle diagnostic system deter-
mines that the Ignition Off Draw
(IOD) fuse is improperly installed, or
damaged, a “noFUSE” message will
display in the odometer display area.
For further information on fuses and
fuse locations refer to “Fuses” in
“Maintaining Your Vehicle”.
172
Page 336 of 364

VEHICLE STORAGE
If you are leaving your vehicle dor-
mant for more than 21 days, you may
want to take steps to protect your
battery. You may do the following:
Remove the 60 Amp cartridge inthe Totally Integrated Power Mod-
ule (TIPM) labeled Ignition-Off
Draw (IOD).
Or, disconnect the negative cable from the battery.
Anytime you store your vehicle, or keep it out of service for two weeks
or more, run the air conditioning
system at idle for about five min-
utes in the fresh air and high blower
setting. This will ensure adequate
system lubrication to minimize the
possibility of compressor damage
when the system is started again.
REPLACEMENT BULBS
LIGHT BULBS –
Interior Bulb Number
Center & Rear Dome Lamp . . 578
Center & Rear Reading
Lamps .................578 Front Door Courtesy Lamp . . 578
Front Header Reading Lamps
(for versions/markets, where
provided)
................578
Liftgate Lamp(s) ..........578
Overhead Console Reading
Lamps ................ PC579
Removable Console Lamp
(for versions/markets, where
provided) ................194
Visor Vanity Lamps .....6501966
NOTE: For lighted switches, see
your dealer for replacement in-
structions.
All of the interior bulbs are glass
wedge base or glass cartridge types.
Aluminum base bulbs are not ap-
proved and should not be used for
replacement.
LIGHT BULBS –
Exterior Bulb Number
Headlamp . . ............H11
Headlamp (HID) (for versions/
markets, where provided) . . D1S
Front Turn Signal . . . PY27 / 7W Front Position Lamp . . . . . W5W
Front Fog Lamp . . . .
.....H11
Side Repeater Lamps . . . . W5W
Backup Lamp . . .....P27/7W
Tail/Stop Lamp . ........LED
(Serviced at Authorized Dealer)
Rear Turn Signal
Lamps ........... PY27 / 7W
Rear Fog Lamps . . .......LED
(Serviced at Authorized Dealer)
Center High-Mounted Stop
Lamp .................LED
(Serviced at Authorized Dealer)
License Plate Lamp .....W5W
BULB REPLACEMENT
NOTE: Lens fogging can occur
under certain atmospheric condi-
tions. This will usually clear as at-
mospheric conditions change to
allow the condensation to change
back into a vapor. Turning the
lamps on will usually accelerate
the clearing process.
330
Page 338 of 364

SIDE REPEATER LAMPS
The side repeater lamps are located in
both front fenders.
1. Push the side repeater lamp to the
right and release retaining tab on the
left.
2. Pull side repeater lamp out and
disengage bulb socket from lamp.
3. Press, then rotate and pull bulb
from socket.
4. Install bulb to socket.
5. Push the lamp socket into the side
repeater lamp.
6. Position metal spring clip in
fender hole notch.
7. Position side repeater lamp to hole
in fender.8. Push side repeater lamp to com-
press metal spring clip and seat re-
taining tab into fender.
FOG LAMPS
NOTE: Access to the fog lamp
bulb is from the rear of the fascia.
On the left rear side of the fascia,
remove the push pin and lower the
hinged access door on the air dam.
1. Remove access cover from under
bumper fascia.
2. Remove bulb from lamp.
3. Disconnect wire harness connec-
tor.
4. Remove the bulb from the connec-
tor socket and install the replacement
bulb.
CAUTION!
Do not touch the new bulb with
your fingers. Oil contamination will
severely shorten bulb life. If the
bulb comes in contact with an oily
surface, clean the bulb with rub-
bing alcohol.
5. Install the bulb and connector as-
sembly into the fog lamp housing.
6. Close and secure the access door
cover under bumper fascia.
REAR TURN SIGNAL AND
BACKUP LAMP
1. Raise the liftgate.
2. Remove the tail lamp assembly by
removing the two screws from the in-
board side. Use a fiber stick or similar
tool to gently pry the light on the
outboard side to disengage the two
ball studs.
NOTE:
If a screwdriver is used, make
sure a soft material is placed be-
tween the vehicle body and tool
so not to scratch the paint.
Side Repeater Bulb Replacement
332
Page 357 of 364

Gear Ranges...............238
Gear Select Lever Override.....300
General Information........16, 22
Glass Cleaning..............323
Gross Axle Weight Rating.......276
Gross Vehicle Weight Rating.....276
Hands-Free Phone (Uconnect®). . .89
Hazard
Driving Through Flowing, Rising, or
Shallow Standing Water
.....243
Hazard Warning Flasher.......286
Headlights................129
Cleaning.............. .323
Leveling...............132
Passing................132
Time Delay.............130
Washers............130, 163
Headlight Washers...........163
Head Restraints.............115
Heated Mirrors..............83
Heated Seats...............113
High Beam/Low Beam Select
(Dimmer) Switch
..........131
Hill Start Assist.............252
Hood Release.............. .128
Hook, Coat................156
Ignition...................14
Key....................14
Ignition Key Removal..........14
Immobilizer (Sentry Key).......15
Information Center, Vehicle.....178
Inside Rearview Mirror.........82
Instrument Cluster.......170, 172
Instrument Panel and Controls. . .169
Instrument Panel Cover........323
Instrument Panel Lens Cleaning. .324
Integrated Power Module
(Fuses)
.................325
Interior Appearance Care.......323
Interior Lights............. .129
Intervention Regeneration
Strategy
................310
Introduction.................4
iPod®/USB/MP3 ControlBluetooth Streaming Audio
. . .110
Jack Location............. .288
Jack Operation..............287
Jump Starting..............296
Key-In Reminder.............14
Keyless Enter-N-Go.......24, 232
Keyless Entry System..........18
Keyless Go................186
Key, Programming............16
Key, Replacement.............16
Key, Sentry (Immobilizer).......15
Lap/Shoulder Belts............36
Latches...................71
Hood..................128
Leaks, Fluid................71
Leveling, Headlight..........132
Life of Tires.............. .264
Liftgate...................33
Light Bulbs.................71
Lights....................71
Airbag........51, 55, 69, 176
Alarm.................176
Anti-Lock..............173
Automatic Headlights......129
Back-Up.............. .332
Battery Saver............131
Brake Assist Warning.......251
Brake Warning...........176
Bulb Replacement.........330
Center Mounted Stop.......333
Electronic Stability Program (ESP)
Indicator
...............251
Exterior.................71
Fog...........130, 172, 332
Hazard Warning Flasher.....286
Headlight Leveling........132
351