2014 Lancia Thema phone
[x] Cancel search: phonePage 181 of 332
HARD-KEYS
Hard-Keys are located below the
Uconnect® system in the center of the
instrument panel. In addition, there is
a Scroll/Enter control knob located on
the right side of the Climate Controls
in the center of the instrument panel.
Turn the control knob to scroll
through menus and change settings
(i.e., 30, 60, 90), press the center of
the control knob one or more times to
select or change a setting (i.e., ON,
OFF).
SOFT-KEYS
Soft-Keys are accessible on the
Uconnect® touchscreen.
CUSTOMER
PROGRAMMABLE
FEATURES — Uconnect®
8.4 SETTINGS
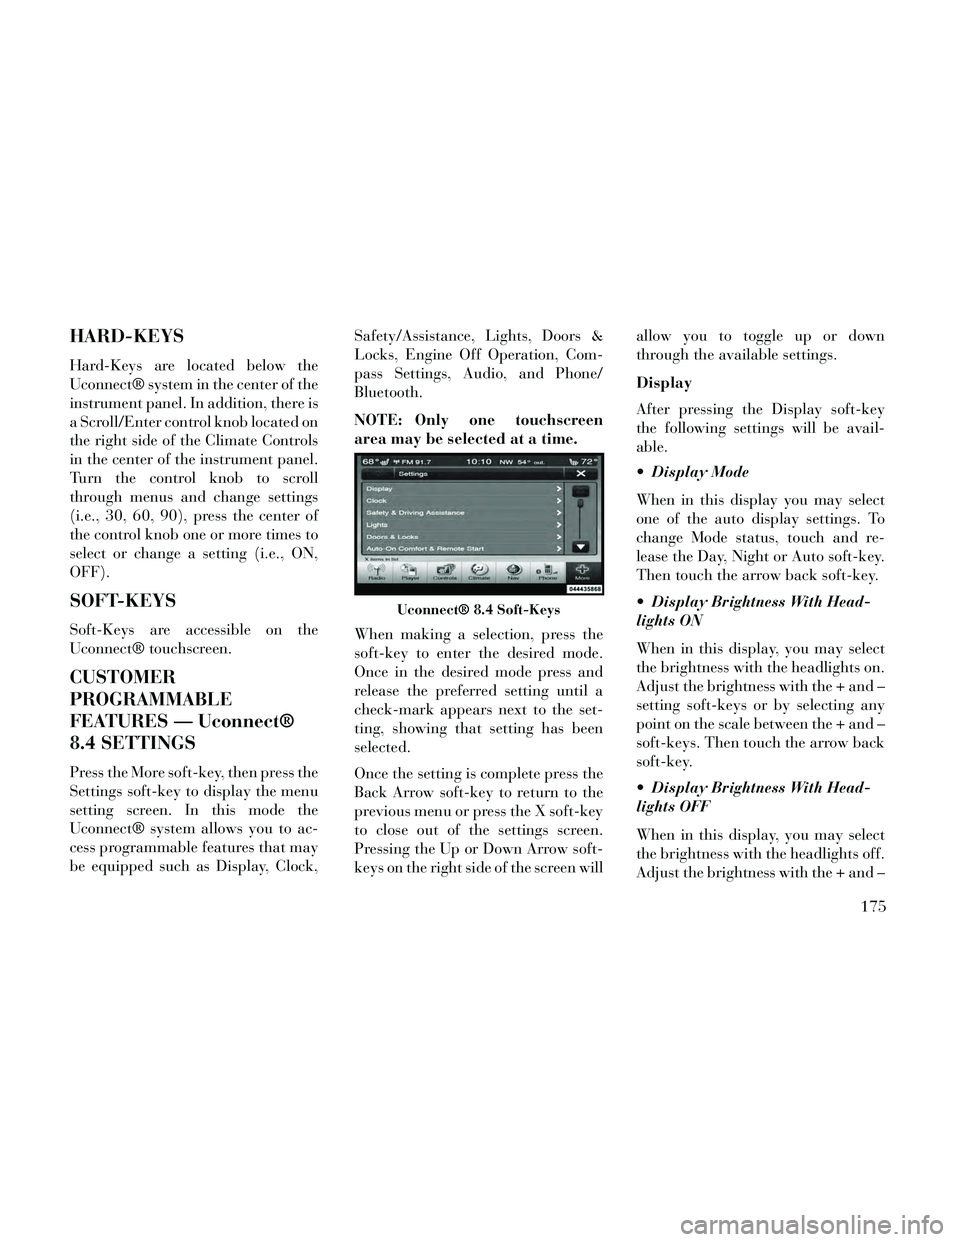
Press the More soft-key, then press the
Settings soft-key to display the menu
setting screen. In this mode the
Uconnect® system allows you to ac-
cess programmable features that may
be equipped such as Display, Clock,Safety/Assistance, Lights, Doors &
Locks, Engine Off Operation, Com-
pass Settings, Audio, and Phone/
Bluetooth.
NOTE: Only one touchscreen
area may be selected at a time.
When making a selection, press the
soft-key to enter the desired mode.
Once in the desired mode press and
release the preferred setting until a
check-mark appears next to the set-
ting, showing that setting has been
selected.
Once the setting is complete press the
Back Arrow soft-key to return to the
previous menu or press the X soft-key
to close out of the settings screen.
Pressing the Up or Down Arrow soft-
keys on the right side of the screen willallow you to toggle up or down
through the available settings.
Display
After pressing the Display soft-key
the following settings will be avail-
able.
Display Mode
When in this display you may select
one of the auto display settings. To
change Mode status, touch and re-
lease the Day, Night or Auto soft-key.
Then touch the arrow back soft-key.
Display Brightness With Head-
lights ON
When in this display, you may select
the brightness with the headlights on.
Adjust the brightness with the + and –
setting soft-keys or by selecting any
point on the scale between the + and –
soft-keys. Then touch the arrow back
soft-key.
Display Brightness With Head-
lights OFF
When in this display, you may select
the brightness with the headlights off.
Adjust the brightness with the + and –
Uconnect® 8.4 Soft-Keys
175
Page 187 of 332
is programmed touching the
handle more than once will only
result in the driver’s door opening.
If driver door first is selected, once
the driver door is opened, the inte-
rior door lock/unlock switch can
be used to unlock all doors (or use
RKE transmitter).
Passive Entry
This feature allows you to lock and
unlock the vehicle’s door(s) without
having to press the Remote Keyless
Entry (RKE) transmitter lock or un-
lock buttons. To make your selection,
touch the Passive Entry soft-key, until
a check-mark appears next to setting,
showing that setting has been selected.
Touch the back arrow soft-key to re-
turn to the previous menu. Refer to
“Keyless Enter-N-Go” in “Things To
Know Before Starting Your Vehicle”.
Personal Settings Linked To FOB
(for versions/markets, where pro-
vided)
This feature provides automatic
driver seat positioning to enhance
driver mobility when entering and ex-
iting the vehicle. To make your selec-
tion, touch the Personal SettingsLinked To FOB soft-key, until a
check-mark appears next to setting,
showing that setting has been se-
lected. Touch the back arrow soft-key
to return to the previous menu.
NOTE: The seat will return to the
memorized seat location (if Recall
Memory with Remote Key Unlock
is set to ON) when the Remote Key-
less Entry (RKE) transmitter is
used to unlock the door. Refer to
“Driver Memory Seat” in “Under-
standing The Features Of Your Ve-
hicle” for further information.
Engine Off Options
After pressing the Engine Off Options
soft-key the following settings will be
available.
Easy Exit Seat (for versions/
markets, where provided)
This feature provides automatic
driver seat positioning to enhance
driver mobility when entering and ex-
iting the vehicle. To make your selec-
tion, touch the Easy Exit Seats soft-
key, until a check-mark appears next
to setting, showing that setting has
been selected. Touch the back arrow
soft-key to return to the previous
menu.
Engine Off Power Delay (for
versions/markets, where provided)
When this feature is selected, the
power window switches, radio,
Uconnect® phone system (for
versions/markets, where provided),
DVD video system (for versions/
markets, where provided), power
sunroof (for versions/markets, where
provided), and power outlets will re-
main active for up to 10 minutes after
the ignition is cycled to OFF. Opening
either front door will cancel this fea-
ture. To change the Engine Off Power
Delay status touch the 0 seconds, 45
seconds, 5 minutes or 10 minutes
soft-key. Then touch the arrow back
soft-key.
Headlight Off Delay
When this feature is selected, the
driver can choose to have the head-
lights remain on for 0, 30, 60, or 90
seconds when exiting the vehicle. To
change the Headlight Off Delay status
touch the + or - soft-key to select your
181
Page 188 of 332

desired time interval. Touch the back
arrow soft-key to return to the previ-
ous menu.
Compass Settings
After pressing the Compass Settings
soft-key the following settings will be
available: Variance
Compass Variance is the difference
between Magnetic North and Geo-
graphic North. To compensate for the
differences the variance should be set
for the zone where the vehicle is
driven, per the zone map. Once prop-
erly set, the compass will automati-
cally compensate for the differences,
and provide the most accurate com-
pass heading.NOTE: Keep magnetic materials
away from the top of the instru-
ment panel, such as iPod's, Mobile
Phones, Laptops and Radar Detec-
tors. This is where the compass
module is located, and it can cause
interference with the compass sen-
sor, and it may give false readings.
Compass Variance Map
182
Page 189 of 332
Perform Compass Calibration
Touch the Calibration soft-key to
change this setting. This compass is
self-calibrating, which eliminates the
need to manually reset the compass.
When the vehicle is new, the compass
may appear erratic until the compass
is calibrated. You may also calibrate
the compass by pressing the ON soft-
key and completing one or more 360-
degree turns, in an area free from
large metal or metallic objects. The
compass will now function normally.
Audio
After pressing the Audio soft-key the
following settings will be available.
Balance/Fade
When in this display you may adjust
the Balance and Fade settings.
Equalizer
When in this display you may adjust
the Bass, Mid and Treble settings. Ad-
just the settings with the + and –
setting soft-keys or by selecting anypoint on the scale between the + and –
soft-keys. Then touch the arrow back
soft-key.
NOTE: Bass/Mid/Treble allow
you to simply slide your finger up
or down to change the setting as
well as touch directly on the de-
sired setting.
Speed Adjusted Volume
This feature increases or decreases
volume relative to vehicle speed. To
change the Speed Adjusted Volume
touch the Off, 1, 2 or 3 soft-key. Then
touch the arrow back soft-key.
Music Info Cleanup (for versions/
markets, where provided)
This feature helps organize music files
for optimized music navigation. To
make your selection, touch the Music
Info Cleanup soft-key, select On or Off
followed by pressing the arrow back
soft-key.
Surround Sound (for versions/
markets, where provided)
This feature provides simulated sur-
round sound mode. To make your se-
lection, touch the Surround Sound
soft-key, select On or Off followed by
pressing the arrow back soft-key.
Phone/Bluetooth
After pressing the Phone/Bluetooth
soft-key the following settings will be
available.
Paired Devices
This feature shows which phones are
paired to the Phone/Bluetooth sys-
tem. For further information, refer to
the Uconnect® Supplement.
SOUND SYSTEMS
Refer to your Sound Systems Booklet.
NAVIGATION SYSTEM
(for versions/markets,
where provided)
Refer to your Uconnect® User
Manual.
183
Page 190 of 332
SETTING THE ANALOG
CLOCK
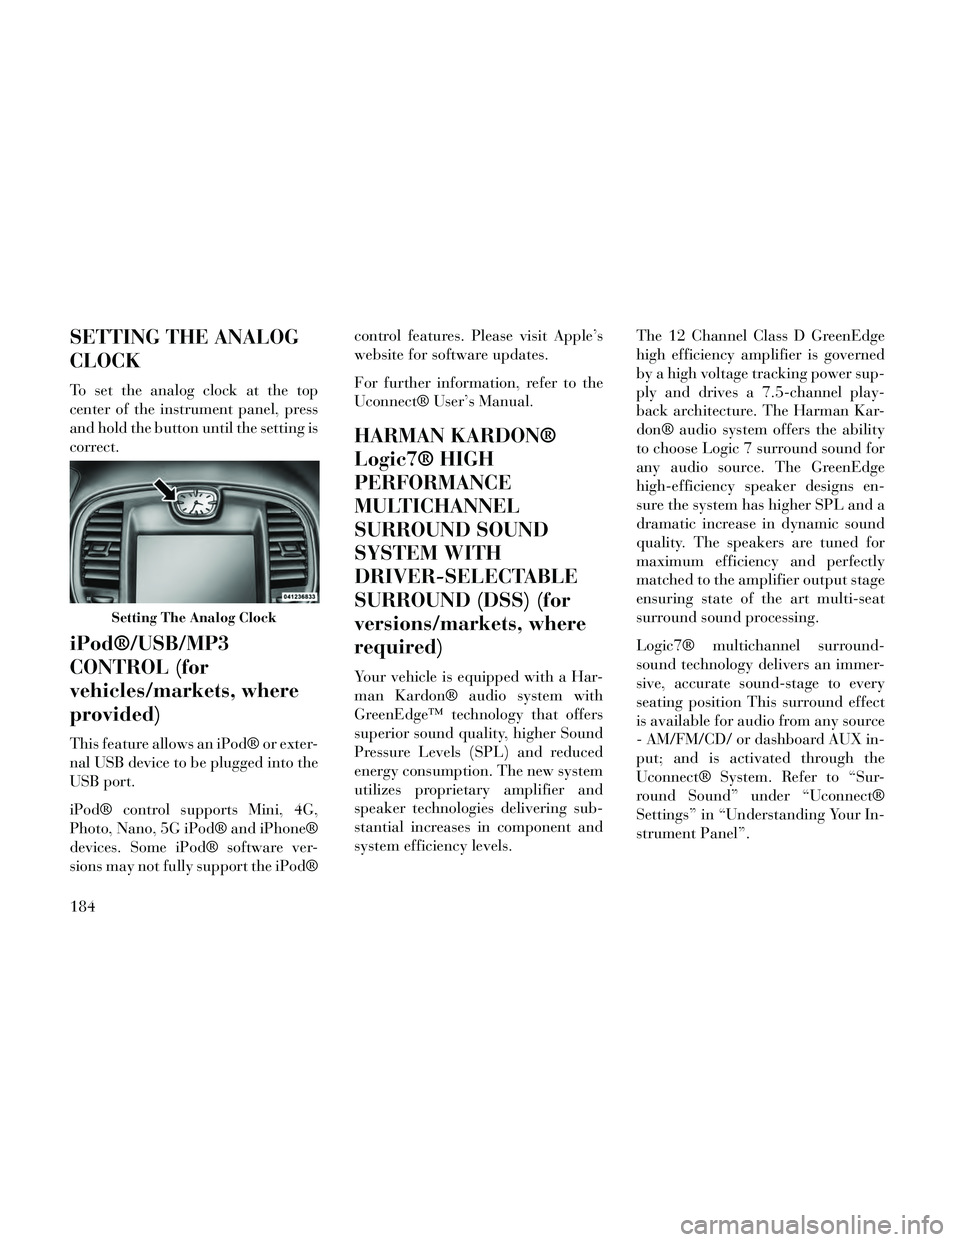
To set the analog clock at the top
center of the instrument panel, press
and hold the button until the setting is
correct.
iPod®/USB/MP3
CONTROL (for
vehicles/markets, where
provided)
This feature allows an iPod® or exter-
nal USB device to be plugged into the
USB port.
iPod® control supports Mini, 4G,
Photo, Nano, 5G iPod® and iPhone®
devices. Some iPod® software ver-
sions may not fully support the iPod®control features. Please visit Apple’s
website for software updates.
For further information, refer to the
Uconnect® User’s Manual.
HARMAN KARDON®
Logic7® HIGH
PERFORMANCE
MULTICHANNEL
SURROUND SOUND
SYSTEM WITH
DRIVER-SELECTABLE
SURROUND (DSS) (for
versions/markets, where
required)
Your vehicle is equipped with a Har-
man Kardon® audio system with
GreenEdge™ technology that offers
superior sound quality, higher Sound
Pressure Levels (SPL) and reduced
energy consumption. The new system
utilizes proprietary amplifier and
speaker technologies delivering sub-
stantial increases in component and
system efficiency levels.
The 12 Channel Class D GreenEdge
high efficiency amplifier is governed
by a high voltage tracking power sup-
ply and drives a 7.5-channel play-
back architecture. The Harman Kar-
don® audio system offers the ability
to choose Logic 7 surround sound for
any audio source. The GreenEdge
high-efficiency speaker designs en-
sure the system has higher SPL and a
dramatic increase in dynamic sound
quality. The speakers are tuned for
maximum efficiency and perfectly
matched to the amplifier output stage
ensuring state of the art multi-seat
surround sound processing.
Logic7® multichannel surround-
sound technology delivers an immer-
sive, accurate sound-stage to every
seating position This surround effect
is available for audio from any source
- AM/FM/CD/ or dashboard AUX in-
put; and is activated through the
Uconnect® System. Refer to “Sur-
round Sound” under “Uconnect®
Settings” in “Understanding Your In-
strument Panel”.
Setting The Analog Clock
184
Page 192 of 332
on the vehicle, the center button will
select the next available CD in the
player.
CD/DVD DISC
MAINTENANCE
To keep a CD/DVD in good condition,
take the following precautions:
1. Handle the disc by its edge; avoid
touching the surface.
2. If the disc is stained, clean the
surface with a soft cloth, wiping from
center to edge.
3. Do not apply paper or tape to the
disc; avoid scratching the disc.
4. Do not use solvents such as ben-
zene, thinner, cleaners, or anti-static
sprays.
5. Store the disc in its case after play-
ing.
6. Do not expose the disc to direct
sunlight.
7. Do not store the disc where tem-
peratures may become too high.NOTE: If you experience diffi-
culty in playing a particular disc, it
may be damaged (i.e., scratched,
reflective coating removed, a hair,
moisture or dew on the disc) over-
sized, or have protection encoding.
Try a known good disc before con-
sidering disc player service.
RADIO OPERATION AND
MOBILE PHONES
Under certain conditions, the mobile
phone being on in your vehicle can
cause erratic or noisy performance
from your radio. This condition may
be lessened or eliminated by relocat-
ing the mobile phone antenna. This
condition is not harmful to the radio.
If your radio performance does not
satisfactorily “clear” by the reposi-
tioning of the antenna, it is recom-
mended that the radio volume be
turned down or off during mobile
phone operation.
CLIMATE CONTROLS
The air conditioning and heating sys-
tem is designed to make you comfort-
able in all types of weather. This sys-
tem can be operated through either
the controls on the instrument panel
or through the Uconnect® system dis-
play.
When the Uconnect® system is in dif-
ferent modes (Radio, Player, Settings,
More, etc.) the driver and passenger
temperature settings will be indicated
at the top of the display.
GENERAL OVERVIEW
Hard-Keys
The hard-keys are located below the
Uconnect® screen, in the center of the
instrument panel.
186
Page 267 of 332

2. Connect the opposite end of the
positive(+)jumper cable to the posi-
tive (+)post of the booster battery.
3. Connect the negative end (-)of the
jumper cable to the negative (-)post
of the booster battery.
4. Connect the opposite end of the
negative (-)jumper cable to the re-
mote negative (-)post of the vehicle
with the discharged battery.
WARNING!
Do not connect the jumper cable to
the negative (-)post of the dis-
charged battery. The resulting elec-
trical spark could cause the battery
to explode and could result in per-
sonal injury. Only use the specific
ground point, do not use any other
exposed metal parts.
5. Start the engine in the vehicle that
has the booster battery, let the engine
idle a few minutes, and then start the
engine in the vehicle with the dis-
charged battery. Once the engine is started, remove the
jumper cables in the reverse sequence:
6. Disconnect the negative
(-)jumper
cable from the remote negative (-)
post of the vehicle with the discharged
battery.
7. Disconnect the negative end (-)of
the jumper cable from the negative (-)
post of the booster battery.
8. Disconnect the opposite end of the
positive (+)jumper cable from the
positive (+)post of the booster bat-
tery.
9. Disconnect the positive (+)end of
the jumper cable from the remote
positive (+)post of the discharged ve-
hicle.
If frequent jump-starting is required
to start your vehicle you should have
the battery and charging system in-
spected at your authorized dealer.
CAUTION!
Accessories plugged into the vehicle
power outlets draw power from the
vehicle’s battery, even when not in
use (i.e., cellular phones, etc.).
Eventually, if plugged in long
enough without engine operation,
the vehicle’s battery will discharge
sufficiently to degrade battery life
and/or prevent the engine from
starting.
FREEING A STUCK
VEHICLE
If your vehicle becomes stuck in mud,
sand, or snow, it can often be moved
by a rocking motion. Turn your steer-
ing wheel right and left to clear the
area around the front wheels. Then
shift back and forth between DRIVE
and REVERSE. Using minimal accel-
erator pedal pressure to maintain the
rocking motion, without spinning the
wheels, is most effective.
NOTE: For vehicles with 8-speed
transmission: Shifts between
DRIVE and REVERSE can only be
261
Page 308 of 332

ARRANGEMENTS FOR
DEALING WITH THE
VEHICLE AT THE END OF
ITS LIFE
LANCIA has been committed for
many years to safeguarding the envi-
ronment through the constant im-
provement of its production processes
and manufacturing products that are
increasingly “eco-compatible”.
To give customers the best possible
service in terms of respecting environ-
mental laws and in response to Euro-
pean Directive 2000/53/EC govern-
ing vehicles at the end of their life,
LANCIA is offering its customers the
opportunity of handing over their ve-
hicle* at the end of its life without
incurring any additional costs.
The European Directive sets out that
when the vehicle is handed over the
last keeper or owner should not incur
any expenses as a result of it having a
zero or negative market value.In all European Union countries, until
1st January 2007, only vehicles regis-
tered after 1st July 2002 were col-
lected free of charge, while since 2007
collection has been free of charge irre-
spective of the year of registration as
long as the vehicle contains its basic
components (in particular, the engine
and bodywork) and has no additional
waste.
To hand your vehicle over at the end
of its life without extra cost, go to one
of our Dealerships or LANCIA-
authorized collection and scrapping
centres.
These centres have been carefully
chosen to offer high quality service for
the collection, treatment and recy-
cling of unused vehicles with respect
to the environment.
You can find further information on
these collection and scrapping centres
either from a LANCIA or LANCIA
Commercial Vehicle Dealership or by
calling the freephone number
00800 526242 00 or by going on the
LANCIA website.
(*) Vehicle for transporting passen-
gers with a maximum of nine seats
and a total permitted weight of 3.5 t
302