2014 KIA Sportage engine
[x] Cancel search: enginePage 182 of 457
Features of your vehicle
90
4
D210000AEN
D210200AAM-EU
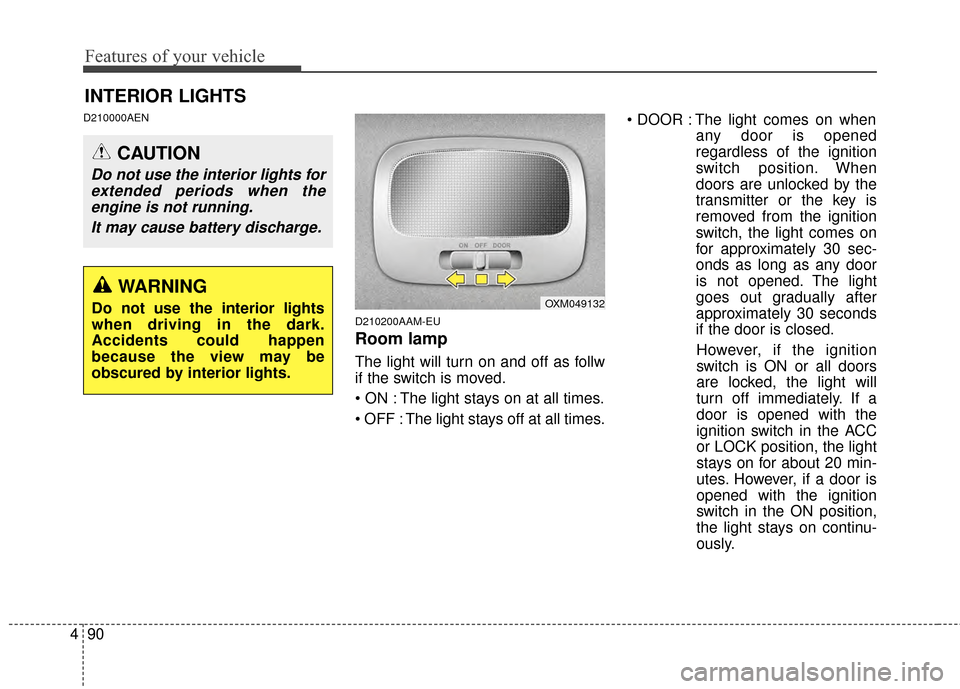
Room lamp
The light will turn on and off as follw
if the switch is moved.
The light stays on at all times.
The light stays off at all times. The light comes on when
any door is opened
regardless of the ignition
switch position. When
doors are unlocked by the
transmitter or the key is
removed from the ignition
switch, the light comes on
for approximately 30 sec-
onds as long as any door
is not opened. The light
goes out gradually after
approximately 30 seconds
if the door is closed.
However, if the ignition
switch is ON or all doors
are locked, the light will
turn off immediately. If a
door is opened with the
ignition switch in the ACC
or LOCK position, the light
stays on for about 20 min-
utes. However, if a door is
opened with the ignition
switch in the ON position,
the light stays on continu-
ously.
INTERIOR LIGHTS
CAUTION
Do not use the interior lights for extended periods when theengine is not running.
It may cause battery discharge.
OXM049132WARNING
Do not use the interior lights
when driving in the dark.
Accidents could happen
because the view may be
obscured by interior lights.
Page 185 of 457
493
Features of your vehicle
DEFROSTER
220000AUN
✽
✽NOTICE
If you want to defrost and defog the
front windshield, refer to
“Windshield defrosting and defog-
ging” in this section.Rear window defroster
The defroster heats the window to
remove frost, fog and thin ice from
the rear window, while the engine is
running.
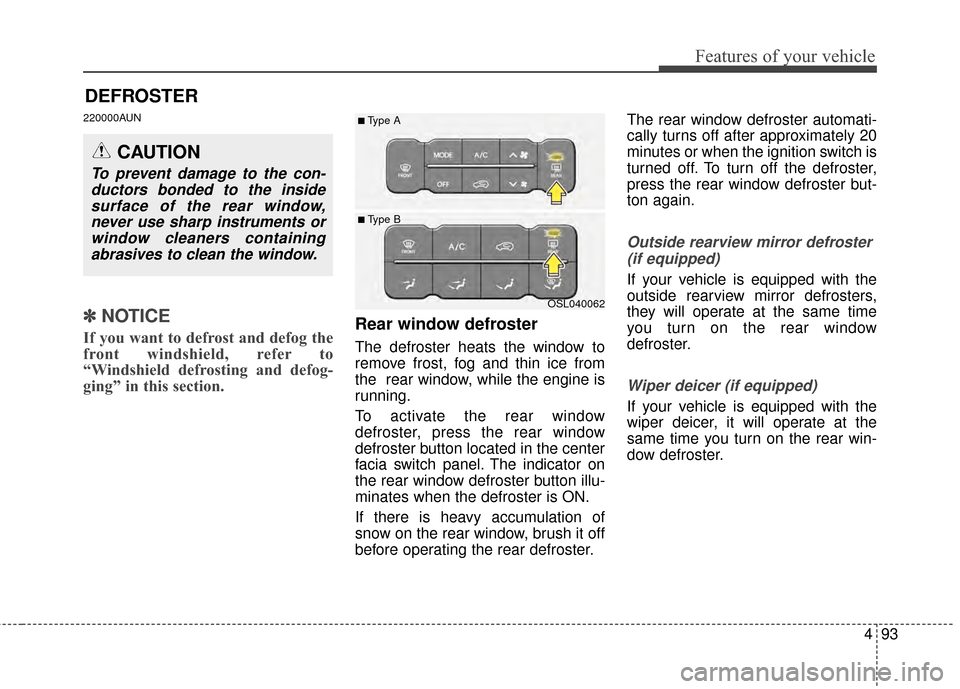
To activate the rear window
defroster, press the rear window
defroster button located in the center
facia switch panel. The indicator on
the rear window defroster button illu-
minates when the defroster is ON.
If there is heavy accumulation of
snow on the rear window, brush it off
before operating the rear defroster. The rear window defroster automati-
cally turns off after approximately 20
minutes or when the ignition switch is
turned off. To turn off the defroster,
press the rear window defroster but-
ton again.
Outside rearview mirror defroster
(if equipped)
If your vehicle is equipped with the
outside rearview mirror defrosters,
they will operate at the same time
you turn on the rear window
defroster.
Wiper deicer (if equipped)
If your vehicle is equipped with the
wiper deicer, it will operate at the
same time you turn on the rear win-
dow defroster.
CAUTION
To prevent damage to the con-ductors bonded to the insidesurface of the rear window,never use sharp instruments orwindow cleaners containingabrasives to clean the window.
OSL040062
■ Type B
■Type A
Page 186 of 457
Features of your vehicle
94
4
Heating and air conditioning
1.Start the engine.
2.Set the mode to the desired posi-
tion.
For improving the effectiveness of
heating and cooling;
- Heating:
- Cooling:
3.Set the temperature control to the desired position.
4.Set the air intake control to the out- side (fresh) air position (if
equipped).
5.Set the fan speed control to the desired speed.
6.If air conditioning is desired, turn the air conditioning system (if
equipped) on.
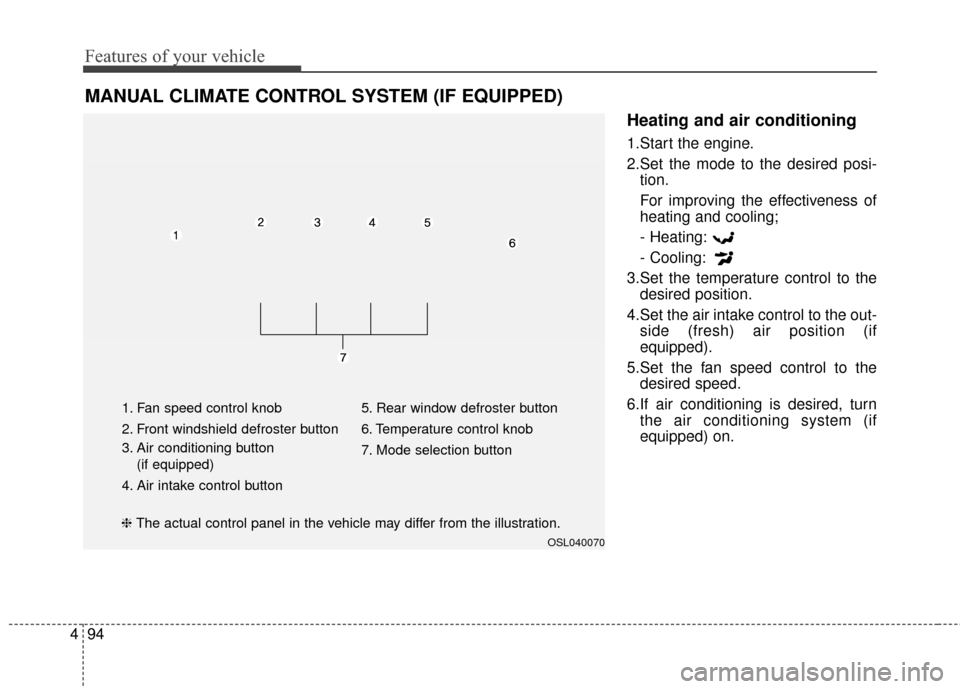
MANUAL CLIMATE CONTROL SYSTEM (IF EQUIPPED)
OSL040070
1. Fan speed control knob
2. Front windshield defroster button
3. Air conditioning button
(if equipped)
4. Air intake control button 5. Rear window defroster button
6. Temperature control knob
7. Mode selection button
❈
The actual control panel in the vehicle may differ from the illustration.
Page 192 of 457
Features of your vehicle
100
4
Operation Tips
To keep dust or unpleasant fumes
from entering the vehicle through
the ventilation system, temporarily
set the air intake control to the
recirculated air position. Be sure to
return the control to the fresh air
position when the irritation has
passed to keep fresh air in the
vehicle. This will help keep the driv-
er alert and comfortable.
Air for the heating/cooling system is drawn in through the grilles just
ahead of the windshield. Care
should be taken that these are not
blocked by leaves, snow, ice or
other obstructions.
To prevent interior fog on the wind- shield, set the air intake control to
the fresh air position and fan speed
to the desired position, turn on the
air conditioning system, and adjust
the temperature control to desired
temperature.Air conditioning
Kia Air Conditioning Systems are
filled with environmentally friendly
R-134a refrigerant.
1.Start the engine. Press the air con-ditioning button.
2.Set the mode to the position.
3.Set the air intake control to the out- side air or recirculated air position.
4.Adjust the fan speed control and temperature control to maintain
maximum comfort.
When maximum cooling is desired, set the temperature control to the
extreme left position, set the mode
control to the MAX A/C position,
then set the fan speed control to
the highest speed.
✽ ✽ NOTICE
• When using the air conditioning
system, monitor the temperature
gauge closely while driving up
hills or in heavy traffic when out-
side temperatures are high. Air
conditioning system operation
may cause engine overheating.
Continue to use the blower fan but
turn the air conditioning system
off if the temperature gauge indi-
cates engine overheating.
• When opening the windows in humid weather air conditioning
may create water droplets inside
the vehicle. Since excessive water
droplets may cause damage to
electrical equipment, air condi-
tioning should only be used with
the windows closed.
Page 193 of 457
4101
Features of your vehicle
Air conditioning system operation tips
If the vehicle has been parked indirect sunlight during hot weather,
open the windows for a short time
to let the hot air inside the vehicle
escape.
To help reduce moisture inside of the windows on rainy or humid
days, decrease the humidity inside
the vehicle by operating the air
conditioning system.
During air conditioning system operation, you may occasionally
notice a slight change in engine
speed as the air conditioning com-
pressor cycles. This is a normal
system operation characteristic.
Use the air conditioning system every month only for a few minutes
to ensure maximum system per-
formance. When using the air conditioning
system, you may notice clear water
dripping (or even puddling) on the
ground under the passenger side
of the vehicle. This is a normal sys-
tem operation characteristic.
Operating the air conditioning sys- tem in the recirculated air position
provides maximum cooling, how-
ever, continual operation in this
mode may cause the air inside the
vehicle to become stale.
During cooling operation, you may occasionally notice a misty air flow
because of rapid cooling and
humid air intake. This is a normal
system operation characteristic.
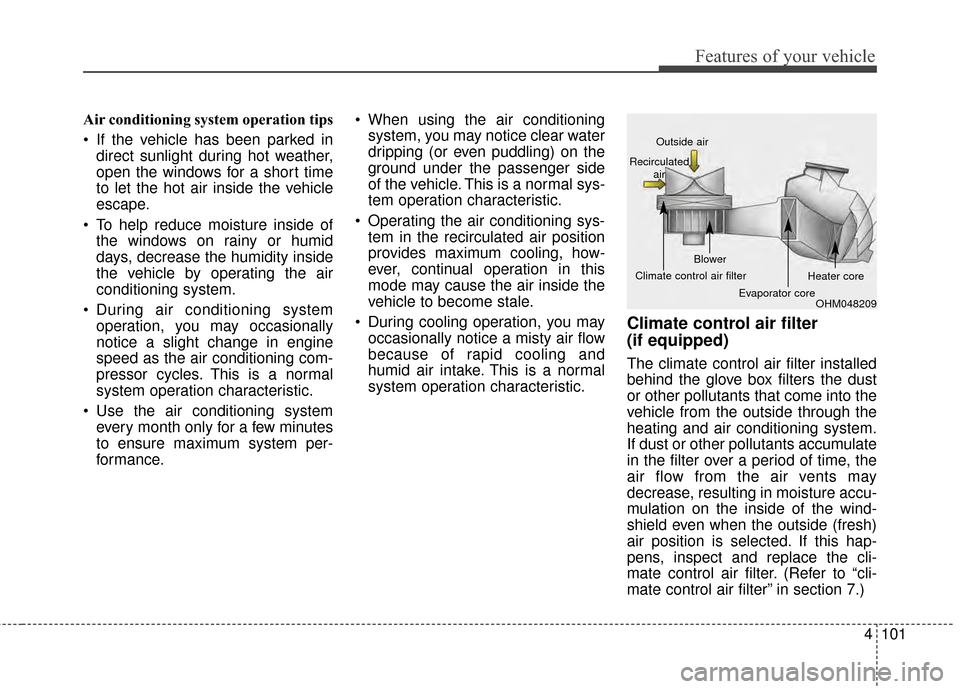
Climate control air filter
(if equipped)
The climate control air filter installed
behind the glove box filters the dust
or other pollutants that come into the
vehicle from the outside through the
heating and air conditioning system.
If dust or other pollutants accumulate
in the filter over a period of time, the
air flow from the air vents may
decrease, resulting in moisture accu-
mulation on the inside of the wind-
shield even when the outside (fresh)
air position is selected. If this hap-
pens, inspect and replace the cli-
mate control air filter. (Refer to “cli-
mate control air filter” in section 7.)
OHM048209
Outside air
Recirculated air
Climate control air filter Blower
Evaporator core Heater core
Page 197 of 457
4105
Features of your vehicle
✽
✽NOTICE
Never place anything over the sen-
sor located on the instrument panel
to ensure better control of the heat-
ing and cooling system.
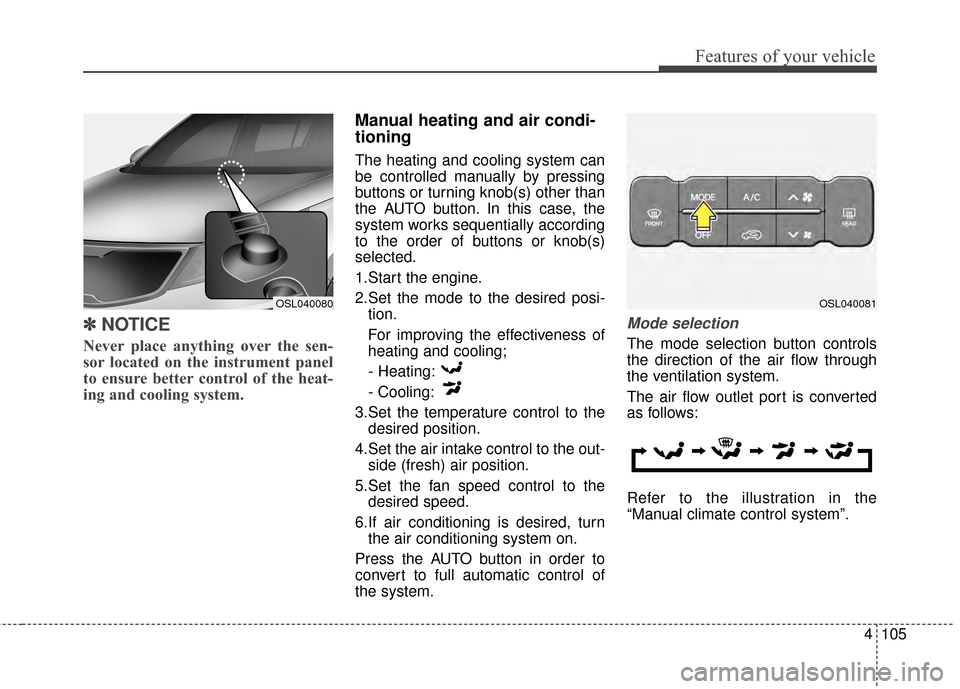
Manual heating and air condi-
tioning
The heating and cooling system can
be controlled manually by pressing
buttons or turning knob(s) other than
the AUTO button. In this case, the
system works sequentially according
to the order of buttons or knob(s)
selected.
1.Start the engine.
2.Set the mode to the desired posi-
tion.
For improving the effectiveness of
heating and cooling;
- Heating:
- Cooling:
3.Set the temperature control to the desired position.
4.Set the air intake control to the out- side (fresh) air position.
5.Set the fan speed control to the desired speed.
6.If air conditioning is desired, turn the air conditioning system on.
Press the AUTO button in order to
convert to full automatic control of
the system.
Mode selection
The mode selection button controls
the direction of the air flow through
the ventilation system.
The air flow outlet port is converted
as follows:
Refer to the illustration in the
“Manual climate control system”.
OSL040081OSL040080
Page 211 of 457
4119
Features of your vehicle
The ticket holder (5) is provided for
holding a tollgate ticket. (if equipped)
* The actual sunvisor lamp in thevehicle may differ from the illustra-
tion.
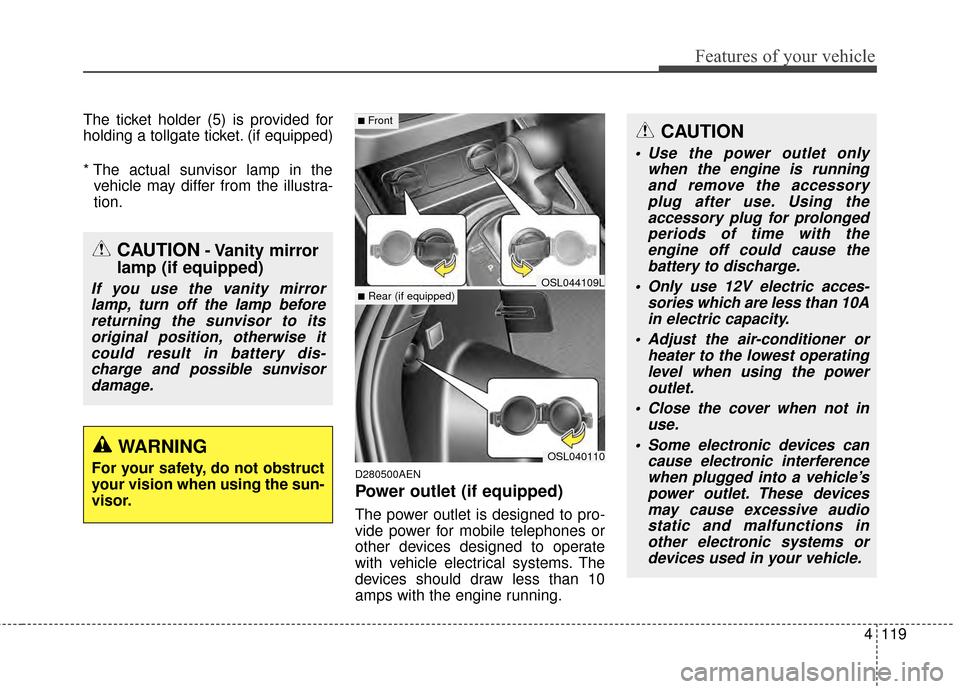
D280500AEN
Power outlet (if equipped)
The power outlet is designed to pro-
vide power for mobile telephones or
other devices designed to operate
with vehicle electrical systems. The
devices should draw less than 10
amps with the engine running.
CAUTION- Vanity mirror
lamp (if equipped)
If you use the vanity mirror
lamp, turn off the lamp beforereturning the sunvisor to itsoriginal position, otherwise itcould result in battery dis-charge and possible sunvisordamage.
OSL040110
■Front
■Rear (if equipped)OSL044109L
CAUTION
Use the power outlet only when the engine is runningand remove the accessoryplug after use. Using theaccessory plug for prolongedperiods of time with theengine off could cause thebattery to discharge.
Only use 12V electric acces- sories which are less than 10Ain electric capacity.
Adjust the air-conditioner or heater to the lowest operatinglevel when using the poweroutlet.
Close the cover when not in use.
Some electronic devices can cause electronic interferencewhen plugged into a vehicle’spower outlet. These devicesmay cause excessive audiostatic and malfunctions inother electronic systems ordevices used in your vehicle.
WARNING
For your safety, do not obstruct
your vision when using the sun-
visor.
Page 220 of 457
Features of your vehicle
128
4
D300205AHM
MUTE (4)
Press the button to mute the
sound.
Press the button to turn off the microphone during a telephone
call.
Detailed information for audio control
buttons is described in the following
pages in this section.
D300600AHM-EE
Aux, USB and iPod®* port
(if equipped)
If your vehicle has an aux and/or
USB(universal serial bus) port or
iPod
®port, you can use an aux port
to connect audio devices and an
USB port to plug in an USB and also
an iPod
®port to plug in an iPod®.
✽ ✽ NOTICE
When using a portable audio device
connected to the power outlet, noise
may occur during playback. If this
happens, use the power source of the
portable audio device.
*iPod®is a trademark of Apple Inc.
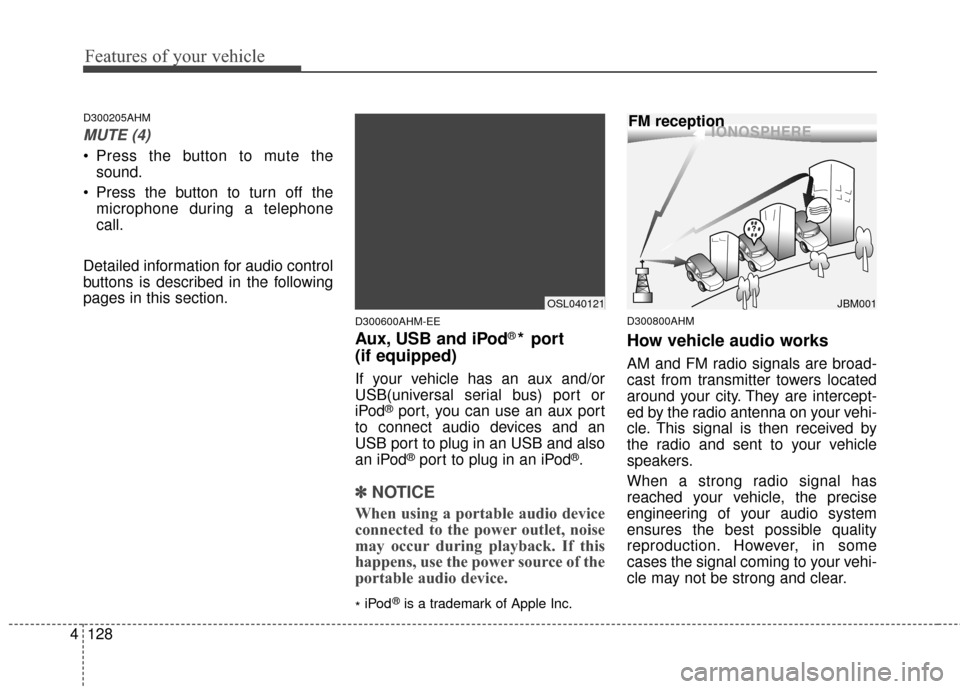
D300800AHM
How vehicle audio works
AM and FM radio signals are broad-
cast from transmitter towers located
around your city. They are intercept-
ed by the radio antenna on your vehi-
cle. This signal is then received by
the radio and sent to your vehicle
speakers.
When a strong radio signal has
reached your vehicle, the precise
engineering of your audio system
ensures the best possible quality
reproduction. However, in some
cases the signal coming to your vehi-
cle may not be strong and clear.
¢¢¢
JBM001
FM reception
OSL040121