Page 143 of 382
Features of your vehicle
134
3
1VQA2141
1VQA2333
Main control switch
OFF Any
Close ONOFF*
2)OFF
ON ( ) Any
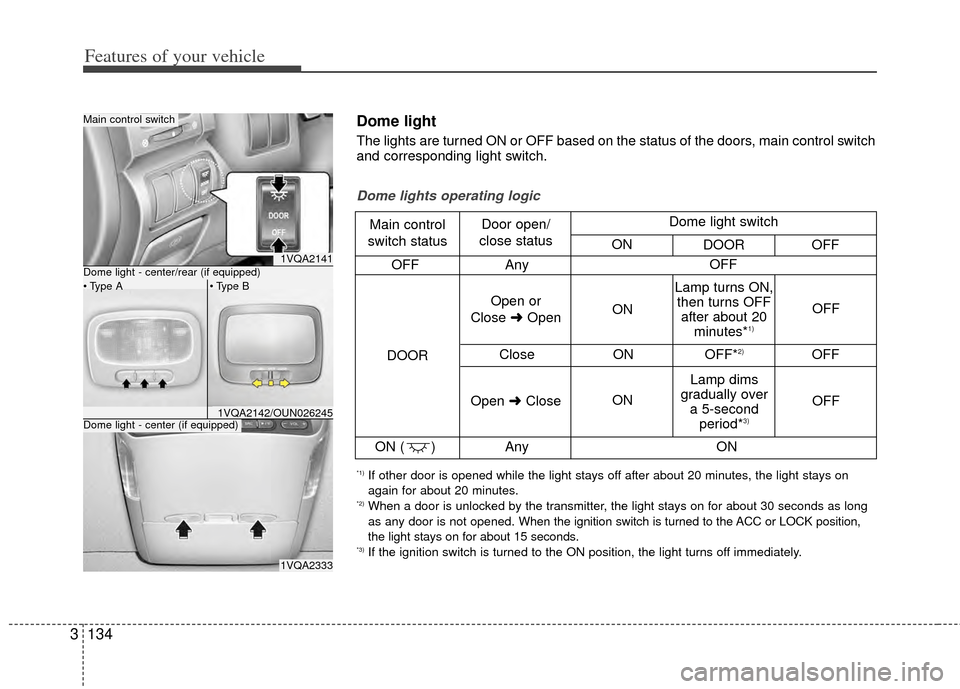
Dome lights operating logic
Main control
switch status Door open/
close status
DOOR Open or
Close ➜Open ON
ON OFF
OFF
Lamp turns ON,
then turns OFF after about 20 minutes*
1)
Lamp dims
gradually over a 5-second period*
3)
Open ➜Close OFF
ON
Dome light switch
ON DOOR OFF
*1) If other door is opened while the light stays off after about 20 minutes, the light stays on
again for about 20 minutes.
*2) When a door is unlocked by the transmitter, the light stays on for about 30 seconds as long
as any door is not opened. When the ignition switch is turned to the ACC or LOCK position,
the light stays on for about 15 seconds.
*3) If the ignition switch is turned to the ON position, the light turns off immediately.
Dome light
The lights are turned ON or OFF based on the status of the doors, main control switch
and corresponding light switch.
1VQA2142/OUN026245Dome light - center (if equipped)
Dome light - center/rear (if equipped)
Page 146 of 382
3137
Features of your vehicle
Battery saver function
The purpose of this feature is to pre-vent the battery from being dis-
charged. The system automatically
turns off the parking lights when the
driver removes the ignition key and
opens the driver- side door.
With this feature, the parking lights will be turned off automatically if the driver
parks on the side of road at night.
If necessary, to keep the lights on
when the ignition key is removed, per-
form the following :
1) Open the driver-side door.
2) Turn the parking lights OFF and ON again using the light switch on the
steering column.
Rescue mode function
If your vehicle has any problem on the
vehicle network system, the headlights
(low beam) and parking lights turn on
automatically with the ignition switch in
the ON position even though the head-
light switch is not turned on. At this time,
the emergency lighting is not turned off
when the headlight switch is turned off.
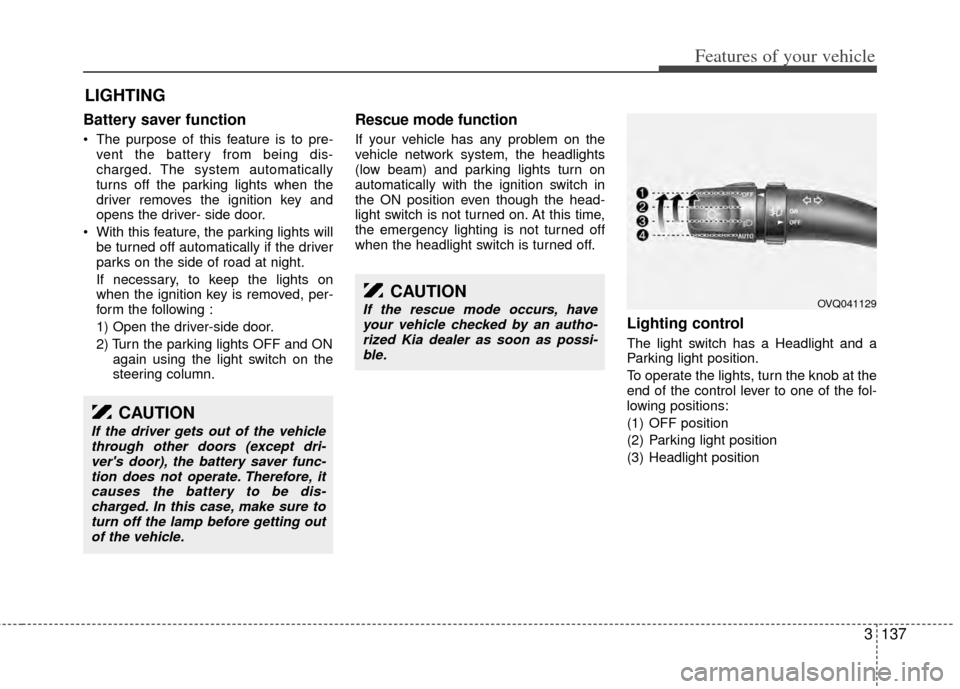
Lighting control
The light switch has a Headlight and a
Parking light position.
To operate the lights, turn the knob at the
end of the control lever to one of the fol-
lowing positions:
(1) OFF position
(2) Parking light position
(3) Headlight position
LIGHTING
CAUTION
If the driver gets out of the vehiclethrough other doors (except dri-ver's door), the battery saver func-tion does not operate. Therefore, itcauses the battery to be dis-charged. In this case, make sure toturn off the lamp before getting out of the vehicle.
CAUTION
If the rescue mode occurs, haveyour vehicle checked by an autho-rized Kia dealer as soon as possi-ble.OVQ041129
Page 147 of 382
Features of your vehicle
138
3
Parking light position ( )
When the light switch is in the parking
light position (1st position), the tail, posi-
tion, license and instrument panel lights
are ON.
Headlight position ( )
When the light switch is in the headlight
position (2nd position) the head, tail,
position, license and instrument panel
lights are ON.
✽ ✽
NOTICE
The ignition switch must be in the ON
position to turn on the headlights.
High - beam operation
To turn on the high beam headlights,
push the lever away from you. Pull it back
for low beams.
The high-beam indicator will light when
the headlight high beams are switched
on.
To prevent the battery from being dis-
charged, do not leave the lights on for a
prolonged time while the engine is not
running.
OVQ041130OVQ041131OVQ041134
Page 148 of 382

3139
Features of your vehicle
Flashing headlights
To flash the headlights, pull the lever
towards you. It will return to the normal
(low-beam) position when released. The
headlight switch does not need to be on
to use this flashing feature.
Turn signals (A)
The ignition switch must be on for the
turn signals to function. To turn on the
turn signals, move the lever up or down.
Green arrow indicators on the instrument
panel indicate which turn signal is oper-
ating. They will self-cancel after a turn is
completed. If the indicator continues to
flash after a turn, manually return the
lever to the OFF position.
Lane change signals (B)
To signal a lane change, move the turn
signal lever slightly and hold it in position.
The lever will return to the OFF position
when released.
If an indicator stays on and does not
flash or if it flashes abnormally, one of the
turn signal bulbs may be burned out and
will require replacement.
✽ ✽NOTICE
If an indicator flash is abnormally quick
or slow, bulb may be burned out or have
a poor electrical connection in the cir-
cuit.OVQ041132OVQ041133
Page 150 of 382
3141
Features of your vehicle
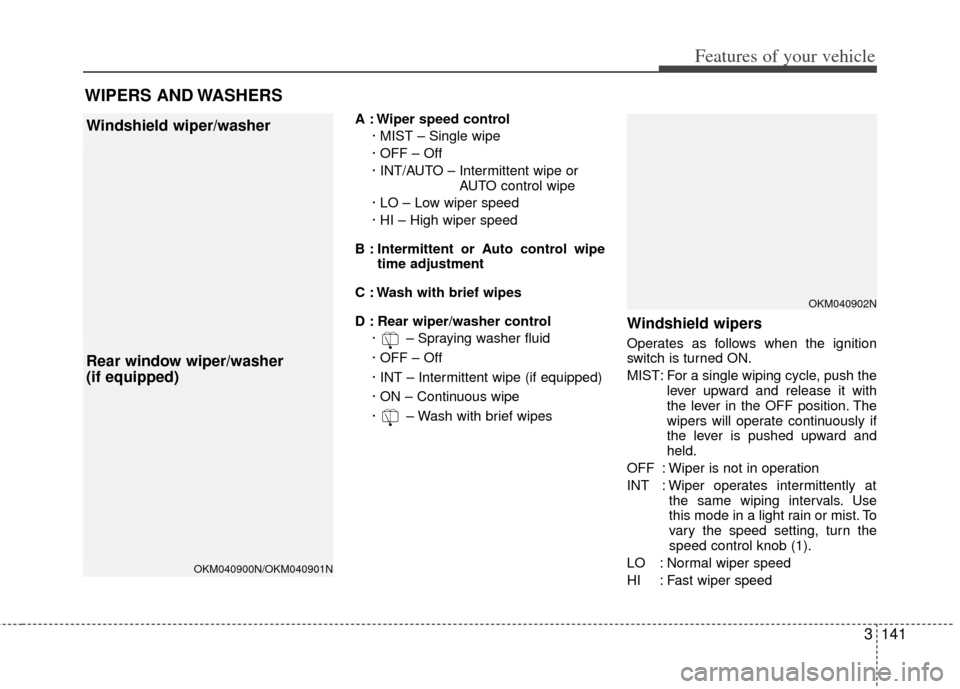
A : Wiper speed control· MIST – Single wipe
· OFF – Off
· INT/AUTO – Intermittent wipe or AUTO control wipe
· LO – Low wiper speed
· HI – High wiper speed
B : Intermittent or Auto control wipe time adjustment
C : Wash with brief wipes
D : Rear wiper/washer control · – Spraying washer fluid
· OFF – Off
· INT – Intermittent wipe (if equipped)
· ON – Continuous wipe
· – Wash with brief wipes
Windshield wipers
Operates as follows when the ignition
switch is turned ON.
MIST: For a single wiping cycle, push the lever upward and release it with
the lever in the OFF position. The
wipers will operate continuously if
the lever is pushed upward and
held.
OFF : Wiper is not in operation
INT : Wiper operates intermittently at the same wiping intervals. Use
this mode in a light rain or mist. To
vary the speed setting, turn the
speed control knob (1).
LO : Normal wiper speed
HI : Fast wiper speed
WIPERS AND WASHERS
OKM040900N/OKM040901N
Windshield wiper/washer
Rear window wiper/washer
(if equipped)
OKM040902N
Page 151 of 382
Features of your vehicle
142
3
✽
✽
NOTICE
If there is heavy accumulation of snow
or ice on the windshield, defrost the
windshield for about 10 minutes, or
until the snow and/or ice is removed
before using the windshield wipers to
ensure proper operation.
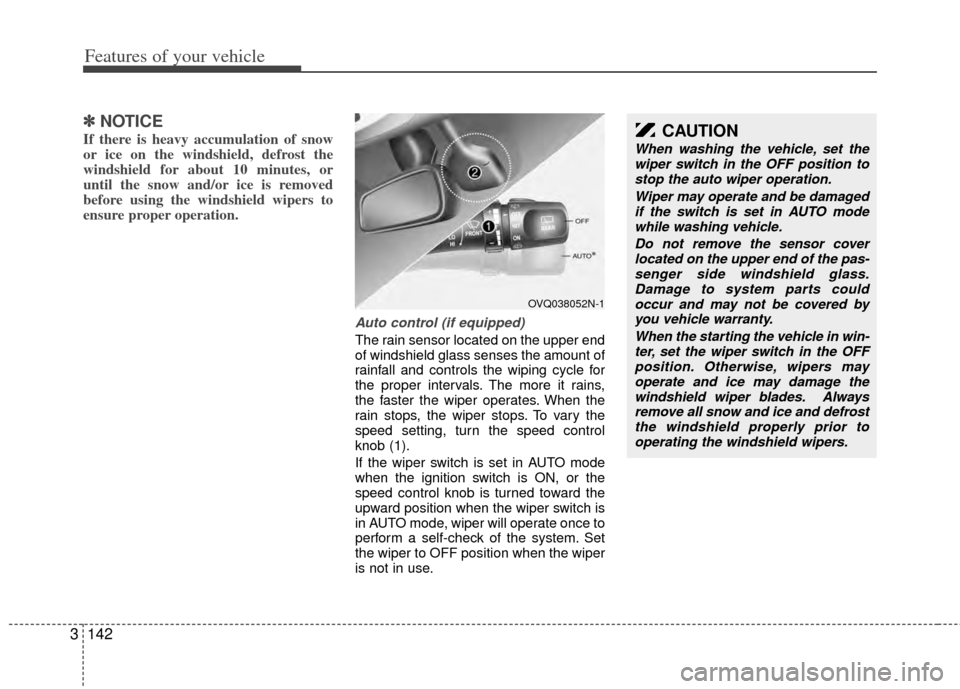
Auto control (if equipped)
The rain sensor located on the upper end
of windshield glass senses the amount of
rainfall and controls the wiping cycle for
the proper intervals. The more it rains,
the faster the wiper operates. When the
rain stops, the wiper stops. To vary the
speed setting, turn the speed control
knob (1).
If the wiper switch is set in AUTO mode
when the ignition switch is ON, or the
speed control knob is turned toward the
upward position when the wiper switch is
in AUTO mode, wiper will operate once to
perform a self-check of the system. Set
the wiper to OFF position when the wiper
is not in use.
OVQ038052N-1
CAUTION
When washing the vehicle, set the
wiper switch in the OFF position tostop the auto wiper operation.
Wiper may operate and be damagedif the switch is set in AUTO modewhile washing vehicle.
Do not remove the sensor coverlocated on the upper end of the pas- senger side windshield glass.Damage to system parts could occur and may not be covered byyou vehicle warranty.
When the starting the vehicle in win-ter, set the wiper switch in the OFFposition. Otherwise, wipers mayoperate and ice may damage the windshield wiper blades. Alwaysremove all snow and ice and defrost the windshield properly prior tooperating the windshield wipers.
Page 152 of 382
3143
Features of your vehicle
Variable intermittent wipers
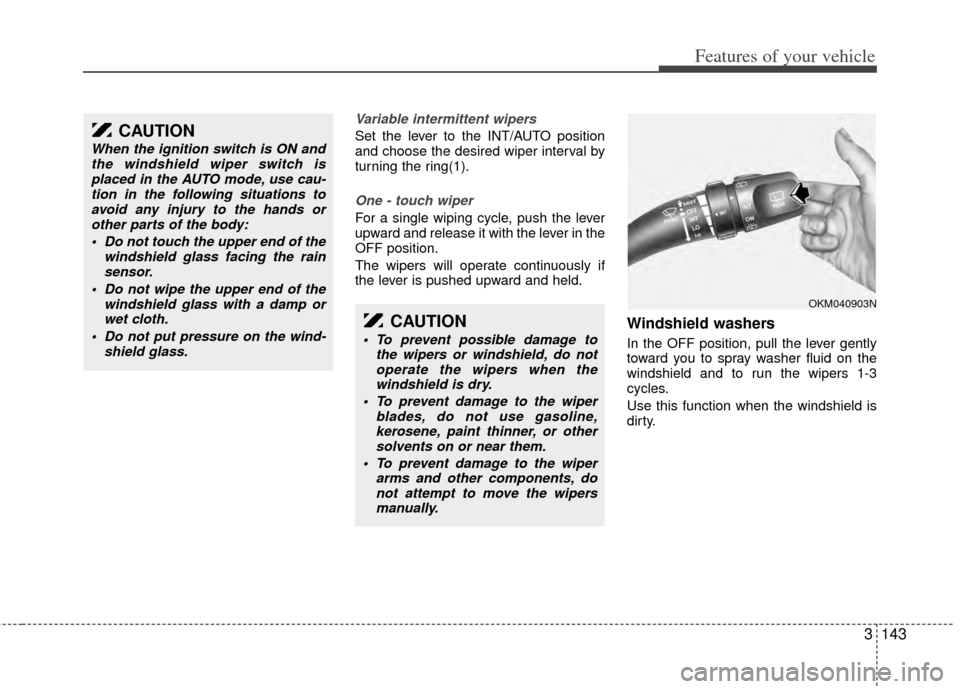
Set the lever to the INT/AUTO position
and choose the desired wiper interval by
turning the ring(1).
One - touch wiper
For a single wiping cycle, push the lever
upward and release it with the lever in the
OFF position.
The wipers will operate continuously if
the lever is pushed upward and held.
Windshield washers
In the OFF position, pull the lever gently
toward you to spray washer fluid on the
windshield and to run the wipers 1-3
cycles.
Use this function when the windshield is
dirty.
CAUTION
When the ignition switch is ON andthe windshield wiper switch isplaced in the AUTO mode, use cau-tion in the following situations toavoid any injury to the hands orother parts of the body:
Do not touch the upper end of the windshield glass facing the rainsensor.
Do not wipe the upper end of the windshield glass with a damp orwet cloth.
Do not put pressure on the wind- shield glass.
CAUTION
To prevent possible damage tothe wipers or windshield, do notoperate the wipers when thewindshield is dry.
To prevent damage to the wiper blades, do not use gasoline,kerosene, paint thinner, or othersolvents on or near them.
To prevent damage to the wiper arms and other components, donot attempt to move the wipersmanually.
OKM040903N
Page 154 of 382
3145
Features of your vehicle
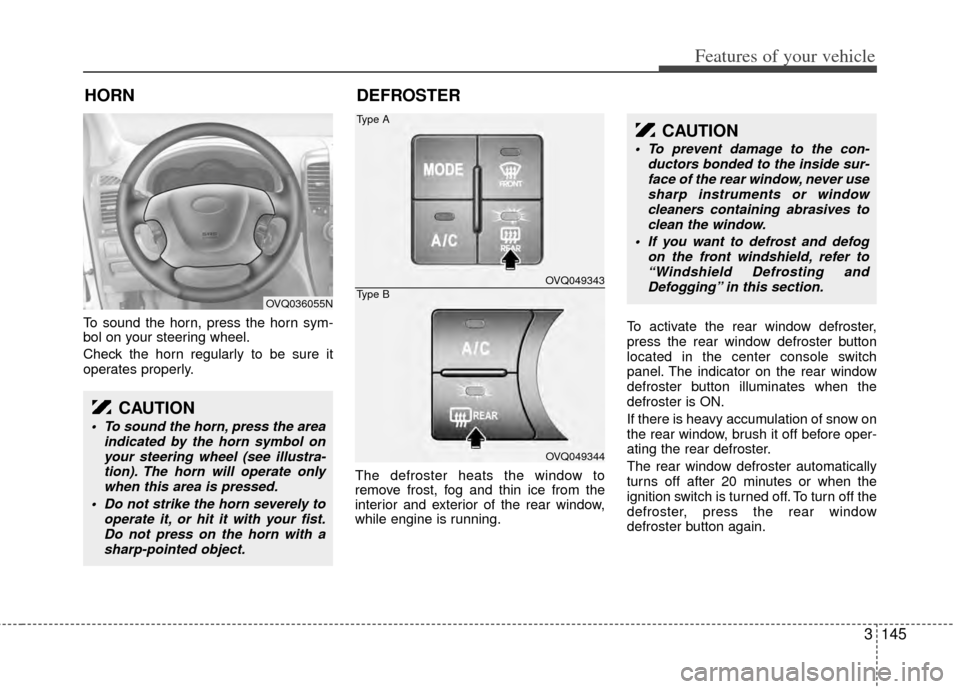
To sound the horn, press the horn sym-
bol on your steering wheel.
Check the horn regularly to be sure it
operates properly.The defroster heats the window to
remove frost, fog and thin ice from the
interior and exterior of the rear window,
while engine is running.To activate the rear window defroster,
press the rear window defroster button
located in the center console switch
panel. The indicator on the rear window
defroster button illuminates when the
defroster is ON.
If there is heavy accumulation of snow on
the rear window, brush it off before oper-
ating the rear defroster.
The rear window defroster automatically
turns off after 20 minutes or when the
ignition switch is turned off. To turn off the
defroster, press the rear window
defroster button again.
HORN
CAUTION
To sound the horn, press the area
indicated by the horn symbol onyour steering wheel (see illustra-tion). The horn will operate only when this area is pressed.
Do not strike the horn severely to operate it, or hit it with your fist.Do not press on the horn with asharp-pointed object.
OVQ036055N
DEFROSTER
OVQ049343
OVQ049344
Type A
Type B
CAUTION
To prevent damage to the con- ductors bonded to the inside sur-face of the rear window, never use sharp instruments or windowcleaners containing abrasives to clean the window.
If you want to defrost and defog on the front windshield, refer to“Windshield Defrosting andDefogging” in this section.