2014 KIA Sedona ECU
[x] Cancel search: ECUPage 187 of 382

Features of your vehicle
178
3
Your new mirror comes with an integrat-
ed HomeLink®Universal Transceiver,
which allows you to program the mirror to
activate your garage door(s), estate gate,
home lighting, etc. The mirror actually
learns the codes from your various exist-
ing transmitters.
* HomeLink®is a registered trademark of
Johnson Controls, Inc
Programming
Your vehicle may require the ignition
switch to be turned to the ACC position
for programming and/or operation of
HomeLink
®. It is also recommended that
a new battery be replaced in the hand-
held transmitter of the device being pro-
grammed to HomeLink
®for quicker train-
ing and accurate transmission of the
radio-frequency.
Follow these steps to train your
HomeLink
®mirror:
HOMELINK® WIRELESS CONTROL SYSTEM (IF EQUIPPED)
WARNING
When programming the HomeLink®Wireless Control
System, you may be operating a
garage door or gate operator.
Make sure that people and objects
are out of the way of the moving
door or gate to prevent potential
harm or damage.
Do not use HomeLink
®with any
garage door opener that lacks the
safety stop and reverse feature as
required by federal safety stan-
dards. (This includes any garage
door opener model manufactured
before April 1, 1982.) A garage
door opener which cannot detect
an object, signaling the door to
stop and reverse, does not meet
current federal safety standards.
Using a garage door opener with-
out these features increases risk
of serious injury or death. For
more information, call 1-800-355-
3515 or on the internet at
www.homelink.com.
(Continued)
(Continued)
Retain the original transmitter forfuture programming procedures
(i.e., new vehicle purchase). It is
also suggested that upon the sale
of the vehicle, the programmed
HomeLink
®buttons be erased for
security purposes (follow step 1
in the “Programming” portion of
this text).
OVQ036305N
Glare detection sensor
Indicator light
Homelink®buttons
Page 189 of 382
Features of your vehicle
180
3
Rolling code programming
To train a garage door opener (or other
rolling code equipped devices) with the
rolling code feature, follow these instruc-
tions after completing the “Programming”
portion of this text. (A second person
may make the following training proce-
dures quicker & easier.)
4. Locate the “learn” or “smart” button on
the device’s motor head unit. Exact
location and color of the button may
vary by product brand. If there is diffi-
culty locating the “learn” or “smart” but-
ton, reference the device’s owner’s
manual or contact HomeLink
®at 1-
800-355-3515 or on the internet at
www.homelink.com.
5. Press and release the “learn” or “smart” button on the device’s motor
head unit. You have 30 seconds to
complete step number 6.
6. Return to the vehicle and firmly press and release the programmed
HomeLink
®button up to three times.
The rolling code equipped device
should now recognize the HomeLink
®
signal and activate when the
HomeLink®button is pressed. The
remaining two buttons may now be
programmed if this has not previously
been done. Refer to the
“Programming” portion of this text.
Operating HomeLink®
To operate, simply press the pro-
grammed HomeLink®button. Activation
will now occur for the trained product
(garage door, security system, entry door
lock, estate gate, or home or office light-
ing). For convenience, the hand-held
transmitter of the device may also be
used at any time. The HomeLink
®
Wireless Controls System (once pro-
grammed) or the original hand-held
transmitter may be used to activate the
device (e.g. garage door, entry door lock,
etc.). In the event that there are still pro-
gramming difficulties, contact
HomeLink
®at 1-800-355-3515 or on the
internet at www.homelink.com.
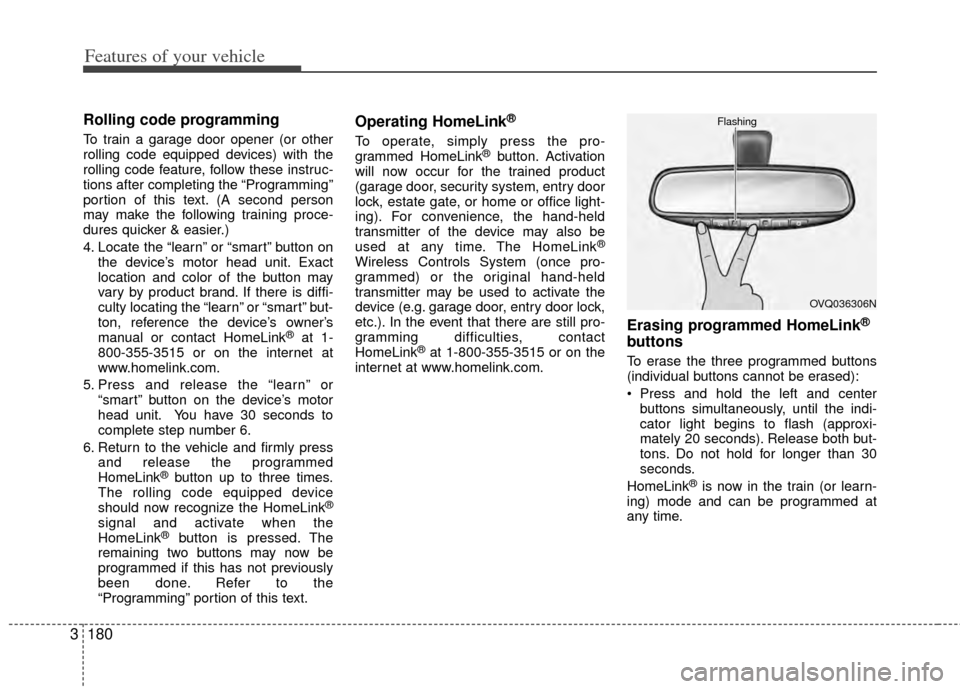
Erasing programmed HomeLink®
buttons
To erase the three programmed buttons
(individual buttons cannot be erased):
Press and hold the left and center buttons simultaneously, until the indi-
cator light begins to flash (approxi-
mately 20 seconds). Release both but-
tons. Do not hold for longer than 30
seconds.
HomeLink
®is now in the train (or learn-
ing) mode and can be programmed at
any time.
OVQ036306N
Flashing
Page 191 of 382

Features of your vehicle
182
3
Your new mirror comes with an integrat-
ed HomeLink®Universal Transceiver,
which allows you to program the mirror to
activate your garage door(s), estate gate,
home lighting, etc. The mirror actually
learns the codes from your various exist-
ing transmitters.
* HomeLink®is a registered trademark of
Johnson Controls, Inc
Programming
Your vehicle may require the ignition
switch to be turned to the ACC position
for programming and/or operation of
HomeLink
®. It is also recommended that
a new battery be replaced in the hand-
held transmitter of the device being pro-
grammed to HomeLink
®for quicker train-
ing and accurate transmission of the
radio-frequency.
Follow these steps to train your
HomeLink
®mirror:
HOMELINK® WIRELESS CONTROL SYSTEM WITH REARVIEW DISPLAY (IF EQUIPPED)
WARNING
When programming the HomeLink®Wireless Control
System, you may be operating a
garage door or gate operator.
Make sure that people and objects
are out of the way of the moving
door or gate to prevent potential
harm or damage.
Do not use HomeLink
®with any
garage door opener that lacks the
safety stop and reverse feature as
required by federal safety stan-
dards. (This includes any garage
door opener model manufactured
before April 1, 1982.) A garage
door opener which cannot detect
an object, signaling the door to
stop and reverse, does not meet
current federal safety standards.
Using a garage door opener with-
out these features increases risk
of serious injury or death. For
more information, call 1-800-355-
3515 or on the internet at
www.homelink.com.
(Continued)
(Continued)
Retain the original transmitter forfuture programming procedures
(i.e., new vehicle purchase). It is
also suggested that upon the sale
of the vehicle, the programmed
HomeLink
®buttons be erased for
security purposes (follow step 1
in the “Programming” portion of
this text).
OVQ032360N
OVQ032305N
Glare detection sensor
Indicator light
Rearview display
Homelink®buttons
Compass display
Page 193 of 382
Features of your vehicle
184
3
Rolling code programming
To train a garage door opener (or other
rolling code equipped devices) with the
rolling code feature, follow these instruc-
tions after completing the “Programming”
portion of this text. (A second person
may make the following training proce-
dures quicker & easier.)
4. Locate the “learn” or “smart” button on
the device’s motor head unit. Exact
location and color of the button may
vary by product brand. If there is diffi-
culty locating the “learn” or “smart” but-
ton, reference the device’s owner’s
manual or contact HomeLink
®at 1-
800-355-3515 or on the internet at
www.homelink.com.
5. Press and release the “learn” or “smart” button on the device’s motor
head unit. You have 30 seconds to
complete step number 6.
6. Return to the vehicle and firmly press and release the programmed
HomeLink
®button up to three times.
The rolling code equipped device
should now recognize the HomeLink
®
signal and activate when the
HomeLink®button is pressed. The
remaining two buttons may now be
programmed if this has not previously
been done. Refer to the
“Programming” portion of this text.
Operating HomeLink®
To operate, simply press the pro-
grammed HomeLink®button. Activation
will now occur for the trained product
(garage door, security system, entry door
lock, estate gate, or home or office light-
ing). For convenience, the hand-held
transmitter of the device may also be
used at any time. The HomeLink
®
Wireless Controls System (once pro-
grammed) or the original hand-held
transmitter may be used to activate the
device (e.g. garage door, entry door lock,
etc.). In the event that there are still pro-
gramming difficulties, contact
HomeLink
®at 1-800-355-3515 or on the
internet at www.homelink.com.
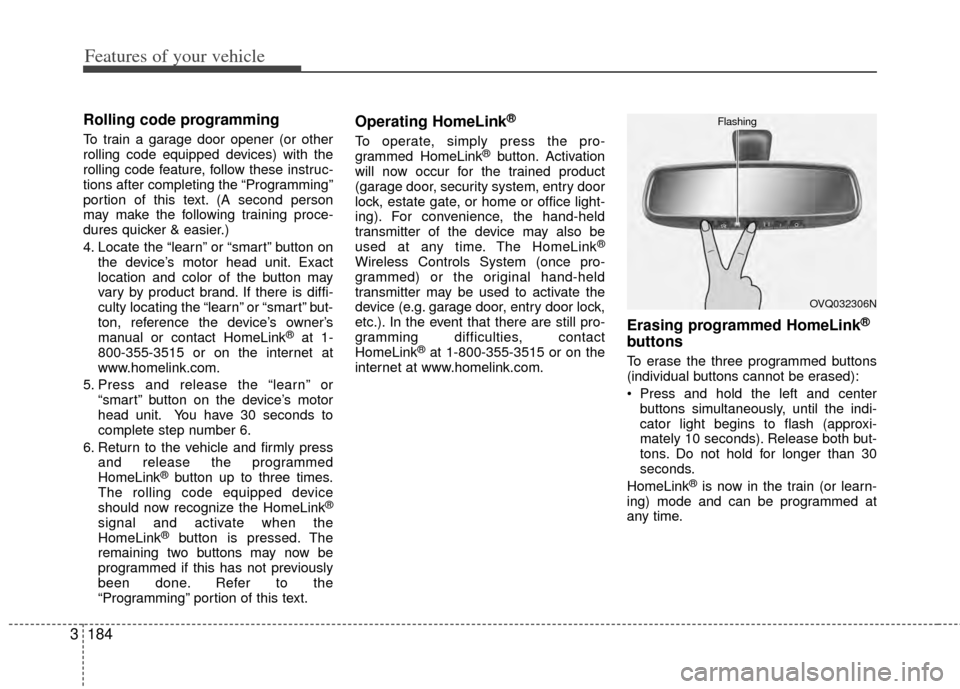
Erasing programmed HomeLink®
buttons
To erase the three programmed buttons
(individual buttons cannot be erased):
Press and hold the left and center buttons simultaneously, until the indi-
cator light begins to flash (approxi-
mately 10 seconds). Release both but-
tons. Do not hold for longer than 30
seconds.
HomeLink
®is now in the train (or learn-
ing) mode and can be programmed at
any time.
OVQ032306N
Flashing
Page 195 of 382
Features of your vehicle
186
3
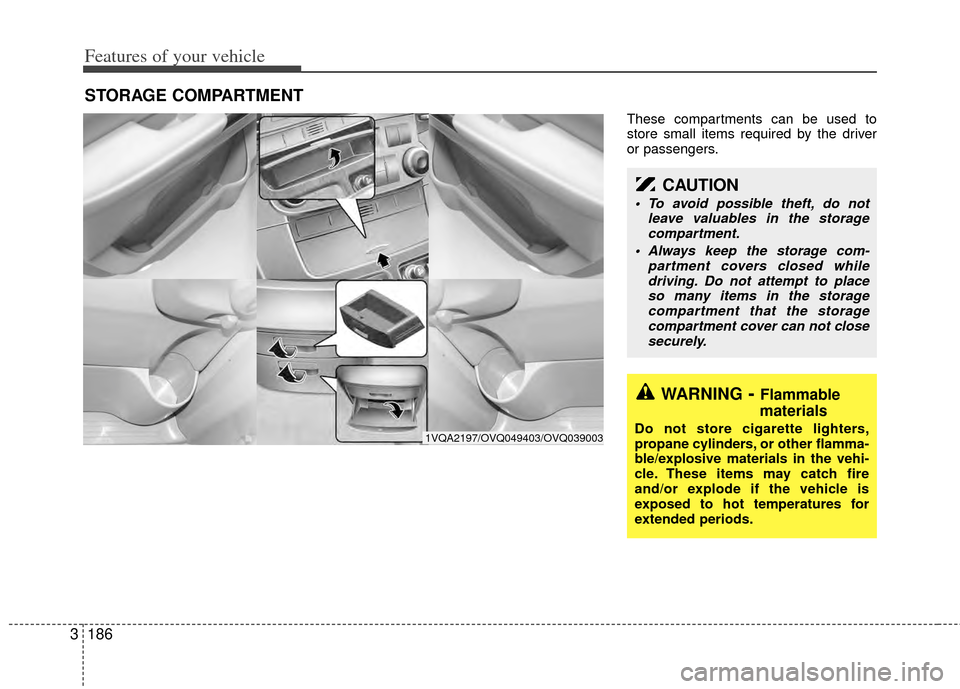
These compartments can be used to
store small items required by the driver
or passengers.
STORAGE COMPARTMENT
WARNING- Flammable
materials
Do not store cigarette lighters,
propane cylinders, or other flamma-
ble/explosive materials in the vehi-
cle. These items may catch fire
and/or explode if the vehicle is
exposed to hot temperatures for
extended periods.
CAUTION
To avoid possible theft, do not
leave valuables in the storagecompartment.
Always keep the storage com- partment covers closed whiledriving. Do not attempt to placeso many items in the storagecompartment that the storage compartment cover can not closesecurely.
1VQA2197/OVQ049403/OVQ039003
Page 199 of 382
Features of your vehicle
190
3
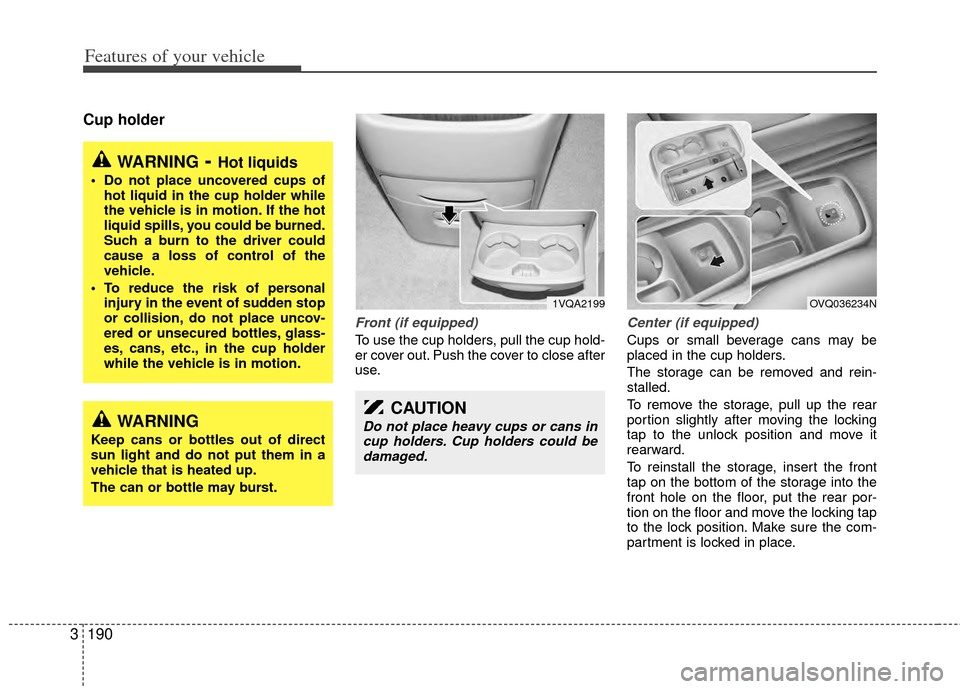
Cup holder
Front (if equipped)
To use the cup holders, pull the cup hold-
er cover out. Push the cover to close after
use.
Center (if equipped)
Cups or small beverage cans may be
placed in the cup holders.
The storage can be removed and rein-
stalled.
To remove the storage, pull up the rear
portion slightly after moving the locking
tap to the unlock position and move it
rearward.
To reinstall the storage, insert the front
tap on the bottom of the storage into the
front hole on the floor, put the rear por-
tion on the floor and move the locking tap
to the lock position. Make sure the com-
partment is locked in place.
WARNING- Hot liquids
Do not place uncovered cups of
hot liquid in the cup holder while
the vehicle is in motion. If the hot
liquid spills, you could be burned.
Such a burn to the driver could
cause a loss of control of the
vehicle.
To reduce the risk of personal injury in the event of sudden stop
or collision, do not place uncov-
ered or unsecured bottles, glass-
es, cans, etc., in the cup holder
while the vehicle is in motion.
WARNING
Keep cans or bottles out of direct
sun light and do not put them in a
vehicle that is heated up.
The can or bottle may burst.
1VQA2199
CAUTION
Do not place heavy cups or cans incup holders. Cup holders could be damaged.
OVQ036234N
Page 201 of 382
Features of your vehicle
192
3
1VQA2188A
Front (Type A)
OVQ040188
Front (Type B)
1VQA2190
Rear
Sunvisor
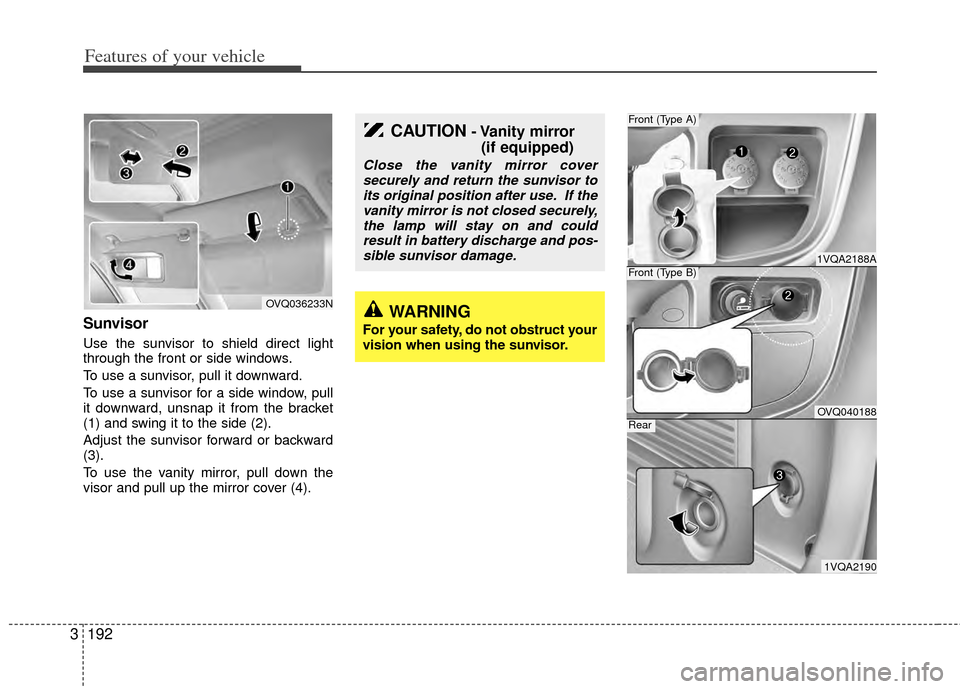
Use the sunvisor to shield direct light
through the front or side windows.
To use a sunvisor, pull it downward.
To use a sunvisor for a side window, pull
it downward, unsnap it from the bracket
(1) and swing it to the side (2).
Adjust the sunvisor forward or backward
(3).
To use the vanity mirror, pull down the
visor and pull up the mirror cover (4).
OVQ036233N
CAUTION- Vanity mirror
(if equipped)
Close the vanity mirror cover
securely and return the sunvisor toits original position after use. If thevanity mirror is not closed securely,the lamp will stay on and couldresult in battery discharge and pos-sible sunvisor damage.
WARNING
For your safety, do not obstruct your
vision when using the sunvisor.
Page 203 of 382
Features of your vehicle
194
3
HOUR:
Pressing the “H” button with your fin-
ger, a pencil or similar object will
advance the time displayed by one
hour.
MINUTE:
Pressing the “M” button with your fin-
ger, a pencil or similar object will
advance the time displayed by one
minute.
To change the 12 hour format to the 24
hour format, press the “H” and “M” but-
tons for more than 3 seconds.
For example, if the “H” and “M” buttons is
pressed for more than 3 seconds while
the time is 10:15 p.m., the display will be
changed to 22:15.
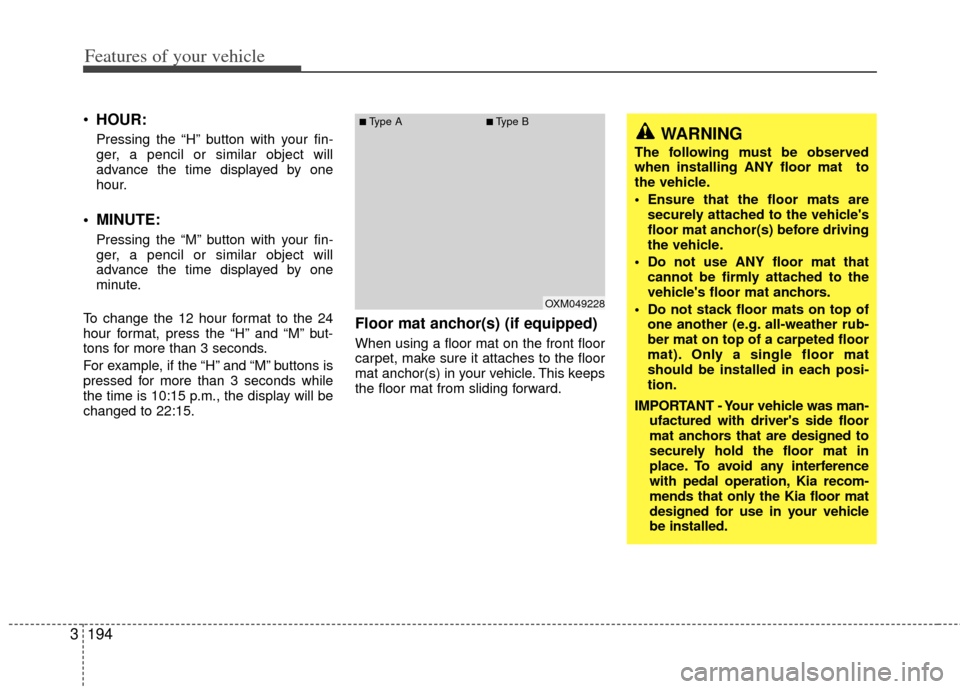
Floor mat anchor(s) (if equipped)
When using a floor mat on the front floor
carpet, make sure it attaches to the floor
mat anchor(s) in your vehicle. This keeps
the floor mat from sliding forward.
OXM049228
■Type A■Type BWARNING
The following must be observed
when installing ANY floor mat to
the vehicle.
Ensure that the floor mats are securely attached to the vehicle's
floor mat anchor(s) before driving
the vehicle.
Do not use ANY floor mat that cannot be firmly attached to the
vehicle's floor mat anchors.
Do not stack floor mats on top of one another (e.g. all-weather rub-
ber mat on top of a carpeted floor
mat). Only a single floor mat
should be installed in each posi-
tion.
IMPORTANT - Your vehicle was man- ufactured with driver's side floor
mat anchors that are designed to
securely hold the floor mat in
place. To avoid any interference
with pedal operation, Kia recom-
mends that only the Kia floor mat
designed for use in your vehicle
be installed.