Page 233 of 446

Features of your vehicle
162
4
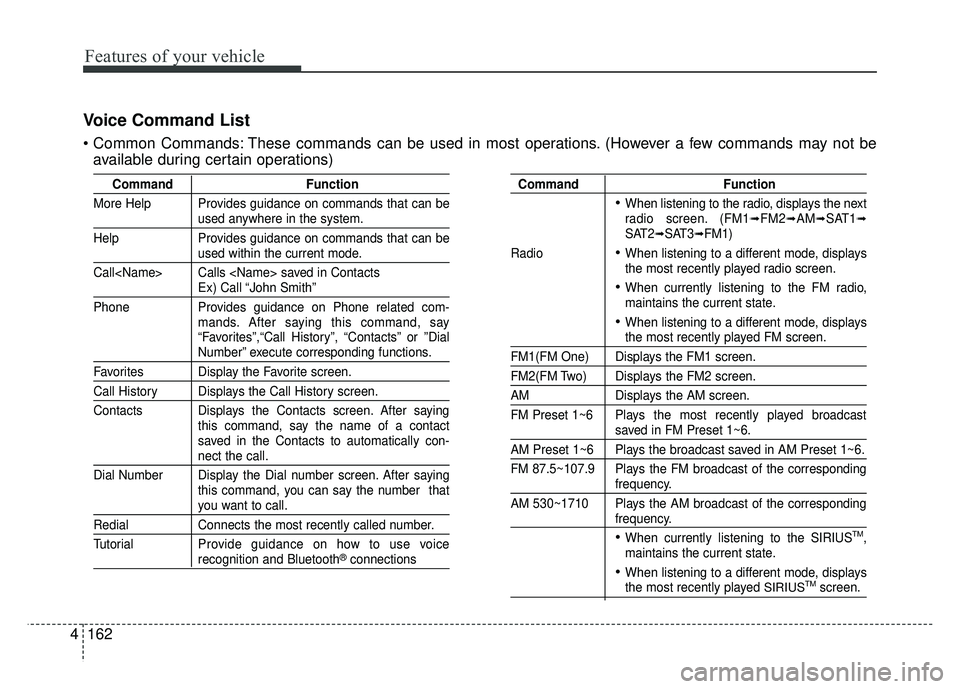
Voice Command List
These commands can be used in most operations. (However a few commands may not be
available during certain operations)
Command Function
More Help Provides guidance on commands that can be
used anywhere in the system.
Help Provides guidance on commands that can be
used within the current mode.
Call Calls saved in Contacts
Ex) Call “John Smith”
Phone Provides guidance on Phone related com- mands. After saying this command, say
“Favorites”,“Call History”, “Contacts” or ”Dial
Number” execute corresponding functions.
Favorites Display the Favorite screen.
Call History Displays the Call History screen.
Contacts Displays the Contacts screen. After sayingthis command, say the name of a contact
saved in the Contacts to automatically con-
nect the call.
Dial Number Display the Dial number screen. After saying this command, you can say the number that
you want to call.
RedialConnects the most recently called number.
Tutorial Pro vide guidance on how to use voice
recognition and Bluetooth®connections
Command Function
When listening to the radio, displays the next
radio screen. (FM1➟FM2➟AM➟SAT1➟SAT2➟SAT3➟FM1)
Radio
When listening to a different mode, displays
the most recently played radio screen.
When currently listening to the FM radio,
maintains the current state.
When listening to a different mode, displaysthe most recently played FM screen.
FM1(FM One) Displays the FM1 screen.
FM2(FM Two) Displays the FM2 screen.
AM Displays the AM screen.
FM Preset 1~6 Plays the most recently played broadcast
saved in FM Preset 1~6.
AM Preset 1~6 Plays the broadcast saved in AM Preset 1~6.
FM 87.5~107.9 Plays the FM broadcast of the corresponding
frequency.
AM 530~1710 Plays the AM broadcast of the corresponding
frequency.
When currently listening to the SIRIUSTM,
maintains the current state.
When listening to a different mode, displaysthe most recently played SIRIUSTMscreen.
Page 242 of 446
Driving your vehicle
45
WARNING - Fire risk
When you intend to park or stop
the vehicle with the engine on,
be careful not to depress the
accelerator pedal for a long
period of time. It may overheat
the engine or exhaust system
and cause fire.
WARNING - Drivingwhile intoxi-
cated
Do not drive while intoxicated.
Drinking and driving is danger-
ous. Even a small amount of
alcohol will affect your reflexes,
perceptions and judgment.
Driving while under the influ-
ence of drugs is as dangerous
as or more dangerous than driv-
ing drunk.
WARNING - Looseobjects
Securely store items in your
vehicle. When you make a sud-
den stop or turn the steering
wheel rapidly, loose objects
may drop on the floor and it
could interfere with the opera-
tion of the foot pedals, possibly
causing an accident.
Page 257 of 446

519
Driving your vehicle
Up (+) : Push the lever forward onceto shift up one gear.
Down (-) : Pull the lever backwards once to shift down one
gear.
In Sports mode, the driver must execute upshifts in accordance
with road conditions, taking care to
keep the engine speed below the
red zone.
In Sports mode, only the 6 forward gears can be selected. To reverse
or park the vehicle, move the shift
lever to the R (Reverse) or P (Park)
position as required.
In Sports mode, downshifts are made automatically when the vehi-
cle slows down. When the vehicle
stops, 1st gear is automatically
selected.
In Sports mode, when the engine rpm approaches the red zone shift
points are varied to upshift auto-
matically. To maintain the required levels of
vehicle performance and safety,
the system may not execute cer-
tain gearshifts when the shift lever
is operated.
When driving on a slippery road, push the shift lever forward into the
+(up) position. This causes the
transaxle to shift into the 2nd gear
which is better for smooth driving
on a slippery road. Push the shift
lever to the -(down) side to shift
back to the 1st gear.
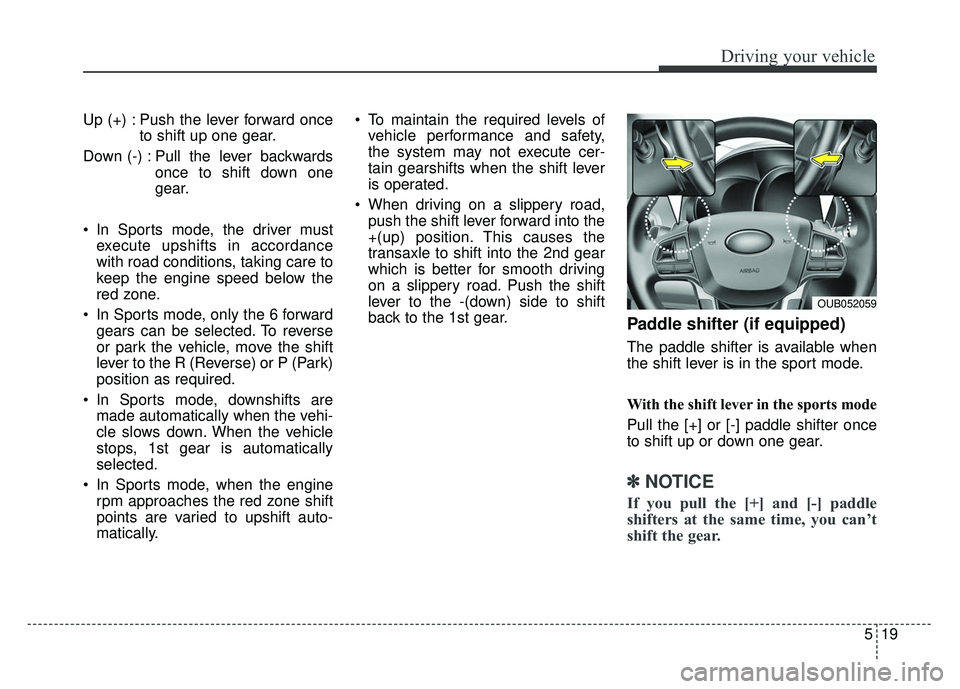
Paddle shifter (if equipped)
The paddle shifter is available when
the shift lever is in the sport mode.
With the shift lever in the sports mode
Pull the [+] or [-] paddle shifter once
to shift up or down one gear.
✽ ✽ NOTICE
If you pull the [+] and [-] paddle
shifters at the same time, you can’t
shift the gear.
OUB052059
Page 298 of 446
Driving your vehicle
60
5
✽
✽
NOTICE
Overloading your vehicle may cause
damage. Repairs would not be cov-
ered by your warranty. Do not over-
load your vehicle.
WARNING - Over
loading
Do not overload your vehicle.
Overloading your vehicle can
cause heat buildup in your vehi-
cle's tires and possible tire fail-
ure, increased stopping dis-
tances and poor vehicle han-
dling--all of which may result in
a crash.
WARNING - Loose cargo
Do not travel with unsecured
blunt objects in the passenger
compartment of your vehicle
(e.g. suit cases or unsecured
child seats). These items may
strike occupant during a sud-
den stop or crash.
Page 303 of 446

What to do in an emergency
46
IF THE ENGINE WILL NOT START
If the engine doesn't turn over
or turns over slowly
1. If your vehicle has an automatictransaxle, be sure the shift lever is
in N (Neutral) or P (Park) and the
emergency brake is set.
2. Check the battery connections to be sure they are clean and tight.
3. Turn on the interior light. If the light dims or goes out when you oper-
ate the starter, the battery is dis-
charged.
4. Check the starter connections to be sure they are securely tight-
ened.
5. Do not push or pull the vehicle to start it. See instructions for "Jump
starting".
If engine turns over normally
but does not start
1. Check fuel level.
2. With the ignition switch in theLOCK position, check all connec-
tors at the ignition coil and spark
plugs. Reconnect any that may be
disconnected or loose.
3. Check the fuel line in the engine compartment.
4. If the engine still does not start, call an authorized Kia dealer or
seek other qualified assistance.
WARNING - Push/pullstart
Do not push or pull the vehicle
to start it. Push or pull starting
may cause the catalytic con-
verter to overload and create a
fire hazard.
Page 314 of 446
615
What to do in an emergency
Do not allow anyone to remain in the
vehicle while it is on the jack.
Make sure any children present are
in a secure place away from the road
and from the vehicle to be raised with
the jack.
Removing and storing the
spare tire
Turn the tire hold-down wing bolt
counterclockwise.
Store the tire in the reverse order of
removal.
To prevent the spare tire and tools
from “rattling” while the vehicle is in
motion, store them properly.
Changing tires
1. Park on a level surface and applythe parking brake firmly.
2. Shift the shift lever into R (Reverse) for manual transaxle or
P (Park) for automatic transaxle.
3. Activate the hazard warning flash- er.
OED066033
WARNING- Runningvehicle on
jack
Do not start or run the engine of
the vehicle while the vehicle is
on the jack as this may cause
the vehicle to fall off the jack.OUB061003
Page 318 of 446

619
What to do in an emergency
Wheel nut tightening torque:
Steel wheel & aluminium alloy wheel:
65~79 lb.ft (9~11 kg.m)
If you have a tire gauge, remove the
valve cap and check the air pressure.
If the pressure is lower than recom-
mended, drive slowly to the nearest
service station and inflate to the cor-
rect pressure. If it is too high, adjust
it until it is correct. Always reinstall
the valve cap after checking or
adjusting the tire pressure. If the cap
is not replaced, air may leak from the
tire. If you lose a valve cap, buy
another and install it as soon as pos-
sible.
After you have changed wheels,
always secure the flat tire in its place
and return the jack and tools to their
proper storage locations.Note that most lug nuts do not have
metric threads. Be sure to use
extreme care in checking for thread
style before installing aftermarket lug
nuts or wheels. If in doubt, consult an
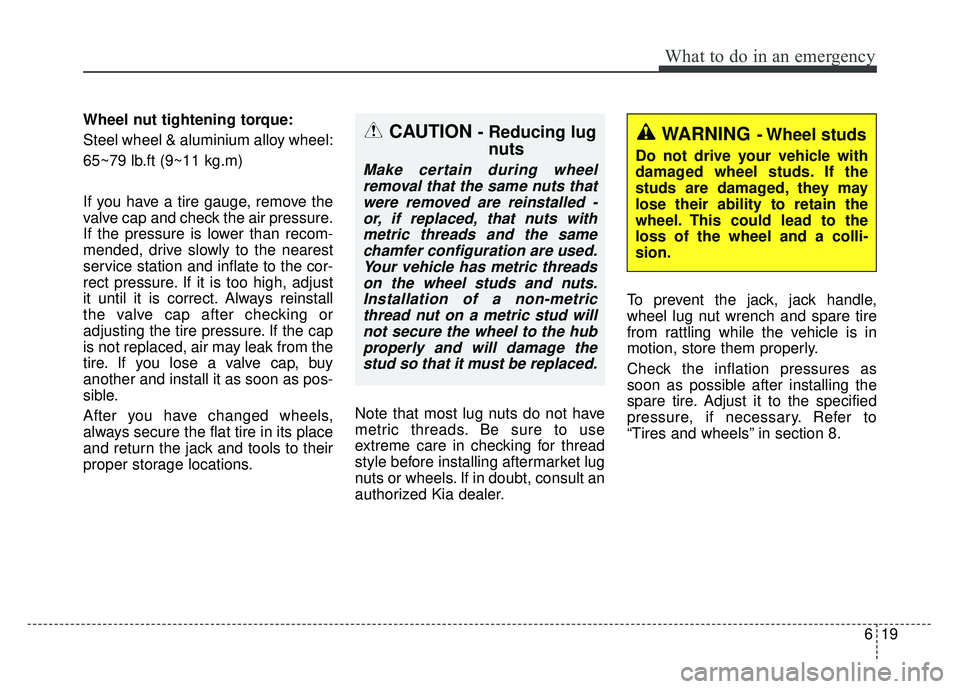
authorized Kia dealer.To prevent the jack, jack handle,
wheel lug nut wrench and spare tire
from rattling while the vehicle is in
motion, store them properly.
Check the inflation pressures as
soon as possible after installing the
spare tire. Adjust it to the specified
pressure, if necessary. Refer to
“Tires and wheels” in section 8.CAUTION - Reducing lug
nuts
Make certain during wheel
removal that the same nuts thatwere removed are reinstalled -or, if replaced, that nuts withmetric threads and the samechamfer configuration are used.Your vehicle has metric threadson the wheel studs and nuts.Installation of a non-metricthread nut on a metric stud willnot secure the wheel to the hubproperly and will damage thestud so that it must be replaced.
WARNING- Wheel studs
Do not drive your vehicle with
damaged wheel studs. If the
studs are damaged, they may
lose their ability to retain the
wheel. This could lead to the
loss of the wheel and a colli-
sion.
Page 328 of 446
629
What to do in an emergency
When towing your vehicle in an
emergency without wheel dollies :
1. Set the ignition switch in the ACCposition.
2. Place the transaxle shift lever in N (Neutral).
3. Release the parking brake.
Removable towing hook (front)
(if equipped)
1.Remove the towing hook from the tool case.
2.Remove the hole cover pressing the lower part of the cover on the
front bumper. 3.Install the towing hook by turning it
clockwise into the hole until it is
fully secured.
4.Remove the towing hook and install the cover after use.
CAUTION - Towing gear position
Always place the transaxle shift
lever in N (Neutral) when towingyour vehicle. Failure to place thetransaxle shift lever in N(Neutral) may cause internaldamage to the transaxle.
OUB061011
■ 4 door
■ 5 doorOUB061022K