Page 41 of 148
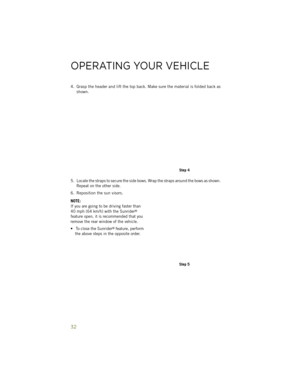
4. Fold header rearward, pulling the fabric to the rear.
5. Fold the top so that the material forms a "W" as shown. Enter the vehicle and movethe material into two folds.
Step 4
Step 5
OPERATING YOUR VEHICLE
39
Page 42 of 148
6. Release Sunrider®latch (both sides).
Step 6
Step 6
OPERATING YOUR VEHICLE
40
Page 43 of 148

7. Open the swing gate and lower the top.
NOTE:
Ensure the fabric does not overhang the
sides of the vehicle.
• To raise the soft top, perform theabove steps in the opposite order.
CAUTION!
• Do not run a fabric top through an automatic car wash. Window scratches and
wax buildup may result.
• Do not lower the top when the temperature is below 41°F (5°C). Damage to the
top may result.
• Do not lower the top when the windows are dirty. Grit may scratch the window.
• Do not move your vehicle until the top has been either fully attached to the
windshield frame, or fully lowered.
• The soft top is not designed to carry any additional loads such as roof racks,
spare tires, building, hunting, or camping supplies, and/or luggage, etc. Also,
it was not designed as a structural member of the vehicle and, thus, cannot
properly carry any additional loads other than environmental (rain, snow, etc.).
WARNING!
• Do not drive the vehicle with the rear window curtain up unless the sidecurtains are also open. Dangerous exhaust gases which can kill could enter the
vehicle.
• The fabric upper doors and fabric top are designed only for protection against
the elements. Do not rely on them to contain occupants within the vehicle or to
protect against injury during an accident. Remember, always wear seat belts.
Step 7
OPERATING YOUR VEHICLE
41
Page 44 of 148
HARD TOP AND FREEDOM TOP®
Freedom Top® Removal
Follow these simple steps to remove the front panels.
1. Fold down the sun visor, and move it to the side.
2. Turn the rear fasteners (knobs) (located on the overhead speaker bar assembly)counterclockwise until they can be removed.
3. Turn the center L-shaped locks (two) from the center of the roof panel.
Step 2
Step 3
OPERATING YOUR VEHICLE
42
Page 45 of 148
4. Turn the rear L-shaped lock (located above the shoulder belt anchorage).
5. Unlatch the header panel latch located at the top of the windshield.
6. Remove the left-hand panel.
• To remove the right panel, follow thesteps above except for Step 3.
NOTE:
• The left panel must be removed before removing right panel.
• Vehicles equipped with a Freedom To p
®, come with a Freedom Top®stor-
age bag that allows you to store your
Freedom Top
®panels. Refer to the
Owner's Manual on the DVD for details.
Step 4
Step 5
OPERATING YOUR VEHICLE
43
Page 46 of 148

Hard Top Removal
Follow these simple steps to remove the hard top.
1. Remove both front panels. Refer to “Front Panel(s) Removal” above.
2. Open both doors.
3. Remove the two Torx
®head screws that secure the hard top at the B-pillar (near
the top of the door) using a #40 Torx®head driver (Four–Door Only).
4. Remove the six Torx
®head screws that secure the hard top to the vehicle (along
the interior bodyside) using a #40 Torx®head driver.
5. Open the swing gate all the way to ensure clearance of the rear window glass. Lift the rear window glass.
6. Locate and disconnect the wire harness on the left rear inside corner of the vehicle.
7. Remove the washer hose (next to the wire harness) by pinching the grips on
hose connector and pull downward.
8. Close the swing gate.
9. Remove the hard top from the vehicle. Place the hard top on a soft surface to
prevent damage.
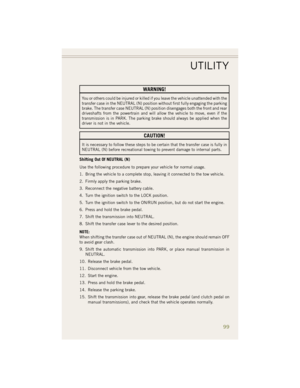
CAUTION!
• The front panel(s) must be positioned properly to ensure sealing. Improperinstallation can cause water to leak into the vehicles interior.
• The hard top assembly must be positioned properly to ensure sealing. Improper
installation can cause water to leak into the vehicles interior.
• The hard top is not designed to carry any additional loads such as roof racks,
spare tires, building, hunting, or camping supplies, and/or luggage, etc. Also,
it was not designed as a structural member of the vehicle, and thus cannot
properly carry any additional loads other than environmental (rain, snow, etc.).
• Do not move your vehicle until the top has been either fully attached to the
windshield frame and bodyside, or fully removed.
• The removal of the hard top requires four adults located on each corner. Failure
to follow this caution could damage the hard top.
Step 6
OPERATING YOUR VEHICLE
44
Page 47 of 148
DUAL TOP – IF EQUIPPED
• If your vehicle is equipped with a Dual Top, you must remove one of the tops fromthe vehicle.
• Two Door - If the soft top is removed, the pivot brackets must also be removed from
the sport bar.
• Four Door - If the soft top is removed, ensure that the pivot bracket strap is installed
onto the Soft Top pivot bracket before removing the soft top from the vehicle. Remove
the fasteners between the Soft Top pivot bracket and the attach bracket to the
sport bar.
• The soft top was installed at the fac- tory for shipping purposes only.
NOTE:
The soft top and the hard top are to be
used independently.
• Refer to the Understanding The Fea- tures Of Your Vehicle section of your
vehicle's Owner's Manual on the DVD
for further details.
WIND BUFFETING
• Wind buffeting can be described as a helicopter-type percussion sound. Ifbuffeting occurs with the rear windows open, adjust the front and rear windows
together.
Pivot Bracket Strap
OPERATING YOUR VEHICLE
45
Page 48 of 148
YOUR VEHICLE'S SOUND SYSTEM
1. Uconnect®Voice Command Button pg. 85
2. Uconnect
®Phone Button pg. 82
3. Steering Wheel Audio Controls (Left) pg. 81
4. Volume Knob/Audio Mute Button
5. Eject Button
ELECTRONICS
46