Page 89 of 148
 — During")
While In:Voice Command Example:
Memo Mode To switch to the voice recorder mode, say “Memo.” The fol-
lowing are common voice commands for this mode: “NewMemo” (to record a new memo) — During the recording,
you may press the Voice Command button
to stop
recording. You proceed by saying one of the following commands:
— “Save” (to save the memo)
— “Continue” (to continue recording) — “Delete” (to delete the recording)
— “Play Memos” (to play previously recorded memos) — During the playback you may press the Voice Commandbutton
to stop playing memos. You proceed by
saying one of the following commands:
— “Repeat” (to repeat a memo)
— “Next” (to play the next memo)
— “Previous” (to play the previous memo) — “Delete” (to delete a memo)
— “Delete All” (to delete all memos)
Voice Text Reply
• If equipped with Uconnect®Voice Command, your Uconnect®430N / 730N radio
may be able to play incoming Short Message Service (SMS) messages (text
messages) through the vehicle's sound system.
• It also allows you to respond by selecting from various predefined phrases.
• Not all phones are compatible with this feature. Refer to the phone compatibility list at www.UconnectPhone.com. Connected mobile phones must be bluetooth-
compatible and paired with your radio.
• Press the “Voice Command” button
and after the BEEP, say “SMS” to get
started.
NOTE:
To access the tutorial, press the “Voice Command” button
. After the BEEP,
say “tutorial.” Press any hard-key/button or touch the display (Touchscreen radio) to
cancel the tutorial.
WARNING!
Any voice commanded system should be used only in safe driving conditions
following applicable laws regarding phone use. Your attention should be focused
on safely operating the vehicle. Failure to do so may result in a collision causing
you and others to be severely injured or killed.
ELECTRONICS
87
Page 90 of 148

Bluetooth® STREAMING AUDIO
•If equipped with Uconnect®Voice Com-
mand, your Bluetooth®-equipped iPod®
devices, cell phones or other media play-
ers, may also be able to stream music to
your vehicles speakers. Your connected
device must be Bluetooth
®-compatible,
and paired with your radio (see
www.UconnectPhone.com for pairing in-
structions).
• Non-Touchscreen Radios: Press the “AUX” button on the radio faceplate until "BT"
or “Audio Streaming” is displayed on the radio screen.
• Touchscreen-Radios: Press the “RADIO/MEDIA” or “MEDIA” hard-key and then
touch the “AUX” soft-key tab.
ELECTRONIC VEHICLE INFORMATION CENTER (EVIC)
The EVIC features a driver interactive
display that is located in the instrument
cluster. Pressing the controls on the
steering wheel allows the driver to select
vehicle information and Personal Set-
tings. For additional information, refer to
Programmable Features in this guide.
•
Press and release theMENU button to
scroll through the main menus (Speed-
ometer, Fuel Economy, Miles To
Empty, Tire Pressure, Warnings, Timer,
Vehicle Info, Units, System Warning,
Personal Settings) or to exit sub menus.
• Press and release the SELECT/ Right arrow
button for access to main menus,
sub menus or to select a personal setting in the setup menu.
• Press and release the COMPASS
button to display one of eight compass
readings and the outside temperature or to exit sub menus.
• Press and release the DOWN arrow
button to scroll downward through the sub
menus.
ELECTRONICS
88
Page 91 of 148

EVIC Main Menu
• To step to each main menu feature press and release the MENU button once foreach step. A step from the last item in the list will cause the first item in the
feature list to be displayed. The following features are in the Main menu:• Compass, Outside Temperature, and ECO display
• Digital Speedometer
• Average Fuel Economy
• Distance to Empty
• Elapsed Time
• Vehicle Information
• Coolant Temp
• Oil Pressure
• Transmission Temp
• Oil Life Remaining (Automatic Oil Change Indicator)
• EVIC Units Selection
• System Status
• Personal Settings
• Tire PSI
Compass Calibration
This compass is self-calibrating, which eliminates the need to set the compass
manually. When the vehicle is new, the compass may appear erratic and the EVIC will
display “CAL” until the compass is calibrated.
You may also calibrate the compass by completing one or more 360 degree turns (in
an area free from large metal or metallic objects) until the “CAL” message displayed
in the EVIC turns off. The compass will now function normally.
ECO
• The ECO message will appear in your EVIC display whenever you are driving in a fuel efficient manner.
• This feature allows you to monitor when you are driving in a fuel efficient manner, and it can be used to modify driving habits in order to increase fuel economy.
ELECTRONICS
89
Page 92 of 148

• The EVIC can be used to program the following Personal Settings. Press andrelease the MENU button until Personal Settings display")
PROGRAMMABLE FEATURES
Electronic Vehicle Information Center (EVIC)
• The EVIC can be used to program the following Personal Settings. Press andrelease the MENU button until Personal Settings displays, then press the DOWN
button
to scroll through the settings. Press the SELECT buttonto change
the setting.
• Language • Illumin Approach
• Auto UNLK On Exit • Hill Start Assist (HSA)
• RKE Unlock • Display Units of Measure In
• Sound Horn With RKE Lock • Nav – Turn by Turn
• Flash Lamp With Lock • Display Fuel Saver
• Headlamp Off Delay • Compass Variance
• Headlamps With Wipers • Calibrate Compass
• Key-Off Power Delay
Key Fob Programmable Features
The following features may also be programmed by using the Key Fob transmitter or
the ignition switch and driver's door lock switch.
NOTE:
Pushing the LOCK button while you are inside the vehicle will activate the Vehicle
Security Alarm. Opening a door with the Vehicle Security Alarm activated will cause
the alarm to sound. Push the UNLOCK button to deactivate the Vehicle Security
Alarm.
Flashing Lamps With Lock
• The turn signal lights flashing, when the doors are locked or unlocked, feature can be turned on or off. To turn this feature on or off:• Press and hold the UNLOCK button for at least 4 seconds, but no longer than
10 seconds. Then, press and hold the LOCK button while still holding the
UNLOCK button.
• Release both buttons at the same time.
ELECTRONICS
90
Page 93 of 148

POWER INVERTER
• A 115 Volt, 150 Watt AC power in-verter is located on the front of the
center console.
• This outlet can power cellular phones, electronics and other low power de-
vices requiring power up to 150 Watts.
• The power inverter switch is located on the instrument panel below the cli-
mate controls. To turn on the power
outlet, press the switch once. The in-
dicator light will illuminate. Press the
switch a second time to turn the power
inverter outlet off.
NOTE:
The power inverter is designed with built-in overload protection. If the power rating
of 150 Watts is exceeded, the power inverter will automatically shut down. Once the
electrical device has been removed from the outlet, the inverter should automatically
reset. If the power rating exceeds approximately 170 Watts, the power inverter may
have to be reset manually. To reset the inverter manually, unplug the device and plug
it in again. To avoid overloading the circuit, check the power ratings on electrical
devices prior to using the inverter.
WARNING!
To Avoid Serious Injury or Death DO NOT:
• insert any objects into the receptacles
• touch with wet hands
Close the lid when not in use. If this outlet is mishandled, it may cause an electric
shock and failure.
ELECTRONICS
91
Page 94 of 148
POWER OUTLETS
• There are three possible 12 Volt Power Outlets in this vehicle.• The front power outlet, located in the lower portion of the instrument panel, is
powered when the key is in the ON or ACC position.
• A second power outlet is located inside the center console bin and is powered directly from the vehicle battery.
• On vehicles equipped with a rear subwoofer, there is a power outlet located in the right rear cargo area.
NOTE: • Do not exceed the maximum power of 160 Watts (13 Amps) at 12 Volts. If the160 Watt (13 Amp) power rating is exceeded the fuse protecting the system will
need to be replaced.
• Power outlets are designed for accessory plugs only. Do not insert any other object in the power outlet as this will damage the outlet and blow the fuse.
Improper use of the power outlet can cause damage not covered by your new
vehicle warranty.
ELECTRONICS
92
Page 95 of 148
, 4H (Four-wheel drive high
range), N (Neutral), and 4L (Four-wheel
drive low range).
• T")
COMMAND-TRAC®/ROCK-TRAC®
•The transfer case provides four mode
positions: 2H (Two-wheel drive high
range), 4H (Four-wheel drive high
range), N (Neutral), and 4L (Four-wheel
drive low range).
• The transfer case is intended to be driven in the 2H position for normal
street and highway conditions such as
hard-surfaced roads.
Shifting Between 2H And 4H
• Shifting between 2H and 4H can be made with the vehicle stopped or in
motion. Shift the transfer case lever
firmly to 4H at any speed up to 50 mph
(80 km/h).
Shifting Between 4H And 4L (Automatic Transmission)
• Shifting between 4H and 4L should be made with the vehicle rolling at 2 to 3 mph (3 to 5 km/h). Shift the automatic transmission into NEUTRAL then shift the
transfer case lever firmly to 4L (do not pause with the transfer case in NEUTRAL).
Once the shift is completed, place the automatic transmission into DRIVE.
Shifting Between 4H And 4L (Manual Transmission)
• Shifting between 4H and 4L should be made with the vehicle rolling at 2 to 3 mph (3 to 5 km/h). Fully depress the clutch pedal and shift the transfer case lever firmly
to 4L (do not pause with the transfer case in NEUTRAL). Once the shift is
completed, release the clutch pedal.
NOTE:
To enhance off-road performance in 4L mode, manual transmission vehicles will start
regardless of whether or not the clutch pedal is depressed.
OFF-ROAD CAPABILITIES (4WD OPERATION)
93
Page 96 of 148
 RUBICON ONLY
• The AXLE LOCK switch is located on the instrument panel (to the left of thesteering column).
• This feature will only activate when the following conditions ar")
AXLE LOCK (TRU-LOK®) RUBICON ONLY
• The AXLE LOCK switch is located on the instrument panel (to the left of thesteering column).
• This feature will only activate when the following conditions are met: • Key in Run Position, vehicle in 4L (Low) range.
• Vehicle speed at 10 mph (16 km/h) or less.
• Press the bottom of the AXLE LOCK switch once to lock the rear axle only and a second time to lock the front axle (the rear and front axle lock indicator lights will
illuminate).
• To unlock the axles, press the top of the AXLE LOCK switch.
• The indicator light will flash until the axles are fully locked or unlocked.
ELECTRONIC SWAY BAR DISCONNECT – RUBICON
ONLY
Off-Road
• This feature will only activate when the following conditions are met:
• Key in Run positon, vehicle in 4L (Low) or 4H (High) range.
• Vehicle speed under 18 mph.
• Press the SWAY BAR switch, located on the instrument panel (to the left of the steering column), once to disconnect the Sway Bar.
• The Sway Bar indicator light will illuminate in the instrument cluster.
On-Road
• Press the SWAY BAR switch a second time to reconnect the Sway Bar.
• The Sway Bar should remain in on-road mode during normal driving conditions.
OFF-ROAD CAPABILITIES (4WD OPERATION)
94
 1
1 2
2 3
3 4
4 5
5 6
6 7
7 8
8 9
9 10
10 11
11 12
12 13
13 14
14 15
15 16
16 17
17 18
18 19
19 20
20 21
21 22
22 23
23 24
24 25
25 26
26 27
27 28
28 29
29 30
30 31
31 32
32 33
33 34
34 35
35 36
36 37
37 38
38 39
39 40
40 41
41 42
42 43
43 44
44 45
45 46
46 47
47 48
48 49
49 50
50 51
51 52
52 53
53 54
54 55
55 56
56 57
57 58
58 59
59 60
60 61
61 62
62 63
63 64
64 65
65 66
66 67
67 68
68 69
69 70
70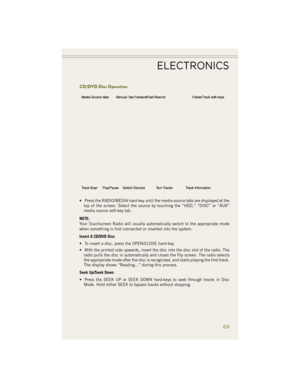 71
71 72
72 73
73 74
74 75
75 76
76 77
77 78
78 79
79 80
80 81
81 82
82 83
83 84
84 85
85 86
86 87
87 88
88 89
89 90
90 91
91 92
92 93
93 94
94 95
95 96
96 97
97 98
98 99
99 100
100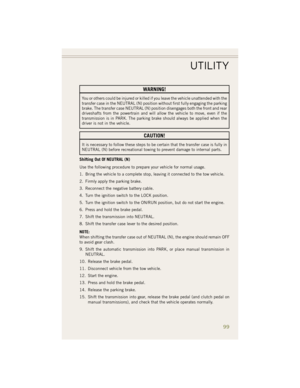 101
101 102
102 103
103 104
104 105
105 106
106 107
107 108
108 109
109 110
110 111
111 112
112 113
113 114
114 115
115 116
116 117
117 118
118 119
119 120
120 121
121 122
122 123
123 124
124 125
125 126
126 127
127 128
128 129
129 130
130 131
131 132
132 133
133 134
134 135
135 136
136 137
137 138
138 139
139 140
140 141
141 142
142 143
143 144
144 145
145 146
146 147
147