2014 JEEP GRAND CHEROKEE charging
[x] Cancel search: chargingPage 10 of 220

INSTRUMENT CLUSTER
Warning Lights
- Low Fuel Warning Light
- Charging System Light **
- Oil Pressure Warning Light **
- Engine Temperature Warning Light
- Transmission Temperature Warning Light
- Anti-Lock Brake (ABS) Light **
- Air Bag Warning Light **
- Electronic Throttle Control (ETC) Light
- Tire Pressure Monitoring System (TPMS) Light
- Seat Belt Reminder Light
BRAKE- Brake Warning Light **
- Malfunction Indicator Light (MIL) **
-Electronic Stability Control (ESC) Activation/Malfunction Indicator Light *
(See page 150 for more information.)
CONTROLS AT A GLANCE
8
Page 70 of 220

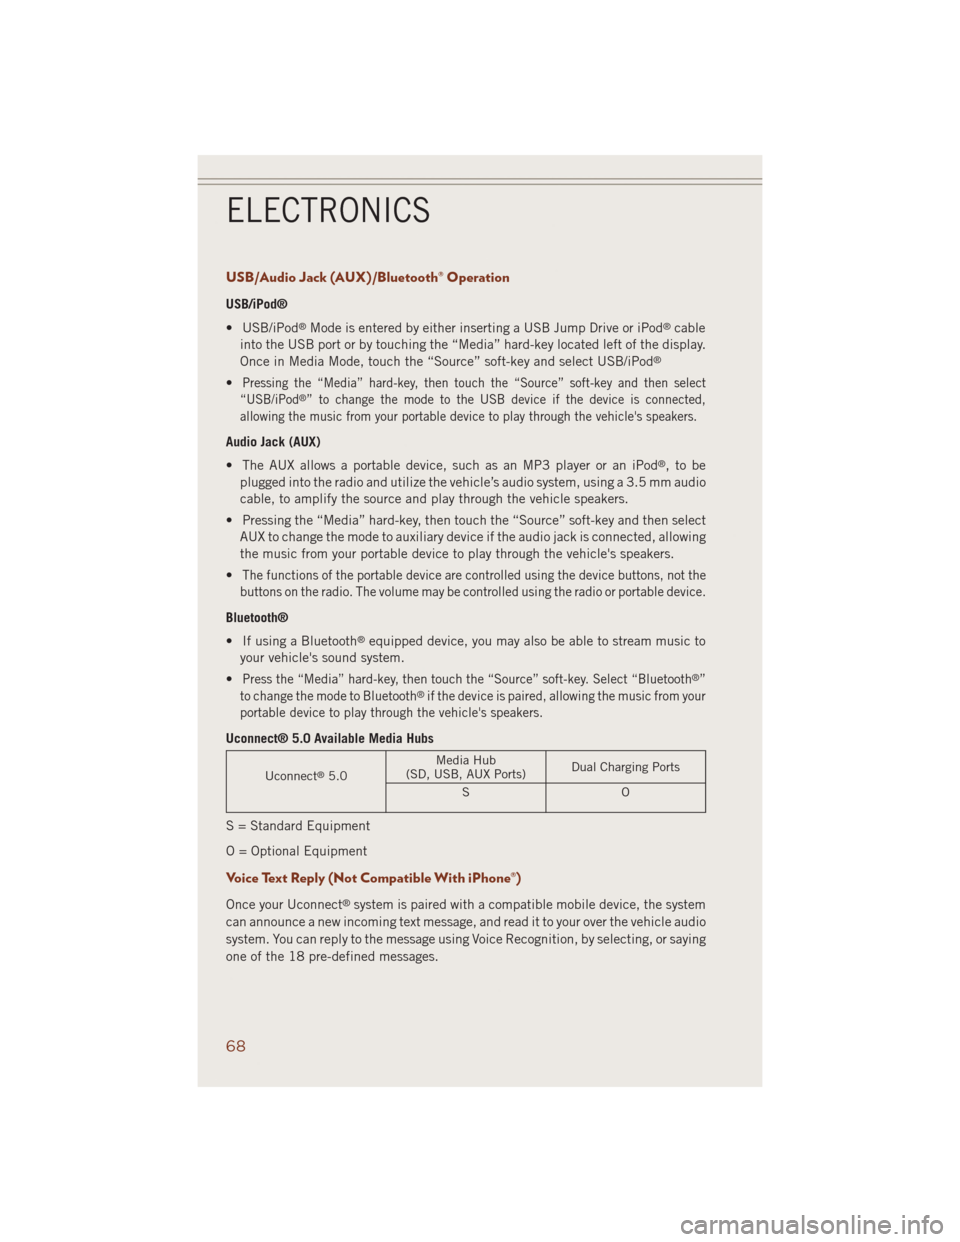
USB/Audio Jack (AUX)/Bluetooth® Operation
USB/iPod®
• USB/iPod
®Mode is entered by either inserting a USB Jump Drive or iPod®cable
into the USB port or by touching the “Media” hard-key located left of the display.
Once in Media Mode, touch the “Source” soft-key and select USB/iPod
®
•Pressing the “Media” hard-key, then touch the “Source” soft-key and then select
“USB/iPod®” to change the mode to the USB device if the device is connected,
allowing the music from your portable device to play through the vehicle's speakers.
Audio Jack (AUX)
• The AUX allows a portable device, such as an MP3 player or an iPod
®,tobe
plugged into the radio and utilize the vehicle’s audio system, using a 3.5 mm audio
cable, to amplify the source and play through the vehicle speakers.
• Pressing the “Media” hard-key, then touch the “Source” soft-key and then select
AUX to change the mode to auxiliary device if the audio jack is connected, allowing
the music from your portable device to play through the vehicle's speakers.
•
The functions of the portable device are controlled using the device buttons, not the
buttons on the radio. The volume may be controlled using the radio or portable device.
Bluetooth®
• If using a Bluetooth
®equipped device, you may also be able to stream music to
your vehicle's sound system.
•
Press the “Media” hard-key, then touch the “Source” soft-key. Select “Bluetooth®”
to change the mode to Bluetooth®if the device is paired, allowing the music from your
portable device to play through the vehicle's speakers.
Uconnect® 5.0 Available Media Hubs
Uconnect®5.0Media Hub
(SD, USB, AUX Ports)Dual Charging Ports
SO
S = Standard Equipment
O = Optional Equipment
Voice Text Reply (Not Compatible With iPhone®)
Once your Uconnect®system is paired with a compatible mobile device, the system
can announce a new incoming text message, and read it to your over the vehicle audio
system. You can reply to the message using Voice Recognition, by selecting, or saying
one of the 18 pre-defined messages.
ELECTRONICS
68
Page 156 of 220

• The ESC system will make buzzing or clicking sounds when it is active. This is
normal; the sounds will stop when ESC becomes inactive following the maneuver
that caused the ESC activation.
• To improve the vehicle's traction when starting off in deep snow, sand or gravel, it
may be desirable to switch the ESC system to Partial Off mode by momentarily
pressing the ESC Off
switch located below the climate controls, on the switch
panel.
- Electronic Stability Control (ESC) OFF Indicator Light
This light indicates the Electronic Stability Control (ESC) is off.
- Charging System Light
This light shows the status of the electrical charging system. If the charging system
light remains on, it means that the vehicle is experiencing a problem with the
charging system.
We recommend you do not continue driving if the charging system light is on. Have
the vehicle serviced immediately.
- Oil Pressure Warning Light
This light indicates low engine oil pressure. If the light turns on while driving, stop
the vehicle and shut off the engine as soon as possible. A chime will sound for four
minutes when this light turns on.
We recommend you do not operate the vehicle or engine damage will occur. Have the
vehicle serviced immediately.
- Anti-Lock Brake (ABS) Light
This light monitors the Anti-Lock Brake System (ABS). The light will turn on when the
ignition switch is turned to the ON/RUN position and may stay on for as long as four
seconds.
If the ABS light remains on or turns on while driving, it indicates that the Anti-Lock
portion of the brake system is not functioning and that service is required. However,
the conventional brake system will continue to operate normally if the BRAKE
warning light is not on.
If the ABS light is on, the brake system should be serviced as soon as possible to
restore the benefits of Anti-Lock brakes. If the ABS light does not turn on when the
ignition switch is turned to the ON/RUN position, have the light inspected by an
authorized dealer.
WHAT TO DO IN EMERGENCIES
154
Page 168 of 220

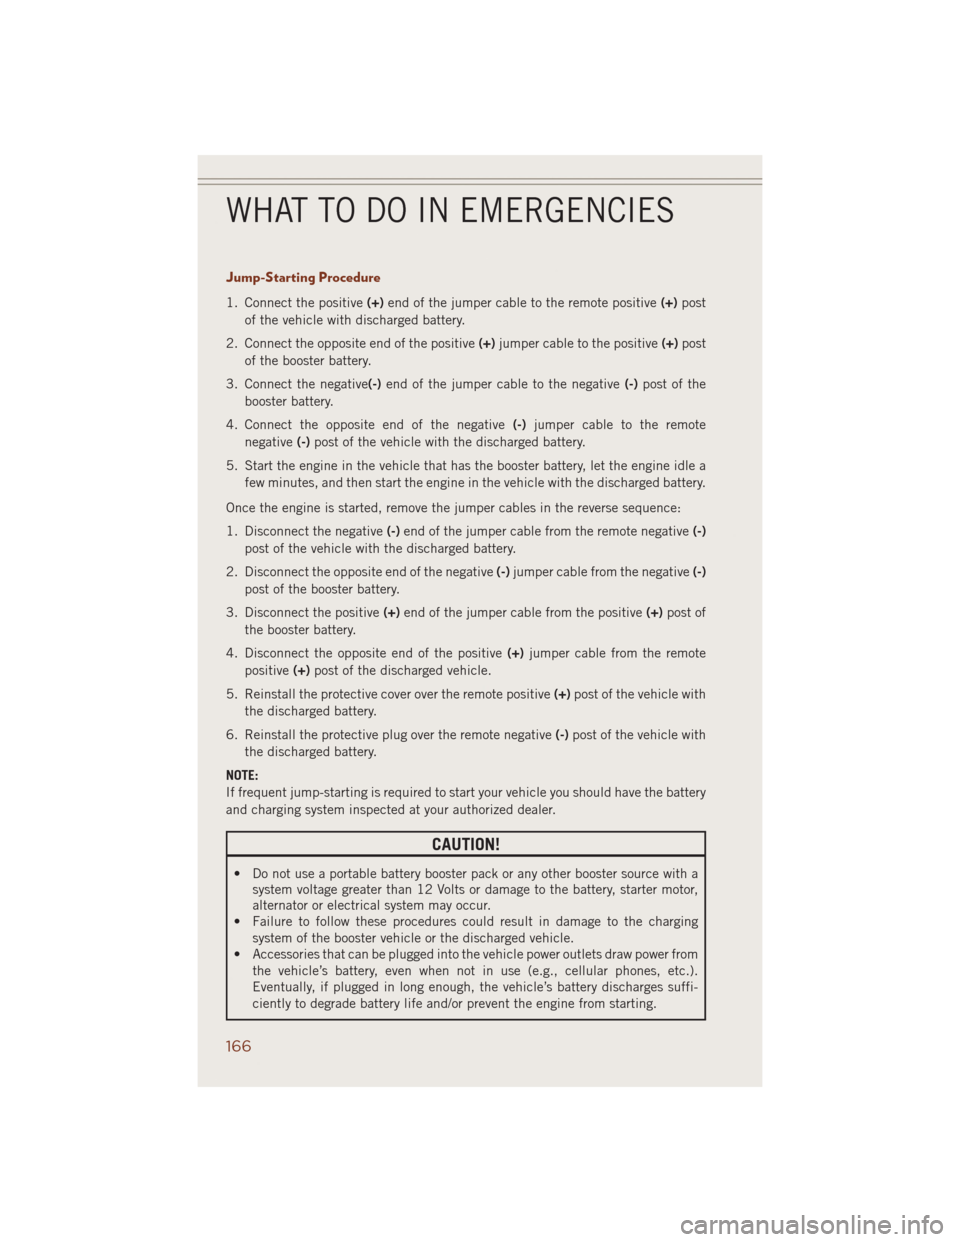
Jump-Starting Procedure
1. Connect the positive(+)end of the jumper cable to the remote positive(+)post
of the vehicle with discharged battery.
2. Connect the opposite end of the positive(+)jumper cable to the positive(+)post
of the booster battery.
3. Connect the negative(-)end of the jumper cable to the negative(-)post of the
booster battery.
4. Connect the opposite end of the negative(-)jumper cable to the remote
negative(-)post of the vehicle with the discharged battery.
5. Start the engine in the vehicle that has the booster battery, let the engine idle a
few minutes, and then start the engine in the vehicle with the discharged battery.
Once the engine is started, remove the jumper cables in the reverse sequence:
1. Disconnect the negative(-)end of the jumper cable from the remote negative(-)
post of the vehicle with the discharged battery.
2. Disconnect the opposite end of the negative(-)jumper cable from the negative(-)
post of the booster battery.
3. Disconnect the positive(+)end of the jumper cable from the positive(+)post of
the booster battery.
4. Disconnect the opposite end of the positive(+)jumper cable from the remote
positive(+)post of the discharged vehicle.
5. Reinstall the protective cover over the remote positive(+)post of the vehicle with
the discharged battery.
6. Reinstall the protective plug over the remote negative(-)post of the vehicle with
the discharged battery.
NOTE:
If frequent jump-starting is required to start your vehicle you should have the battery
and charging system inspected at your authorized dealer.
CAUTION!
• Do not use a portable battery booster pack or any other booster source with a
system voltage greater than 12 Volts or damage to the battery, starter motor,
alternator or electrical system may occur.
• Failure to follow these procedures could result in damage to the charging
system of the booster vehicle or the discharged vehicle.
• Accessories that can be plugged into the vehicle power outlets draw power from
the vehicle’s battery, even when not in use (e.g., cellular phones, etc.).
Eventually, if plugged in long enough, the vehicle’s battery discharges suffi-
ciently to degrade battery life and/or prevent the engine from starting.
WHAT TO DO IN EMERGENCIES
166
Page 213 of 220

Access
Uconnect®.............51
Access Registration
Uconnect
®.............52
Adaptive Cruise Control (ACC) (Cruise
Control)................34
Adding Fuel..............172
Airbag..................16
Air Bag
AdvanceFrontAirBag ......16
AirBags ...............16
AirBagWarningLight....16,155
Driver Knee Air Bag........16
FrontAirBag ............16
Rollover...............16
SideImpacts ............16
Air Conditioning..........40,41
Air Suspension............125
Alarm
Arm The System..........15
Disarm The System........15
Vehicle Security Alarm......15
Alarm (Security Alarm).....15,156
Anti-Lock Brake System (ABS) . . .154
Arming System (Security Alarm) . . .15
Assistance Towing..........150
Automatic Headlights.........29
Automatic High Beams........30
Automatic Temperature
Control (ATC)............40
Automatic Transmission
FluidType .........177, 181
Shifting...............38
AxleFluid.........177, 178, 181
Axle Lubrication........178, 182
Back-Up Camera............43
Battery.................165
Charging System Light.....154
Blind Spot Monitoring.........44
Brake Fluid....177, 178, 181, 182
Brake System
WarningLight ..........152
Break-In Recommendations, Diesel. .142
Break-In Recommendations, New
Vehicle................28
BulbReplacement ..........205Calibration, Compass.........115
Caps, Filler
Fuel ................170
ChangingAFlatTire .........158
Charging System Light........154
Check Engine Light (Malfunction Indi-
cator Light).............153
Child Restraints
CarSeat ...............17
Child Restraints..........17
Child Seat Installation.......19
Installing Child Restraints Using The
Vehicle Seat Belt..........19
LATCH Positions..........17
Locating The LATCH Anchorages..17
Lower Anchors And Tethers For Chil-
dren ..............17,19
Using The Top Tether
Anchorage............18,19
ChildSeat................19
Climate Control.............40
Cluster Warning/Indicator Lights
AirBagWarningLight ......155
Brake Warning Light.......152
Electronic Speed Control ON
Indicator..............157
Electronic Speed Control SET Indi-
cator................157
Electronic Stability Control (ESC)
OFF Indicator Light.......154
Front Fog Light Indicator....156
High Beam Indicator......156
Park/Headlight ON Indicator . .157
Vehicle Security Light......156
Compass Calibration.........115
Cooling System
Coolant Capacity.....177, 181
Cruise Control (Speed Control)....32
CruiseLight...............32
Customer Assistance.........206
Customer Programmable Features...115
Defects, Reporting..........207
Diesel Engine Maintenance.....144
Diesel Exhaust Fluid.........146
Diesel Fuel Water Separator.....144
DimmerControl.............30
Dimmer Switch, Headlight......30
INDEX
211