2014 JEEP GRAND CHEROKEE radio
[x] Cancel search: radioPage 116 of 220

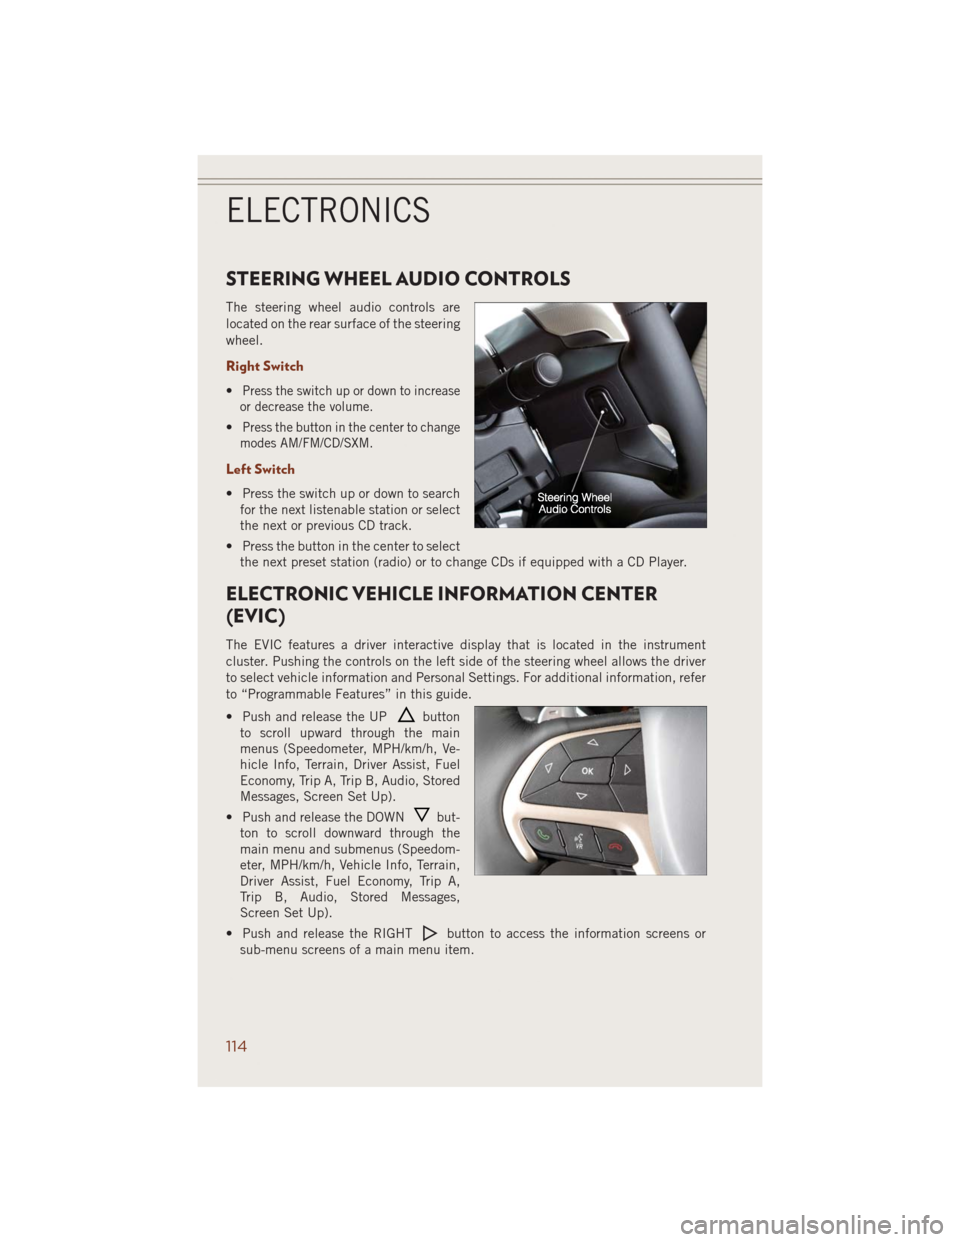
STEERING WHEEL AUDIO CONTROLS
The steering wheel audio controls are
located on the rear surface of the steering
wheel.
Right Switch
•Press the switch up or down to increase
or decrease the volume.
•Press the button in the center to change
modes AM/FM/CD/SXM.
Left Switch
• Press the switch up or down to search
for the next listenable station or select
the next or previous CD track.
• Press the button in the center to select
the next preset station (radio) or to change CDs if equipped with a CD Player.
ELECTRONIC VEHICLE INFORMATION CENTER
(EVIC)
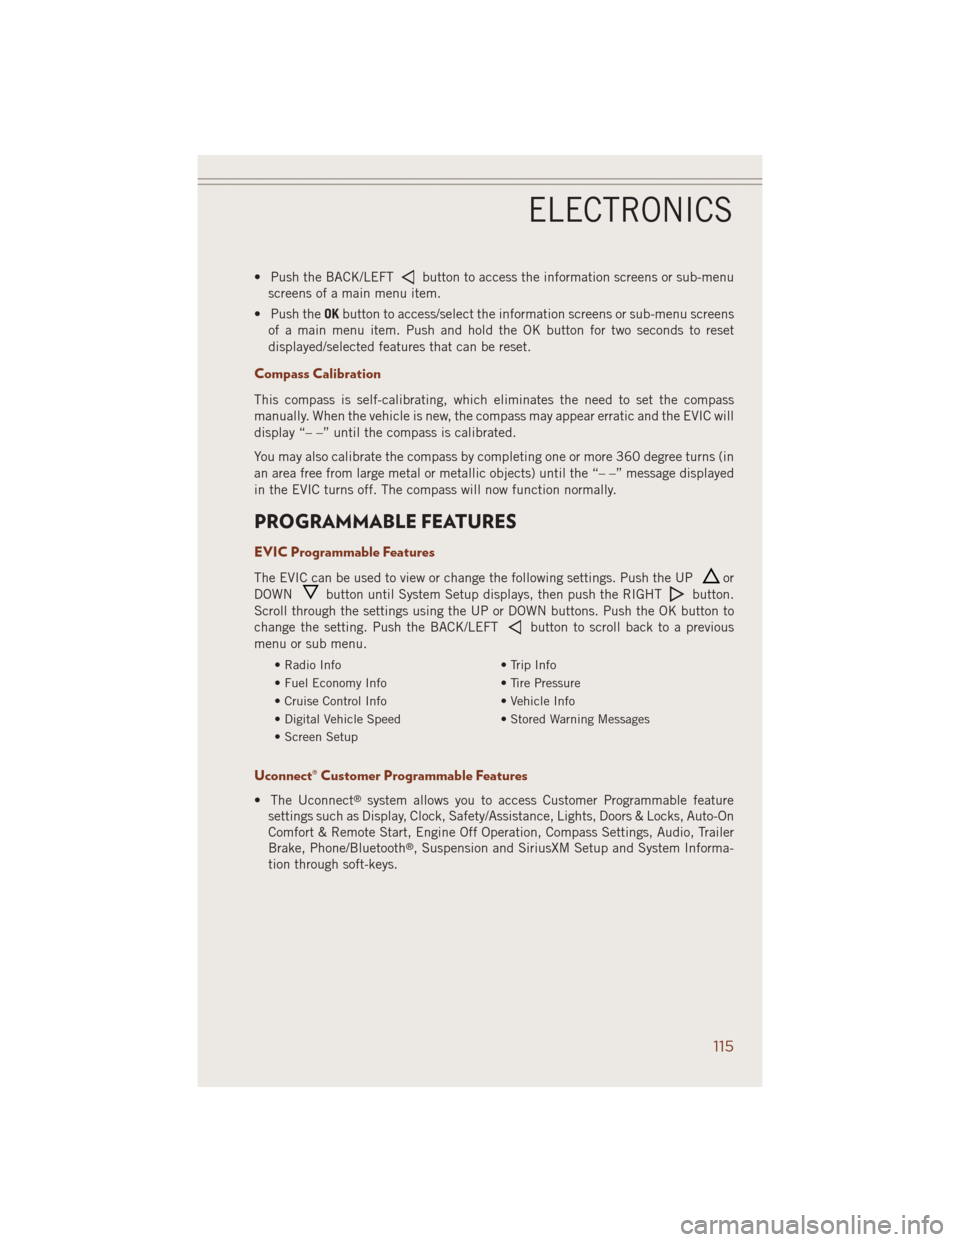
The EVIC features a driver interactive display that is located in the instrument
cluster. Pushing the controls on the left side of the steering wheel allows the driver
to select vehicle information and Personal Settings. For additional information, refer
to “Programmable Features” in this guide.
• Push and release the UP
button
to scroll upward through the main
menus (Speedometer, MPH/km/h, Ve-
hicle Info, Terrain, Driver Assist, Fuel
Economy, Trip A, Trip B, Audio, Stored
Messages, Screen Set Up).
• Push and release the DOWN
but-
ton to scroll downward through the
main menu and submenus (Speedom-
eter, MPH/km/h, Vehicle Info, Terrain,
Driver Assist, Fuel Economy, Trip A,
Trip B, Audio, Stored Messages,
Screen Set Up).
• Push and release the RIGHT
button to access the information screens or
sub-menu screens of a main menu item.
ELECTRONICS
114
Page 117 of 220

• Push the BACK/LEFTbutton to access the information screens or sub-menu
screens of a main menu item.
• Push theOKbutton to access/select the information screens or sub-menu screens
of a main menu item. Push and hold the OK button for two seconds to reset
displayed/selected features that can be reset.
Compass Calibration
This compass is self-calibrating, which eliminates the need to set the compass
manually. When the vehicle is new, the compass may appear erratic and the EVIC will
display “– –” until the compass is calibrated.
You may also calibrate the compass by completing one or more 360 degree turns (in
an area free from large metal or metallic objects) until the “– –” message displayed
in the EVIC turns off. The compass will now function normally.
PROGRAMMABLE FEATURES
EVIC Programmable Features
The EVIC can be used to view or change the following settings. Push the UPor
DOWN
button until System Setup displays, then push the RIGHTbutton.
Scroll through the settings using the UP or DOWN buttons. Push the OK button to
change the setting. Push the BACK/LEFT
button to scroll back to a previous
menu or sub menu.
• Radio Info • Trip Info
• Fuel Economy Info • Tire Pressure
• Cruise Control Info • Vehicle Info
• Digital Vehicle Speed • Stored Warning Messages
• Screen Setup
Uconnect® Customer Programmable Features
• The Uconnect®system allows you to access Customer Programmable feature
settings such as Display, Clock, Safety/Assistance, Lights, Doors & Locks, Auto-On
Comfort & Remote Start, Engine Off Operation, Compass Settings, Audio, Trailer
Brake, Phone/Bluetooth
®, Suspension and SiriusXM Setup and System Informa-
tion through soft-keys.
ELECTRONICS
115
Page 119 of 220

UNIVERSAL GARAGE DOOR OPENER (HomeLink®)
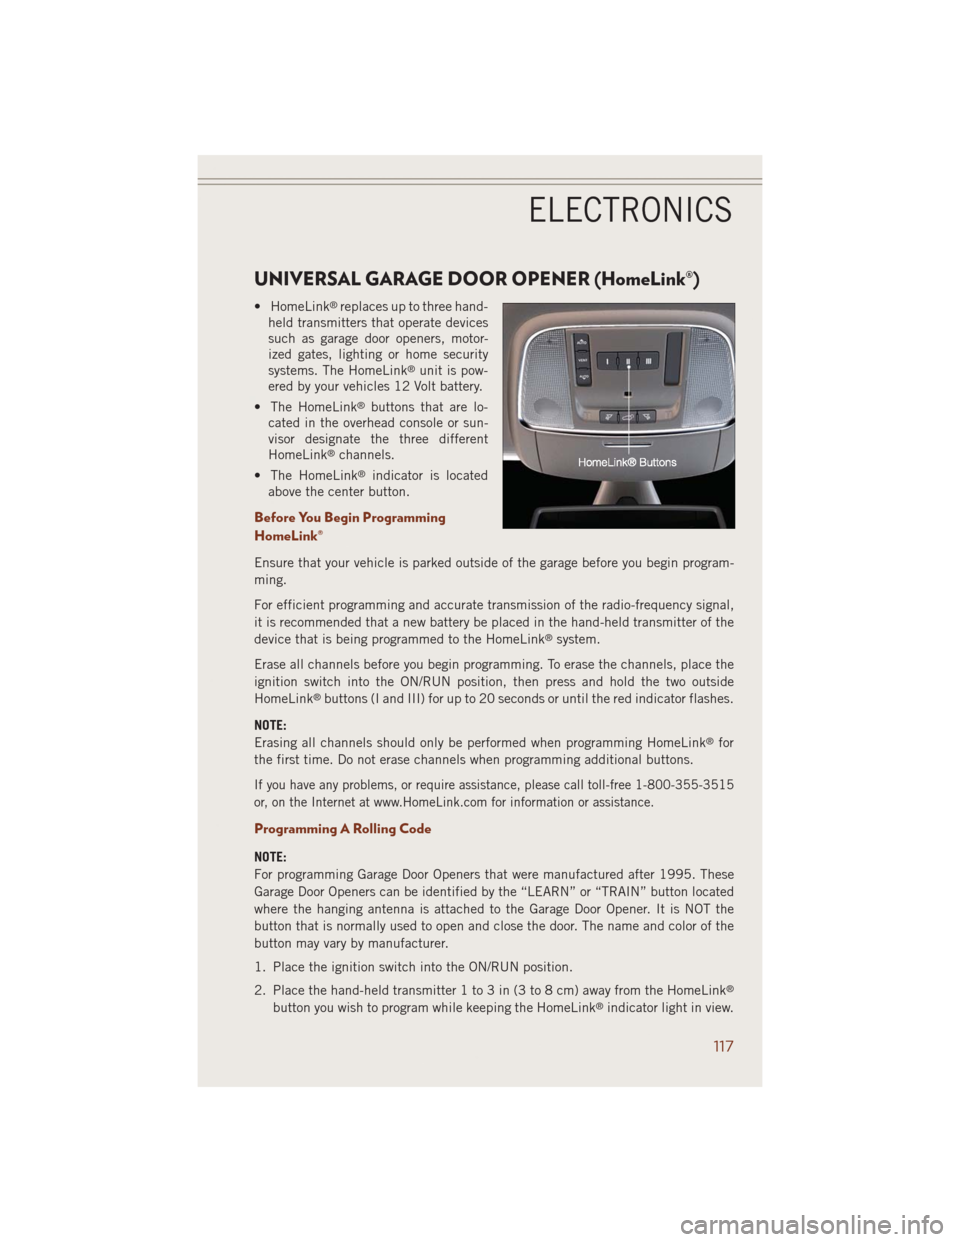
• HomeLink®replaces up to three hand-
held transmitters that operate devices
such as garage door openers, motor-
ized gates, lighting or home security
systems. The HomeLink
®unit is pow-
ered by your vehicles 12 Volt battery.
• The HomeLink
®buttons that are lo-
cated in the overhead console or sun-
visor designate the three different
HomeLink
®channels.
• The HomeLink
®indicator is located
above the center button.
Before You Begin Programming
HomeLink®
Ensure that your vehicle is parked outside of the garage before you begin program-
ming.
For efficient programming and accurate transmission of the radio-frequency signal,
it is recommended that a new battery be placed in the hand-held transmitter of the
device that is being programmed to the HomeLink
®system.
Erase all channels before you begin programming. To erase the channels, place the
ignition switch into the ON/RUN position, then press and hold the two outside
HomeLink
®buttons (I and III) for up to 20 seconds or until the red indicator flashes.
NOTE:
Erasing all channels should only be performed when programming HomeLink
®for
the first time. Do not erase channels when programming additional buttons.
If you have any problems, or require assistance, please call toll-free 1-800-355-3515
or, on the Internet at www.HomeLink.com for information or assistance.
Programming A Rolling Code
NOTE:
For programming Garage Door Openers that were manufactured after 1995. These
Garage Door Openers can be identified by the “LEARN” or “TRAIN” button located
where the hanging antenna is attached to the Garage Door Opener. It is NOT the
button that is normally used to open and close the door. The name and color of the
button may vary by manufacturer.
1. Place the ignition switch into the ON/RUN position.
2. Place the hand-held transmitter 1 to 3 in (3 to 8 cm) away from the HomeLink
®
button you wish to program while keeping the HomeLink®indicator light in view.
ELECTRONICS
117
Page 127 of 220

QUADRA-LIFT™
The Quadra-Lift™ air suspension system provides full time load leveling capability
along with the benefit of being able to adjust vehicle height by the push of a button.
Quadra-Lift™ is available with both Quadra-Trac II
®and Quadra-Drive II™.
• The system requires that the engine be
running for all changes. When lowering
the vehicle all of the doors, including
the liftgate, must be closed.
• The Quadra-Lift™ air suspension sys-
tem uses a lifting and lowering pattern
which keeps the headlights from shin-
ing into oncoming traffic. When raising
the vehicle, the rear of the vehicle will
move up first and then the front. When
lowering the vehicle, the front will
move down first and then the rear.
• After the engine is turned off, you may
notice that the air suspension system
operates briefly. This is normal. The
system is correcting the position of the vehicle.
• To assist with changing a spare tire, the Quadra-Lift™ air suspension system has
a feature which allows the automatic leveling to be disabled. The feature controls
are located in the radio screen. Driving the vehicle over 5 mph (8 km/h) will return
the air suspension to normal operation.
• An audible chime will be heard whenever a system error has been detected.
Operation
• Pressing the “Up” or “Down” button once will move the suspension one position
higher or lower from the current position, assuming all conditions are met (i.e.,
engine running and all doors and liftgate closed).
• The 4 indicator lamps will illuminate to show the current position of the vehicle.
Flashing indicator lamps will show a position which the system is working to
achieve. If multiple indicator lamps are flashing on the “Up” button, the highest
flashing indicator lamp is the position the system is working to achieve.
• Normal Ride Height (NRH) – This is the standard position of the
suspension and is meant for normal driving. Only the bottom Indicator
lamp on the “Up” button will be illuminated when the vehicle is in this
position.
UP
OFF-ROAD CAPABILITIES (4WD OPERATION)
125
Page 167 of 220

BATTERY LOCATION
The battery in your vehicle is located under the passenger's front seat. Remote
battery posts are located on the right side of the engine compartment for jump-
starting.
JUMP-STARTING
If your vehicle has a discharged battery it can be jump-started using a set of jumper
cables and a battery in another vehicle or by using a portable battery booster pack.
Jump-starting can be dangerous if done improperly so please follow the procedures
in this section carefully.
NOTE:
When using a portable battery booster pack follow the manufacturer’s operating
instructions and precautions.
Preparations For Jump-Start
The battery in your vehicle is located
under the passengers front seat. There
are remote locations under the hood to
assist in jump starting.
1. Set the parking brake, shift the auto-
matic transmission into PARK and
turn the ignition to LOCK.
2. Turn off the heater, radio, and all
unnecessary electrical accessories.
3. Remove the protective cover over the
remote positive (+) battery post. Pull
upward on the cover to remove it.
4. If using another vehicle to jump-start
the battery, park the vehicle within
the jumper cables reach, set the park-
ing brake and make sure the ignition
is OFF.
Remote Battery Posts
1 — Remote Positive(+)Post
2 — Remote Negative(-)Post
WHAT TO DO IN EMERGENCIES
165
Page 208 of 220

CHRYSLER GROUP LLC CUSTOMER CENTER
P.O. Box 21–8004 Auburn Hills, MI 48321–8004 Phone: 1–877–426–5337
CHRYSLER CANADA INC. CUSTOMER CENTER
P.O. Box 1621 Windsor, Ontario N9A 4H6 Phone: 1–800–465–2001 (English)
Phone: 1–800–387–9983 (French)
ASSISTANCE FOR THE HEARING IMPAIRED
To assist customers who have hearing difficulties, the manufacturer has installed
special TDD (Telecommunication Devices for the Deaf) equipment at its customer
center. Any hearing or speech impaired customer, who has access to a TDD or a
conventional teletypewriter (TTY) in the United States, can communicate with the
manufacturer by dialing 1–800–380–CHRY. Canadian residents with hearing
difficulties that require assistance can use the special needs relay service offered
by Bell Canada. For TTY teletypewriter users, dial 711 and for Voice callers, dial
1–800–855–0511 to connect with a Bell Relay Service operator.
WARNING!
Engine exhaust, some of its constituents, and certain vehicle components con-
tain, or emit, chemicals known to the State of California to cause cancer and birth
defects, or other reproductive harm. In addition, certain fluids contained in
vehicles and certain products of component wear contain, or emit, chemicals
known to the State of California to cause cancer and birth defects, or other
reproductive harm.
PUBLICATIONS ORDERING
•If you are the first registered retail owner of your vehicle,you may obtain one free
printed copy of the Owner's Manual, Warranty Booklet or Radio Manuals on your
DVD by calling 1–877–426–5337 (U.S.) or 1–800–387–1143 (Canada) or by
contacting your dealer.
• Replacement User Guide kits or DVDs or, if you prefer, additional printed copies
of the Owner's Manual, Warranty Booklet or Radio Manuals may be purchased
by visiting www.techauthority.com or by calling 1–877–890–4038 (U.S.) or
1–800–387–1143 (Canada). Visa, Master Card, American Express and Discover
orders are accepted. If you prefer mailing your order, please call the above
numbers for an order form.
CONSUMER ASSISTANCE
206
Page 211 of 220

FREQUENTLY ASKED QUESTIONS
GETTING STARTED
How do I install my LATCH Equipped Child Seat? pg. 17
How do I program my Front Seat Memory? pg. 22
OPERATING YOUR VEHICLE
How does the Electronic Speed Control operate? pg. 32
ELECTRONICS
Which radio is in my vehicle?
• Uconnect
®5.0 pg. 65
• Uconnect
®8.4 pg. 73
• Uconnect
®8.4AN pg. 93
How do I activate the Audio Jack?
• Uconnect
®5.0 pg. 68
• Uconnect
®8.4A pg. 99
• Uconnect
®8.4AN pg. 99
How do I set the clock on my radio?
• Uconnect
®5.0 pg. 65
• Uconnect
®8.4A pg. 73
• Uconnect
®8.4AN pg. 93
How do I use the Navigation feature? pg. 101
How do I pair my cell phone via Bluetooth
®with the Uconnect®Hands-Free Voice
Activation System?
• Uconnect
®8.4A pg. 105
• Uconnect
®8.4AN pg. 105
How do I use my USB port to listen to audio through my touchscreen radio? pg. 99
OFF-ROAD CAPABILITIES
How do I shift into different four-wheel drive selections? pg. 122
UTILITY
How do I know how much I can tow with my Jeep Grand Cherokee? pg. 128
FAQ’s
209
Page 214 of 220

Disabled Vehicle Towing.......150
Disarming, Security System......15
Discharged Battery..........165
Driver Information Display
Programmable Features.....115
Economy(Fuel)Mode.........39
Electronics
Your Vehicle's Sound
System.............48,49
Electronic Speed Control (Cruise
Control)................32
Electronic Stability Control (ESC) . .153
Electronic Stability Control (ESC) OFF
Indicator..............154
Electronic Throttle Control Warning
Light.............155, 157
Electronic Vehicle Information Center
Programmable Features.....115
Electronic Vehicle Information Center
(EVIC)................115
Average Fuel Consumption . . .114
Distance Traveled.........114
Electronic Vehicle Information Cen-
ter(EVIC) .............114
ExitMenu .............114
Language (Selecting The
Language).............115
Travel Time............114
Trip Functions...........114
Units (Set Units).........115
Emergency, In Case of
Jacking..............158
Overheating............158
Towing ...............150
Engine.................142
Break-In Recommendations . . .28
Compartment. .173, 174, 175, 176
Coolant (Antifreeze)....177, 181
Malfunction Indicator (Check En-
gine) ................153
Oil ..............177, 181
Oil Filter..........177, 181
OilSelection ........177, 181
Overheating............158
Event Data Recorder.........170
Exhaust Regeneration........145Exterior Lights.............205
Filters.................181
EngineFuel ............144
Flashers
TurnSignal ............156
Flat...................158
FlatTire ................158
Fluid Capacities........177, 181
Fluids..............177, 181
FogLights ............29,156
FoldingFrontPassengerSeat.....23
FoldingRearSeat ...........24
Forward Collision Warning.......36
Four Wheel Drive...........122
Shifting..............123
Four Wheel Drive Operation.....122
Shifting into Transfer Case
Neutral (N)............123
Shifting out of Transfer Case
Neutral (N)............123
Front And Rear ParkSense System . .42
Front ParkSense System........42
Fuel
EconomyMode ..........39
Filler Door Emergency Release. .172
Specifica-
tions......177, 178, 181, 183
Fuse ..................201
Fuses..................201
Headlights................29
Automatic.............29
Dimmer Switch..........30
HighBeam .............31
High Beam/Low Beam
Select Switch...........31
Heated Seats..............24
Heated Steering Wheel........26
High Beam Indicator.........156
High Beam/Low Beam Select (Dimmer)
Switch................31
Hill Descent Control.........127
Hill Start Assist............127
HomeLink®(Garage Door Opener)...117
Hood Release.............171
Identifying Your Radio.........50
INDEX
212