2014 Hyundai Sonata steering
[x] Cancel search: steeringPage 498 of 665
5-49
Driving your vehicle
5
Information
The VSM does not operate when:
•Driving on bank road such as gradi-
ent or incline
• Driving rearward.
• ESC OFF indicator light is on.
•EPS (Electric PowerSteering) warn-
ing light ( ) is on.
VSM OFF condition
To cancel VSM operation, press the
ESC OFF button. ESC OFF indicator
light ( ) will illuminate.
To turn on VSM, press the ESC OFF
button again. The ESC OFF indicator
light will go out.
Driving with varying tire or wheel
sizes may cause the ESC system
to malfunction. When replacing
tires, make sure they are the same
size as your original tires for this
vehicle.
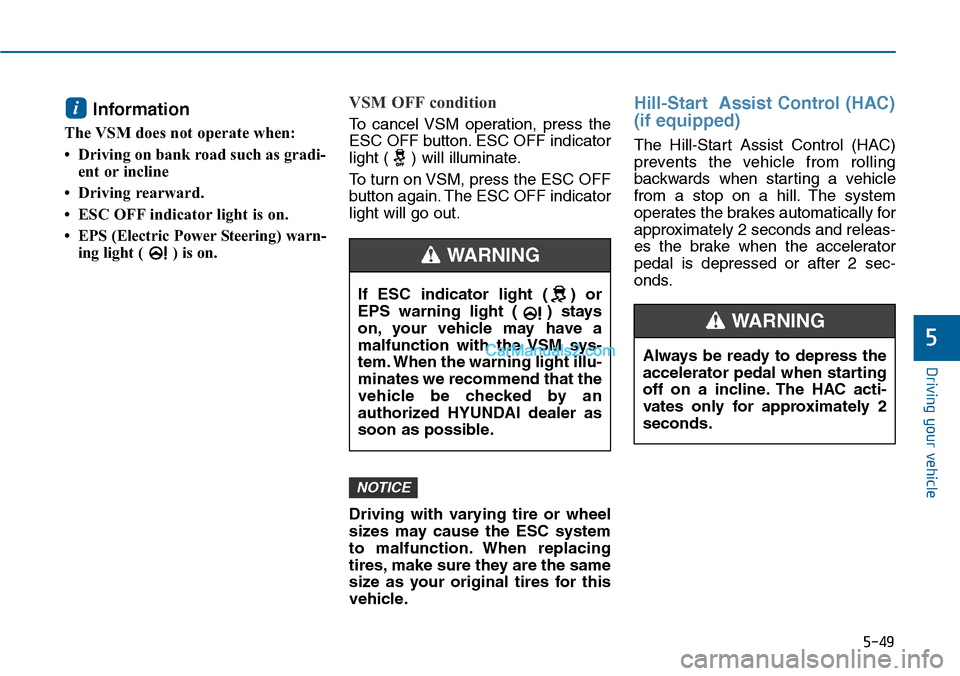
Hill-Start Assist Control (HAC)
(if equipped)
The Hill-Start Assist Control (HAC)
prevents the vehicle from rolling
backwards when starting a vehicle
from a stop on a hill. The system
operates the brakes automatically for
approximately 2 seconds and releas-
es the brake when the accelerator
pedal is depressed or after 2 sec-
onds.
NOTICE
i
If ESC indicator light ( ) or
EPS warning light ( ) stays
on, your vehicle may have a
malfunction with the VSM sys-
tem. When the warning light illu-
minates we recommend that the
vehicle be checked by an
authorized HYUNDAI dealer as
soon as possible.
WARNING
Always be ready to depress the
accelerator pedal when starting
off on a incline. The HAC acti-
vates only for approximately 2
seconds.
WARNING
Page 502 of 665
5-53
Driving your vehicle
5
When Active ECO is activated:
•The acceleration response may be
slightly reduced as the accelerator
pedal is depressed moderately.
•The air conditioner performance
may be limited.
•The shift pattern of the automatic
transaxle may change.
•The engine noise may get louder.
The above situations are normal
conditions when the Active ECO sys-
tem is activated to improve fuel effi-
ciency.
Limitation of Active ECO opera-
tion:
If the following conditions occur while
Active ECO is operating, the system
operation is limited even though
there is no change in the ECO indi-
cator.
•When the coolant temperature is
low:
The system will be limited until
engine performance becomes nor-
mal.
•When driving up a hill:
The system will be limited to gain
power when driving uphill because
engine torque is restricted.
•When using the automatic
transaxle Sports mode:
The system will be limited accord-
ing to the shift location.
•When the accelerator pedal is
deeply depressed for a few sec-
onds: The system will be limited,
judging that the driver wants to
speed up.
SPORT mode
SPORT mode focuses on
dynamic driving by auto-
matically controlling the
steering wheel, engine
and transaxle system.
•When the DRIVE MODE button is
pressed and the SPORT mode is
selected, the SPORT indicator
(yellow) will illuminate.
•When the SPORT mode is activat-
ed, and the engine is turned off
and on it will change to NORMAL
mode. To turn on the SPORT
mode, press the DRIVE MODE
button again.
•If the system is activated:
- After accelerating and releasing
the accelerator pedal, the gear
and engine speed RPM may not
drop as soon as in NORMAL
mode.
- Up-shifting is delayed.
Information
In SPORT mode, the fuel efficiency
may decrease.
i
SPORT
Page 504 of 665
5-55
Driving your vehicle
5
Information
• During normal cruise control opera-
tion, when the SET switch is activat-
ed or reactivated after applying the
brakes, the cruise control will ener-
gize after approximately 3 seconds.
This delay is normal.
• To activate cruise control, depress
the brake pedal at least once after
turning the ignition switch to the
ON position or starting the engine.
This is to check if the brake switch
which is important part to cancel
cruise control is in normal condi-
tion.
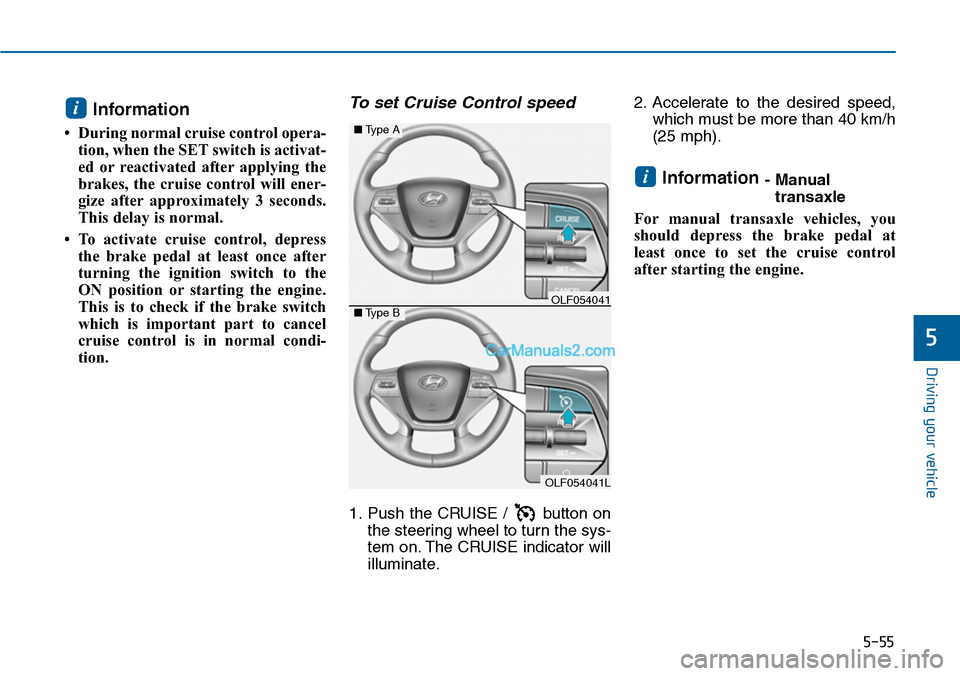
To set Cruise Control speed
1. Push the CRUISE / button on
the steering wheel to turn the sys-
tem on. The CRUISE indicator will
illuminate.
2. Accelerate to the desired speed,
which must be more than 40 km/h
(25 mph).
Information - Manual
transaxle
For manual transaxle vehicles, you
should depress the brake pedal at
least once to set the cruise control
after starting the engine.
i
i
OLF054041L
■Type A
■Type BOLF054041
Page 507 of 665
5-58
Driving your vehicle
To temporarily accelerate with
the Cruise Control ON
Depress the accelerator pedal. When
you take your foot off the accelerator,
the vehicle will return to the previ-
ously set speed.
If you push the lever down (SET-) at
the increased speed, the Cruise
Control will maintain the increased
speed.
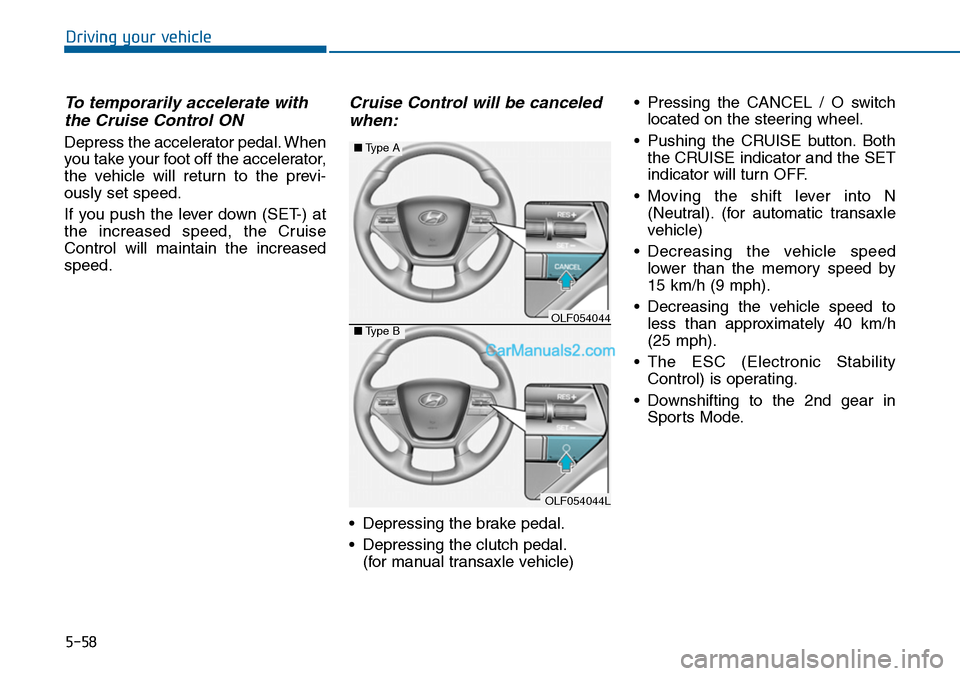
Cruise Control will be canceled
when:
•Depressing the brake pedal.
•Depressing the clutch pedal.
(for manual transaxle vehicle)
•Pressing the CANCEL / O switch
located on the steering wheel.
•Pushing the CRUISE button.Both
the CRUISE indicator and the SET
indicator will turn OFF.
•Moving the shift lever into N
(Neutral). (for automatic transaxle
vehicle)
•Decreasing the vehicle speed
lower than the memory speed by
15 km/h (9 mph).
•Decreasing the vehicle speed to
less than approximately 40 km/h
(25 mph).
•The ESC (Electronic Stability
Control) is operating.
•Downshifting to the 2nd gear in
Sports Mode.
OLF054044L
■Type A
■Type BOLF054044
Page 508 of 665
5-59
Driving your vehicle
5
Information
Each of the above actions will cancel
Cruise Control operation (the SET
indicator light in the instrument clus-
ter will go off), but only pressing the
CRUISE button will turn the system
off. If you wish to resume Cruise
Control operation, push the lever up
(RES+) located on your steering
wheel. You will return to your previ-
ously preset speed, unless the system
was turned off using the CRUISE but-
ton.
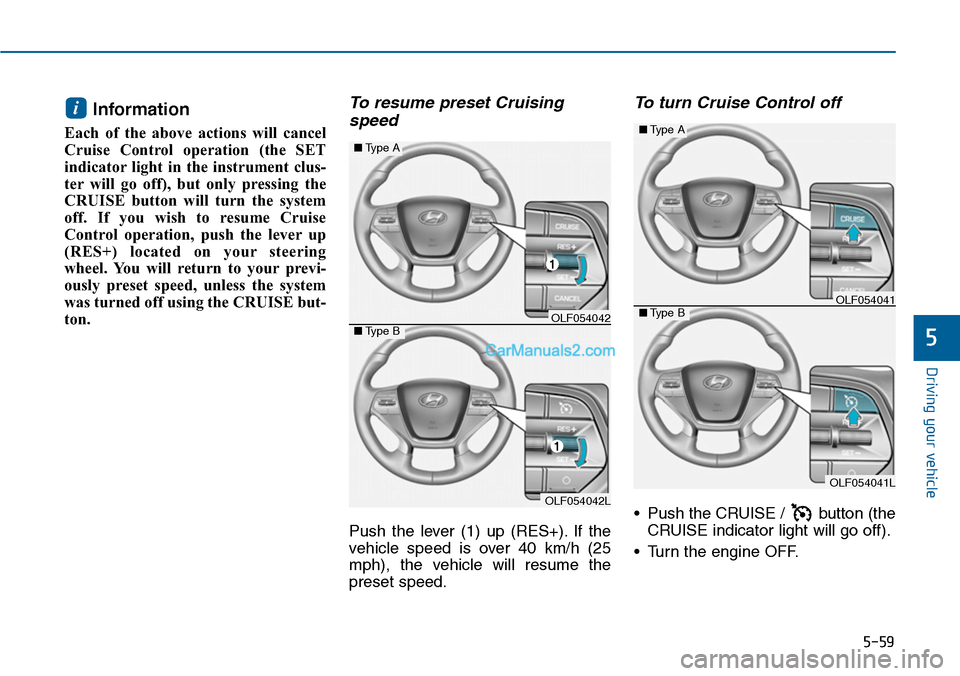
To resume preset Cruising
speed
Push the lever (1) up (RES+). If the
vehicle speed is over 40 km/h (25
mph), the vehicle will resume the
preset speed.
To turn Cruise Control off
•Push the CRUISE / button (the
CRUISE indicator light will go off).
•Turn the engine OFF.
i
OLF054042L
■Type A
■Type BOLF054042
OLF054041L
■Type A
■Type BOLF054041
Page 517 of 665
5-68
Driving your vehicle
Hazardous driving conditions
When hazardous driving conditions
are encountered such as water,
snow, ice, mud or sand:
Drive cautiously and allow extra dis-
tance for braking.
Avoid sudden movements in braking
or steering.
If stuck in snow, mud, or sand, use
second gear. Accelerate slowly to
avoid spinning the drive wheels.
Use sand, rock salt, or other non-slip
material under the drive wheels to
provide traction when stuck in ice,
snow, or mud.
Rocking the vehicle
If it is necessary to rock the vehicle
to free it from snow, sand, or mud,
first turn the steering wheel right and
left to clear the area around your
front wheels. Then, shift back and
forth between R (Reverse) and a for-
ward gear.
Try to avoid spinning the wheels, and
do not race the engine.
To prevent transaxle wear, wait until
the wheels stop spinning before
shifting gears. Release the accelera-
tor pedal while shifting, and press
lightly on the accelerator pedal while
the transaxle is in gear. Slowly spin-
ning the wheels in forward and
reverse directions causes a rocking
motion that may free the vehicle.
SPECIAL DRIVING CONDITIONS
Downshifting with an automatic
transaxle while driving on slip-
pery surfaces can cause an
accident. The sudden change in
tire speed could cause the tires
to skid. Be careful when down-
shifting on slippery surfaces.
WARNING
If the tires spin at high speed
the tires can explode, and you
or others may be injured. Do not
attempt this procedure if people
or objects are anywhere near
the vehicle.
The vehicle can overheat caus-
ing an engine compartment fire
or other damage. Spin the
wheels as little as possible and
avoid spinning the wheels at
speeds over 56 km/h (35 mph)
as indicated on the speedome-
ter.
WARNING
Page 524 of 665

5-75
Driving your vehicle
5
Don't let your parking brake freeze
Under some conditions your parking
brake can freeze in the engaged
position. This is most likely to hap-
pen when there is an accumulation
of snow or ice around or near the
rear brakes or if the brakes are wet.
If there is a risk the parking brake
may freeze, apply it only temporarily
while you put the shift lever in P
(automatic transaxle) or in first or
reverse gear (manual transaxle) and
block the rear wheels so the vehicle
cannot roll. Then release the parking
brake.
Don't let ice and snow accumulate
underneath
Under some conditions, snow and
ice can build up under the fenders
and interfere with the steering. When
driving in severe winter conditions
where this may happen, you should
periodically check underneath the
vehicle to be sure the movement of
the front wheels and the steering
components is not obstructed.
Carry emergency equipment
Depending on the severity of the
weather, you should carry appropri-
ate emergency equipment. Some of
the items you may want to carry
include tire chains, tow straps or
chains, flashlight, emergency flares,
sand, shovel, jumper cables, window
scraper, gloves, ground cloth, cover-
alls, blanket, etc.
Don't place foreign objects or
materials in the engine compart-
ment
Placement of foreign object or mate-
rials which prevent cooling of the
engine, in the engine compartment,
may cause a failure or combustion.
The manufacturer is not responsible
for the damage caused by such
placement.
Page 530 of 665
5-81
Driving your vehicle
5
Backing up
Hold the bottom of the steering
wheel with one hand. Then, to move
the trailer to the left, move your hand
to the left. To move the trailer to the
right, move your hand to the right.
Always back up slowly and, if possi-
ble, have someone guide you.
Making turns
When you’re turning with a trailer,
make wider turns than normal. Do
this so your trailer won’t strike soft
shoulders, curbs, road signs, trees,
or other objects. Avoid jerky or sud-
den maneuvers. Signal well in
advance.
Turn signals
When you tow a trailer, your vehicle
has to have a different turn signal
flasher and extra wiring. The green
arrows on your instrument panel will
flash whenever you signal a turn or
lane change. Properly connected,
the trailer lights will also flash to alert
other drivers you’re about to turn,
change lanes, or stop.
When towing a trailer, the green
arrows on your instrument panel will
flash for turns even if the bulbs on
the trailer are burned out. Thus, you
may think drivers behind you are
seeing your signals when, in fact,
they are not. It’s important to check
occasionally to be sure the trailer
bulbs are still working. You must also
check the lights every time you dis-
connect and then reconnect the
wires.
Do not connect a trailer lighting
system directly to your vehi-
cle’s lighting system. Use an
approved trailer wiring harness.
Failure to do so could result in
damage to the vehicle electrical
system and/or personal injury.
Consult an authorized
HYUNDAI dealer for assistance.
WARNING