2014 Hyundai Sonata steering
[x] Cancel search: steeringPage 186 of 665
3-90
Convenient features of your vehicle
Information - Electronic
Brake force Distribution (EBD)
System Warning Light
When the ABS Warning Light is on or
both ABS and Parking Brake & Brake
Fluid Warning Lights are on, the
speedometer, odometer, or tripmeter
may not work. Also, the EPS Warning
Light may illuminate and the steering
effort may increase or decrease.
In this case, we recommend you have
the vehicle inspected by an authorized
HYUNDAI dealer as soon as possible.
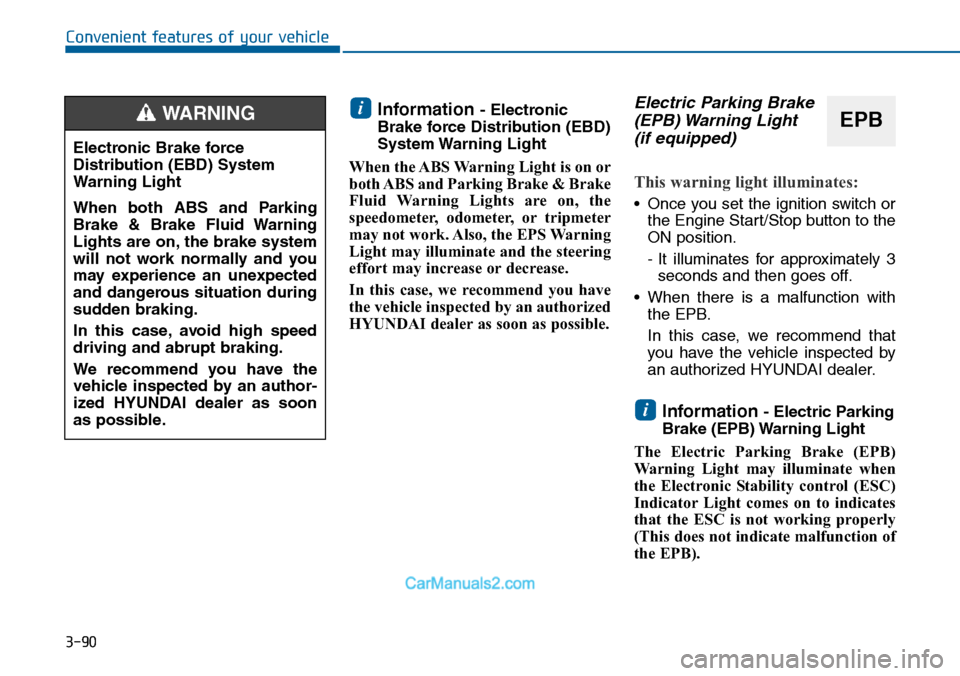
Electric Parking Brake
(EPB) Warning Light
(if equipped)
This warning light illuminates:
•Once you set the ignition switch or
the Engine Start/Stop button to the
ON position.
- It illuminates for approximately 3
seconds and then goes off.
•When there is a malfunction with
the EPB.
In this case, we recommend that
you have the vehicle inspected by
an authorized HYUNDAI dealer.
Information - Electric Parking
Brake (EPB) Warning Light
The Electric Parking Brake (EPB)
Warning Light may illuminate when
the Electronic Stability control (ESC)
Indicator Light comes on to indicates
that the ESC is not working properly
(This does not indicate malfunction of
the EPB).
i
i
Electronic Brake force
Distribution (EBD) System
Warning Light
When both ABS and Parking
Brake & Brake Fluid Warning
Lights are on, the brake system
will not work normally and you
may experience an unexpected
and dangerous situation during
sudden braking.
In this case, avoid high speed
driving and abrupt braking.
We recommend you have the
vehicle inspected by an author-
ized HYUNDAI dealer as soon
as possible.
WARNINGEPB
Page 187 of 665
3-91
Convenient features of your vehicle
3
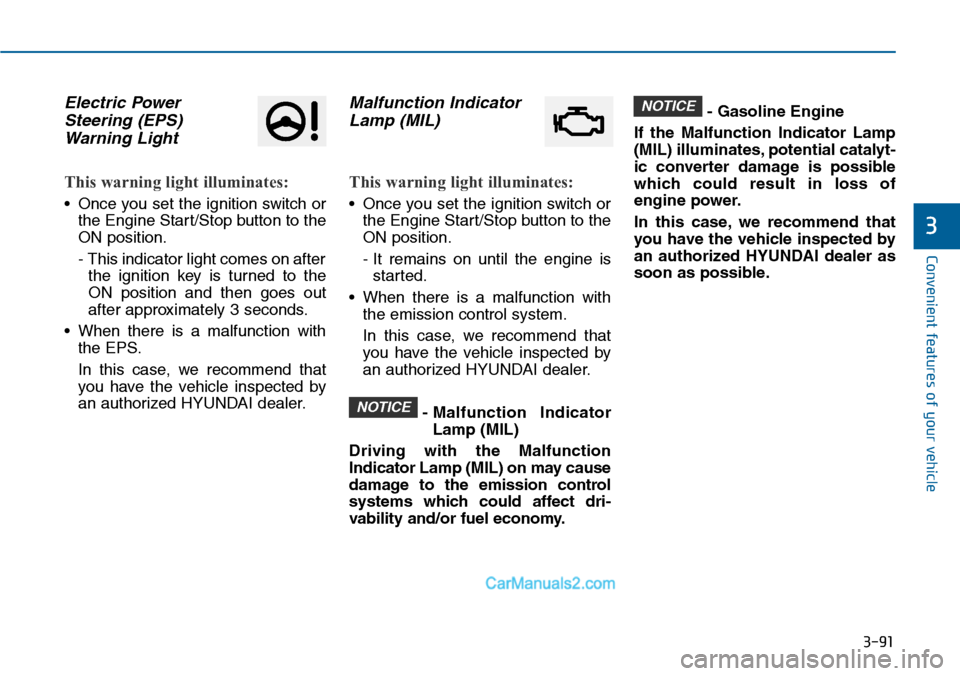
Electric Power
Steering (EPS)
Warning Light
This warning light illuminates:
•Once you set the ignition switch or
the Engine Start/Stop button to the
ON position.
- This indicator light comes on after
the ignition key is turned to the
ON position and then goes out
after approximately 3 seconds.
•When there is a malfunction with
the EPS.
In this case, we recommend that
you have the vehicle inspected by
an authorized HYUNDAI dealer.
Malfunction Indicator
Lamp (MIL)
This warning light illuminates:
•Once you set the ignition switch or
the Engine Start/Stop button to the
ON position.
- It remains on until the engine is
started.
•When there is a malfunction with
the emission control system.
In this case, we recommend that
you have the vehicle inspected by
an authorized HYUNDAI dealer.
- Malfunction Indicator
Lamp (MIL)
Driving with the Malfunction
Indicator Lamp (MIL) on may cause
damage to the emission control
systems which could affect dri-
vability and/or fuel economy.
- Gasoline Engine
If the Malfunction Indicator Lamp
(MIL) illuminates, potential catalyt-
ic converter damage is possible
which could result in loss of
engine power.
In this case, we recommend that
you have the vehicle inspected by
an authorized HYUNDAI dealer as
soon as possible.
NOTICE
NOTICE
Page 198 of 665
3-102
Convenient features of your vehicle
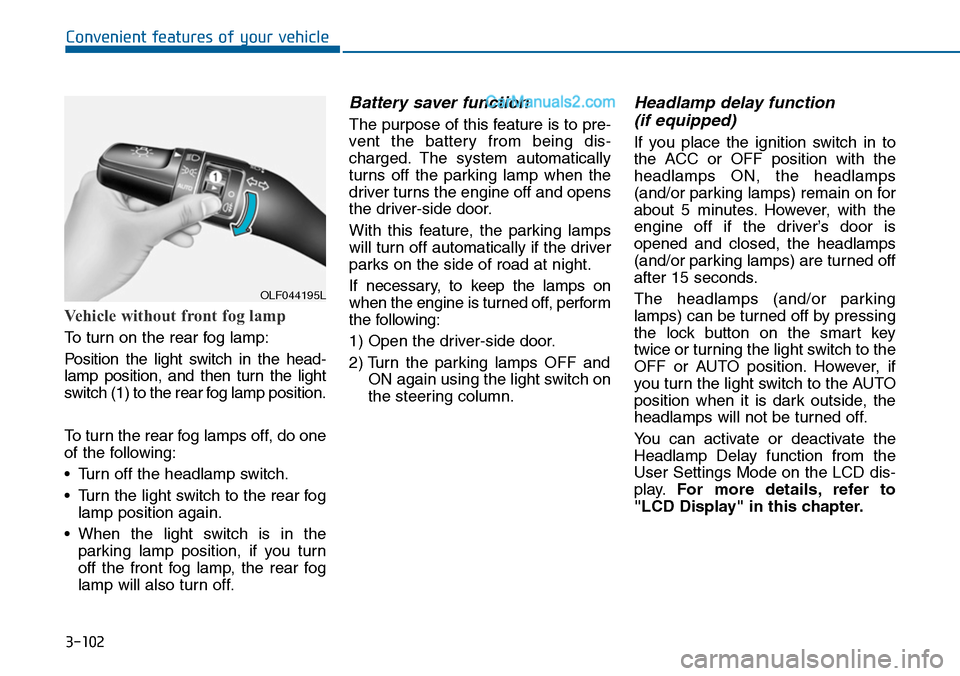
Vehicle without front fog lamp
To turn on the rear fog lamp:
Position the light switch in the head-
lamp position, and then turn the light
switch (1) to the rear fog lamp position.
To turn the rear fog lamps off, do one
of the following:
•Turn off the headlamp switch.
•Turn the light switch to the rear fog
lamp position again.
•When the light switch is in the
parking lamp position, if you turn
off the front fog lamp, the rear fog
lamp will also turn off.
Battery saver function
The purpose of this feature is to pre-
vent the batter y from being dis-
charged. The system automatically
turns off the parking lamp when the
driver turns the engine off and opens
the driver-side door.
With this feature, the parking lamps
will turn off automatically if the driver
parks on the side of road at night.
If necessary, to keep the lamps on
when the engine is turned off, perform
the following:
1) Open the driver-side door.
2) Turn the parking lamps OFF and
ON again using the light switch on
the steering column.
Headlamp delay function
(if equipped)
If you place the ignition switch in to
the ACC or OFF position with the
headlamps ON, the headlamps
(and/or parking lamps) remain on for
about 5 minutes. However, with the
engine off if the driver’s door is
opened and closed, the headlamps
(and/or parking lamps) are turned off
after 15 seconds.
The headlamps (and/or parking
lamps) can be turned off by pressing
the lock button on the smart key
twice or turning the light switch to the
OFF or AUTO position. However, if
you turn the light switch to the AUTO
position when it is dark outside, the
headlamps will not be turned off.
Yo u c a n a c t i v a t e o r d e a c t i v a t e t h e
Headlamp Delay function from the
User Settings Mode on the LCD dis-
play.For more details, refer to
"LCD Display" in this chapter.
OLF044195L
Page 259 of 665
Multimedia System
Multimedia system .................................................4-2
AUX, USB and iPod®port ...............................................4-2
Antenna ...............................................................................4-3
Steering wheel audio control ........................................4-4
Audio / Video / Navigation system (AVN) ..................4-5
Bluetooth®Wireless Technology hands-free ............4-5
How Vehicle Audio Works ...............................................4-6
System controllers and functions
- 3.8 inch MONO TFT (Except Europe)............4-20
Setup (for RDS model) ...................................................4-26
Phone setup (for RDS, Bluetooth®Wireless Technology
equipped model) ..................................................................4-28
System settings ...............................................................4-32
Setup ..................................................................................4-33
RADIO (for RDS model)..................................................4-40
RADIO .................................................................................4-42
System controllers and functions
- 4.3 inch COLOR TFT LCD (Except Europe) ...4-52
Radio mode(for RDS model) .........................................4-56
Radio mode .......................................................................4-60
Media mode ......................................................................4-62
Audio CD mode ................................................................4-63
MP3 CD mode ..................................................................4-66
USB mode ........................................................................4-69
iPod®mode .......................................................................4-72
AUX mode ........................................................................4-75
My music mode................................................................4-76
Bluetooth®Wireless Technology audio mode ..........4-79
Voice recognition ............................................................4-99
Ending voice recognition ............................................4-100
Setup (for RDS, Bluetooth®Wireless Technology
equipped model) ............................................................4-107
Setup (for Bluetooth® WirelessTechnology equipped
model) ..............................................................................4-114
Rear view camera .........................................................4-120
System controllers and functions
- 3.8 inch MONO TFT (For Europe)................4-126
Setup ................................................................................4-128
Radio ................................................................................4-131
Basic method of use : Audio CD / MP3 CD / USB /
iPod®/ My Music .........................................................4-132
System controllers and functions
- 4.3 inch COLOR TFT LCD (For Europe) .......4-139
Radio mode .....................................................................4-143
Media mode ....................................................................4-145
Audio CD mode ..............................................................4-146
MP3 CD mode ................................................................4-148
USB mode ......................................................................4-151
iPod®mode .....................................................................4-154
AUX mode ......................................................................4-156
My music mode .............................................................4-157
Bluetooth® Wireless Technology audio mode ........4-160
Voice recognition ..........................................................4-172
Setup (for Bluetooth®Wireless Technology equipped
model) ..............................................................................4-180
Rear view camera .........................................................4-186
4
Page 262 of 665
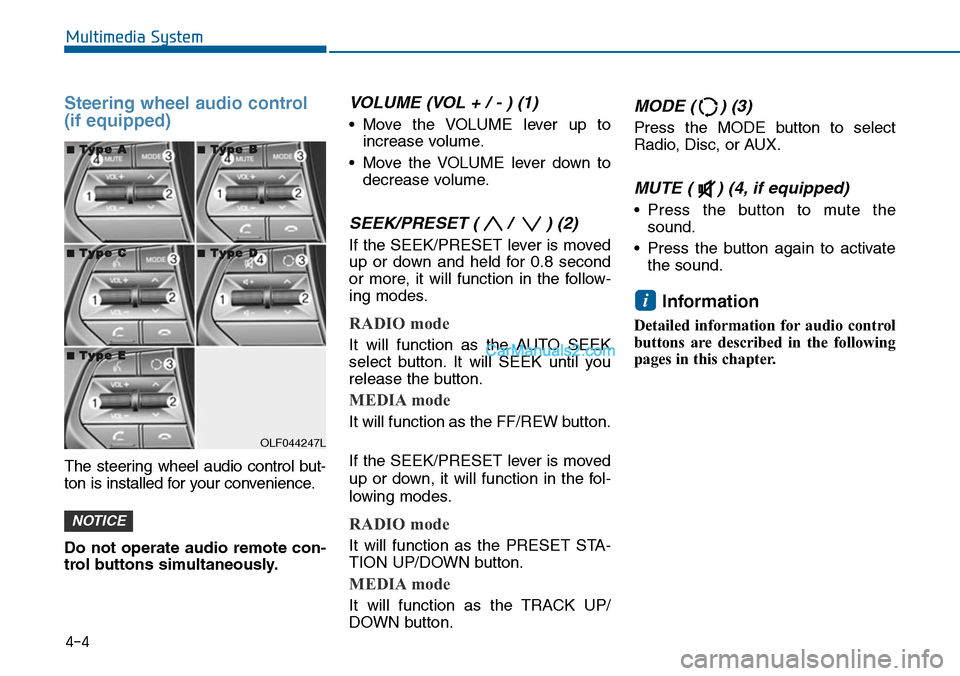
Steering wheel audio control
(if equipped)
The steering wheel audio control but-
ton is installed for your convenience.
Do not operate audio remote con-
trol buttons simultaneously.
VOLUME (VOL + / - ) (1)
•Move the VOLUME lever up to
increase volume.
•Move the VOLUME lever down to
decrease volume.
SEEK/PRESET ( / ) (2)
If the SEEK/PRESET lever is moved
up or down and held for 0.8 second
or more, it will function in the follow-
ing modes.
RADIO mode
It will function as the AUTO SEEK
select button. It will SEEK until you
release the button.
MEDIA mode
It will function as the FF/REW button.
If the SEEK/PRESET lever is moved
up or down, it will function in the fol-
lowing modes.
RADIO mode
It will function as the PRESET STA-
TION UP/DOWN button.
MEDIA mode
It will function as the TRACK UP/
DOWN button.
MODE ( ) (3)
Press the MODE button to select
Radio, Disc, or AUX.
MUTE ( ) (4, if equipped)
•Press the button to mute the
sound.
•Press the button again to activate
the sound.
Information
Detailed information for audio control
buttons are described in the following
pages in this chapter.
i
NOTICE
4-4
Multimedia System
OLF044247L
■■TTyyppee AA■■TTyyppee BB
■■TTyyppee CC■■TTyyppee DD
■■TTyyppee EE
Page 305 of 665
4-47
Multimedia System
4
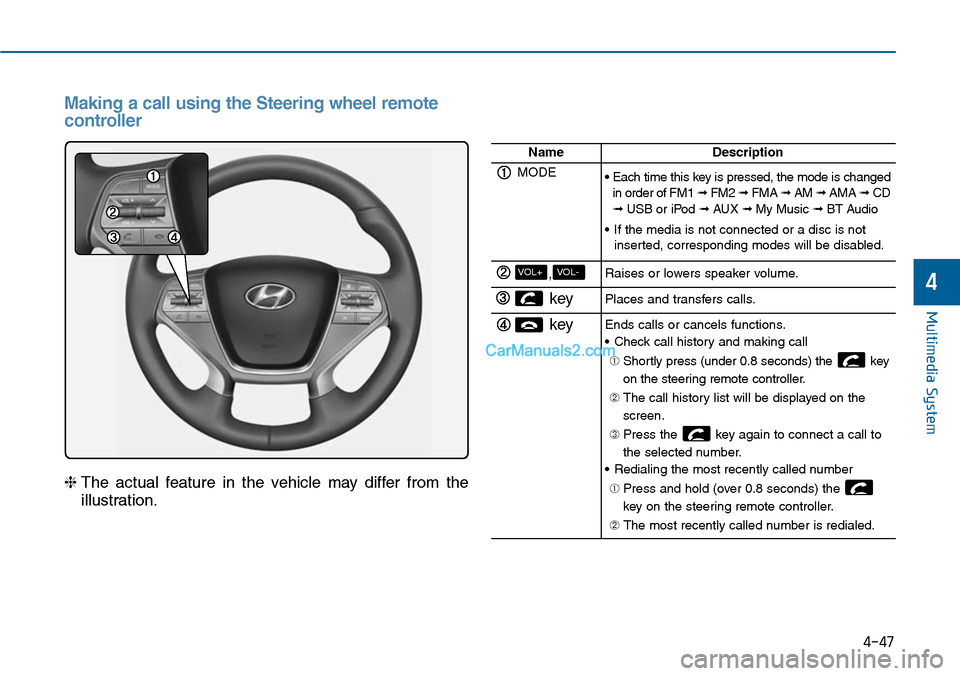
Making a call using the Steering wheel remote
controller
❈The actual feature in the vehicle may differ from the
illustration.
NameDescription
MODE• Each time this key is pressed, the mode is changedin order of FM1 ➟ FM2 ➟ FMA ➟ AM ➟ AMA➟ CD➟ USB or iPod ➟ AUX ➟ My Music ➟ BT Audio
•If the media is not connected or a disc is notinserted, corresponding modes will be disabled.
,VOL-VOL+Raises or lowers speaker volume.
key Places and transfers calls.
keyEnds calls or cancels functions.
•Check call history and making call
➀ Shortly press (under 0.8 seconds) the key
on the steering remote controller.
➁ The call history list will be displayed on the
screen.
➂ Press the key again to connect a call to
the selected number.
•Redialing the most recently called number
➀ Press and hold (over 0.8 seconds) the
key on the steering remote controller.
➁ The most recently called number is redialed.
Page 312 of 665
4-54
Multimedia System
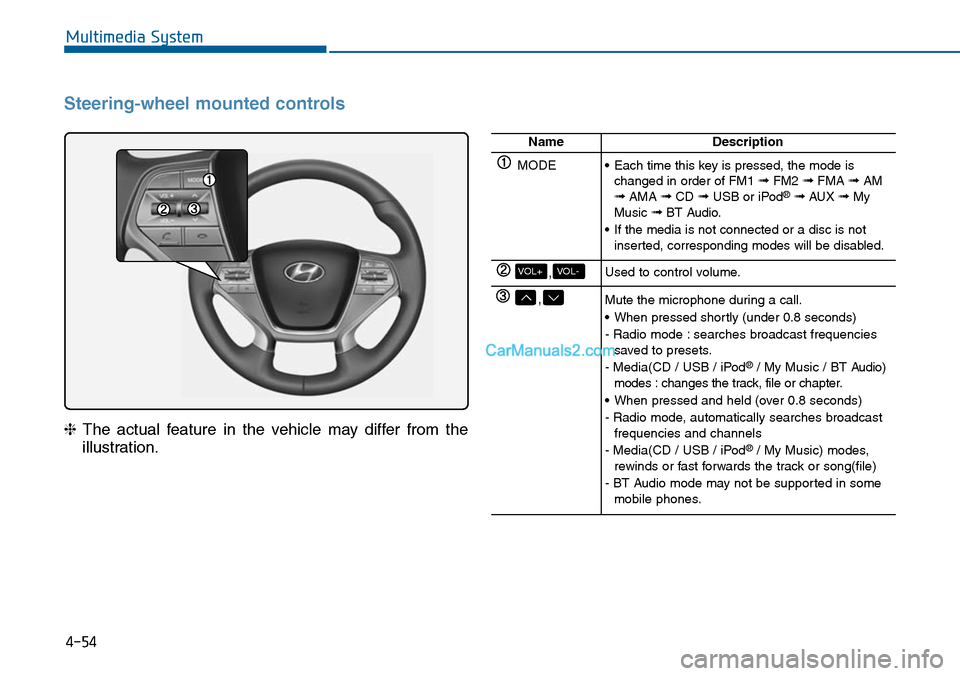
Steering-wheel mounted controls
❈The actual feature in the vehicle may differ from the
illustration.
NameDescription
MODE•Each time this key is pressed, the mode ischanged in order of FM1 ➟FM2 ➟FMA ➟AM➟AMA ➟CD ➟USB or iPod®➟ AUX ➟MyMusic ➟BT Audio.
•If the media is not connected or a disc is notinserted, corresponding modes will be disabled.
,VOL-VOL+Used to control volume.
,Mute the microphone during a call.
•When pressed shortly (under 0.8 seconds)
- Radio mode : searches broadcast frequenciessaved to presets.
- Media(CD / USB / iPod®/ My Music / BT Audio)modes : changes the track, file or chapter.
•When pressed and held (over 0.8 seconds)
- Radio mode, automatically searches broadcastfrequencies and channels
- Media(CD / USB / iPod®/ My Music) modes,rewinds or fast forwards the track or song(file)
- BT Audio mode may not be supported in somemobile phones.
Page 341 of 665
Pairing a Bluetooth®Wireless
Technology wireless technolo-
gy Device
What is Bluetooth®Wireless
Technology Pairing?
Pair ing refers to the process of syn-
chronizing your Bluetooth®Wireless
Technology phone or device with the
car audio system for connection.
Pair ing is necessar y to connect and
use the Bluetooth®Wireless
Technology feature.
Pairing Key / Key
on the Steering Remote
Controller
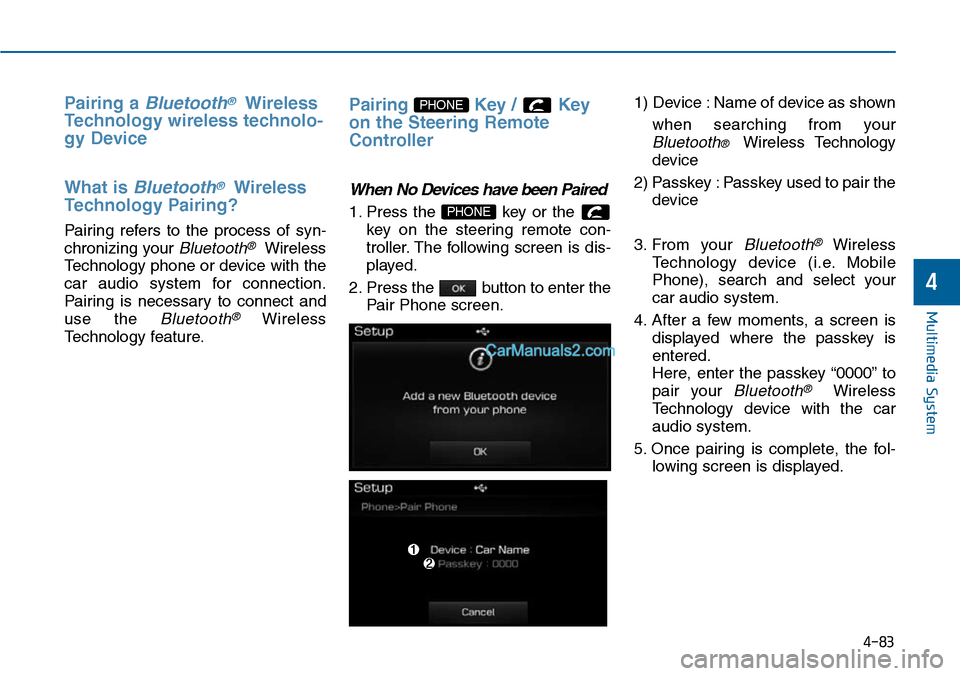
When No Devices have been Paired
1. Press the key or the
key on the steering remote con-
troller. The following screen is dis-
played.
2. Press the button to enter the
Pair Phone screen.
1) Device : Name of device as shown
when searching from your
Bluetooth® Wireless Technology
device
2) Passkey : Passkey used to pair the
device
3. From your Bluetooth®Wireless
Te c h n o l o g y d e v i c e ( i . e . M o b i l e
Phone), search and select your
car audio system.
4. After a few moments, a screen is
displayed where the passkey is
entered.
Here, enter the passkey “0000” to
pair your Bluetooth®Wireless
Technology device with the car
audio system.
5. Once pairing is complete, the fol-
lowing screen is displayed.
PHONE
PHONE
4-83
Multimedia System
4