Page 983 of 1534
Specifications & Consumer information
2
8
DIMENSIONS
Item mm (in)
Overall length 4410 (173.6)
Overall width 1820 (71.6)
Overall height 1655 (65.2)/1665 (65.6)* 1
Front tread 1591 (62.6)* 2
/1585 (62.4)* 3
Rear tread 1592 (62.6)* 2
/1586 (62.4)* 3
Wheelbase 2640 (103.9)
* 1
with roof rack
* 2
with 215/70R16
* 3
with 225/60R17 or 225/55R18
ENGINE Item
Gasoline 1.6 Gasoline 2.0Diesel 1.7Diesel R2.0
Displacement cc (cu. in)
1,591 (97.09) 1,999 (121.99)1,685 (102.8)1,995 (121.74)
Bore x Stroke mm (in.)
77X85.4
(3.03X3.36) 81X97
(3.19X3.81)77.2X90
(3.04X3.81)84X90
(3.30X3.54)
Firing order
1-3-4-2 1-3-4-21-3-4-21-3-4-2
No. of cylinders
4. In-line 4. In-line4. In-line4. In-line
ItemWeight of volume Classification
Refrigerant
550±25g R134a
Compressor lubricant
120±10cc PAG oil
AIR CONDITIONING SYSTEM
EL(FL) Eng 8.QXP 8/8/2013 6:57 PM Page 2
Page 1008 of 1534
Safety features of your vehicle
2
3
Front seat
(1) Forward and backward
(2) Seatback angle
(3) Seat cushion height (Driver’s seat)
(4) Lumbar support (Driver’s seat)*
(5) Seat warmer*
(6) Head restraint Rear seat
(7) Seatback folding
(8) Head restraint
(9) Armrest
(10) Seat warmer* * if equipped
SEAT
OEL039001R
EL(FL) UK 3.QXP 8/5/2013 6:25 PM Page 2
Page 1011 of 1534
35
Safety features of your vehicle
Front seat
Manual adjustment
Forward and backward
To move the seat forward or backward:
1. Pull the seat slide adjustment lever upand hold it.
2. Slide the seat to the position you desire.
3. Release the lever and make sure the seat is locked in place.
Adjust the seat before driving, and make
sure the seat is locked securely by trying
to move forward and backward without
using the lever. If the seat moves, it is not
locked properly.
Adjusting the seatback recliner
To recline the seatback, rotate the knob
forward or rearward to the desired angle. Seat cushion height
(for driver’s seat, if equipped)
To change the height of the seat cushion,
push the lever upwards or downwards.
To lower the seat cushion, push down
the lever several times.
To raise the seat cushion, pull up the lever several times.
OEL039002/HOEL039003/HOEL039004/H
EL(FL) UK 3.QXP 8/5/2013 6:26 PM Page 5
Page 1013 of 1534
37
Safety features of your vehicle
Forward and backward
Push the control switch forward or back-
ward to move the seat to the desired
position. Release the switch once theseat reaches the desired position.Seatback angle
Push the control switch forward or back-
ward to move the seatback to the desired
angle. Release the switch once the seatreaches the desired position.Seat height (for driver’s seat)
Pull the control switch up to raise or
down to lower the seat cushion. Release
the switch once the seat reaches thedesired position.
OLM039007/HOLM039008/HOLM039006/H
EL(FL) UK 3.QXP 8/5/2013 6:26 PM Page 7
Page 1014 of 1534

Safety features of your vehicle
8
3
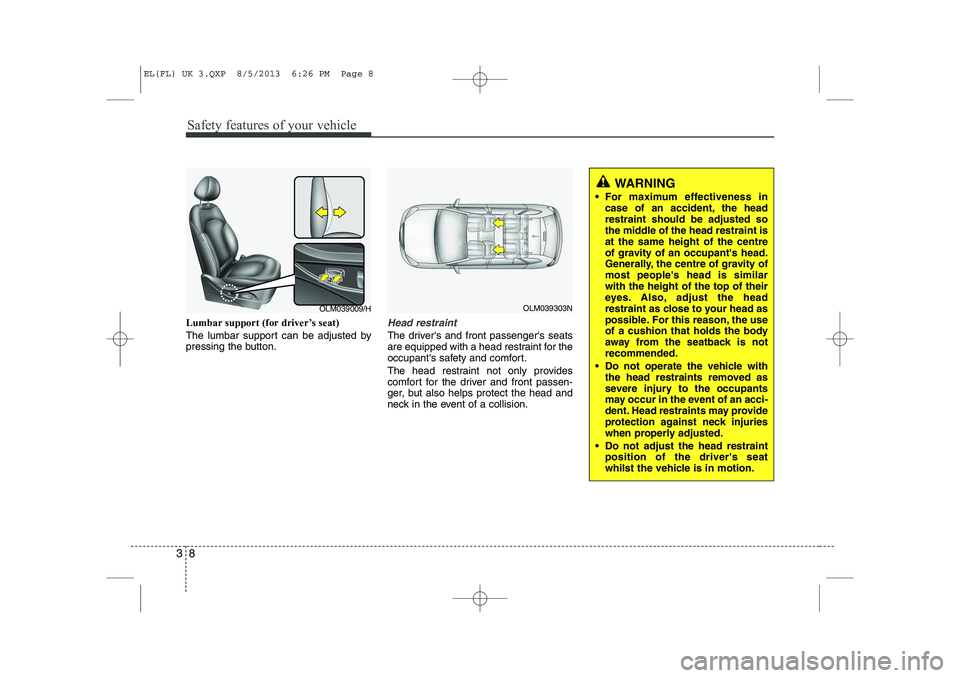
Lumbar support (for driver’s seat)
The lumbar support can be adjusted by
pressing the button.Head restraint
The driver's and front passenger's seats
are equipped with a head restraint for the
occupant's safety and comfort.
The head restraint not only provides
comfort for the driver and front passen-
ger, but also helps protect the head and
neck in the event of a collision.
OLM039303N
WARNING
For maximum effectiveness in case of an accident, the head restraint should be adjusted so
the middle of the head restraint isat the same height of the centre
of gravity of an occupant's head.
Generally, the centre of gravity ofmost people's head is similarwith the height of the top of their
eyes. Also, adjust the head
restraint as close to your head as
possible. For this reason, the use
of a cushion that holds the body
away from the seatback is notrecommended.
Do not operate the vehicle with the head restraints removed as
severe injury to the occupants
may occur in the event of an acci-
dent. Head restraints may provide
protection against neck injuries
when properly adjusted.
Do not adjust the head restraint position of the driver's seat
whilst the vehicle is in motion.
OLM039009/H
EL(FL) UK 3.QXP 8/5/2013 6:26 PM Page 8
Page 1015 of 1534

39
Safety features of your vehicle
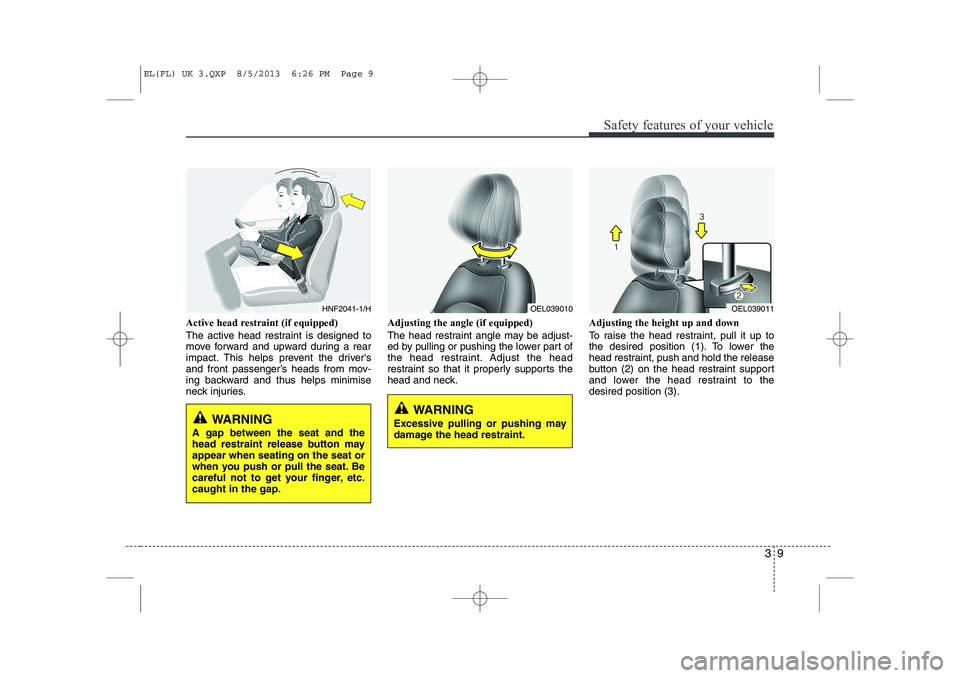
Active head restraint (if equipped)
The active head restraint is designed to
move forward and upward during a rear
impact. This helps prevent the driver's
and front passenger’s heads from mov-
ing backward and thus helps minimise
neck injuries.Adjusting the angle (if equipped)
The head restraint angle may be adjust-
ed by pulling or pushing the lower part of
the head restraint. Adjust the head
restraint so that it properly supports the
head and neck.
Adjusting the height up and down
To raise the head restraint, pull it up to
the desired position (1). To lower the
head restraint, push and hold the release
button (2) on the head restraint support
and lower the head restraint to thedesired position (3).
HNF2041-1/HOEL039010OEL039011
WARNING
Excessive pulling or pushing may
damage the head restraint.WARNING
A gap between the seat and the
head restraint release button mayappear when seating on the seat or
when you push or pull the seat. Be
careful not to get your finger, etc.caught in the gap.
EL(FL) UK 3.QXP 8/5/2013 6:26 PM Page 9
Page 1016 of 1534

Safety features of your vehicle
10
3
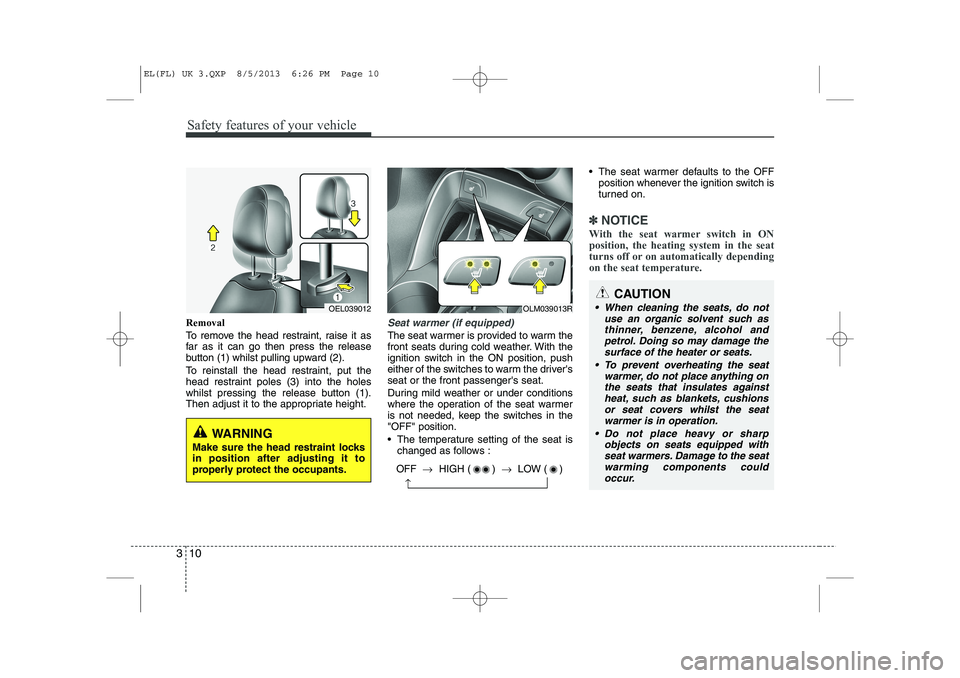
Removal
To remove the head restraint, raise it as
far as it can go then press the release
button (1) whilst pulling upward (2).
To reinstall the head restraint, put the
head restraint poles (3) into the holes
whilst pressing the release button (1).
Then adjust it to the appropriate height.Seat warmer (if equipped)
The seat warmer is provided to warm the
front seats during cold weather. With the
ignition switch in the ON position, push
either of the switches to warm the driver'sseat or the front passenger's seat.
During mild weather or under conditions
where the operation of the seat warmer
is not needed, keep the switches in the"OFF" position.
The temperature setting of the seat is
changed as follows : The seat warmer defaults to the OFF
position whenever the ignition switch is
turned on.
✽✽ NOTICE
With the seat warmer switch in ON position, the heating system in the seat
turns off or on automatically depending
on the seat temperature.
OEL039012
WARNING
Make sure the head restraint locks in position after adjusting it to
properly protect the occupants.
OLM039013R
OFF →HIGH ( ) →LOW ( )
→
CAUTION
When cleaning the seats, do not
use an organic solvent such as
thinner, benzene, alcohol andpetrol. Doing so may damage the surface of the heater or seats.
To prevent overheating the seat warmer, do not place anything on
the seats that insulates against heat, such as blankets, cushionsor seat covers whilst the seat warmer is in operation.
Do not place heavy or sharp objects on seats equipped withseat warmers. Damage to the seatwarming components couldoccur.
EL(FL) UK 3.QXP 8/5/2013 6:26 PM Page 10
Page 1018 of 1534

Safety features of your vehicle
12
3
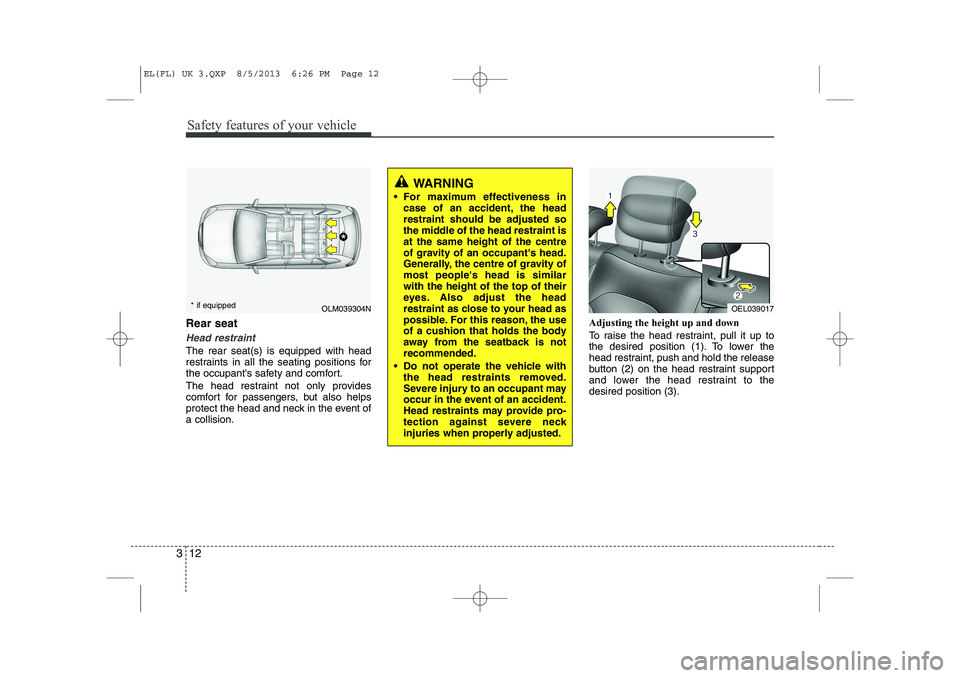
Rear seat
Head restraint
The rear seat(s) is equipped with head
restraints in all the seating positions for
the occupant's safety and comfort.
The head restraint not only provides
comfort for passengers, but also helps
protect the head and neck in the event ofa collision. Adjusting the height up and down
To raise the head restraint, pull it up to
the desired position (1). To lower the
head restraint, push and hold the release
button (2) on the head restraint support
and lower the head restraint to thedesired position (3).
OLM039304N
*
* if equipped
WARNING
For maximum effectiveness in case of an accident, the head restraint should be adjusted so
the middle of the head restraint isat the same height of the centre
of gravity of an occupant's head.
Generally, the centre of gravity ofmost people's head is similarwith the height of the top of their
eyes. Also adjust the head
restraint as close to your head as
possible. For this reason, the use
of a cushion that holds the body
away from the seatback is notrecommended.
Do not operate the vehicle with the head restraints removed.
Severe injury to an occupant may
occur in the event of an accident.
Head restraints may provide pro-
tection against severe neck
injuries when properly adjusted.
OEL039017
EL(FL) UK 3.QXP 8/5/2013 6:26 PM Page 12