Page 421 of 476

Maintenance
60 7
If the headlights or other electrical
components do not work and the
fuses are OK, check the fuse panel
in the engine compartment. If a fuse
is open, it must be replaced.
If the headlights, fog lights, turn sig-
nal lights, position lights or interior
lights do not work and there is noth-
ing wrong with the bulbs, consult with
an authorized HYUNDAI dealer.
Fuse switch
Always put the transportation fuse
switch at the ON position.
If you move the switch to the OFF
position, some items such as the
audio and digital clock must be reset
and the transmitter (or smart key)
may not work properly.
✽ ✽
NOTICE
If you need to park your vehicle for
prolonged periods more than 1
month, move the transportation fuse
switch to the OFF position to pre-
vent the battery being discharged.
CAUTION
Always place the transporta-
tion fuse switch in the ON posi-
tion while driving the vehicle.
Do not move the transportation
fuse switch repeatedly. The
fuse switch may be worn out.
OGDE071018
Page 422 of 476
761
Maintenance
Engine compartment fuse
replacement
1. Turn the ignition switch and all
other switches off.
2. Remove the fuse panel cover by
pressing the tab and pulling up.3. Check the removed fuse; replace it
if it is open. To remove or insert the
fuse, use the fuse puller in the
engine compartment fuse panel.
4. Push in a new fuse of the same
rating, and make sure it fits tightly
in the clips. If it fits loosely, consult
an authorized HYUNDAI dealer.
OGD071019
CAUTION
After checking the fuse panel in
the engine compartment, secure-
ly install the fuse panel cover. If
not, electrical malfunctions may
occur from water contact.
Page 427 of 476
Maintenance
66 7
Engine compartment fuse panel
Inside the fuse/relay panel covers,
you can find the fuse/relay label
describing fuse/relay name and
capacity.
✽ ✽
NOTICE
Not all fuse panel descriptions in
this manual may be applicable to
your vehicle. It is accurate at the
time of printing. When you inspect
the fuse panel in your vehicle, refer
to the fuse panel label.
OGD071023
OGD072060N
Page 438 of 476

777
Maintenance
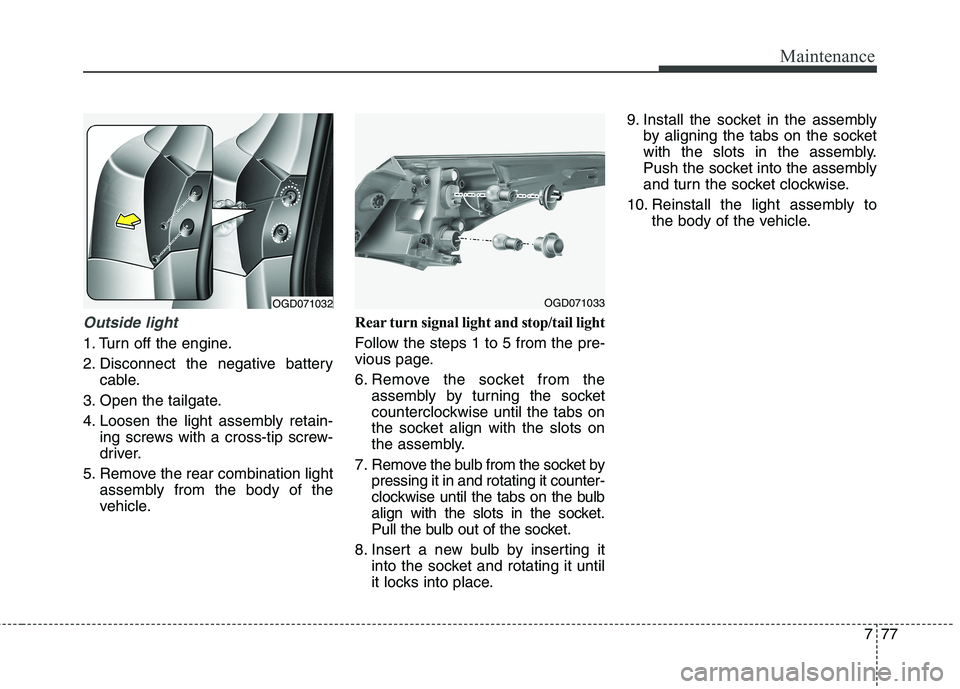
Outside light
1. Turn off the engine.
2. Disconnect the negative battery
cable.
3. Open the tailgate.
4. Loosen the light assembly retain-
ing screws with a cross-tip screw-
driver.
5. Remove the rear combination light
assembly from the body of the
vehicle.Rear turn signal light and stop/tail light
Follow the steps 1 to 5 from the pre-
vious page.
6. Remove the socket from the
assembly by turning the socket
counterclockwise until the tabs on
the socket align with the slots on
the assembly.
7. Remove the bulb from the socket by
pressing it in and rotating it counter-
clockwise until the tabs on the bulb
align with the slots in the socket.
Pull the bulb out of the socket.
8. Insert a new bulb by inserting it
into the socket and rotating it until
it locks into place.9. Install the socket in the assembly
by aligning the tabs on the socket
with the slots in the assembly.
Push the socket into the assembly
and turn the socket clockwise.
10. Reinstall the light assembly to
the body of the vehicle.
OGD071032OGD071033
Page 439 of 476
Maintenance
78 7
Rear side marker
Follow the steps 1 to 5 from the pre-
vious page.
6. Remove the socket from the
assembly by turning the socket
counterclockwise until the tabs on
the socket align with the slots on
the assembly.
7. Remove the bulb from the socket
by pulling out the bulb.
8. Insert a new bulb.9. Install the socket in the assembly
by aligning the tabs on the socket
with the slots in the assembly.
Push the socket into the assembly
and turn the socket clockwise.
10. Reinstall the light assembly to
the body of the vehicle.Inside light
1. Turn off the engine.
2. Disconnect the negative battery
cable.
3. Open the tailgate.
4. Remove the service cover using a
flat-blade screwdriver.
OGD072063NOGD071034
Page 440 of 476

779
Maintenance
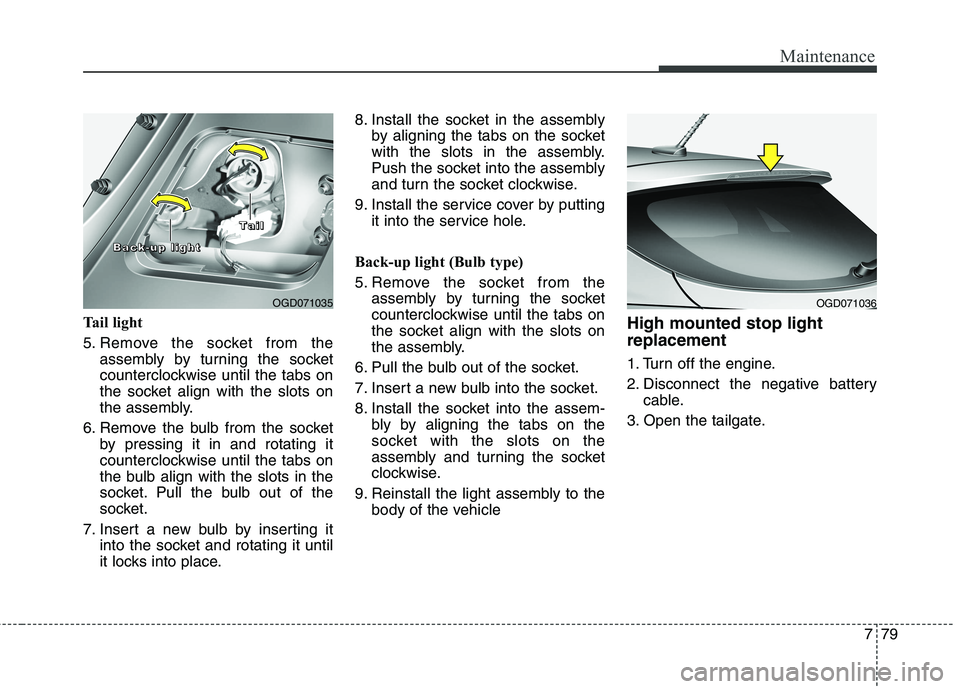
Tail light
5. Remove the socket from the
assembly by turning the socket
counterclockwise until the tabs on
the socket align with the slots on
the assembly.
6. Remove the bulb from the socket
by pressing it in and rotating it
counterclockwise until the tabs on
the bulb align with the slots in the
socket. Pull the bulb out of the
socket.
7. Insert a new bulb by inserting it
into the socket and rotating it until
it locks into place.8. Install the socket in the assembly
by aligning the tabs on the socket
with the slots in the assembly.
Push the socket into the assembly
and turn the socket clockwise.
9. Install the service cover by putting
it into the service hole.
Back-up light (Bulb type)
5. Remove the socket from the
assembly by turning the socket
counterclockwise until the tabs on
the socket align with the slots on
the assembly.
6. Pull the bulb out of the socket.
7. Insert a new bulb into the socket.
8. Install the socket into the assem-
bly by aligning the tabs on the
socket with the slots on the
assembly and turning the socket
clockwise.
9. Reinstall the light assembly to the
body of the vehicleHigh mounted stop light
replacement
1. Turn off the engine.
2. Disconnect the negative battery
cable.
3. Open the tailgate.
OGD071035
B B B B
a a a a
c c c c
k k k k
- - - -
u u u u
p p p p
l l l l
i i i i
g g g g
h h h h
t t t t
T
T T T
a a a a
i i i i
l l l l
OGD071036
Page 442 of 476
781
Maintenance
7. Remove the rear spoiler assembly. 8. Remove the high mounted stop
lamp after removing the mounting
nuts.
9. Install a new lamp
10. Reinstall the rear spoiler and the
tailgate upper trim in the reverse
order.License plate light bulb
replacement
1. Turn off the engine.
2. Disconnect the negative battery
cable.
3. Remove the cover by pressing it
as direction of the arrows.
4. Remove the bulb by pulling it
straight out.
5. Install a new bulb.
6. Reinstall in the reverse order.
OGD072067NOGD072068NOGD071046
Page 445 of 476

Maintenance
84 7
Waxing
Wax the vehicle when water will no
longer bead on the paint.
Always wash and dry the vehicle
before waxing. Use a good quality liq-
uid or paste wax, and follow the man-
ufacturer’s instructions. Wax all metal
trim to protect it and to maintain its
luster.
Removing oil, tar, and similar materi-
als with a spot remover will usually
strip the wax from the finish. Be sure to
re-wax these areas even if the rest of
the vehicle does not yet need waxing.Finish damage repair
Deep scratches or stone chips in the
painted surface must be repaired
promptly. Exposed metal will quickly
rust and may develop into a major
repair expense.
✽ ✽
NOTICE
If your vehicle is damaged and
requires any metal repair or
replacement, be sure the body shop
applies anti-corrosion materials to
the parts repaired or replaced.
CAUTION
Wiping dust or dirt off the
body with a dry cloth will
scratch the finish.
Do not use steel wool, abra-
sive cleaners, or strong deter-
gents containing highly alka-
line or caustic agents on
chrome-plated or anodized
aluminum parts. This may
result in damage to the protec-
tive coating and cause discol-
oration or paint deterioration.
CAUTION
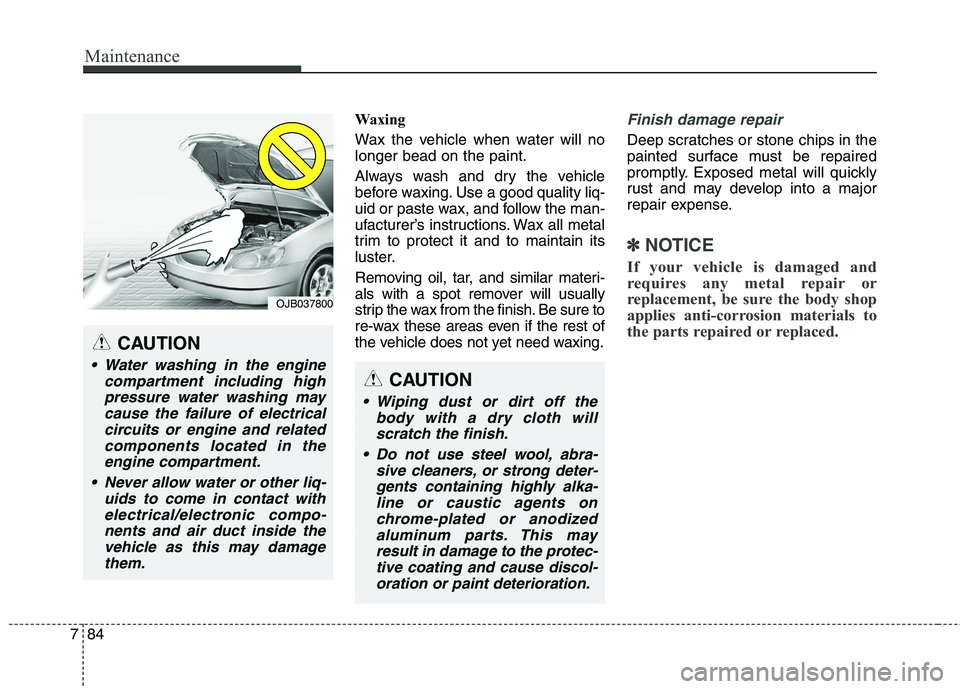
Water washing in the engine
compartment including high
pressure water washing may
cause the failure of electrical
circuits or engine and related
components located in the
engine compartment.
Never allow water or other liq-
uids to come in contact with
electrical/electronic compo-
nents and air duct inside the
vehicle as this may damage
them.
OJB037800