Page 132 of 327
131Navigation
Changing Your DestinationThere are several methods you can use to change the route destination.Find Nearest PlaceHENTER button (on map)
Search Nearby
Search for the nearest place/landmark on the map screen and set it as your
destination.
1.Rotate i to select Search
Nearby. Press u.
2.Rotate i to select a category
type. Press u.
3.Rotate i to select a place. Press
u.
4.Rotate i to select Set as
Destination. Press u.
5.Move r to select Clear Current
Route. Press u.
The route is automatically
recalculated and displayed on
the map screen.
Rotate i to edit the order to
set the location as a new
waypoint. Press u.
1Find Nearest Place
d “Find Nearest…”
The Find Nearest voice command is the fastest
method of specifying a place/landmark as your
destination. Many kinds of places can be found.
2Find Place Commands P. 309
Page 133 of 327
132
Changing Your Destination
Selecting a Destination on the Map
Navigation
Selecting a Destination on the MapSelect a new destination when en route by selecting a location on the map.
1.Scroll the map to position the
cursor over your desired
destination, adjusting the map
scale as necessary. Press u.
If the address displayed is not
the desired location, press the
BACK button and repeat the
procedure.
2.Rotate i to select Set as
Destination. Press u.
2Calculating the Route
P. 108
3.Move r to select Clear Current
Route. Press u.
The route is automatically
recalculated and displayed on
the map screen.
Rotate i to edit the order to
set the location as a new
waypoint. Press u.
1Selecting a Destination on the Map
If there is more than one icon or street under the
map cursor, you are prompted to select the item
from a list.
Rotate i to select an item. Press u.
Page 134 of 327
133
Changing Your Destination
Entering a New Destination
Navigation
Entering a New DestinationHMENU button (when en route)
Destination
Enter a new destination using the Destination Menu screen even when you are en
route.
1.Rotate i to select a method to
enter a new destination.
2Entering a Destination
P. 84
After entering a new
destination, the address is
displayed on the Calculate
Route screen.
2.Rotate i to select Set as
Destination. Press u.
3.Move r to select Clear Current
Route. Press u.
The route is automatically
recalculated and displayed on
the map screen.
Rotate i to edit the order to
set the location as a new
waypoint. Press u.
1Entering a New Destination
d “Display Destination”, d “Display
Navigation”
Page 135 of 327

134Navigation
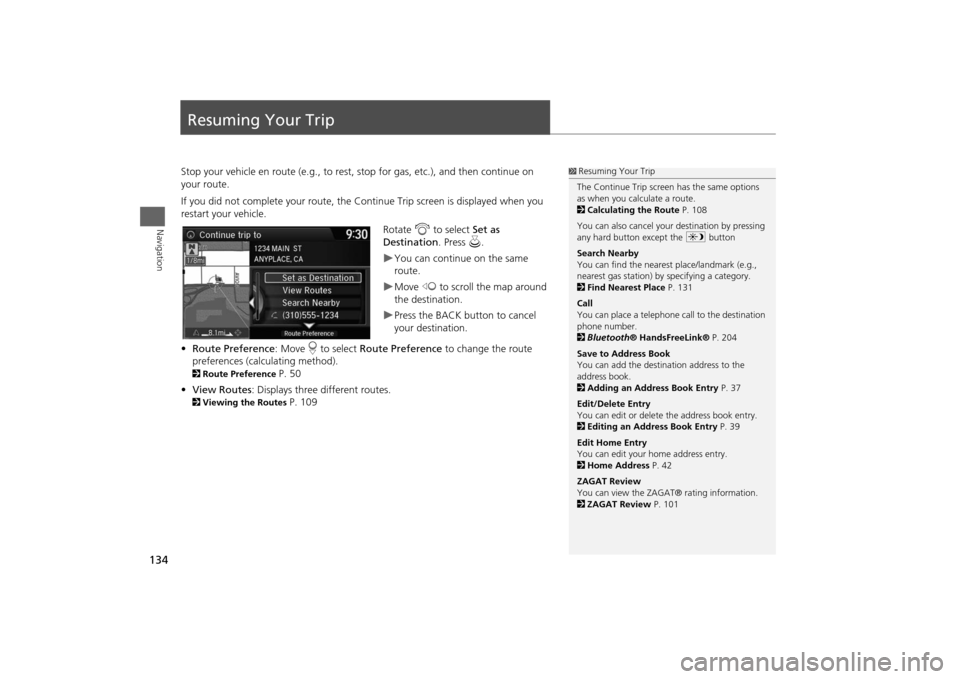
Resuming Your TripStop your vehicle en route (e.g., to rest, stop for gas, etc.), and then continue on
your route.
If you did not complete your route, the Continue Trip screen is displayed when you
restart your vehicle.
Rotate i to select Set as
Destination. Press u.
You can continue on the same
route.Move w to scroll the map around
the destination.Press the BACK button to cancel
your destination.
•Route Preference: Move r to select Route Preference to change the route
preferences (calculating method).
2Route Preference
P. 50
•View Routes: Displays three different routes.
2Viewing the Routes
P. 109
1Resuming Your Trip
The Continue Trip screen has the same options
as when you calculate a route.
2Calculating the Route P. 108
You can also cancel your destination by pressing
any hard button except the a button
Search Nearby
You can find the nearest place/landmark (e.g.,
nearest gas station) by specifying a category.
2Find Nearest Place P. 131
Call
You can place a telephone call to the destination
phone number.
2Bluetooth® HandsFreeLink® P. 204
Save to Address Book
You can add the destination address to the
address book.
2Adding an Address Book Entry P. 37
Edit/Delete Entry
You can edit or delete the address book entry.
2Editing an Address Book Entry P. 39
Edit Home Entry
You can edit your home address entry.
2Home Address P. 42
ZAGAT Review
You can view the ZAGAT® rating information.
2ZAGAT Review P. 101
Page 148 of 327

147Audio
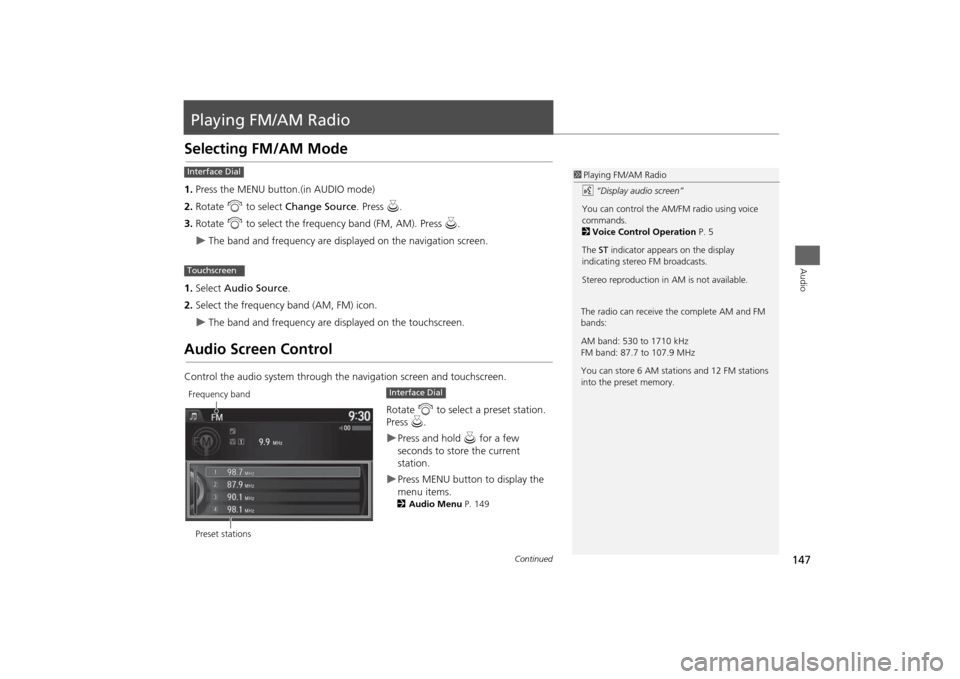
Playing FM/AM RadioSelecting FM/AM Mode1.Press the MENU button.(in AUDIO mode)
2.Rotate i to select Change Source. Press u.
3.Rotate i to select the frequency band (FM, AM). Press u.
The band and frequency are displayed on the navigation screen.
1.Select Audio Source.
2.Select the frequency band (AM, FM) icon.
The band and frequency are displayed on the touchscreen.
Audio Screen ControlControl the audio system through the navigation screen and touchscreen.
Rotate i to select a preset station.
Press u.
Press and hold u for a few
seconds to store the current
station.Press MENU button to display the
menu items.2Audio Menu P. 149
1Playing FM/AM Radio
d “Display audio screen”
You can control the AM/FM radio using voice
commands.
2Voice Control Operation P. 5
The ST indicator appears on the display
indicating stereo FM broadcasts.
Stereo reproduction in AM is not available.
Interface DialTouchscreen
The radio can receive the complete AM and FM
bands:
AM band: 530 to 1710 kHz
FM band: 87.7 to 107.9 MHz
You can store 6 AM stations and 12 FM stations
into the preset memory.
Preset stationsFrequency band
Interface Dial
Continued
Page 151 of 327

150
Playing FM/AM Radio
Audio Menu
Audio
•Radio Text: Displays the text information broadcast by the current RDS station.
•Tag Song*: Displays the TAG information saved to the audio system when an HD
Radio
TM station is selected.
•Tagged Song List*: You can store the TAG information in the connected iPod®/
iPhone®. If the iPod®/iPhone® is not connected to the audio system, the
information is stored in the audio unit temporarily, then once the device is
connected to the system, data is transferred to the iPod®/iPhone®.
•Tune/Seek: Tunes the radio to the frequency you select. Rotate i to select a
frequency, then Move u.
•HD subchannel*: Displays the subchannel list when an HD Radio
TM station is
selected.
1Audio Menu
iTunes Tagging*
“iTunes” in “iTunes Tagging” is a trademark of
Apple Inc.
When an HD Radio
TM station is selected, the HD
indicator appears on the navigation screen and
touchscreen.
If you want to have the information on the song
played from the HD Radio
TM station, select TAG
in touchscreen or select Tag Song in the menu
with Interface dial.
If iPod®/iPhone® is connected, the tag is
transferred to the connected device immediately,
otherwise the tag will be transferred when the
device will be connected and select Tag Song in
the menu with Interface dial.
*: Not available on all models
Page 154 of 327

153Audio
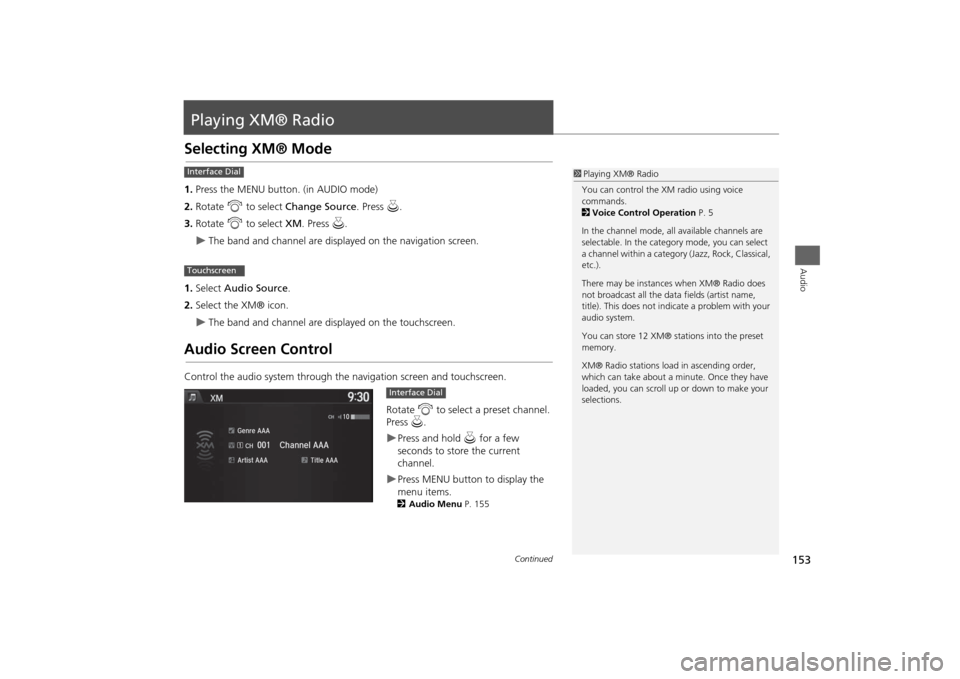
Playing XM® RadioSelecting XM® Mode1.Press the MENU button. (in AUDIO mode)
2. Rotate i to select Change Source . Press u.
3. Rotate i to select XM. Press u.
The band and channel are displayed on the navigation screen.
1. Select Audio Source .
2. Select the XM® icon.
The band and channel are displayed on the touchscreen.
Audio Screen ControlControl the audio system through the navigation screen and touchscreen.
Rotate i to select a preset channel.
Press u.
Press and hold u for a few
seconds to store the current
channel.Press MENU button to display the
menu items.2 Audio Menu P. 155
1Playing XM® Radio
You can control the XM radio using voice
commands.
2 Voice Control Operation P. 5
In the channel mode, all available channels are
selectable. In the categor y mode, you can select
a channel within a category (Jazz, Rock, Classical,
etc.).
There may be instances when XM® Radio does
not broadcast all the data fields (artist name,
title). This does not indicate a problem with your
audio system.
You can store 12 XM® stations into the preset
memory.
XM® Radio stations load in ascending order,
which can take about a minute. Once they have
loaded, you can scroll up or down to make your
selections.
Interface DialTouchscreen
Interface Dial
Continued
Page 160 of 327
159
Playing a Disc
Audio Screen Control
Audio
Audio Screen ControlControl the audio system through the navigation screen and touchscreen.
1.Rotate i or press u to display
the song list.
2.Rotate i, move w or y to
select a file from the list. Press u.
Press MENU button to display
the menu items2Audio Menu P. 149
1.Select n to skip to the next folder,
and b to skip to the beginning of
the previous folder in MP3, WMA,
or AAC.
2. Select c or x to change tracks
(files in MP3, WMA, or AAC).
Select and hold to move rapidly
within a track/file.
Select More to display the menu
item.2Audio Menu P. 149
Track list
Interface Dial
File AAAFile AAAFile AAA010101
Folder AAAFolder AAAFolder AAA
020202
Touchscreen