Page 90 of 573

Continued
89
uuSetting the ClockuClock
Controls
■Using the MENU button
1.Press the MENU button.
2.Rotate to select CLOCK ADJUST in the
display.
3.Press . CLOCK ADJUST appears.
4.Rotate to select the item you want to
adjust (12/24 hour mode, hour, minute).
Then press .
5.Rotate to make the adjustment.
6.Press to enter your selection. The display
returns to CLOCK ADJUST. Repeat steps 4
to 6 to adjust other items.
7.To enter the selection, Rotate and select
SET, then press .
8.Press the MENU button to go back to the
normal display.
1Clock
You can switch the clock display between 24 hours
and 12 hours when in the menu mode.
Selector Knob Icon details
Rotate to select.
Press to enter.
To set the time to the nearest hour:
Press and hold the CLOCK button until the clock
display begins to blink, then press the
(6 (Reset)
button.
Depending on the displayed time, the clock sets
forward or backward.
Example:
1:06 will reset to 1:00
1:53 will reset to 2:00
Models without audio touch screen
MENU Button
Minute Setting Hour Setting12/24 Hour Mode
Page 92 of 573

91
Continued
Controls
Locking and Unlocking the DoorsKey Types and FunctionsThis vehicle comes with the following keys:
Use the key to start and stop the engine, and
to lock and unlock the doors, tailgate, and
fuel fill door.
You can also use the remote transmitter or
smart entry system
* to lock and unlock the
doors, tailgate, and fuel fill door.
The seat automatically moves to the preset
position when you unlock the door using the
remote transmitter or smart entry system.
2Driving Position Memory System
* P. 127
■Smart entry remote
The built-in key can be used to lock/unlock the
doors and tailgate when the smart entry
remote battery becomes weak and the power
door lock/unlock operation is disabled.
To remove the built-in key, pull it out while
sliding the release knob. To reinstall the built-
in key, push the built-in key into the smart
entry remote until it clicks.■Master Keys
1Key Types and Functions
All the keys have an immobilizer system. The
immobilizer system helps to protect against vehicle
theft.
2Immobilizer System P. 107
The keys contain precision electronics.
Adhere to the following advice to prevent damage to
the electronics:•Do not leave the keys in direct sunlight, or in
locations with high temperature or high humidity.•Do not drop the keys or set heavy objects on them.•Keep the keys away from liquids.•Do not take the keys apart except for replacing the
battery.
If the circuits in the keys are damaged, the engine
may not start, and the remote transmitter may not
work.
If the keys do not work properly, have them
inspected by a dealer.
Master Key
*
Smart Entry
Remote
*
Built-in Key Release Knob
* Not available on all models
Page 126 of 573
125
uuOperating the Switches Around the Steering WheeluBrightness Control
Controls
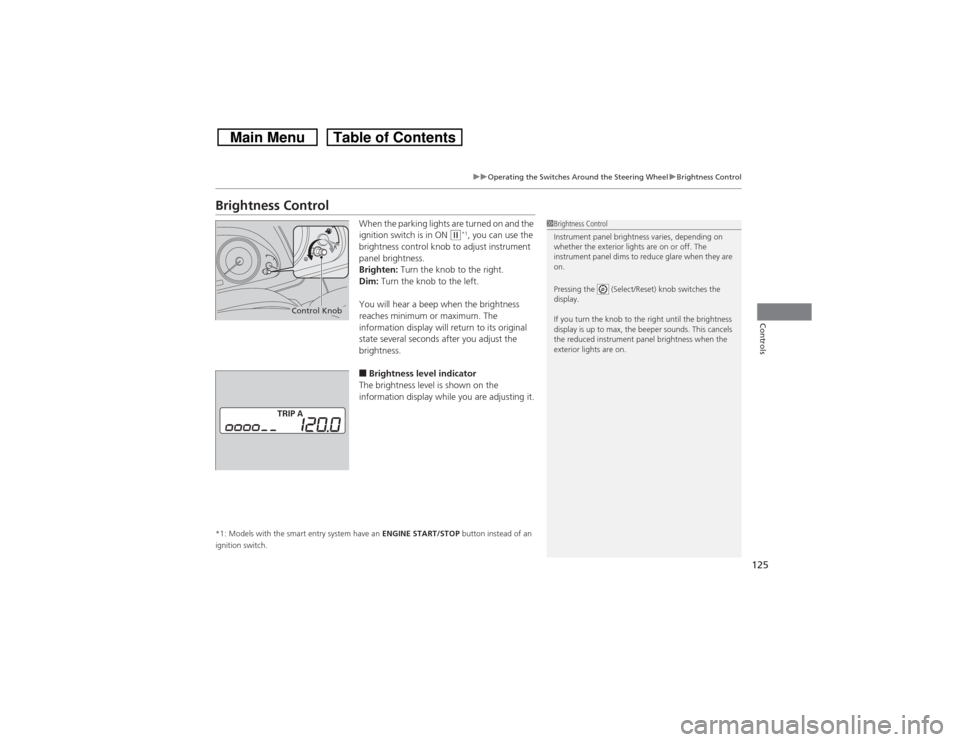
Brightness Control
When the parking lights are turned on and the
ignition switch is in ON
(w*1, you can use the
brightness control knob to adjust instrument
panel brightness.
Brighten: Turn the knob to the right.
Dim: Turn the knob to the left.
You will hear a beep when the brightness
reaches minimum or maximum. The
information display will return to its original
state several seconds after you adjust the
brightness.
■Brightness level indicator
The brightness level is shown on the
information display while you are adjusting it.
*1: Models with the smart entry system have an ENGINE START/STOP button instead of an
ignition switch.
1Brightness Control
Instrument panel brightness varies, depending on
whether the exterior lights are on or off. The
instrument panel dims to reduce glare when they are
on.
Pressing the (Select/Reset) knob switches the
display.
If you turn the knob to the right until the brightness
display is up to max, the beeper sounds. This cancels
the reduced instrument panel brightness when the
exterior lights are on.
Control Knob
Page 128 of 573
127
uuOperating the Switches Around the Steering WheeluDriving Position Memory System
*
Continued
Controls
Driving Position Memory System
*
You can store two driver’s seat and door mirror positions with the driving position
memory system.
When you unlock and open the driver’s door with a remote, the seat and door
mirrors adjust automatically to one of the two preset positions.
Select either remote you use to unlock the vehicle when you enter.
•DRIVER 1 transmitter is linked to memory button 1.
•DRIVER 2 transmitter is linked to memory button 2.
1Driving Position Memory System
*
Using the audio/information screen, you can disable
the automatic seat adjustment function.
2Customized Features
* P. 281
Models with audio/information screen
DRIVER 1
DRIVER 2
Models with smart entry systemModels without smart entry system
* Not available on all models
Page 167 of 573
166
uuAudio SystemuAudio System Theft Protection
Features
Audio System Theft ProtectionThe audio system is disabled when it is disconnected from the power source, such as
when the battery is disconnected or goes dead.■Reactivating the audio system
1.Turn the ignition switch to ON
(w, and turn on the audio system.
uIf you turn the ignition switch to ACCESSORY
(q, you will be requested to
enter the audio security code.
2.Enter the audio security code using the preset buttons.
1.Turn the ignition switch to ON
(w*1, and turn on the audio system.
uIf you turn the ignition switch to ACCESSORY
(q*1, you will be requested to
enter the audio security code. See step 3.
2.Press and hold the VOL/ (power/volume) button again for more than two
seconds.
uThe audio system is reactivated when the system’s control unit recognizes that
the system is in your vehicle.
If the control unit fails to recognize, Enter code/Enter PIN appears on the
audio/information screen.
3.If the two steps do not work, you can enter the audio security code using the
touch screen.
If you enter an incorrect digit, continue to the last digit, then try again. If you do not
enter the code correctly after 10 tries, leave the system for one hour before trying
again, or visit a dealer to have the system reset.
*1: Models with the smart entry system have an ENGINE START/STOP button instead of an
ignition switch.
1Audio System Theft Protection
Find the audio system’s security code and serial
number label in your owner’s manual kit.
We recommend that you write down the serial
number in this owner’s manual.
Do not store the label in your vehicle. If you lose the
label, you must first retrieve the serial number, and
then obtain the code.
You can find out about your serial number and
security code from a dealer.
You can register the security code at Honda Owners
(owners.honda.com.), and find information on how
to retrieve the serial number and obtain the code at
radio-navicode.honda.com.U.S. models
Audio system without touch screenAudio system with touch screenAll models
Page 169 of 573
168
uuAudio SystemuAudio Remote Controls
Features
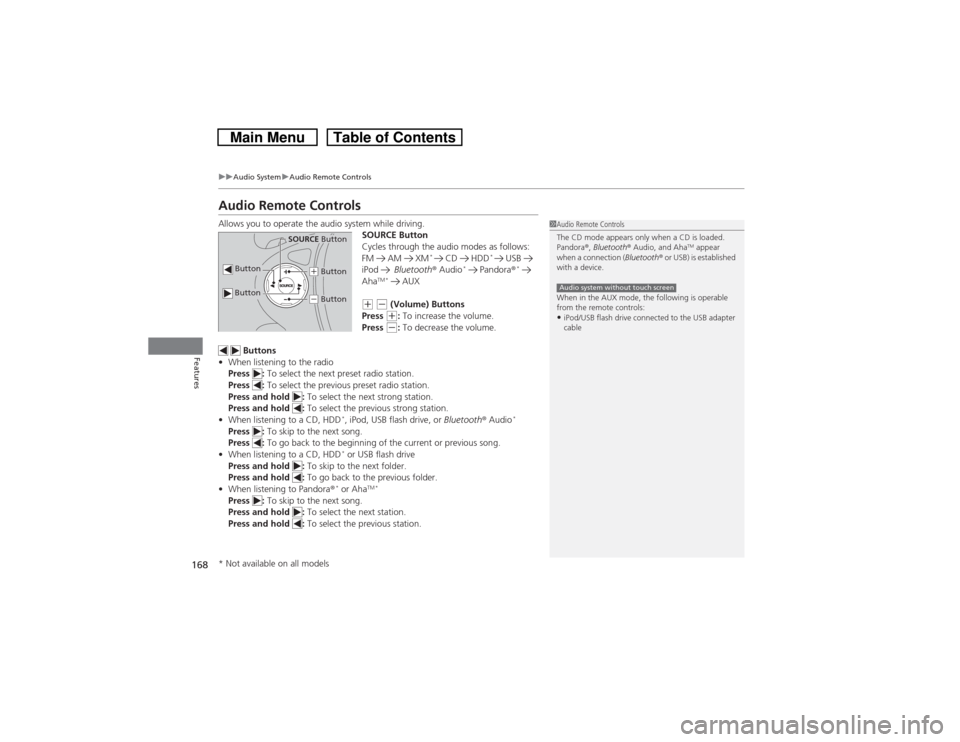
Audio Remote ControlsAllows you to operate the audio system while driving.
SOURCE Button
Cycles through the audio modes as follows:
FM AM XM
*
CD HDD
*
USB
iPod Bluetooth® Audio
* Pandora®
*
Aha
TM * AUX
(+ (- (Volume) Buttons
Press (+: To increase the volume.
Press (-: To decrease the volume.
Buttons
•When listening to the radio
Press : To select the next preset radio station.
Press : To select the previous preset radio station.
Press and hold : To select the next strong station.
Press and hold : To select the previous strong station.
•When listening to a CD, HDD
*, iPod, USB flash drive, or Bluetooth® Audio
*
Press : To skip to the next song.
Press : To go back to the beginning of the current or previous song.
•When listening to a CD, HDD
* or USB flash drive
Press and hold : To skip to the next folder.
Press and hold : To go back to the previous folder.
•When listening to Pandora®* or Aha
TM *
Press : To skip to the next song.
Press and hold : To select the next station.
Press and hold : To select the previous station.
1Audio Remote Controls
The CD mode appears only when a CD is loaded.
Pandora®, Bluetooth® Audio, and Aha
TM appear
when a connection (Bluetooth® or USB) is established
with a device.
When in the AUX mode, the following is operable
from the remote controls:
•iPod/USB flash drive connected to the USB adapter
cableAudio system without touch screen
Button
SOURCE Button
Button
(+ Button(- Button
* Not available on all models
Page 172 of 573
171
uuAudio System Basic OperationuPlaying the AM/FM Radio
Continued
Features
Playing the AM/FM Radio
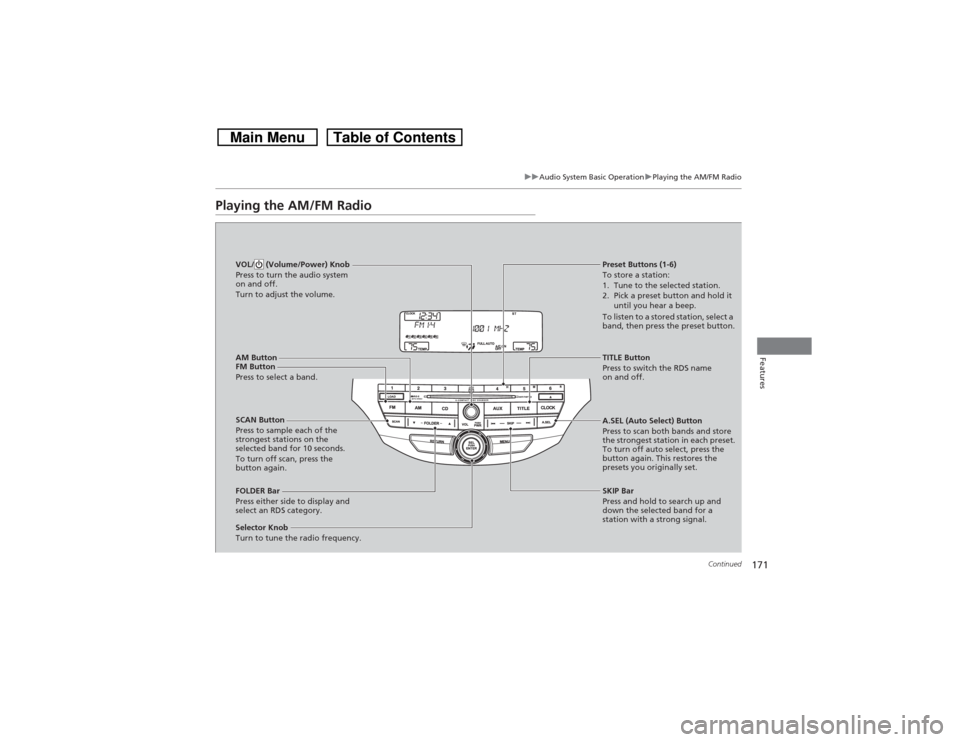
FM Button
Press to select a band.
SCAN Button
Press to sample each of the
strongest stations on the
selected band for 10 seconds.
To turn off scan, press the
button again. VOL/ (Volume/Power) Knob
Press to turn the audio system
on and off.
Turn to adjust the volume.
Preset Buttons (1-6)
To store a station:
1. Tune to the selected station.
2. Pick a preset button and hold it
until you hear a beep.
To listen to a stored station, select a
band, then press the preset button.
Selector Knob
Turn to tune the radio frequency.TITLE Button
Press to switch the RDS name
on and off.
FOLDER Bar
Press either side to display and
select an RDS category.SKIP Bar
Press and hold to search up and
down the selected band for a
station with a strong signal. A.SEL (Auto Select) Button
Press to scan both bands and store
the strongest station in each preset.
To turn off auto select, press the
button again. This restores the
presets you originally set.
AM Button
Page 173 of 573
uuAudio System Basic OperationuPlaying the AM/FM Radio
172Features
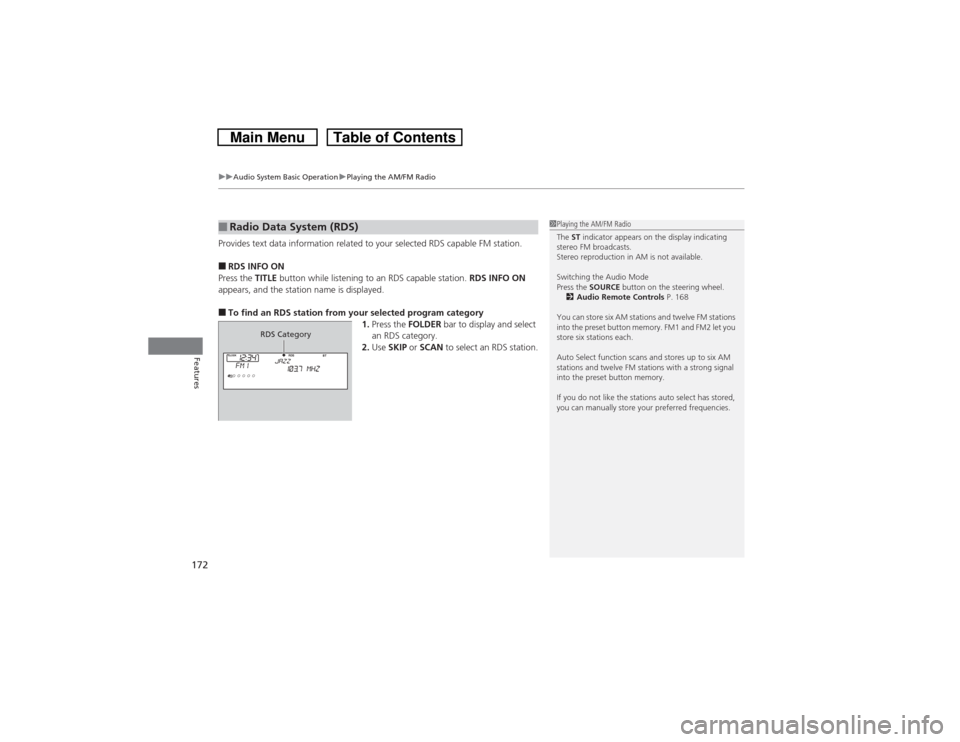
Provides text data information related to your selected RDS capable FM station.■RDS INFO ON
Press the TITLE button while listening to an RDS capable station. RDS INFO ON
appears, and the station name is displayed.■To find an RDS station from your selected program category
1.Press the FOLDER bar to display and select
an RDS category.
2.Use SKIP or SCAN to select an RDS station.■Radio Data System (RDS)
1Playing the AM/FM Radio
The ST indicator appears on the display indicating
stereo FM broadcasts.
Stereo reproduction in AM is not available.
Switching the Audio Mode
Press the SOURCE button on the steering wheel.
2Audio Remote Controls P. 168
You can store six AM stations and twelve FM stations
into the preset button memory. FM1 and FM2 let you
store six stations each.
Auto Select function scans and stores up to six AM
stations and twelve FM stations with a strong signal
into the preset button memory.
If you do not like the stations auto select has stored,
you can manually store your preferred frequencies.
RDS Category