Page 99 of 469

uuGauges and Displays uintelligent Multi-Information Display (i-MID)
*
98Instrument Panel
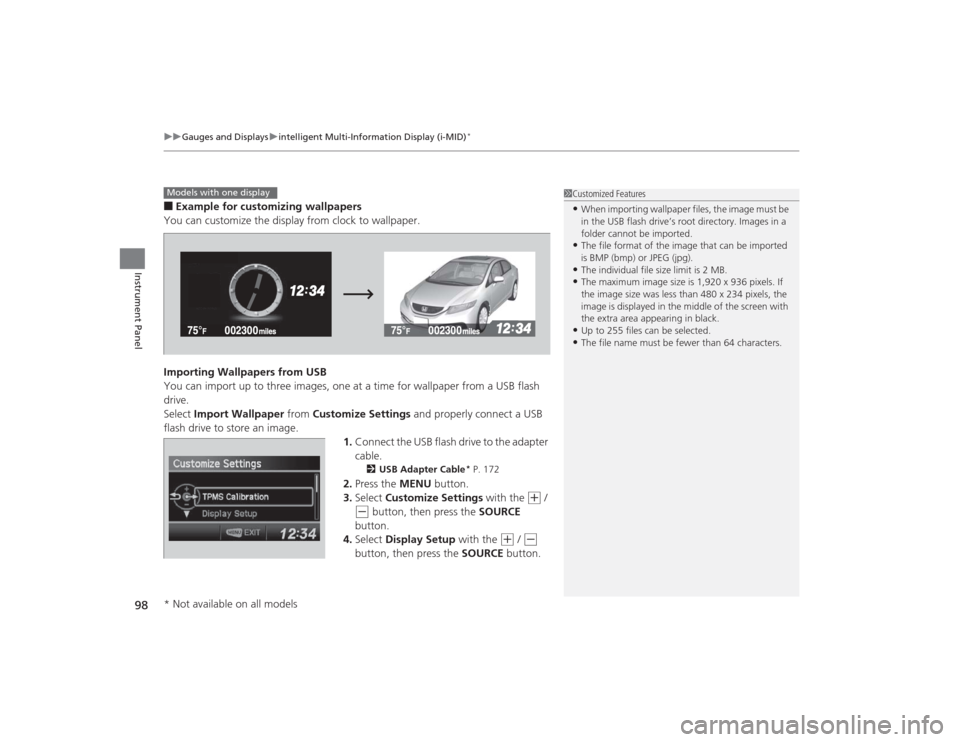
■Example for customizing wallpapers
You can customize the display from clock to wallpaper.
Importing Wallpapers from USB
You can import up to three images, one at a time for wallpaper from a USB flash
drive.
Select Import Wallpaper from Customize Settings and properly connect a USB
flash drive to store an image. 1.Connect the USB flash drive to the adapter
cable.
2 USB Adapter Cable
* P. 172
2.Press the MENU button.
3. Select Customize Settings with the
(+
/
(-
button, then press the SOURCE
button.
4. Select Display Setup with the
(+
/ (-
button, then press the SOURCE button.
1Customized Features•When importing wallpaper files, the image must be
in the USB flash drive’s root directory. Images in a
folder cannot be imported.•The file format of the image that can be imported
is BMP (bmp) or JPEG (jpg).•The individual file size limit is 2 MB.•The maximum image size is 1,920 x 936 pixels. If
the image size was less than 480 x 234 pixels, the
image is displayed in the middle of the screen with
the extra area appearing in black.•Up to 255 files can be selected.•The file name must be fewer than 64 characters.
Models with one display* Not available on all models
Page 100 of 469
99
uuGauges and Displays uintelligent Multi-Information Display (i-MID)
*
Continued
Instrument Panel
5. Select Import Wallpaper with the
(+
/ (-
button, then press the SOURCE button.
u The file names are displayed on the
screen.
6. Press the
(-
button until the file name you
want to store appears on the center of the
display, then press the SOURCE button.
7. The preview of the imported data is
displayed. Press the SOURCE button if it is
OK.
8. Press the SOURCE button to save the
image file.
Save
Page 101 of 469
100
uuGauges and Displays uintelligent Multi-Information Display (i-MID)
*
Instrument Panel
9. Select the location you want to store the
image file in with the
(+
/ (-
button,
then press the SOURCE button.
10. Press the MENU button to exit the
customize screen.
Page 102 of 469
101
uuGauges and Displays uintelligent Multi-Information Display (i-MID)
*
Instrument Panel
Selecting a Wallpaper
1.Press the MENU button.
2. Select Customize Settings with the
(+
/
(-
button, then press the SOURCE button.
3. Select Display Setup with the
(+
/ (-
button, then press the SOURCE button.
4. Select Select Wallpaper with the
(+
/ (-
button, then press the SOURCE button.
5. Select the image file you want with the
(+
/
(-
button, then press the SOURCE button.
u When the scroll is stopped, the
thumbnail is displayed.
6. Press the MENU button to exit the
customize screen.
Page 105 of 469

104Controls
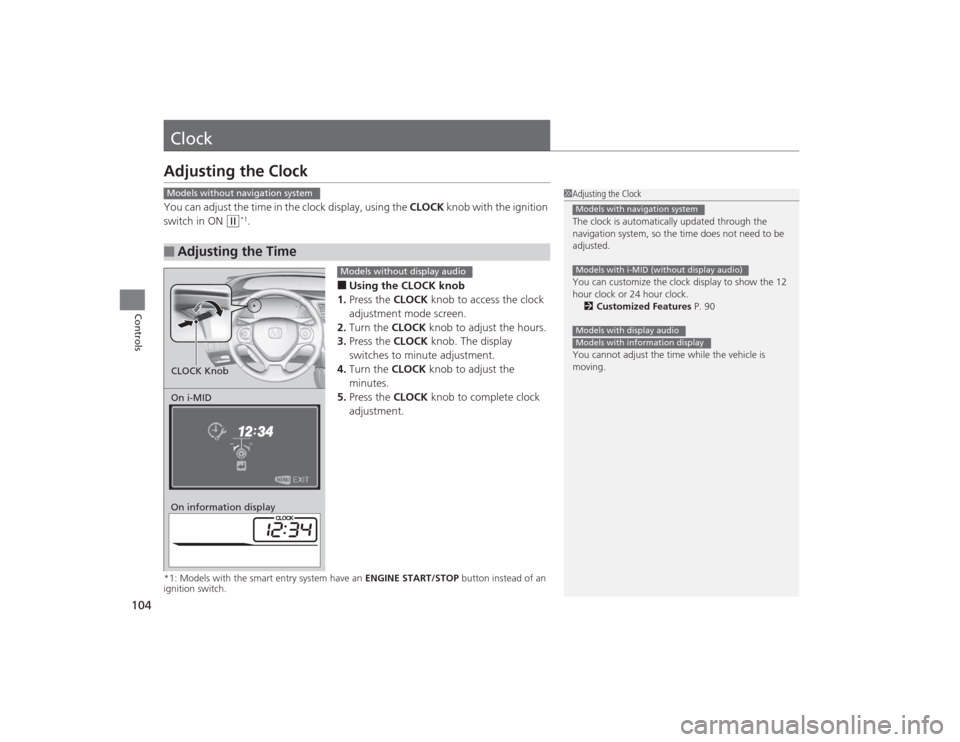
ClockAdjusting the ClockYou can adjust the time in the clock display, using the CLOCK knob with the ignition
switch in ON
(w
*1.
■Using the CLOCK knob
1. Press the CLOCK knob to access the clock
adjustment mode screen.
2. Turn the CLOCK knob to adjust the hours.
3. Press the CLOCK knob. The display
switches to minute adjustment.
4. Turn the CLOCK knob to adjust the
minutes.
5. Press the CLOCK knob to complete clock
adjustment.
*1: Models with the smart entry system have an ENGINE START/STOP button instead of an
ignition switch.■
Adjusting the Time
1 Adjusting the Clock
The clock is automatically updated through the
navigation system, so the time does not need to be
adjusted.
You can customize the clock display to show the 12
hour clock or 24 hour clock.
2 Customized Features P. 90
You cannot adjust the time while the vehicle is
moving.Models with navigation systemModels with i-MID (without display audio)Models with display audioModels with information display
Models without navigation systemOn i-MID
On information displayCLOCK Knob
Models without display audio
Page 106 of 469
105
uuClock uAdjusting the Clock
Controls
■Using the Settings menu on the audio/
information screen
1. Select Settings .
2. Select System.
3. Select Clock.
4. Select Clock Adjustment .
5. Select or to change hour.
6. Select or to change minute, then
select OK.
1Adjusting the Clock
You can customize the clock display to show the 12
hour clock or 24 hour clock.
2 Customized Features
* P. 233
The clock display is set to off by factory default.
You can turn the clock display on and off. 2 Customized Features* P. 233
The clock is automatically updated when your
smartphone is connected to the audio system.
Models with display audio
Models with display audio
3
4
3
4
* Not available on all models
Page 142 of 469

141
uuOperating the Switches Around the Steering Wheel uBrightness Control
Controls
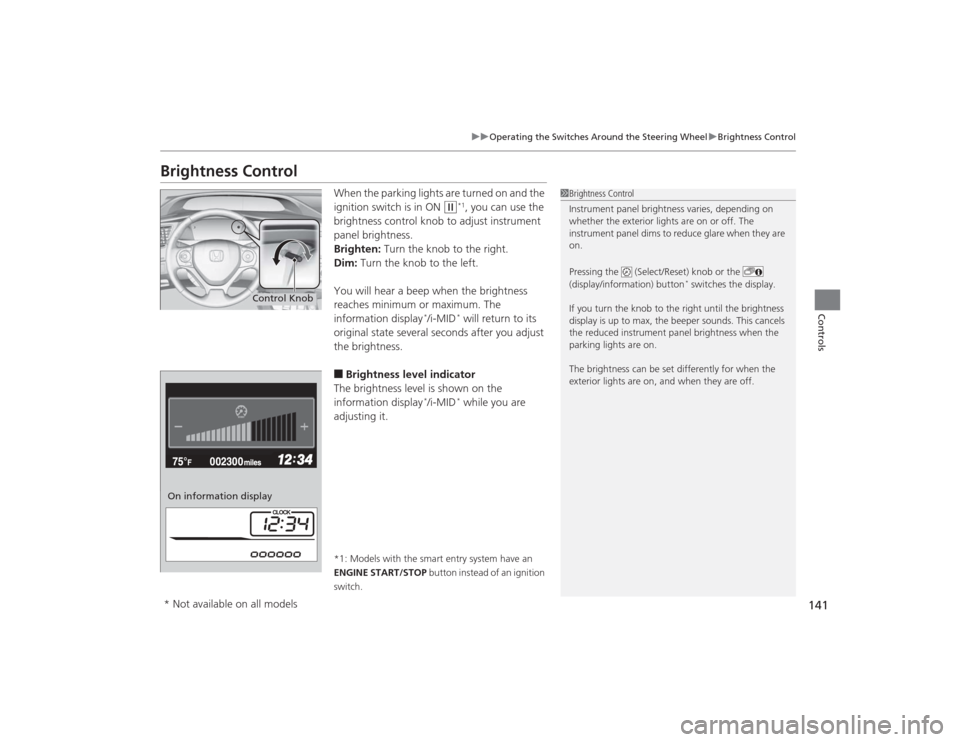
Brightness Control
When the parking lights are turned on and the
ignition switch is in ON
(w
*1, you can use the
brightness control knob to adjust instrument
panel brightness.
Brighten: Turn the knob to the right.
Dim: Turn the knob to the left.
You will hear a beep when the brightness
reaches minimum or maximum. The
information display
*/i-MID
* will return to its
original state several seconds after you adjust
the brightness.
■Brightness level indicator
The brightness level is shown on the
information display
*/i-MID
* while you are
adjusting it.
*1: Models with the smart entry system have an
ENGINE START/STOP button instead of an ignition
switch.
1 Brightness Control
Instrument panel brightness varies, depending on
whether the exterior lights are on or off. The
instrument panel dims to reduce glare when they are
on.
Pressing the (Select/Reset) knob or the
(display/information) button
* switches the display.
If you turn the knob to the right until the brightness
display is up to max, the beeper sounds. This cancels
the reduced instrument panel brightness when the
parking lights are on.
The brightness can be set differently for when the
exterior lights are on, and when they are off.
Control Knob
On information display* Not available on all models
Page 166 of 469

165
Continued
Controls
Climate Control System
*
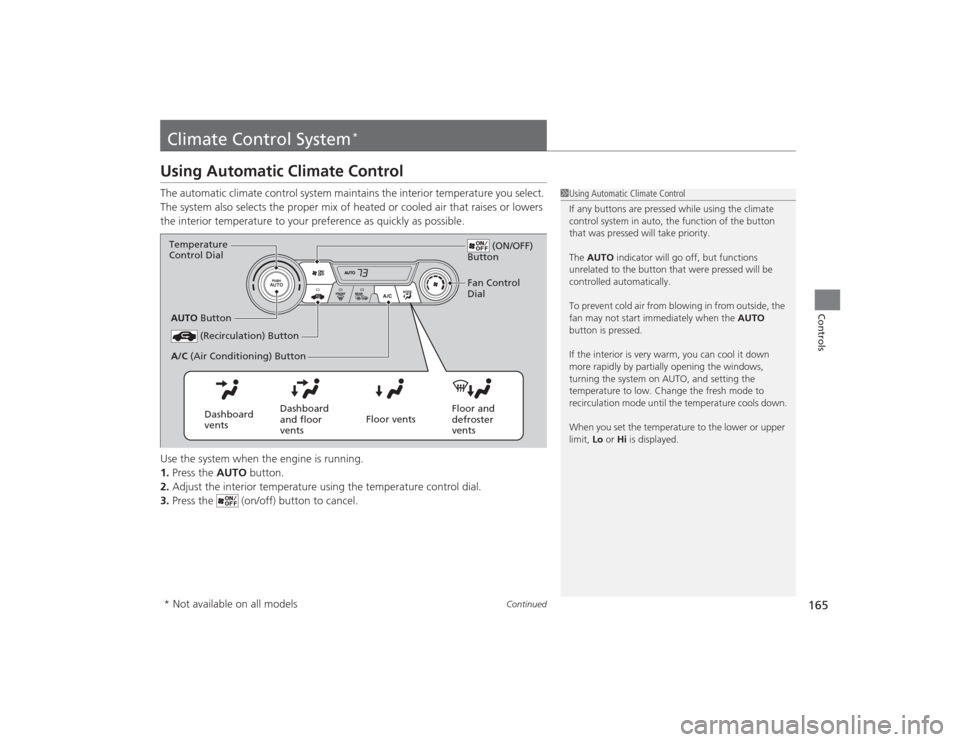
Using Automatic Climate ControlThe automatic climate control system maintains the interior temperature you select.
The system also selects the proper mix of heated or cooled air that raises or lowers
the interior temperature to your preference as quickly as possible.
Use the system when the engine is running.
1.Press the AUTO button.
2. Adjust the interior temperature using the temperature control dial.
3. Press the (on/off) button to cancel.
1Using Automatic Climate Control
If any buttons are pressed while using the climate
control system in auto, the function of the button
that was pressed will take priority.
The AUTO indicator will go off, but functions
unrelated to the button that were pressed will be
controlled automatically.
To prevent cold air from blowing in from outside, the
fan may not start immediately when the AUTO
button is pressed.
If the interior is very warm, you can cool it down
more rapidly by partially opening the windows,
turning the system on AUTO, and setting the
temperature to low. Change the fresh mode to
recirculation mode until the temperature cools down.
When you set the temperature to the lower or upper
limit, Lo or Hi is displayed.
(ON/OFF)
Button
(Recirculation) Button
Floor and
defroster
vents
Floor vents
Dashboard
and floor
vents
Dashboard
vents
AUTO
Button
A/C (Air Conditioning) Button
Temperature
Control Dial
Fan Control
Dial
* Not available on all models