Page 126 of 561
125
uuOpening and Closing the TrunkuEmergency Trunk Opener
Controls
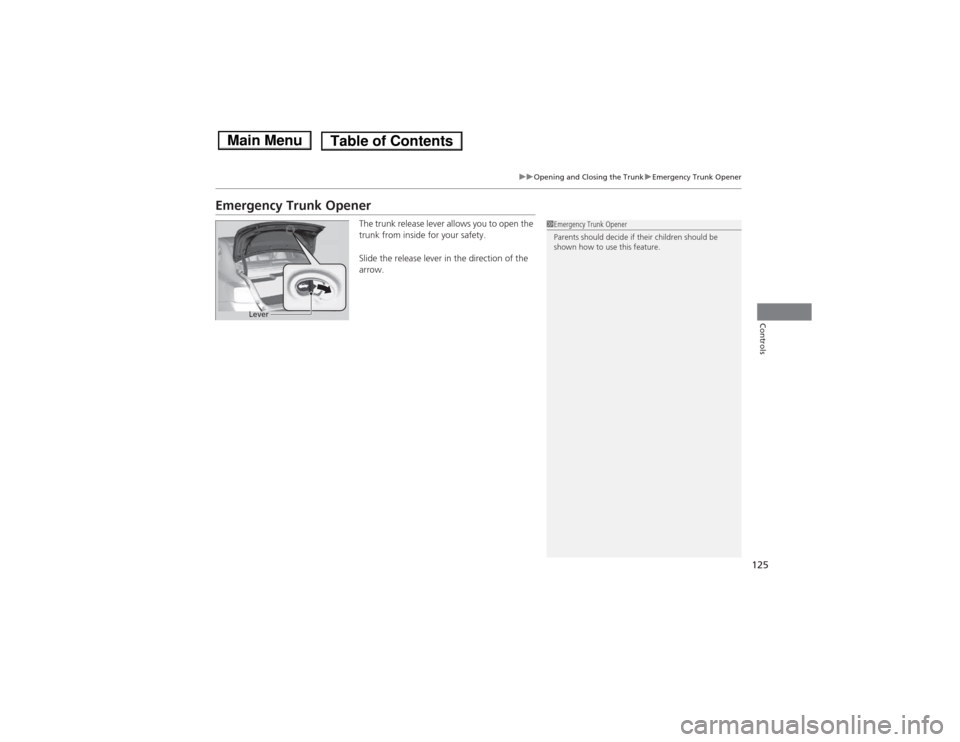
Emergency Trunk OpenerThe trunk release lever allows you to open the
trunk from inside for your safety.
Slide the release lever in the direction of the arrow.
1Emergency Trunk Opener
Parents should decide if their children should be
shown how to use this feature.
Lever
Main MenuTable of Contents
Page 127 of 561
126
Controls
Security System
Immobilizer System
The immobilizer system prevents a key that has not been pre-registered from
starting the motor. Each key contains electronic transmitters that use electronic
signals to verify the key.
Pay attention to the following when selecting the ACCESSORY mode with the
POWER button:
• Do not allow objects that emit strong radio waves near the POWER button.
• Make sure the key is not covered by or touching a metal object.
• Do not bring a key from another vehicle's immobilizer system near the smart entry
remote.
Security System Alarm
The security system alarm activates when the doors, trunk, or hood are opened
without the key, remote transmitter, or smart entry system. ■When the security system alarm activates
The horn sounds intermittently and all of the exterior lights flash.■ To deactivate the security system alarm
Unlock the vehicle using the key, remote transmitter, or smart entry system. The
system, along with the horn and flashing lights, is deactivated.
1Immobilizer System
NOTICELeaving the ignition key in the vehicle can result in
theft or accidental movement of the vehicle.
Always take the ignition key with you whenever you
leave the vehicle unattended.
Do not alter the system or add other devices to it.
Doing so may damage the system and make your
vehicle inoperable.
1Security System Alarm
The security alarm continues for a maximum of two
minutes until the security system deactivates.
Main MenuTable of Contents
Page 128 of 561
Continued127
uuSecurity SystemuSecurity System Alarm
Controls
■Setting the security system alarm
The security system alarm automatically sets when the following conditions have
been met: • The power mode is in VEHICLE OFF (LOCK).
• The hood and trunk are closed.
• All doors are locked from outside with the key, the remote transmitter, or smart entry system.
■ When the security system alarm sets
The security system alarm indicator in the instrument panel blinks. When the
blinking interval changes after about 15 seconds, the security system is set. ■ To cancel the security system alarm
The security system alarm is canceled when the vehicle is unlocked using the key,
remote transmitter, or smart entry system. The security system indicator goes off at
the same time.1Security System Alarm
Do not set the security system alarm when someone
is in the vehicle or a window is open. The system can
accidentally activate when:• Unlocking the door with the lock tab.
• Opening the trunk with the trunk release or the
emergency trunk opener.
If the 12-volt battery goes dead after you have set the
security system alarm, the security alarm may go off
once the 12-volt battery is recharged or replaced.
If this occurs, deactivate the security system alarm by
unlocking a door using the key or remote transmitter.
Do not attempt to alter this system or add another device to it.
Main MenuTable of Contents
Page 162 of 561
Continued161
uuInterior Lights/Interior Convenience ItemsuInterior Convenience Items
Controls
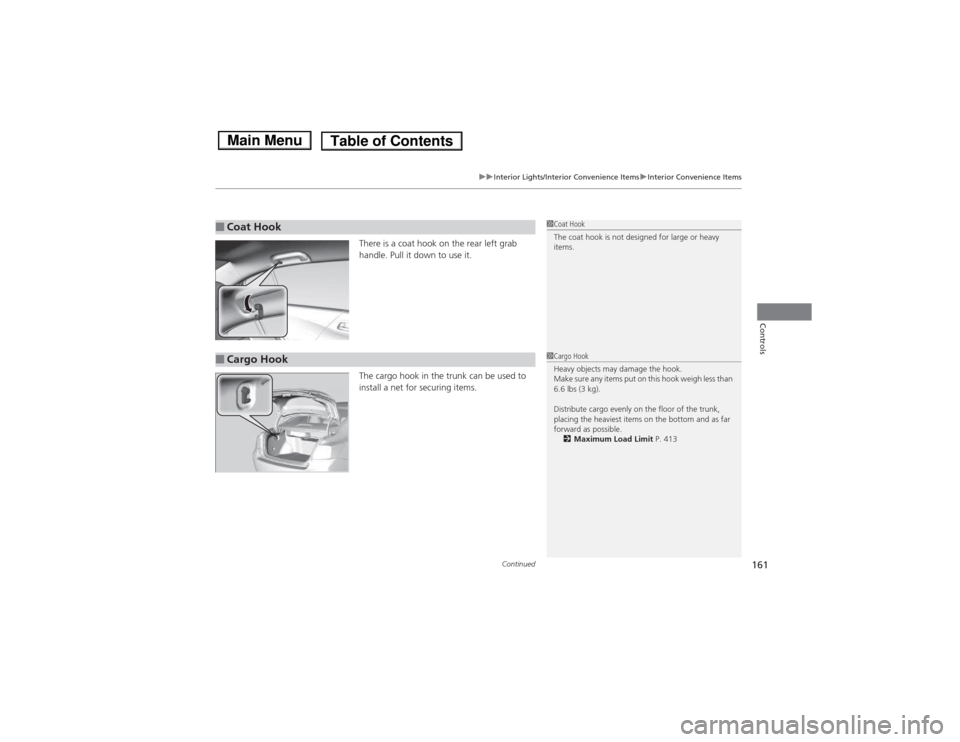
There is a coat hook on the rear left grab
handle. Pull it down to use it.
The cargo hook in the trunk can be used to
install a net for securing items.
■Coat Hook1Coat Hook
The coat hook is not designed for large or heavy items.
■Cargo Hook1Cargo Hook
Heavy objects may damage the hook.
Make sure any items put on this hook weigh less than
6.6 lbs (3 kg).
Distribute cargo evenly on the floor of the trunk,
placing the heaviest items on the bottom and as far
forward as possible.
2 Maximum Load Limit P. 413
Main MenuTable of Contents
Page 163 of 561
uuInterior Lights/Interior Convenience ItemsuInterior Convenience Items
162
Controls
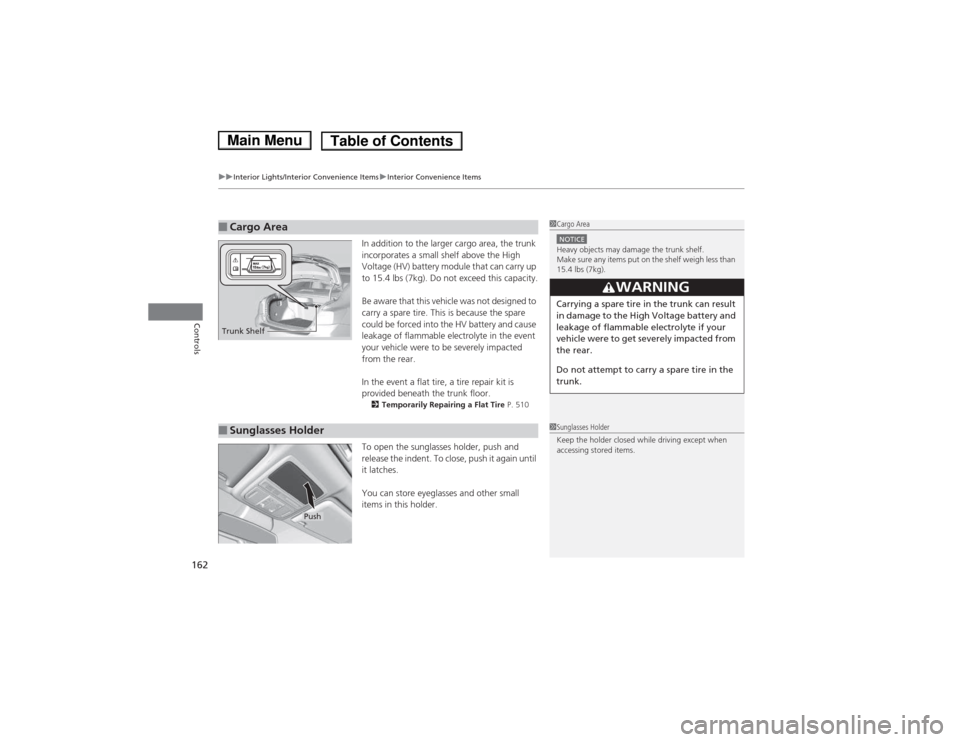
In addition to the larger cargo area, the trunk
incorporates a small shelf above the High
Voltage (HV) battery module that can carry up
to 15.4 lbs (7kg). Do not exceed this capacity.
Be aware that this vehicle was not designed to
carry a spare tire. This is because the spare
could be forced into the HV battery and cause
leakage of flammable electrolyte in the event
your vehicle were to be severely impacted
from the rear.
In the event a flat tire, a tire repair kit is
provided beneath the trunk floor. 2 Temporarily Repairing a Flat Tire P. 510
To open the sunglasses holder, push and
release the indent. To close, push it again until
it latches.
You can store eyeglasses and other small
items in this holder.
■Cargo Area1Cargo Area
NOTICEHeavy objects may damage the trunk shelf.
Make sure any items put on the shelf weigh less than
15.4 lbs (7kg).
3WARNING
Carrying a spare tire in the trunk can result
in damage to the High Voltage battery and
leakage of flammable electrolyte if your
vehicle were to get severely impacted from
the rear.
Do not attempt to carry a spare tire in the
trunk.
Trunk Shelf
■Sunglasses Holder1Sunglasses Holder
Keep the holder closed while driving except when
accessing stored items.
Push
Main MenuTable of Contents
Page 412 of 561
Continued411
uuBefore DrivinguDriving Preparation
Driving
•Store or secure all items on board properly.uCarrying too much cargo, or improp erly storing it, can affect your vehicle's
handling, stability, stopping distance, and tires, and make it unsafe. 2 Maximum Load Limit P. 413
• Do not pile items higher than the seat height.
uThey can block your view and may be thrown forward in the event of sudden
braking.
• Do not place anything in the front seat footwells. Make sure to secure the floor mat.
uAn object or unsecured floor mat can interfere with your brake and accelerator
pedal operation while driving.
• If you have any animals on board, do not let them move around in the vehicle.
uThey may interfere with driving and a crash could occur.
• Securely close and lock all doors and the trunk.
2 Locking/Unlocking the Doors from the Inside P. 118
• Adjust your seating position properly.
uAdjust the head restraint, too.
2 Adjusting the Seats P. 148
2 Adjusting the Head Restraints P. 151
• Adjust the mirrors and steering wheel properly for your driving.
uAdjust them while sitting in the proper driving position.
2 Adjusting the Mirrors P. 146
2 Adjusting the Steering Wheel P. 145
■Interior Checks1Interior Checks
The headlight aim is set by the factory, and does not
need to be adjusted. However, if you regularly carry
heavy items in the trunk, have the aiming readjusted
at a dealer or by a qualified technician.
Main MenuTable of Contents
Page 485 of 561
484
Maintenance
Replacing Light Bulbs
Headlight Bulbs
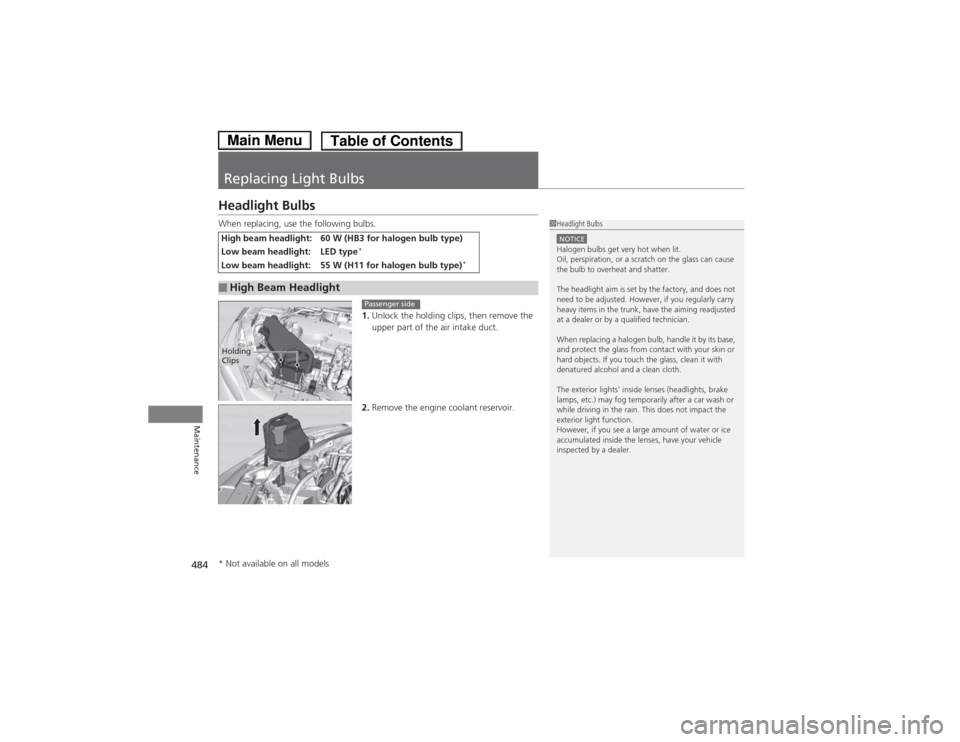
When replacing, use the following bulbs.1.Unlock the holding clips, then remove the
upper part of the air intake duct.
2. Remove the engine coolant reservoir.
High beam headlight: 60 W (HB3 for halogen bulb type)
Low beam headlight: LED type *
Low beam headlight: 55 W (H11 for halogen bulb type) *
■High Beam Headlight
1Headlight Bulbs
NOTICEHalogen bulbs get very hot when lit.
Oil, perspiration, or a scratch on the glass can cause
the bulb to overheat and shatter.
The headlight aim is set by the factory, and does not
need to be adjusted. However, if you regularly carry
heavy items in the trunk, have the aiming readjusted
at a dealer or by a qualified technician.
When replacing a halogen bulb, handle it by its base,
and protect the glass from contact with your skin or
hard objects. If you touch the glass, clean it with
denatured alcohol and a clean cloth.
The exterior lights' inside lenses (headlights, brake
lamps, etc.) may fog temporarily after a car wash or
while driving in the rain. This does not impact the
exterior light function.
However, if you see a large amount of water or ice
accumulated inside the lenses, have your vehicle
inspected by a dealer.
Holding
Clips
Passenger side
* Not available on all models
Main MenuTable of Contents
Page 512 of 561
Continued511
uuIf a Tire Goes FlatuTemporarily Repairing a Flat Tire
Handling the Unexpected
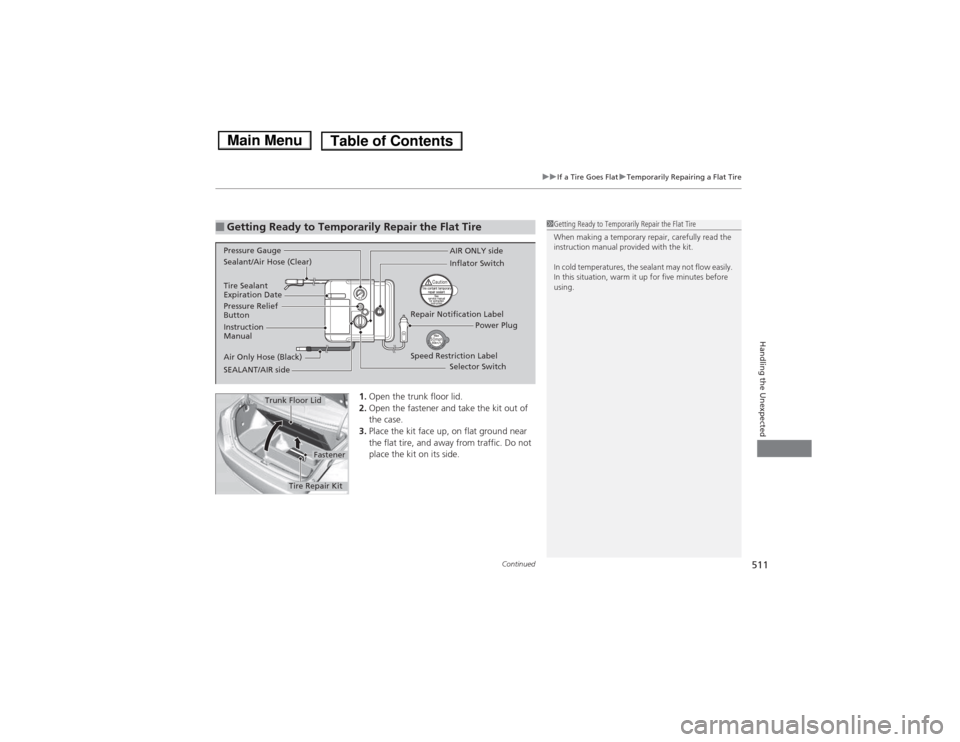
1.Open the trunk floor lid.
2. Open the fastener and take the kit out of the case.
3. Place the kit face up, on flat ground near
the flat tire, and away from traffic. Do not
place the kit on its side.
■Getting Ready to Temporarily Repair the Flat Tire1Getting Ready to Temporarily Repair the Flat Tire
When making a temporary repair, carefully read the
instruction manual provided with the kit.
In cold temperatures, the sealant may not flow easily.
In this situation, warm it up for five minutes before using.
Instruction
Manual
Air Only Hose (Black) Speed Restriction Label
Repair Notification Label
Pressure Relief
Button Inflator Switch
Selector Switch
SEALANT/AIR side
Sealant/Air Hose (Clear)
AIR ONLY side
Power Plug
Pressure Gauge
Tire Sealant
Expiration Date
Fastener
Trunk Floor Lid
Tire Repair Kit
Main MenuTable of Contents